
Related Manuals for Vimar ELVOX EAM2


Summary of Contents for Vimar ELVOX EAM2
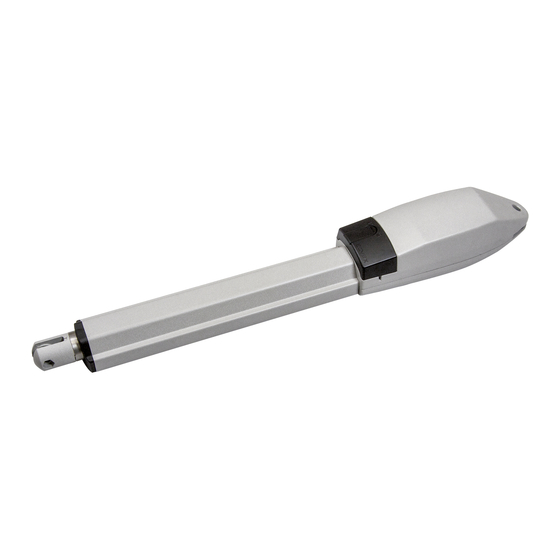
- Page 1 Manuale installatore Installer manual EAM2, EAM3 Attuatore per cancelli battenti 24 Vdc Actuator for swing gates 24 Vdc...
-
Page 2: Table Of Contents
EAM2, EAM3 Indice: Importante - informazioni di sicurezza Pagina Predisposizione impianto tipo ....................................1 Dati tecnici ..........................................1 Dimensioni di ingombro attuatore ....................................1 Limiti di impiego .........................................1 Posizioni possibili della staffa ....................................2 Scelta del foro per il fissaggio del fulcro di rotazione dell’attuatore .........................2 Tabella con quote di installazione ....................................3 Fissaggio della staffa al pilastro ....................................4 Montaggio dell’attuatore ......................................4... -
Page 3: Predisposizione Impianto Tipo
EAM2, EAM3 1- Predisposizione impianto tipo: Legenda A - Attuatore lineare B - Centralina di comando 2x1 mm C - Lampeggiante D - Radiocomando 2 canali E - Coppia di fotocellule F - Selettore 3x0,5 mm G - Elettroserratura 2x0,5 mm 4x0,5 mm 2x0,5 mm 2x2,5 mm... -
Page 4: Posizioni Possibili Della Staffa
EAM2, EAM3 Prima di procedere all’installazione dell’automatismo, controllare: - le cerniere siano robuste e efficienti e che non vi siano forti attriti - che la misura Y non sia superiore al valore indicato nella tabella delle quote di installazione. In tal caso è necessario intervenire sul pilastro in modo da raggiungere tale misura - la lunghezza dei cavi di alimentazione dei motoriduttore, non sia superiore ai 15 metri - che siano presenti e ben fissate le battute d’arresto meccanico... -
Page 5: Tabella Con Quote Di Installazione
EAM2, EAM3 7- Tabella con quote di installazione EAM2: Massima Posizione staffa Y (mm) A(mm) B(mm) E(mm) C(mm) H(mm) apertura e foro 90° Z2-F1 1026 90° Z2-F1 1026 90° Z2-F2 1026 90° Z2-F2 1026 90° Z2-F3 1026 90° Z1-F2 1026 90°... -
Page 6: Fissaggio Della Staffa Al Pilastro
EAM2, EAM3 8- Fissare la staffa a pilastro, seguendo le quote riportate in tabella. 9- Montaggio dell’attuatore: Posizionare l’attuatore, fissare le vite di ancoraggio e controllare la messa in bolla dell’attuatore. Fissare la staffa ancoraggio anta (vedi quota E in tabella) -
Page 7: Sbloccaggio Dell'attuatore
EAM2, EAM3 10- Sblocco dell’attuatore: aprire il portello a slitta (A), inserire la chiave e girare in senso antiorario (B) e togliere la copertura (C). Girare la leva di sblocco in senso antiorario per 180°. Con attuatore sbloccato simulare manualmente una apertura e una chiusura completa, durante il movimento non ci devono essere forti attriti mecca- nici. -
Page 8: Manuale Utente
EAM2, EAM3 12- Manuale utente Operazione di sblocco manuale: aprire il portello a slitta (A), inserire la chiave e girare in senso antiorario (B) e togliere la copertura (C). Girare la leva di sblocco in senso antiorario per 180°. - Per bloccare nuovamente l’anta girare la leva in senso orario. - In caso di mancata alimentazione di rete, la batteria tampone garantisce per un periodo limitato il funzionamento dell’automazione. - Page 9 EAM2, EAM3 DICHIARAZIONE CE DI CONFORMITÀ (Dichiarazione di incorporazione di quasi-macchine allegato IIB Direttiva 2006/42/CE) No.:ZDT00439.00 Il sottoscritto, rappresentante il seguente costruttore Elvox SpA Via Pontarola, 14/A - 35011 Campodarsego (PD) Italy dichiara qui di seguito che i prodotti ATTUATORI PER CANCELLI AD ANTE BATTENTI - SERIE EKKO Articoli EAM1 (EKKO 200D), EAM2 (EKKO 250D), EAM3 (EKKO 350D) risultano in conformità...
- Page 10 EAM2, EAM3 Contents: Important - safety information Page Standard system setup ........................................9 Technical data ..........................................9 Overall dimensions of adapter.....................................9 Llimits of use..........................................9 Possible positions of the bracket ....................................10 Choosing the hole for securing the pivot for actuator rotation ..........................10 Table with installation dimensions .....................................12 Fixing the bracket to the pillar ....................................14 Mounting the actuator ......................................13...
-
Page 11: Standard System Setup
EAM2, EAM3 1- Standard system setup 2x1 mm A - Linear actuator B - Control unit C - Flashing light D - 2-channel radio control 3x0.5 mm E - Pair of photocells F - Selector 2x0.5 mm G - Electrical lock 4x0.5 mm 2x0.5 mm 2x2.5 mm... -
Page 12: Possible Positions Of The Bracket
EAM2, EAM3 Before installing the automation, check that: - the hinges are sturdy and efficient and there is no strong friction - the measurement Y is no greater than the value shown in the table of installation dimensions. In this case it is necessary to work on the pillar in order to reach this measurement - the length of the gear motor power supply cables does not exceed 15 metres - there are the mechanical stops which are properly secured... - Page 13 EAM2, EAM3 7- Table with installation dimensions EAM2: Maximum Y (mm) Position of A (mm) B (mm) E (mm) C (mm) H (mm) opening bracket and hole 90° Z2-F1 1026 90° Z2-F1 1026 90° Z2-F2 1026 90° Z2-F2 1026 90° Z2-F3 1026 90°...
-
Page 14: Mounting The Actuator
EAM2, EAM3 8- Secure the bracket to the pillar, following the dimensions given in the table. 9- Mounting the actuator: Position the actuator, secure the anchoring screw and check the actuator level. Secure the bracket for anchoring the gate leaf (see dimension E in the table) -
Page 15: Unlocking The Actuator
EAM2, EAM3 10- Unlocking the actuator: open the sliding door (A), insert the key, turn it anticlockwise (B) and remove the cover (C). Turn the unlocking lever 180° anticlockwise. With the actuator unlocked, manually simulate opening and closing completely. There must be no strong mechanical friction during this movement. N.B.: Check for the presence and tightness of the mechanical stops on both opening and closing. -
Page 16: Fixing The Bracket To The Pillar
EAM2, EAM3 12- User Manual (User operation) Manual unlocking: open the sliding door (A), insert the key, turn it anticlockwise (B) and remove the cover (C). Turn the unlocking lever 180° anticlockwise. - To re-lock the gate leaf turn the lever clockwise. - In the event of mains power failure, the back-up battery ensures the operation of the automatic gate system for a limited period. - Page 17 EAM2, EAM3 EC DECLARATION OF CONFORMITY (Declaration of incorporation of partly completed machinery Annex IIB Directive 2006/42/EC) No.: ZDT00439.00 The undersigned, representing the following manufacturer Elvox SpA Via Pontarola, 14/A 35011 Campodarsego (PD) Italy herewith declares that the products ACTUATORS FOR SWING GATES - EKKO SERIES Articles EAM1 (EKKO 200D), EAM2 (EKKO 250D), EAM3 (EKKO 350D) are in conformity with the provisions of the following EU Directive(s) (including all applicable amendments) and that all...
- Page 18 EAM2, EAM3...
- Page 19 EAM2, EAM3...
- Page 20 Viale Vicenza, 14 36063 Marostica VI - Italy 49401021A0 01 19 11 www.vimar.com...
Need help?
Do you have a question about the ELVOX EAM2 and is the answer not in the manual?
Questions and answers