Table of Contents
Advertisement
Available languages
Available languages
Quick Links
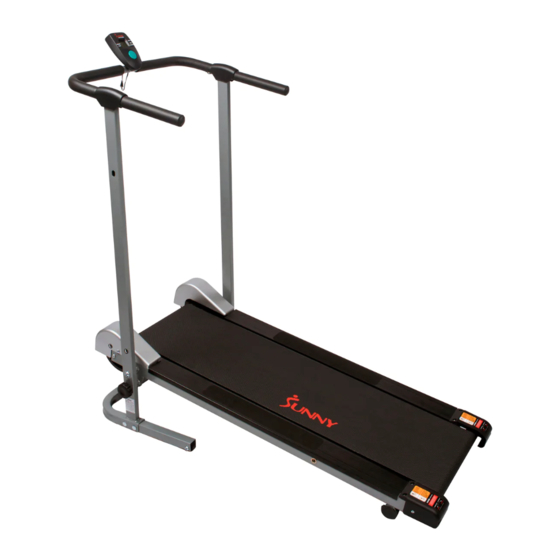
MANUAL WALKING TREADMILL
English, Page 7 ~ 12
Español, Page 13 ~ 18 ¡ IMPORTANTE! Conserve el manual del propietario para las instrucciones de mantenimiento y ajuste.
Français, Page 19 ~ 24
Deutsche, Seite 25 ~ 30 WICHTIG! Bitte bewahren Sie das Benutzerhandbuch für Wartungs- und Einstellanweisungen auf. Ihre
SF-T1407M
USER MANUAL
IMPORTANT! Please retain owner's manual for maintenance and adjustment instructions. Your
satisfaction is very important to us, PLEASE DO NOT RETURN UNTIL YOU HAVE CONTACTED US:
support@sunnyhealthfitness.com or 1- 877 - 90SUNNY (877-907-8669).
Su satisfacció n es muy importante para nosotros, NO DEVUELVA HASTA HABERNOS ONTACTADO:
support@sunnyhealthfitness.com ó 1- 877 - 90SUNNY (877-907-8669).
IMPORTANT! Veuillez conserver le manuel du propriétaire pour les instructions de réglage et d'entretien.
Votre satisfaction est très importante pour nous, VEUILLEZ NE PAS EFFECTUER DE RETOUR AVANT
DE NOUS AVOIR CONTACTÉ: support@sunnyhealthfitness.com ou 1- 877 – 90SUNNY
(877-907-8669).
Zufriedenheit ist besonders wichtig für uns, BITTE SCHICKEN SIE DAS PRODUKT NICHT ZURÜCK,
BEVOR SIE SICH MIT UNS IN VERBINDUNG GESETZT HABEN: support@sunnyhealthfitness.com
oder 1-877-90SUNNY (877-907-8669).
Advertisement
Table of Contents

Subscribe to Our Youtube Channel
Related Manuals for Sunny SF-T1407M


Summary of Contents for Sunny SF-T1407M
- Page 1 MANUAL WALKING TREADMILL SF-T1407M USER MANUAL IMPORTANT! Please retain owner’s manual for maintenance and adjustment instructions. Your English, Page 7 ~ 12 satisfaction is very important to us, PLEASE DO NOT RETURN UNTIL YOU HAVE CONTACTED US: support@sunnyhealthfitness.com or 1- 877 - 90SUNNY (877-907-8669).
-
Page 2: Important Safety Information
IMPORTANT SAFETY INFORMATION We thank you for choosing our product. To ensure your safety and health, please use this equipment correctly. It is important to read this entire manual before assembling and using the equipment. Safe and effective use can only be achieved if the equipment is assembled, maintained, and used properly. - Page 3 INFORMATIONS DE SÉCURITÉ IMPORTANTES Nous vous remercions d’avoir choisi notre produit. Pour votre santé et votre sécurité, veuillez utiliser correctement cet appareil. Il est important de lire entièrement le présent manuel avant d’assembler l’appareil et de l’utiliser. L’utilisation sûre et efficace n’est possible que si l’appareil est correctement assemblé, entretenu et utilisé.
-
Page 4: Exploded Diagram
EXPLODED DIAGRAM HARDWARE PACKAGE #15 M10*70 2PCS #17 M8*50 4PCS #16 M8*35 2PCS #14 M5*10 4PCS #19 ID10.5*OD22 2PCS #18 ID8.2*OD16 2PCS #9 Φ6*Φ10*1 4PCS #12 ID8.2*OD16 4PCS #10 M10*65 1PC #37 M8 4PCS #44 S5 1PC #43 S6 1PC #42 S13-15 1PC... -
Page 5: Parts List
PARTS LIST Description Spec. Qty. Description Spec. Qty. Main Frame Running Board Running Belt Front Roller Left Flywheel Cover Rear Roller Right Flywheel Cover Side Rail Right Upright Support Anti-slip Cloth Left Upright Support Left Side Rail Block Handlebar Right Side Rail Block Decorative Cover Foot Cover Computer... -
Page 6: Liste Des Éléments
LISTE DES ÉLÉMENTS Nº Description Spécification Qté Nº Description Spécification Qté Cadre Principal Plate-forme de Course Bande de Course Rouleau Avant Carter de Volant D’inertie Rouleau Arrière Gauche Carter de Volant D’inertie Rail Latéral Droit Support de Montant Droit Toile Antidérapante Patin de Rail Latéral Support de Montant Gauche Gauche... - Page 7 Ordering Replacement Parts (U.S. and Canadian Customers only) Please provide the following information for us to accurately identify the part(s) needed: ✓ The model number (found on cover of manual) ✓ The product name (found on cover of manual) The part number found on the “EXPLODED DIAGRAM” and “PARTS LIST” (found near the front of the manual) ✓...
- Page 8 ASSEMBLY INSTRUCTIONS We value your experience using Sunny Health and Fitness products. For assistance with parts or troubleshooting, please contact us at support@sunnyhealthfitness.com or 1-877-90SUNNY (877-907-8669). STEP 1: Note: complete steps that involve assembling heavy components, have a second person help with the assembly process. For your safety, do NOT attempt to complete these steps on your own.
- Page 9 We value your experience using Sunny Health and Fitness products. For assistance with parts or troubleshooting, please contact us at support@sunnyhealthfitness.com or 1-877-90SUNNY (877-907-8669). STEP 3: Attach the Main Frame (No. 1) to the Right & Left Upright Supports (No. 4 & No. 5) using 2 Flat Washers (No.
-
Page 10: Maintenance Instructions
LUBRICATING THE TREADMILL IMPORTANT NOTE: You will need to lubricate your treadmill before the first use! RUNNING BELT & TREADMILL LUBRICANT: Lubricating the Running Board (No. 26) and Running Belt (No. 2) is essential as the friction affects the life span and operations of the treadmill. -
Page 11: Folding Instructions
FOLDING INSTRUCTIONS Folding: To fold the treadmill, turn the Lock Knob (No. 10) counter-clockwise and remove it from the lower hole of the Left Upright Support (No. 5). Raise the rear end of the Main Frame (No. 1) all the way up to a vertical position, then insert the Lock Knob (No. -
Page 12: Exercise Computer
EXERCISE COMPUTER SPECIFICATIONS: TIME---------------------------------------------------- 00:00-99:59 MIN: SEC SPEED------------------------------------------------- 0.0-999.9 M (Miles) /H DISTANCE-------------------------------------------- 0.0-999.9 M (Miles) CALORIE-------------------------------------------- 0.0-999.9 KCAL FUNCTION KEY: MODE: Press to select a function. (Time, Speed, Distance, Calorie). Press and hold the MODE button for 3 seconds to reset time, distance, and calorie. OPERATION PROCEDURES: AUTO ON/OFF: If you begin exercising or press the MODE button, the computer will turn on. -
Page 13: Troubleshooting
TROUBLESHOOTING PROBLEM POSSIBLE CAUSE SUGGESTED ACTION There is an object under the main frame Remove the object. of the treadmill, or the ground isn’t level. Move the treadmill to level ground. Base is unstable. The lock knob is loose. Tighten the lock knob. Hardware: nuts, bolts, or screws are Inspect hardware and tighten. -
Page 14: Instrucciones De Armado
INSTRUCCIONES DE ARMADO Valoramos su experiencia con los productos de Sunny Health and Fitness. Para obtener ayuda con las piezas o la solución de problemas, contáctenos en support@sunnyhealthfitness.com o al 1-877-90SUNNY (877-907-8669). PASO 1: NOTA: Para completar los pasos que implican la instalación de componentes pesados, busque... - Page 15 Valoramos su experiencia con los productos de Sunny Health and Fitness. Para obtener ayuda con las piezas o la solución de problemas, contáctenos en support@sunnyhealthfitness.com o al 1-877-90SUNNY (877-907-8669). PASO 3: Fije la Estructura Principal (n.° 1) a los Soportes Verticales Izquierdo y Derecho (n.°...
-
Page 16: Instrucciones De Mantenimiento
LUBRICANDO LA CAMINADORA NOTA IMPORTANTE: ¡ Necesitará lubricar su caminadora antes del primer uso! LUBRICANTE PARA CAMINADORA Y BANDA DE LA CAMINADORA: Lubricar la Plataforma de la Caminadora (n.° 26) y la Banda de la Caminadora (n.° 2) es esencial ya que la fricción afecta la vida útil y las operaciones de la caminadora. -
Page 17: Instrucciones De Plegado
Si siente que la Banda de la Caminadora (n.° 2) está suelta, puede ajustarla un poco al girar ambos Pernos Ajustables (n.° 40), al mismo tiempo, ¼ de vuelta hacia la derecha. Si siente que la banda no está suave o que está demasiado ajustada, la puede soltar al girar ambos Pernos Ajustables (n.°... -
Page 18: Especificaciones
DESMONTAJE DE EMERGENCIA Esté atento a las señales de su cuerpo. El ejercicio incorrecto o excesivo puede dañar su salud. Si siente mareos, náuseas, dolor en el pecho, dolor de espalda u otros sí ntomas de salud, interrumpa el entrenamiento de inmediato y consulte a su médico antes de continuar. -
Page 19: Resolución De Problemas
INSTALACIÓN Y REEMPLAZO DE PILAS Tapa de la Pila Pilas INSTALACIÓN DE LA PILA: 1. Saque 2 pilas AA de la caja de la computadora. 2. Presione la hebilla de la tapa de la pila en la parte posterior de la Monitor (n.° 8) y luego retire la tapa de la pila. 3. -
Page 20: Instructions D'assemblage
INSTRUCTIONS D’ASSEMBLAGE Votre expérience d’utilisation des produits Sunny Health and Fitness compte pour nous. Pour obtenir de l’aide avec les pièces et le dépannage, veuillez nous contacter à l’adresse: support@sunnyhealthfitness.com ou au 1-877-90SUNNY (877-907-8669). ÉTAPE 1: Remarque: Lors étapes comprenant l’assemblage d’éléments lourds, demandez à... - Page 21 Votre expérience d’utilisation des produits Sunny Health and Fitness compte pour nous. Pour obtenir de l’aide avec les pièces et le dépannage, veuillez nous contacter à l’adresse: support@sunnyhealthfitness.com ou au 1-877-90SUNNY (877-907-8669). ÉTAPE 3: Fixer le Cadre Principal (nº 1) aux Supports de Montant Droit et Gauche (nº...
-
Page 22: Instructions D'entretien
LUBRIFIER LE TAPIS DE COURSE REMARQUE IMPORTANTE: Vous devez lubrifier votre tapis de course avant la première utilisation! LUBRIFIANT POUR BANDE ET TAPIS DE COURSE: Il est essentiel de lubrifier la Plate-forme de Course (nº 26) et la Bande de Course (nº 2), car le frottement affecte la durée de vie et le fonctionnement du tapis de course. - Page 23 Au cours de l’exercice, si la Bande de Course (nº 2) semble détendue, on peut la tendre légèrement en tournant en même temps les deux Boulon de Réglage (nº 40) de¼ de tour dans le sens horaire. Si la Bande de Course (nº 2) semble trop tendue, on peut la détendre légèrement en tournant en même temps les deux Boulon de Réglage (nº...
-
Page 24: Descente D'urgence
DESCENTE D’URGENCE Soyez à l’écoute des signaux de votre corps. Accompli de façon incorrecte ou excessive, l’exercice peut nuire à la santé. En cas d’étourdissements, de nausées, de douleurs thoraciques, de maux de dos ou d’autres symptômes de santé, arrêtez immédiatement l’entraînement et consultez votre médecin avant de continuer. -
Page 25: Dépannage
BATTERY INSTALLATION & REPLACEMENT Couvercle du Piles INSTALLATION DES PILES : 1. Retirer les 2 piles de type AA du boîtier de l’ordinateur. 2. Appuyer sur le fermoir du couvercle du compartiment à piles situé à l’arrière de l’Ordinateur (nº 8) et retirer le couvercle. - Page 26 MONTAGEANLEITUNG Wir schä tzen Ihre Erfahrung im Umgang mit den Produkten von Sunny Health and Fitness. Für Fragen zu Teilen oder Hilfe bei der Fehlerbehebung kontaktieren Sie uns bitte unter support@sunnyhealthfitness.com oder 1-877-90SUNNY (877-907-8669). SCHRITT 1: Hinweis: Um Arbeitsschritte durchzuführen, bei...
- Page 27 Wir schä tzen Ihre Erfahrung im Umgang mit den Produkten von Sunny Health and Fitness. Für Fragen zu Teilen oder Hilfe bei der Fehlerbehebung kontaktieren Sie uns bitte unter support@sunnyhealthfitness.com oder 1-877-90SUNNY (877-907-8669). SCHRITT 3: Befestigen Sie den Hauptrahmen (Nr. 1) an der Rechte und Linke Abstützstrebe (Nr.
- Page 28 SCHMIERUNG DES LAUFRADES WICHTIGER HINWEIS: Sie müssen Ihr Laufband vor dem ersten Gebrauch schmieren! LAUFRIEMEN UND LAUFBAND-SCHMIERMITTEL: Die Schmierung des Laufbrett (Nr. 26) und des Laufriemen (Nr. 2) ist unerlässlich, da die Reibung die Lebensdauer und den Betrieb des Laufbandes beeinflusst. Überprüfen Sie regelmäßig das Laufbrett (Nr. 26) und den Laufriemen (Nr.
- Page 29 3. Mit der Zeit lockert sich der Laufriemen (Nr. 2). Um den Laufriemen (Nr. 2) zu spannen, drehen Sie sowohl die linke als auch die rechte Einstellschraube (Nr. 40) eine volle Umdrehung im Uhrzeigersinn. Überprüfen Sie die Spannung des Laufriemen (Nr. 2). Setzen Sie diesen Vorgang fort, bis der Laufriemen (Nr. 2) auf die korrekte Spannung eingestellt ist.
- Page 30 NOTFALLABBRUCH Achten Sie auf die Signale Ihres Körpers. Falsches oder übermäßiges Training kann Ihre Gesundheit schädigen. Wenn Sie Schwindel, Übelkeit, Brustschmerzen, Rückenschmerzen oder andere gesundheitliche Symptome verspüren, stoppen Sie das Training sofort und konsultieren Sie Ihren Arzt, bevor Sie fortfahren. Stellen Sie sich mit den Füßen auf den Flächenbereich (wie in der Abbildung unten gezeigt) und halten Sie die Griffstange fest.
-
Page 31: Fehlerbehebung
EINLEGEN UND AUSTAUSCHEN DER BATTERIE Batterieabdeck Batterie EINLEGEN DER BATTERIEN: 1. Nehmen Sie 2 AA-Batterien aus der Computerbox. 2. Betätigen Sie die Verschlussklappe der Batterieabdeckung auf der Rückseite des Computer (Nr. 8) und entfernen Sie dann die Batterieabdeckung. 3. Legen Sie 2 AA-Batterien in das Batteriefach auf der Rückseite des Computer (Nr. 8) ein. Achten Sie vor dem Einsetzen der Batterie auf die Endungen + und –.
Need help?
Do you have a question about the SF-T1407M and is the answer not in the manual?
Questions and answers