Table of Contents
Advertisement
OM2252
Rev 0 December 15 2016
Serial no.
Type
T: (toll free in US): 800-899-1841 T (International): + 1 941-721-1000 E: technicalsupport@itwgse.us
Manual
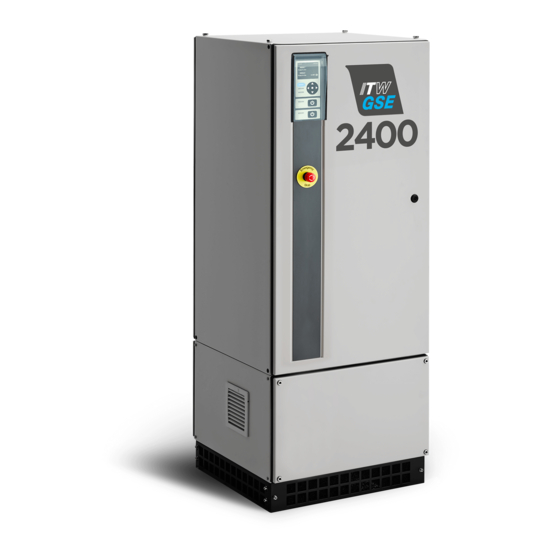
Hobart 2400 Compact
120 / 140 / 180 kVA
400 Hz Ground Power Unit
3GW
ITW GSE HOBART 11001 Us Highway 41 North Palmetto, FL 34221 U.S.A
it's all about connections
-200/
-
Advertisement
Table of Contents

Related Manuals for ITW GSE Hobart 2400 Compact


Summary of Contents for ITW GSE Hobart 2400 Compact
- Page 1 120 / 140 / 180 kVA 400 Hz Ground Power Unit Serial no. Type -200/ ITW GSE HOBART 11001 Us Highway 41 North Palmetto, FL 34221 U.S.A T: (toll free in US): 800-899-1841 T (International): + 1 941-721-1000 E: technicalsupport@itwgse.us...
- Page 2 OM2252 Rev 0 December 15 2016 IMPORTANT NOTE We recommend that the battery that safeguards GPU settings etc. is changed after 5 years of use in order not to lose data. The unit has an internal supervision that keeps track of time the battery has been in service and will display a warning when the battery needs to be changed.
-
Page 3: Table Of Contents
OM2252 Rev 0 December 15 2016 Operation Manual - Hobart 2400 Compact – 120 / 140 / 180 kVA Index INDEX Declaration of Conformity ..................5 Safety Instructions ..................... 6 General Description ....................7 Built-in features / protections ..................13 Transport and Installation .................. - Page 4 OM2252 Rev 0 December 15 2016 Operation Manual - Hobart 2400 Compact – 120 / 140 / 180 kVA Index 7.11 Aircraft Connector Insertion ..................55 7.12 GPU Enable........................55 7.13 Door Switch ........................56 7.14 Cable Temperature ......................56 7.15...
-
Page 5: Declaration Of Conformity
OM2252 Rev 0 December 15 2016 Operation Manual - Hobart 2400 Compact – 120 / 140 / 180 kVA Declaration of Conformity 1.0 Declaration of Conformity Document no. 578.430AB Page 5 of 75... -
Page 6: Safety Instructions
OM2252 Rev 0 December 15 2016 Operation Manual - Hobart 2400 Compact Power – 120 / 140 / 180 kVA Safety Instructions IMPORTANT SAFEGUARDS DANGER – TO REDUCE THE RISK OF FIRE OR ELECTRIC SHOCK, CAREFULLY FOLLOW THESE INSTRUCTIONS 2.0 Safety Instructions This unit is only intended to be installed, operated and maintained by competent persons having the necessary knowledge regarding delivery of external power to an aircraft. -
Page 7: General Description
OM2252 Rev 0 December 15 2016 Operation Manual - Hobart 2400 Compact Power – 120 / 140 / 180 kVA General Description 3.0 General Description The figure below shows the basic principle of the AXA 2400 Compact Power unit. The 50/60 Hz utility voltage is converted into a galvanic isolated 3-phase, 400 Hz output voltage. - Page 8 OM2252 Rev 0 December 15 2016 Operation Manual - Hobart 2400 Compact Power – 120 / 140 / 180 kVA General Description Capacitor Board (A5/A6): These modules include the following functions: • Input and Output RFI filters to reduce the EMI/EMC emission into the mains and output to such a level that surrounding equipment is not disturbed.
- Page 9 OM2252 Rev 0 December 15 2016 Operation Manual - Hobart 2400 Compact Power – 120 / 140 / 180 kVA General Description Output Transformer (T2/T4): The output transformer ensures galvanic separation between input and output. It also transforms the voltages from the Inverter Module into the required aircraft voltage (3 x 200/115 V). The filter choke for the output AC-filter is an integral part of the transformer.
- Page 10 OM2252 Rev 0 December 15 2016 Operation Manual - Hobart 2400 Compact Power – 120 / 140 / 180 kVA General Description • Interface for gate drive situated at the Inverter Module (PM2) via GD2 (X7) • Interface for current sensors situated at the Inverter Module (PM1) via I1 (X23) •...
- Page 11 OM2252 Rev 0 December 15 2016 Operation Manual - Hobart 2400 Compact Power – 120 / 140 / 180 kVA General Description Control Board (A1): The Control Board is based on a micro-controller and a digital signal processor (DSP). Together they regulate, supervise and diagnose possible external and internal faults.
- Page 12 OM2252 Rev 0 December 15 2016 Operation Manual - Hobart 2400 Compact Power – 120 / 140 / 180 kVA General Description ID Chip (A7): The ID Chip is connected to Interface Board A2 (X19) and is fixed to the I/O zone plate.
-
Page 13: Built-In Features / Protections
OM2252 Rev 0 December 15 2016 Operation Manual - Hobart 2400 Compact Power – 120 / 140 / 180 kVA General Description Built-in features / protections No Break Power Transfer: The unit is protected against misalignment during the No Break Power Transfer. - Page 14 OM2252 Rev 0 December 15 2016 Operation Manual - Hobart 2400 Compact Power – 120 / 140 / 180 kVA General Description Aircraft Connector Insertion: This feature verifies that the 90% switch / split “F” pin in the 400 Hz plug is activated. If not activated, the respective output cannot be engaged.
-
Page 15: Transport And Installation
OM2252 Rev 0 December 15 2016 Operation Manual - Hobart 2400 Compact Power – 120 / 140 / 180 kVA Transport and Installation 4.0 Transport and Installation Storage Before Installation To secure optimal storage conditions prior to installation, we recommend that the converter is stored inside. - Page 16 OM2252 Rev 0 December 15 2016 Operation Manual - Hobart 2400 Compact Power – 120 / 140 / 180 kVA Transport and Installation Adequate lifting gear is not part of the delivery. Fig. 4.3.2 Lifting with crane (Place M10 lifting rings at the 4 corners) The AXA 2400 horizontal version (see below) is delivered on a specially designed wooden pallet.
-
Page 17: Installation And Fastening Instructions
OM2252 Rev 0 December 15 2016 Operation Manual - Hobart 2400 Compact Power – 120 / 140 / 180 kVA Transport and Installation Installation and fastening instructions Fig. 4.4.1 Foot Print & Spacing (Fixed Unit) Fig. 4.4.2 Mounting Holes (Fixed Unit) Document no. - Page 18 OM2252 Rev 0 December 15 2016 Operation Manual - Hobart 2400 Compact Power – 120 / 140 / 180 kVA Transport and Installation Fig. 4.4.3 Removable gland plates (Fixed Unit) Made of alu-zink to prevent corrosion at the cable gland holes.
- Page 19 OM2252 Rev 0 December 15 2016 Operation Manual - Hobart 2400 Compact Power – 120 / 140 / 180 kVA Transport and Installation Fig. 4.4.5 Mounting Holes (Bridge-Mounted Unit) Output gland plate Input gland plate Fig. 4.4.6 Removable gland plates (Bridge-Mounted Unit) Made of alu-zink to prevent corrosion at the cable gland holes.
- Page 20 OM2252 Rev 0 December 15 2016 Operation Manual - Hobart 2400 Compact Power – 120 / 140 / 180 kVA Transport and Installation Center of Gravity Fig. 4.4.7 Center of Gravity (Fixed Unit) Document no. 578.430AB Page 20 of 75...
- Page 21 OM2252 Rev 0 December 15 2016 Operation Manual - Hobart 2400 Compact Power – 120 / 140 / 180 kVA Transport and Installation Fig. 4.4.8 Center of Gravity (Horizontal Unit) Document no. 578.430AB Page 21 of 75...
-
Page 22: Connection Of Cables
OM2252 Rev 0 December 15 2016 Operation Manual - Hobart 2400 Compact Power – 120 / 140 / 180 kVA Transport and Installation Connection of Cables 50/60 Hz Input terminals: 3 x M10/25mm 30-44 Nm (266-390 lb.in) (L1–L2–L3) 1 x M10 bolt 50 Nm (444 lb.in) (Ground/PE) Fig. - Page 23 OM2252 Rev 0 December 15 2016 Operation Manual - Hobart 2400 Compact Power – 120 / 140 / 180 kVA Transport and Installation X1 & X2 Remote I/O terminals (Please refer to section 4.9 for connection of I/O terminals) 400 Hz Output terminals: 2 x 3 x M8 (A1-B1-C1/A2-B2-C2) &...
-
Page 24: Utility Input
OM2252 Rev 0 December 15 2016 Operation Manual - Hobart 2400 Compact Power – 120 / 140 / 180 kVA Transport and Installation Utility Input Due to personal health and safety, the AXA 2400 unit must always be protected by grounding the PE terminal ( ). -
Page 25: 400 Hz Interlock
OM2252 Rev 0 December 15 2016 Operation Manual - Hobart 2400 Compact Power – 120 / 140 / 180 kVA Transport and Installation 400 Hz Interlock The interlock safety system ensures that the output contactor stays engaged as long as the aircraft connector is inserted into the aircraft receptacle. - Page 26 OM2252 Rev 0 December 15 2016 Operation Manual - Hobart 2400 Compact Power – 120 / 140 / 180 kVA Transport and Installation • Key reader, bridge, cable drum etc. via GPU enable. Please refer to Fig. 4.9.1 for connection.
-
Page 27: Tcp/Ip On-Board Interface
OM2252 Rev 0 December 15 2016 Operation Manual - Hobart 2400 Compact Power – 120 / 140 / 180 kVA Transport and Installation 4.10 TCP/IP On-board Interface The AXA 2400 is equipped with a TCP/IP (RJ45) communication port for supervision and monitoring of the Ground Power Unit (GPU) e.g. -
Page 28: Technical Specifications
OM2252 Rev 0 December 15 2016 Operation Manual - Hobart 2400 Compact – 120 / 140 / 180 kVA Technical Specifications 5.0 Technical Specifications Standards: ISO 6858 Aircraft ground support electrical supplies - general requirements BS 2G 219 General requirements for ground support electrical supplies for aircraft SAE ARP 5015 Ground equipment –... - Page 29 OM2252 Rev 0 December 15 2016 Operation Manual - Hobart 2400 Compact – 120 / 140 / 180 kVA Technical Specifications Efficiency: Overall efficiency 0.93 at 180 kW load PF 1 at cos ϕ = 0.8 0.93 at 180 kVA load PF 0.8...
- Page 30 OM2252 Rev 0 December 15 2016 Operation Manual - Hobart 2400 Compact – 120 / 140 / 180 kVA Technical Specifications Fixed Horizontal Fig. 5.0.1 Fixed and Bridge-Mounted Document no. 578.430AB Page 30 of 75...
- Page 31 OM2252 Rev 0 December 15 2016 Operation Manual - Hobart 2400 Compact – 120 / 140 / 180 kVA Technical Specifications Fig. 5.0.2 Fixed and Bridge-Mounted with Base Module Document no. 578.430AB Page 31 of 75...
-
Page 32: Operator's Instructions (Display/Led/Keypad Layout)
OM2252 Rev 0 December 15 2016 Operation Manual - Hobart 2400 Compact – 120 / 140 / 180 kVA Operator’s Instructions 6.0 Operator’s Instructions (Display/LED/Keypad layout) Mains On Display ”Blue” LED Navigation Warning keypad ”Yellow” Output 1 Alarm/Failure Start/Stop ”Red” LED... - Page 33 OM2252 Rev 0 December 15 2016 Operation Manual - Hobart 2400 Compact – 120 / 140 / 180 kVA Operator’s Instructions Mains On Display ”Blue” LED Navigation Warning keypad ”Yellow” Output 1 Alarm/Failure Start/Stop ”Red” LED (Reset) Output 2 Output 1 On Start/Stop ”Green”...
-
Page 34: Using The Display/Keypad
OM2252 Rev 0 December 15 2016 Operation Manual - Hobart 2400 Compact – 120 / 140 / 180 kVA Operator’s Instructions Using the Display/Keypad: To enable a smooth and easy operation, the operator control panel has a simple layout. The LED display is located at the top. -
Page 35: Operating The Unit
OM2252 Rev 0 December 15 2016 Operation Manual - Hobart 2400 Compact – 120 / 140 / 180 kVA Operator’s Instructions Operating the unit: • Insert the aircraft cable 1 or 2 / both into the aircraft. Make sure the cable(s) are fully inserted Some cables have a line on the connector head to indicate when the head is fully inserted. - Page 36 OM2252 Rev 0 December 15 2016 Operation Manual - Hobart 2400 Compact – 120 / 140 / 180 kVA Operator’s Instructions Default Display Screen Operating OUTPUT ( I ) Phase A: 115.0 V < 20 A 115.0 V <20 A Phase B: 115.0 V...
-
Page 37: Basic Menu
OM2252 Rev 0 December 15 2016 Operation Manual - Hobart 2400 Compact – 120 / 140 / 180 kVA Operator’s Instructions Basic Menu: Home Set-Up Black Box Save / Upload Power Log View Parameters The basic Icon Menu is shown above with the available sub-menus. - Page 38 OM2252 Rev 0 December 15 2016 Operation Manual - Hobart 2400 Compact – 120 / 140 / 180 kVA Operator’s Instructions 6.3.1 Parameters – Menu structure OUTPUT ( I ) Phase A: 0.0 V < 20 A Phase B: 0.0 V <...
- Page 39 OM2252 Rev 0 December 15 2016 Operation Manual - Hobart 2400 Compact – 120 / 140 / 180 kVA Operator’s Instructions Parameters (continued) – Menu structure Use the ▼/▲ to browse through the various screens. = Active SYSTEM Control Voltage: 25.2 V...
- Page 40 OM2252 Rev 0 December 15 2016 Operation Manual - Hobart 2400 Compact – 120 / 140 / 180 kVA Operator’s Instructions Standard I/O configuration: Inputs Outputs Function Ref. Function Ref. Function Ref. Function Ref. Start/Reset (1) X1: I1 Not used...
- Page 41 OM2252 Rev 0 December 15 2016 Operation Manual - Hobart 2400 Compact – 120 / 140 / 180 kVA Operator’s Instructions 6.3.2 Setup – Menu structure 11:27:47 Setup Menu 26/08/2016 Output Voltage Settings: 115.0 V 80.0 – 135.0 V ◄ Back...
- Page 42 OM2252 Rev 0 December 15 2016 Operation Manual - Hobart 2400 Compact – 120 / 140 / 180 kVA Operator’s Instructions Setup (continued) – Menu structure 11:27:47 Setup Menu 26/08/2016 Fan Control Settings: Normal Normal Boost ◄ Back Modify 11:27:47...
- Page 43 OM2252 Rev 0 December 15 2016 Operation Manual - Hobart 2400 Compact – 120 / 140 / 180 kVA Operator’s Instructions Setup (continued) – Menu structure 11:27:47 Setup Menu 26/08/2016 GPU Enable Settings Active Bypassed Active ◄ Back Modify 11:27:47...
- Page 44 OM2252 Rev 0 December 15 2016 Operation Manual - Hobart 2400 Compact – 120 / 140 / 180 kVA Operator’s Instructions Setup (continued) – Menu structure 11:27:47 Setup Menu 26/08/2016 Settings in additional sub-menu: Real Time Clock Setup Month , Day, Year, Hour, Minute, Second ◄...
- Page 45 OM2252 Rev 0 December 15 2016 Operation Manual - Hobart 2400 Compact – 120 / 140 / 180 kVA Operator’s Instructions Setup (continued) – Menu structure 11:27:47 Setup Menu 26/08/2016 6 Characters: <UNDEFINED> A – Z , 0 – 9 , Space - ◄...
- Page 46 OM2252 Rev 0 December 15 2016 Operation Manual - Hobart 2400 Compact – 120 / 140 / 180 kVA Operator’s Instructions 6.3.3 Black Box – Menu structure 14:54:33 06/28/2013 I - 4307 OVERLOAD: 200% < I < 300% - 10 s...
- Page 47 OM2252 Rev 0 December 15 2016 Operation Manual - Hobart 2400 Compact – 120 / 140 / 180 kVA Operator’s Instructions 6.3.4 Power Log – Menu structure Power Log 001/100 Total Time: 22.0 Minutes Start Date: 06/28/2013 0 – 60 kW...
- Page 48 OM2252 Rev 0 December 15 2016 Operation Manual - Hobart 2400 Compact – 120 / 140 / 180 kVA Operator’s Instructions Document no. 578.430AB Page 48 of 75...
- Page 49 OM2252 Rev 0 December 15 2016 Operation Manual - Hobart 2400 Compact – 120 / 140 / 180 kVA Operator’s Instructions Document no. 578.430AB Page 49 of 75...
- Page 50 OM2252 Rev 0 December 15 2016 Operation Manual - Hobart 2400 Compact – 120 / 140 / 180 kVA Operator’s Instructions Save/Upload(continued) – Menu structure 10:30:00 USB MENU 28/06/2013 Saving log 10:30:00 USB MENU 28/06/2013 10:30:00 USB MENU 28/06/2013 Update Display Software...
-
Page 51: Default Factory Settings
OM2252 Rev 0 December 15 2016 Operation Manual - Hobart 2400 Compact – 120 / 140 / 180 kVA Operator’s Instructions Default Factory Settings: Output Voltage (V): 115.0 Compensation Type: Manual (Plug & Play if GPU supplied with cables) Output 1 Compensation (V): 0.0 (Set if the GPU is supplied with cable) -
Page 52: Set-Up Lock / Output Mode / Compensation
OM2252 Rev 0 December 15 2016 Operation Manual - Hobart 2400 Compact – 120 / 140 / 180 kVA Set-up Lock / Output Mode / Compensation 7.0 Set-up Lock / Output Mode / Compensation Preventing changes of set-up parameters To avoid unintentional modification of the... -
Page 53: Manual Compensation
OM2252 Rev 0 December 15 2016 Operation Manual - Hobart 2400 Compact – 120 / 140 / 180 kVA Set-up Lock / Output Mode / Compensation 4. Initiate the cable identification process by pressing the output’s START button. 5. Within a few seconds, the cable parameters are identified and the ground power unit returns to Standby Mode. -
Page 54: Fan Control
OM2252 Rev 0 December 15 2016 Operation Manual - Hobart 2400 Compact – 120 / 140 / 180 kVA Set-up Lock / Output Mode / Compensation Fan Control The default is set to Normal. This allows the software to control the speed of the fan based on the internal temperature of the unit. -
Page 55: Ef Interlock Ripple Level
OM2252 Rev 0 December 15 2016 Operation Manual - Hobart 2400 Compact – 120 / 140 / 180 kVA Set-up Lock / Output Mode / Compensation EF Interlock Ripple Level The EF Interlock Ripple Level is part of the Neutral Voltage Displacement circuit. If an aircraft has a large unbalanced load and the aircraft power cable has a broken neutral, then it is possible for the aircraft frame to be energized to a dangerous level. -
Page 56: Door Switch
OM2252 Rev 0 December 15 2016 Operation Manual - Hobart 2400 Compact – 120 / 140 / 180 kVA Set-up Lock / Output Mode / Compensation 7.13 Door Switch Some GPU units have a door interlock switch installed on the front & back door. If either the front or back door is opened the unit will shut off when this submenu is set to Active. -
Page 57: Earth Leakage Delay
OM2252 Rev 0 December 15 2016 Operation Manual - Hobart 2400 Compact – 120 / 140 / 180 kVA Set-up Lock / Output Mode / Compensation 7.17 Earth Leakage Delay This submenu is used in conjunction with the Earth Leakage Level submenu. The default value is 1000 Go into the Setup Menu and then scroll up or down to the Earth Leakage Delay submenu. -
Page 58: Led Brightness
OM2252 Rev 0 December 15 2016 Operation Manual - Hobart 2400 Compact – 120 / 140 / 180 kVA Set-up Lock / Output Mode / Compensation Go into the Setup Menu and then scroll up or down to the Modbus Slave Address submenu. Press the... - Page 59 OM2252 Rev 0 December 15 2016 Operation Manual - Hobart 2400 Compact – 120 / 140 / 180 kVA Set-up Lock / Output Mode / Compensation Norwegian, Italian, Swedish, Portuguese, Polish, Czech etc. The default is set to English. Go into the Setup Menu and then scroll up or down to the Language submenu. Press the center...
-
Page 60: Service, Maintenance, Overhaul
OM2252 Rev 0 December 15 2016 Operation Manual - Hobart 2400 Compact – 120 / 140 / 180 kVA Service, Maintenance, Overhaul Service, Maintenance, Overhaul To make certain that the unit is always ready for use it must be maintained on a regular basis. -
Page 61: Battery Back-Up & Replacement
OM2252 Rev 0 December 15 2016 Operation Manual - Hobart 2400 Compact – 120 / 140 / 180 kVA Service, Maintenance, Overhaul Battery back-up & replacement Situated on the back of the control board is a coin type lithium battery which ensures that Firmware/Set- up data etc. - Page 62 If the blue LED on the Control Board (location can be found on the Fig. 8.1.1) flashes with approximate 2 flashes per second and the display reports “Communication Error”, the firmware on the Control Board has been erased. The Control Board must be sent to ITW GSE to be reloaded.
-
Page 63: Trouble Shooting & Repair
OM2252 Rev 0 December 15 2016 Operation Manual - Hobart 2400 Compact – 120 / 140 / 180 kVA Trouble Shooting & Repair Trouble Shooting & Repair Only have qualified personnel remove covers for troubleshooting and repair. Please be aware that the DC capacitors can remain charged to a dangerous voltage up to 5 minutes after the mains input power has been disconnected. -
Page 64: Fault Guidance
OM2252 Rev 0 December 15 2016 Operation Manual - Hobart 2400 Compact – 120 / 140 / 180 kVA Trouble Shooting & Repair Fault Guidance In case you need to contact us for further fault guidance, please do not forget to enter the serial number... - Page 65 OM2252 Rev 0 December 15 2016 Operation Manual - Hobart 2400 Compact – 120 / 140 / 180 kVA Trouble Shooting & Repair List below shows the complete list of error codes and next corrective actions: Error code 2nd. Corrective action 3rd.
- Page 66 OM2252 Rev 0 December 15 2016 Operation Manual - Hobart 2400 Compact – 120 / 140 / 180 kVA Trouble Shooting & Repair Continued from previous page Error code 2nd. Corrective action 3rd. Corrective action 4th. Corrective action 4700 Check output filter capacitors C7-C9...
-
Page 67: Illustrated Parts List
OM2252 Rev 0 December 15 2016 Operation Manual - Hobart 2400 Compact – 120 / 140 / 180 kVA Illustrated Parts List 10.0 Illustrated Parts List Please refer to www.itwgse.com/axapower for recommended list of spare parts. It is also possible to find diagrams and drawings of the unit at this website. - Page 68 OM2252 Rev 0 December 15 2016 Operation Manual - Hobart 2400 Compact – 120 / 140 / 180 kVA Options PM1: Inverter Module 1 Q3: MCB Inverter 2 A6: Capacitor Board Q2: MCB Inverter 1 (located behind plate) Q6: Circuit Breaker...
- Page 69 OM2252 Rev 0 December 15 2016 Operation Manual - Hobart 2400 Compact – 120 / 140 / 180 kVA Options PM2: Inverter Module Air intake PM1: Inverter Module C10-C12: Output C7-C9: Output Capacitors Capacitors M3 – M4: Fans M1 – M2: Fans...
-
Page 70: Options
OM2252 Rev 0 December 15 2016 Operation Manual - Hobart 2400 Compact – 120 / 140 / 180 kVA Options 11.0 Options 578808 Dry Contacts (Diagram 478850) If dry contacts are needed for additional indication/to the PBB or to a BMS system, this option offers the following dry contact relays: 400 Hz On (N.O.) -
Page 71: 578852 Single Output (Diagram 478850)
OM2252 Rev 0 December 15 2016 Operation Manual - Hobart 2400 Compact – 120 / 140 / 180 kVA Options 578852 Single Output (Diagram 478850) The option is used in an installation where there is a desire to have the device as a single output unit. -
Page 72: 578854 Anti-Condensation Heater (Diagram 478850)
OM2252 Rev 0 December 15 2016 Operation Manual - Hobart 2400 Compact – 120 / 140 / 180 kVA Options 578854 Anti-Condensation Heater (Diagram 478850) In areas with high relative humidity, temperature drops cause formation of dew inside the enclosure of the GPU. -
Page 73: 578856 Military Interlock (Diagram 478850)
OM2252 Rev 0 December 15 2016 Operation Manual - Hobart 2400 Compact – 120 / 140 / 180 kVA Options 578856 Military Interlock (Diagram 478850) For military aircraft, the interlock system must be switched from civil interlock to military interlock by means of selector switch (S30) behind the front door. -
Page 74: 578Xxx Remote Control Box
OM2252 Rev 0 December 15 2016 Operation Manual - Hobart 2400 Compact – 120 / 140 / 180 kVA Options 578xxx Remote Control Box 578806 Single 400 Hz output 578818 2 x 400 Hz Outputs 578858 2 x 400 Hz Outputs & controls for Retriever/Hoist... -
Page 75: 578814 Terminal Extension
OM2252 Rev 0 December 15 2016 Operation Manual - Hobart 2400 Compact – 120 / 140 / 180 kVA Options 578814 Terminal Extension If more than 2 x cables per output phase are needed, for instance 2 7 x 35 mm², the terminal extension allows connection of up to 4 x cables per phase. - Page 76 PM1: INVERTER MODULE (INPUT ZONE) T2: OUTPUT OUTPUT FILTER OUTPUT TRANSFORMER CAPACITORS CONTACTORS INPUT INPUT 12-PULS INPUT V1 V2 CHOKE TRANSFORMER TL° Brown Black Grey t° t° TH° Brown Black Grey Blue INPUT DISCON- COM- NECT SWITCH MON- GD1: GATEDRIVE MODE CHO- Brown...
- Page 77 Violet Violet Common Mode OPERATOR Choke Blue Blue INTERFACE: Brown Brown Blue Violet Blue Violet (OPTIONALLY DISPLAY BOARD Black Black LOCATED IN REMOTE OPERATOR Grey Grey CONTROL KEYBOARD BOX) EMERGENCY STOP 2 Turns EEPROM Brown EEPROM +24 (FUSED) UDC1 UDC2 DISPLAY Black OUTP.
Need help?
Do you have a question about the Hobart 2400 Compact and is the answer not in the manual?
Questions and answers