Table of Contents
Advertisement
Available languages
Available languages
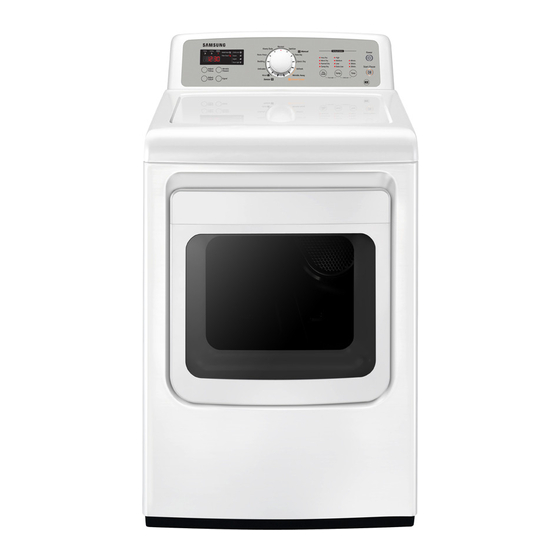
Gas and Electric Dryer
DV5471AE-03022A-01_EN.indd 1
DV5471AE-03022A-01_EN.indd 1
user manual
imagine
the possibilities
Thank you for purchasing this Samsung product.
To receive more complete service,
please register your product at
www.samsung.com/register
DV5471A*
DV5451A*
2011-03-28
2011-03-28
3:44:01
3:44:01
Advertisement
Table of Contents
Troubleshooting

Related Manuals for Samsung DV5451AEWXAC


Summary of Contents for Samsung DV5451AEWXAC
- Page 1 Gas and Electric Dryer imagine Thank you for purchasing this Samsung product. To receive more complete service, please register your product at www.samsung.com/register DV5471AE-03022A-01_EN.indd 1 DV5471AE-03022A-01_EN.indd 1 user manual the possibilities DV5471A* DV5451A* 2011-03-28 2011-03-28 3:44:01 3:44:01...
-
Page 2: Energy Saving
Samsung. 5. Time Saving Our cycles are designed with you in mind. All our dryers are designed to dry your clothes in less time... just 42 minutes! Giving you time for more important things in life. 6. Energy Saving Samsung dryers are super energy effi... - Page 3 7. Easy Reversible Door The direction of our reversible door can be changed easily. 8. 4-way Vent (electric model only : DV5471AE*,DV5451AE*) You can install the exhaust vent in the following four (4) positions: back, either side, bottom. DV5471AE-03022A-01_EN.indd Sec9:3 DV5471AE-03022A-01_EN.indd Sec9:3...
-
Page 4: What You Need To Know About Safety Instructions
WHAT YOU NEED TO KNOW ABOUT SAFETY INSTRUCTIONS Warnings and Important Safety Instructions in this manual do not cover all possible conditions and situations that may occur. It is your responsibility to use common sense, caution, and care when installing, maintaining, or operating your dryer. - Page 5 Flammable substances may cause the fabric to catch fi re by itself. 4. Do not store or use gasoline or other fl ammable vapors and liquids near this or any other appliance.
- Page 6 Do not install a clothes dryer with fl exible plastic venting materials. If fl exible metal (foil type) duct is installed, it must be of a specifi c type identifi ed by the appliance manufacturer as suitable for use with clothes dryers. Flexible venting materials are known to collapse, be easily crushed, and trap lint.
- Page 7 Do not allow children or pets to play on, in, or in front of the appliance. Close supervision is necessary when the appliance is used near children and pets. Before discarding or removing your dryer from service, remove the door to the drying compartment to prevent children or animals from becoming trapped inside.
-
Page 8: Table Of Contents
Getting started Control Panel Tumbler Staines Steeltumbler (DV5471A*)/Powder Coated Tumbler (DV5451A*) Dryer Exterior Dryer Exhaust System Special laundry tips Check these points if your dryer… Information codes APPENDIX Fabric care chart Protecting the environment Declaration of conformity Specifi cations Cycle chart... -
Page 9: Installing Your Dryer
UNPACKING YOUR DRYER Unpack your Dryer and inspect it for shipping damage. Make sure you have received all of the items shown below. If your Dryer was damaged during shipping, or you do not have all of the items, contact 1-800-SAMSUNG (726-7864). -
Page 10: Basic Requirments
A POWER CORD for electric dryers (except in Canada). • GAS LINES (if installing a gas dryer). The gas lines must meet national and local codes. • EXHAUST SYSTEM - must be rigid metal or fl exible stiff-walled metal exhaust ducting. -
Page 11: Ducting Requirements
• If a fl exible metal duct must be used, use the type with a stiff sheet metal wall. Do not use a fl exible duct with a thin foil wall. Serious blockage can result if the fl exible metal duct is bent too sharply. -
Page 12: Important To Installer
Do not install or store the dryer in an area where it will be exposed to water and/or weather. Keep the dryer area clear of combustible materials, casoline, and other fl ammable vapors and liquids. A dryer produces combustible lint. -
Page 13: Mobile Home Installation
Safety, Title 24, HUD (Part 280), 1975} for the United States) or CSA Standards Z240 (for Canada). When installing a dryer in a mobile home, you must make provisions for anchoring the dryer to the fl oor. Locate the dryer in an area that has adequate fresh air. -
Page 14: Gas Requirements
STATES), OR WITH THE CAN/CGA-B149 INSTALLATION CODES (FOR CANADA). Gas dryers are equipped with a burner vent for use with natural gas. If you plan to use your dryer with LP (liquid propane) gas, it must be converted for safe and proper performance by a qualifi ed service technician. -
Page 15: Electrical Requirements
The plug must be plugged into an appropriate outlet that is properly installed and grounded in accordance with all local codes and ordinances. Do not modify the plug provided with your dryer – if it doesn’t fi t the outlet, have a proper outlet installed by a qualifi ed electrician. -
Page 16: Electrical Connections
When local codes allow, the dryer electrical supply may be connected by means of a new power supply cord kit, marked for use with a dryer, that is U.L. listed and rated at a minimum of120/240 volts, 30-ampere with three No. 10 copper wire conductors terminated with closed loop terminals, open-end spade lugs with turned up ends, or with tinned leads. -
Page 17: Installation - General Procedure
To move the dryer easily, lay two of the carton cushion-tops on the fl oor. Tip your dryer on its side so it lies across both cushion-tops. Push the dryer so that it is near its fi nal location. Set your dryer upright. - Page 18 BEFORE OPERATING OR TESTING, follow the grounding instructions in the Grounding section. If converting from a 4-wire electrical system to a 3-wire, you must connect the ground strap to the terminal block support to ground the dryer frame to the neutral conductor.
-
Page 19: Final Installation Checklist
Remove the terminal block cover plate. Insert the power cord with a UL-listed strain relief through the hole provided in the cabinet near the terminal block. A strain relief must be used. Do not loosen the nuts already installed on the terminal block. Be sure they are tight. Use a 3/8” (1cm) deep well socket. -
Page 20: Connecting The Inlet Hose
CONNECTING THE INLET HOSE Method1 - Using the Y Connector and Long Hose The dryer must be connected to the cold water faucet using the new inlet hoses. Do not use old hoses. 1. Turn off the cold water faucet. - Page 21 Method2 - Using the Short Hose, Long Hose, and Y Connector The dryer must be connected to the cold water faucet using the new inlet hoses. Do not use old hoses. If the “Y” connector cannot be attached directly to the cold water faucet, then you must use the short hose.
-
Page 22: Dryer Exhaust Tips
DRYER EXHAUST TIPS Plastic or non-metal fl exible duct presents a potential fi re hazard. WARNING 1. Make sure your dryer is installed properly so it exhausts air easily. 2. Use 4” diameter rigid metal duct. Tape all joints, including at the dryer. -
Page 23: Door Reversal
5. Assemble the lever-holder using the screws that were removed from the lever-holder-in Step 4 and then fasten the screw marked by the circle in the fi gure to the opposite side from the lever-holder. 6. Remove the two screws from the Frame-Front. - Page 24 Cushion-Cover(F) in a safe location. When you change the direction in which the door opens so that the door opens to the left, you have to install the Cushion-Cover(F) onto the door again. 21. Install the door onto the Frame-Front and fasten the 2 screws that you removed in Step 2.
-
Page 25: Operating Instructions, Tips
The indicator light above the pad will illuminate when you select Wrinkle Prevent. The load is dry and you can remove it at any time during the Wrinkle Prevent cycle. Rack Dry (DV5471A*) – Rack Dry is available at Time Dry cycle. Temperature Select Cycle will be set only to Extra Low. - Page 26 The Less Dry setting(DV5471A*) is best suited for lightweight fabrics or for leaving some moisture in the clothing at the end of the cycle. Damp Dry is designed to partially dry items. Use for items that lay fl at or hang to dry. 26_ operating Instructions, tips DV5471AE-03022A-01_EN.indd Sec6:26...
- Page 27 Press to pause and restart programs. selection button Press once to turn your dryer on, press again to turn it off. If you turn Power button your dryer on and do not touch any buttons for 10 minutes, the power automatically turns off.
-
Page 28: Child Lock
You can turn the Drum Light on and off while your dryer is running and when it is stopped. If you do not turn the Drum Light off 5 minutes after turning it on, the Drum Light automatically turns off. -
Page 29: Rack Dry
Installing the drying rack 1. Open the dryer door. 2. Place the Drying Rack inside the product, and then align the holes of the fi lter handle of the Drying Rack to the front projections. 3. Place the rear legs in the two recessed areas of the dryer’s back wall, and then push down the middle of the drying rack to fi... -
Page 30: Clean The Lint Fi Lter
• Add one or more additional similar items to your dryer when you are drying only one or two items. This improves the tumbling action and drying effi ciency. -
Page 31: Care And Cleaning
Apply such products away from your dryer and wipe up any spills or overspray immediately. TUMBLER Remove any stains such as crayon, ink, or fabric dye (from new items such as towels or jeans) with an all- purpose cleaner. Tumble old towels or rags to remove any excess stain or cleaning substance. -
Page 32: Special Laundry Tips
• Use the Normal cycle. • Add a couple of dry towels and a pair of clean sneakers to help the tumbling action and to fl uff the item. • DO NOT dry kapok or foam pillows in the dryer. You can dry these items in the dryer as long as you use the air fl... -
Page 33: Troubleshooting
Be sure the dryer is leveled properly as outlined in the installation instruction. • It is normal for the dryer to hum due to the high velocity of air moving through the dryer drum and exhaust system. • Seams, pockets, and other similarly heavy areas may not be completely dry when the rest of the load has reached the selected dryness level. -
Page 34: Information Codes
Steam-Care starts Sprayed water is not visible during Steam-Care INFORMATION CODES Information codes may be displayed to help you understand what is occurring with your Dryer better. ERROR DISPLAY Clogged Lint Screen Vent is restricted Running the dryer with door open... -
Page 35: Appendix
** The dot symbols represent appropriate wash water temperatures for various items. The temperature range for Hot is 105° –125° F/ 41° – 52° C, for Warm 85° – 105° F/29° – 41° C and for Cold 60° – 85°... -
Page 36: Protecting The Environment
This appliance is manufactured from recyclable materials. If you decide to dispose of this appliance, please observe local waste disposal regulations. Cut off the power cord so that the appliance cannot be connected to a power source. Remove the door so that animals and small children cannot get trapped inside the appliance. -
Page 37: Cycle Chart
Air Fluff (DV5471A*) Manual Dry Quick Dry Time Dry Wrinkle Away Steam Cycles Refresh DV5471AE-03022A-01_EN.indd Sec8:37 DV5471AE-03022A-01_EN.indd Sec8:37 Default (Initial temp. 20.1~30.0° C) Sensor dry Temp control Time level High(Medium) Normal dry 42 min High(No change) Normal dry 58 min... -
Page 38: Warranty
One (1) Year All Parts and Labor Two (2) Years Control Board Parts This limited warranty begins on the original date of purchase, and is valid only on products purchased and used in the United States. To receive warranty service, the purchaser must contact SAMSUNG for problem determination and service procedures. - Page 39 Samsung shall not be liable for loss of revenue or profi ts, failure to realize savings or thter benefi ts, or any other special, incidental or consequential damages caused by the use, misuse, or inability to use this product, regardless of the legal theory on which the claim is based, and even if samsung has been advised of the possibility of such damages.
- Page 40 QUESTIONS OR COMMENTS? Country U.S.A MEXICO DV5471AE-03022A-01_EN.indd Sec7:40 DV5471AE-03022A-01_EN.indd Sec7:40 CALL 1-800-SAMSUNG(726-7864) 01-800-SAMSUNG(726-7864) OR VISIT US ONLINE AT www.samsung.com www.samsung.com Code No. DC68-03022A-01_EN 2011-03-28 2011-03-28 3:45:08 3:45:08...
-
Page 41: Manual Del Usuario
Secadora a gas y eléctrica manual del usuario imagine Gracias por adquirir este producto Samsung. Para que podamos brindarle un servicio más completo, www.samsung.com/register DV5471AE_03022A-01_MES_v1.indd 1 DV5471AE_03022A-01_MES_v1.indd 1 las posibilidades registre su producto en DV5471A* DV5451A* 2011-03-28 2011-03-28 2:38:33 2:38:33... - Page 42 Las secadoras Samsung son súper efi cientes en el consumo de energía. Puede secar hasta 3,09 lb (1,40 kg) de ropa con 1 kWh. Además, tanto la gran capacidad como el control Fuzzy Logic ahorran energía secando automáticamente sus prendas de la manera más efi ciente.
- Page 43 La dirección de la puerta reversible puede modifi carse fácilmente. 8. Ventilación de 4 direcciones (modelo eléctrico solamente: DV5471AE*, DV5451AE*) Puede instalar la ventilación del drenaje en las siguientes cuatro (4) posiciones: atrás, en cualquiera de los laterales, en la parte inferior. DV5471AE_03022A-01_MES_v1.indd Sec9:3 DV5471AE_03022A-01_MES_v1.indd Sec9:3...
-
Page 44: Lo Que Necesita Saber Sobre Las Instrucciones De Seguridad
LO QUE NECESITA SABER SOBRE LAS INSTRUCCIONES DE SEGURIDAD Las advertencias y las instrucciones de seguridad importantes de este manual no cubren todas las posibles condiciones y situaciones que pueden ocurrir. Es su responsabilidad actuar con sentido común, precaución y cuidado cuando instale, realice el mantenimiento o ponga en funcionamiento la secadora. - Page 45 13. No aplique calor para secar prendas que contengan goma espuma o materiales semejantes a la goma con textura similar. 14. Mantenga el área alrededor de la salida del drenaje y las áreas adyacentes libres de la acumulación de pelusa, polvo y suciedad.
- Page 46 No instale una secadora de ropa con materiales para ventilación de plástico fl exible. Si se instala un conducto de metal fl exible (tipo lámina metálica), debe ser de un tipo específi co identifi cado por el fabricante del electrodoméstico como adecuado para utilizar con secadoras de ropa. Los materiales para ventilación fl...
- Page 47 No permita que los niños o las mascotas jueguen sobre el electrodoméstico, dentro de él o frente a él. Se requiere de supervisión cuando el electrodoméstico es utilizado cerca de niños y mascotas. Antes de desechar la secadora o de retirarla de servicio, quite la puerta del compartimiento de secado para evitar que los niños y las mascotas queden atrapados dentro de la secadora.
- Page 48 Massachusetts Requisitos eléctricos Conexión a tierra Conexiones eléctricas Instalación - procedimiento general Lista de verifi cación fi nal de la instalación Conexión de la manguera de entrada Sugerencias acerca del drenaje de la secadora Inversión de la puerta Descripción general del panel de control...
-
Page 49: Instalación De La Secadora
Desembale la secadora e inspecciónela para controlar que no se hayan producido daños durante el transporte. Compruebe que haya recibido todos los elementos que se muestran a continuación. Si la secadora sufrió daños durante el transporte, o si falta algún elemento, comuníquese con el 1-800-SAMSUNG(726-7864). -
Page 50: Requisitos Básicos
TUBERÍAS DE GAS (si se instala una secadora a gas). Las tuberías de gas deben cumplir con los códigos locales y nacionales. • El SISTEMA DE DRENAJE - debe consistir en un conducto de drenaje de metal rígido o fl exible con un recubrimiento de metal resistente. 10_ instalación de la secadora DV5471AE_03022A-01_MES_v1.indd 10... -
Page 51: Requisitos Para El Tendido De Conductos
El conducto de drenaje debe fi nalizar en una tapa del drenaje con un regulador de tiro que gire hacia afuera para evitar el refl ujo de aire y el ingreso de insectos o plantas. Nunca utilice una tapa de drenaje con un regulador de tiro magnético. -
Page 52: Importante Para El Instalador
fl uir sin inconvenientes. Para las secadoras a gas, se debe mantener el espacio libre sufi ciente tal como fi gura en la placa de información para garantizar que haya aire sufi ciente para la combustión y el funcionamiento adecuado de la secadora. -
Page 53: Instalación En Casas Rodantes
Consulte la sección Drenaje a fi n de obtener más información. DRENAJE Si la secadora tiene un drenaje con salida hacia el exterior se evitará que ingrese una gran cantidad de pelusa y humedad a la habitación. En los Estados Unidos: •... -
Page 54: Requisitos En Cuanto Al Gas
Su secadora debe estar desconectada del sistema de suministro de gas durante las pruebas de presión del sistema. NO vuelva a utilizar el viejo conducto de gas en metal fl exible. El diseño del conducto de gas fl exible debe estar certifi cado por la Asociación Americana del Gas (CGA en Canadá). -
Page 55: Requisitos Eléctricos
No modifi que el enchufe provisto con la secadora; si no entra en el tomacorriente, solicite a un electricista califi cado que instale el tomacorriente adecuado. Nunca conecte el cable a tierra a las tuberías de plástico, las tuberías de gas o a las cañerías de agua caliente. -
Page 56: Conexiones Eléctricas
U.L. y categorizado en un mínimo de 120/240 voltios, 30 A con tres conductores de cobre N.° 10 que fi nalicen en terminales de bucle cerrado, pernos de pala de tipo abierto con extremos rebatidos o con conductores de estaño. - Page 57 4. Si tiene un modelo eléctrico, vaya al Paso 6. Si tiene un modelo a gas, vaya al paso siguiente. 5. Consulte la sección Requisitos en cuanto al gas, luego siga los pasos indicados que fi guran a continuación.
- Page 58 Ajuste los tornillos. e. Ajuste los tornillos con dispositivo de alivio de tensión. Inserte la lengüeta de la cubierta del bloque de terminales en la ranura del panel posterior de la secadora. g. Asegure la cubierta con un tornillo de sujeción.
-
Page 59: Lista De Verificación Final De La Instalación
CONEXIÓN DE SISTEMAS DE 4 CABLES para las construcciones nuevas o remodeladas, las casas rodantes o si los códigos locales no permiten la conexión a tierra a través del neutro. Si utiliza un sistema de 4 cables, no puede conectar a tierra el armazón de la secadora al conductor neutro del bloque de terminales. -
Page 60: Conexión De La Manguera De Entrada
No la ajuste en exceso. Puede dañar la unión. 8. Conecte la manguera de la lavadora al otro extremo del conector con forma de “Y”. Atornille la unión de la manguera hasta que esté ajustada. Ajuste la unión con otros dos tercios de giro adicionales utilizando la pinza. - Page 61 La secadora debe conectarse a la llave de agua fría mediante las nuevas mangueras de entrada. No utilice mangueras viejas. Si el conector en forma de "Y" no puede conectarse directamente a la llave de agua fría, debe utilizar la manguera corta.
-
Page 62: Sugerencias Acerca Del Drenaje De La Secadora
SUGERENCIAS ACERCA DEL DRENAJE DE LA SECADORA Un conducto fl exible de plástico o de un material que no sea el metal presenta un potencial riesgo de incendio. ADVERTENCIA 1. Asegúrese de que su secadora esté instalada correctamente para que extraiga el aire fácilmente. -
Page 63: Inversión De La Puerta
4 y apriete el tornillo marcado por el círculo en la fi gura en el lado opuesto de la placa de apoyo. 6. Retire los dos tornillos del cierre de la placa de apoyo. - Page 64 18. Instale las 2 protecciones de la cubierta(F) que ha retirado en el paso 8. 19. Instale el cierre de la puerta en el lado opuesto. 24_ instalación de la secadora DV5471AE_03022A-01_MES_v1.indd 24 DV5471AE_03022A-01_MES_v1.indd 24 20. Retire la protección de la cubierta (F).
-
Page 65: Descripción General Del Panel De Control
(80% seco). Cuando se alcanza este nivel, suena una alarma durante cinco (5) segundos. Después de que suena la alarma, la secadora continuará funcionando hasta que usted la apague o la ropa alcance el nivel de secado que usted seleccionó al inicio del ciclo. - Page 66 Refresh (Refrescar) – Use para alisar arrugas y reducir olores en cargas de una a cuatro prendas. En este ciclo se rocía una pequeña cantidad de agua en el tambor de la secadora después de varios minutos de secado con calor.
- Page 67 La opción Less Dry (Menos seco) (DV5471A*) es la más adecuada para telas livianas, o para que quede algo de humedad en las prendas al fi nal del ciclo. La opción Damp Dry (Centrifugado parcial) fue concebida para secar las prendas parcialmente. Utilícela para las prendas que deban secarse en posición horizontal o colgarse.
-
Page 68: Seguro Para Niños
Power (Encendido), hasta que libere dicha función. Se iluminará el indicador de Seguro para niños. Si no liberó el Seguro para niños, y luego apagó y encendió la secadora, la función Seguro para niños continuará activada. Para liberar el Seguro para niños, siga las instrucciones detalladas a continuación. -
Page 69: Rack Dry (Secado En Estante)
Instalación del estante de secado 1. Abra la puerta de la secadora. 2. Coloque el estante de secado dentro del producto y luego alinee los orifi cios de la tapa del fi ltro con la parte frontal sobresaliente. 3. Coloque las patas traseras en las dos áreas empotradas de la pared trasera de la secadora y luego empuje hacia abajo en el centro del estante de secado para ajustarlo en su lugar. -
Page 70: Limpie El Filtro Para Pelusas
El tiempo puede fl uctuar debido a que los niveles de humedad fl uctúan en la secadora. • Cuando haya fi nalizado el ciclo, la luz de la traba de la puerta se apagará y la palabra "End" (Fin) aparecerá en la pantalla. -
Page 71: Panel De Control
Posteriormente, seque las toallas o prendas viejas para eliminar todo exceso de manchas o solución de limpieza. Una vez que se hayan seguido estos pasos, es posible que las manchas aún sean visibles, pero no se transferirán a las cargas subsiguientes. -
Page 72: Sugerencias Para Prendas Especiales
• Tal vez deba volver a colocarla para garantizar un secado uniforme. • Utilice el ciclo Normal (Normal) y seque de a una sola frazada por vez para lograr un mejor funcionamiento de la secadora. • Asegúrese de que la prenda esté completamente seca antes de usarla o guardarla. -
Page 73: Guía De Solución De Problemas
Verifi que si en la carga hay objetos tales como monedas, botones fl ojos, clavos, etc. Retírelos de inmediato. • Es normal escuchar el ruido de la válvula de gas de la secadora o que el ciclo del dispositivo de calor se enciende o se apaga durante el ciclo de secado. •... -
Page 74: Códigos De Información
• Las telas que contienen olores fuertes deben lavarse en un ciclo normal. • Esto se debe a la condensación del vapor. El goteo de agua se detendrá en unos minutos. • El agua rociada es difícil de ver cuando la puerta está cerrada SIGNIFICADO Limpie el fi... -
Page 75: Tabla De Indicaciones Sobre La Tela
El rango de temperatura para Caliente es de de 41° a 52° C (105° a 125° F), para Tibia es de 29° a 41° C (de 85° a 105° F) y para Fría es de 16° a 29° C (de 60° a 85° F). (La temperatura del agua del lavado debe alcanzar un mínimo de 16°... -
Page 76: Protección Del Medio Ambiente
Este electrodoméstico se fabrica con materiales reciclables. Si decide desechar este electrodoméstico, siga la normativa local relacionada con la eliminación de desechos. Corte el cable de alimentación para que el electrodoméstico no pueda conectarse a una fuente de alimentación. Quite la puerta para que los animales y los niños pequeños no puedan quedar atrapados dentro del electrodoméstico. -
Page 77: Tabla De Ciclos
Secado manual Quick Dry (Secado rápido) Time Dry (Secado con temporizador) Wrinkle Away (Antiarrugas) Ciclos de vapor Refresh (Refrescar) Tipo de secadora a gas Ciclo Normal (Normal) Heavy Duty (Acción fuerte) Perm Press (Plancha permanente) Bedding (Ropa de cama) Secado con... - Page 78 La presente garantía limitada comienza en la fecha original de compra y es válida únicamente para productos comprados y usados en los Estados Unidos. Para recibir el servicio técnico de la garantía, el comprador debe comunicarse con SAMSUNG con el fi n de que se determine el problema y los procedimientos del servicio.
- Page 79 daños.
- Page 80 ¿TIENE PREGUNTAS O COMENTARIOS? País U.S.A MÉXICO DV5471AE_03022A-01_MES_v1.indd Sec7:40 DV5471AE_03022A-01_MES_v1.indd Sec7:40 LLAME AL 1-800-SAMSUNG(726-7864) 01-800-SAMSUNG (726-7864) N.º de código: DC68-03022A-01_MES O VISÍTENOS EN LÍNEA EN www.samsung.com www.samsung.com 2011-03-28 2011-03-28 2:39:08 2:39:08...
Need help?
Do you have a question about the DV5451AEWXAC and is the answer not in the manual?
Questions and answers