Advertisement
Quick Links
LED + Smart Control
Quick Start Guide
Internet
Login
LAN
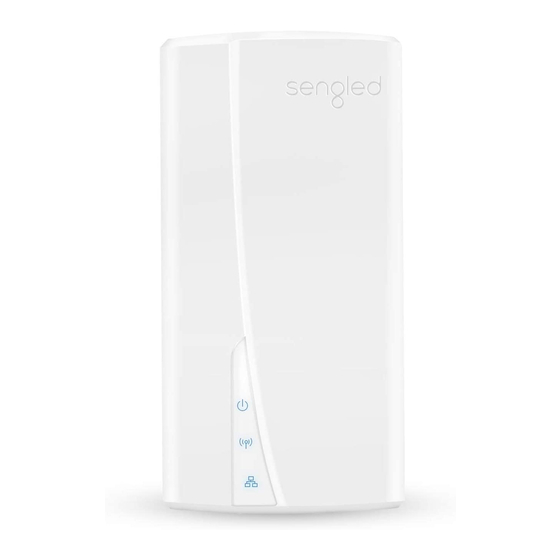
Connect Element hub to any LAN port on the Wi-Fi
router via the ethernet cable provided in the package.
Then provide power to the hub.
sengled element
Connect your mobile app to the Wi-Fi provided by
the same Wi-Fi router in Step 1. Download and install
Element App on your iOS or Android mobile device.
Advertisement

Summary of Contents for Sengled element Z01-hub
- Page 1 Connect Element hub to any LAN port on the Wi-Fi router via the ethernet cable provided in the package. Then provide power to the hub. sengled element Connect your mobile app to the Wi-Fi provided by the same Wi-Fi router in Step 1. Download and install...
- Page 2 Turn off the wall switch, twist Element bulb into the socket, then turn on the wall switch to power the bulb. Devices Add a bulb Add a Hub Login Open the Element App and follow the in-App instructions to create an account, add bulbs and configure their settings.
- Page 3 Internet Once Element bulbs are successfully connected in the App, the ethernet cable connecting the hub to the router can be removed. The bulbs can now be controlled by the App. Note: Keep the wall switch on to provide constant power to the bulbs.
- Page 4 30mA , 2W(rate) User Operation Instructor Ⅰ Software download way Step1: Log in https://appdownload.cloud.sengled.com:8099/ Step2: you can see the android and IOS APP download address. Then click the download button for setup . ⅡEquipment installation method Tighten the Element bulb clockwise on the bulbholder and light to electricity.
- Page 5 4. When log in successfully, we can see the main menu (as PIC3.5.1). Click “Devices”to open the devices page and you can add new hub and the new bulbs follow the Interface prompt.(3.3.1) You should add hub first, and then add bulbs to the hub. PIC3.3.1 5.
- Page 6 PIC3.4.1 PIC3.4.2...
- Page 7 PIC3.4.3 PIC3.4.4 PIC3.4.5 PIC3.4.6 6. Add a new bulbs Devices interface ----- click the top-right “+”icon--click “Add a Bulb” and follow the guidanceto connect the bulb to your hub The setting steps are as below: (1)Select the hub you added before; (PIC3.4.6) (2)Scan the QR code of every bulb which you want to add (as PIC3.4.7).
- Page 8 PIC3.4.7 PIC3.4.8 PIC3.4.9 PIC3.4.10...
- Page 9 7. Operation introduce The functions of Element app as below PIC 3.5.1 showed: ●Main show yours bulbs . You can control them together with the All page or single control with Individuals page. You can turn on or off your bulbs or change the brightness and color temperature.
- Page 10 way: All or Individuals (such as PIC 3.5.2 and PIC3.5.3). PIC3.5.2 PIC3.5.3 You can control all your bulbs together in the “All” page, including turn on and off the bulbs or change their brightness or color temperature if you want. The button on the top right corner, you can click it to show the performance information of all bulbs daily or weekly or monthly.(PIC3.5.4 and PIC3.5.5)
- Page 11 PIC3.5.4 PIC3.5.5 You can control your bulbs one by one in the “individuals” page. Click the right arrow and you will see PIC3.5.6. You can control the bulb and rename the bulb here and see its usage data by slide left.
- Page 12 PIC3.5.6 PIC3.5.7 7.2 Devices Devices allow you manage your devices both of hubs and bulbs. Click the setting icon, and you can rename the SSID of hub. You can also delete bulbs here. Add new hub or bulbs will be enable when you click the top right add button.
- Page 13 PIC3.6.1 PIC3.6.2 7.3 Scenes You can add your favorite scenes as the way you use all your bulbs. Then you can quickly make them effect by only click one button. To add a scene, click the cross button on the top right and you will see PIC3.6.4.
- Page 14 PIC3.6.3 PIC3.6.4 7.4 Schedule You can add an alarm here to make the scene effect at the special time you wanted. As the picture 3.6.5,you can turn on or off the schedule to make it work or not. When you want to add a new schedule, you should click the cross button and create a new one by 4 steps: First, select a scene you like.
- Page 15 PIC3.6.5 PIC3.6.6 7.5 Account You can change your account password or logout in here.(PIC3.7.1)
- Page 16 PIC3.7.1 7.6 About About show the information aboutsoftware version and the firmware version of hubs and bulbs. You can also update the firmware here.(PIC3.8.1)
- Page 17 PIC3.8.1...
- Page 18 FCC STATEMENT FOR USERS This device complies with part 15 of the FCC Rules. Operation is subject to the following two conditions: (1) This device may not cause harmful interference, and (2) this device must accept any interference received, including interference that may cause undesired operation.
- Page 19 IC Radiation Exposure Statement for Canada This device complies with Industry Canada licence-exempt RSS standard(s). Operation is subject to the following two conditions: (1) this device may not cause interference, and (2) this device must accept any interference, including interference that may cause undesired operation of the device.
-
Page 20: Important Note
Industrie Canada pour fonctionner avec les types d'antenne énumérés ci-dessous et ayant un gain admissible maximal et l'impédance requise pour chaque type d'antenne. Les types d'antenne non inclus dans cette liste,ou dont le gain est supérieur au gain maximal indiqué, sont strictement interdits pour l'exploitation de l'émetteur. IMPORTANT NOTE: Radiation Exposure Statement: This equipment complies with “Industry Canada RSS-102 for radiation exposure limits...


Need help?
Do you have a question about the element Z01-hub and is the answer not in the manual?
Questions and answers