
Related Manuals for HOTA H6 PRO


Summary of Contents for HOTA H6 PRO
- Page 1 ..1111111 H6 PRO AC/DC Smart Charger Operating Instructions Shenzhen HOTA Technology Co., LTD.
- Page 2 HG PRO AC/DC Smart Charger Thank you for purchasing the HOTA series of smart chargers. Please read this Instructions carefully before use so as to use the product better, please keep this Instruction in a place safe for easy access.
-
Page 3: Table Of Contents
Contents 4. Recommended Connected W a y - ------------- -------------- 03 7 . St andard Ba tt er y Parameters ---- ---------------- ------------ 0 6 ------- --------- ---------- --------- -------- O p e ration and S e tu p 1. H o w t o Confi rm Chargi ng C u rrent - -------- ----- ---------- 07 2 . - Page 4 HG PRO AC/DC Smart Charger Features • Small Smart This is a charger of amazing power-to-volume ratio, with support of AC 200W and DC 700W charging power, that makes charging no longer anything limiting the users. • Wide-range AC Input Charging Without Borders High-efficiency industrial power management , Active PFC plus resonant control , with support of short circuit protection(SCP), over load protection(OLP), over voltage...
- Page 5 Type Lead Acid(Pb): 1-12S(2-24V) Eneloop : 1-14S Net Weight 410g Temperature protection, time protection, capacity protection, input reverse Protection protection, output protection, short circuit protection, output overcurrent Function protection, output overvoltage protection, overcharge protection HGT1. H6 PRO AC/DC Smart Charger...
- Page 6 B a l an ce Port • · ··········· · B att e ry Port D C Port · ·················································· · ······· ········ ········ ··········· · Mu lt i - F u n ct i on Por t HGT; H6 PRO AC/DC Smart Charger...
-
Page 7: Recommended Connected Way
1. Connect the power supply, wait for self-checking to be completed; 2. Connect the battery to the charger under standby interface; 3. Set up task parameters applicable to your battery through the display and touch key; 4. Enjoy. HGT; H6 PRO AC/DC Smart Charger... - Page 8 1. The detection balance port of this product is suitable for lithium battery packs; 2. When the battery is connected, it is aligned with the "-" sign. The diagram above shows the alignment of the balance plug; HGT; H6 PRO AC/DC Smart Charger...
- Page 9 - + s - + s I•••½ I•••½ � I _ s � I _ s RC airplane receiver or RF transmiter RC airplane control servo connects to the multi-function port connects to the multi-function port HGT; H6 PRO AC/DC Smart Charger...
-
Page 10: Standard Battery Parameters
Be very careful to choose the correct voltage for different types of battery otherwise you may cause damage to the batteries. Incorrect settings could cause the cells to vent, burn or explode leading to injury or loss of property. HGT; H6 PRO AC/DC Smart Charger... -
Page 11: Operation And Setup
� Operation and Setup How to Confirm Charging Current • It is very important to know the maximum charging current of the battery as excessive current could influence the life span of battery and/or cause damages. In addition, excessive current can cause heating and/or explosion of the battery during the charging process. •... -
Page 12: W Ork I Ng Paramete R S Displ A
3. Short press Okey to pop up the "Task Settings" menu, adjust task parameters, Short press O key to start the task. 4. Long press O key to enter the "Charger Settings" . HGT; H6 PRO AC/DC Smart Charger... - Page 13 3. Short press the O key to pop up the "Adjust task" menu to reset the output voltage, output power, or "stop" the task. 4. Long press Okey to stop the current task. HGT; H6 PRO AC/DC Smart Charger...
- Page 14 3. When the charge task is executing , short press the O key to pop up the "Adjust Task" menu , will adjust the charge current , long press the O key can stop the current task; 4. Enjoy. HGT; H6 PRO AC/DC Smart Charger...
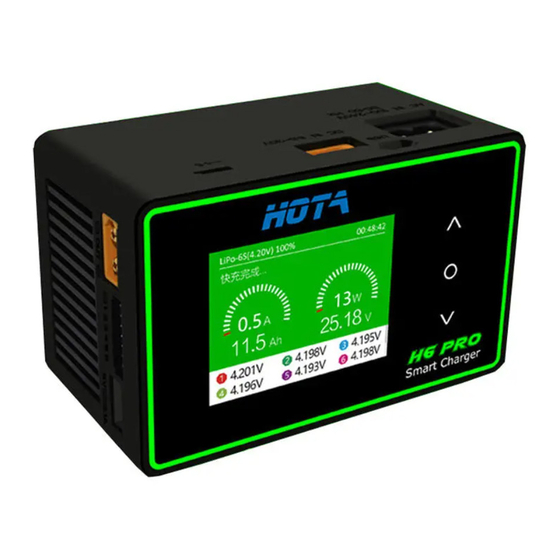
- Page 15 � Operation and Setup Working Parameters Display Battery Type-string Number .---- Operation Time Current & Completion --� Percentage Task Status Present Present Current Power Current Total Capacity Battery Charged Voltage 4.198V 4.195V 4.201V Cell Voltage 4.193V 4.198V 4.196V Fast Charge Done Fast Charge Done Status Simple Operation 1.
- Page 16 � Operation and Setup Working Parameters Display Battery Type-string Number Operation Time Current & Completion --� Percentage Task Status Present Present Current Power Current Total Capacity Battery Charged Voltage 3. gg 7 3.998V 3.999V Cell Voltage 3.996V 3.995V 3.994V Discharging Discharging Status Simple Operation 1.
- Page 17 3. When the Ext. discharge task is executing, short press the O key to pop up the "Adjust Task" menu, will adjust the Ext. discharge current, long press the Okey can stop the current task; 4. Enjoy. HGT1. H6 PRO AC/DC Smart Charger...
- Page 18 3. When the storage task is executing, short press the Okey to pop up the "Adjust Task" menu , will adjust the storage current, long press the Okey can stop the current task; 4. Enjoy. HGT; H6 PRO AC/DC Smart Charger...
- Page 19 � Operation and Setup Working Parameters Display Battery Type-string Number Operation T ime Current & Completion Percentage Task Status Present Present ---Power Current Current Total Capacity Battery Charged Voltage 3.957V 3.956V 3.952V Cell Voltage 3.954V 3.953V 3.955V Balancing Balancing Status Simple Operation 1.
- Page 20 � Operation and Setup Working Parameters Display Battery Type-string Number Current & Completion ...---- Operation T ime Percentage Task Status Present Present Power Current Current Total Capacity Battery Charged Voltage 3.763 V 3.75 7V 3.756V Cell Voltage -.--- - . --- V - .
-
Page 21: Charger Settings
Tools For data calibration Calibrations Start self-checking of the charger System Self-checking Factory Settings Restore all parameters to factory settings(User calibration data cleanup) Display system information, serial number System Info Back Exit "Charger Settings" HGT1. H6 PRO AC/DC Smart Charger... - Page 22 � Operation and Setup Charger Settings > Task Parameters < Task parameters @ Safety Timer 2400 Minute =� Max. Capacity 999999mAh � End Current Trickle Charge � Back � In the standby interface, Long press the Okey to pop up the "Charger Settings" menu. and then choose "Task parameters"...
- Page 23 Device Name long press the O key to exit Back Exit the "System settings" menu Buzzer volume: the default is OFF, the operation sound would be blocked, but not the sound of error warning. HGT; H6 PRO AC/DC Smart Charger...
-
Page 24: Charger Settings > Tools
P pulse width, it the signal output of the receiver. pulse width of the PWM output are controls the angle of the swing arm. automatically detected, then converted into the steering output shaft rotation angle value. HGT; H6 PRO AC/DC Smart Charger... - Page 25 Select battery's strings: 1 ~6S, if balance port is inserted, then it processes Cell count automatic test, no need to do setting Current setting Select current , charger/storage 0.1 ~26.0A, discharge 0.1-5.0A, external discharge 1.0-15.0A Start to execute task Start task Back Back HGT; H6 PRO AC/DC Smart Charger...
-
Page 26: Task Settings And Notes
Operation and Setup Task Settings and Notes The H6 PRO AC/DC smart charger is operation in a series charging mode. When connecting the battery, the battery output cable must be connected. For lithium batteries, it is strongly recommended to connect the balance ports for balanced charging so as to ensure that the charger can accurately monitor the voltage of each cell and balance the cells with poor consistency. - Page 27 The charger's charging ability is much larger than the discharge capacity; in the balance operation , selecting voltage equal or larger than the current battery voltage usually lets you attain faster effect in balancing. HGT1. H6 PRO AC/DC Smart Charger...
- Page 28 After the voltage becomes higher than the pre-charging voltage, the voltage will be adjusted to the set voltage for charging. Such design can protect the over-discharged battery , activate and repair it. HGT1. H6 PRO AC/DC Smart Charger...
- Page 29 Task Settings and Notes About Internal Resistance Measurement The H6 PRO AC/DC Smart Charger has a cell internal resistance measurement function that is only effective when performing balanced charging tasks on the battery. About two or three minutes after the start of the charging task, the internal resistance of the battery is measured and calculated.
- Page 30 � Product Qualification Declaration • H6 PRO AC/DC Smart Charger conforms to relevant commands in B: 2017, PART15 CLASSB; PART15 CLASSC, FCC Testing Standards Result EN 60950-1 :2006+A 11 :2009+A 1 :2010+A 12 : 2011 +A2:2013 EN 62311 :2008 ETSI EN 301 489-1 V2.2.0(2017-03) ETSI EN 301 489-3 V2.1.1(2017-03)
-
Page 31: Troubleshooting
� Troubleshooting • Error processing during "System self-checking" : when the charger is performing the System self-checking, if the output port is connected to the battery, it will cause a self-checking error, at this time, the battery should be removed and wait 5 seconds before retrying. -
Page 32: Safety Tips
Take it to the garbage collection center for classification. Statement • The H6 PRO AC/DC Smart Charger is designed for the battery types listed in this Instructions. The company does not assume any responsibility if the user uses the charger for purposes other than those listed in the Instructions. -
Page 33: Safety Notes
� Safety Notes Before using the charger for the first time, please read the details in the "Safety Notes". Make sure you use this charger safely and correctly. WARNING! FIRE HAZARD! NEVER USE CHARGER UNSUPERVISED! • Please read the complete Instructions carefully before using the charger; •... - Page 34 • -.-. � ..- • lt iJl l $ tt � $ M !l ff lU � a:J Shenzhen HOTA Technology Co., LTD . �· ..• •••• www.hota-exp.com Add: Website: Floor 2, Building 2, Guorun Industrial Park, Min Zhi, Longhua District, Shenzhen, China 0755-28180135 info@hota-exp.com...
Need help?
Do you have a question about the H6 PRO and is the answer not in the manual?
Questions and answers