Advertisement

MY bernette
EMBROIDERY
M A S T E R Y
B O O K
S E R I E S
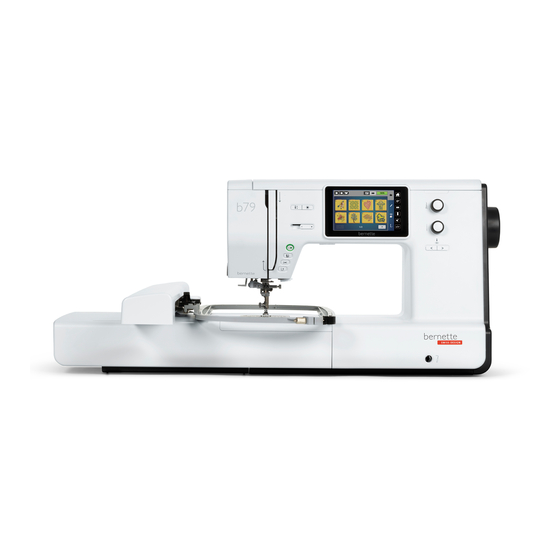
bernette EMBROIDERY WORKBOOK
For b79 and b70 DECO EMBROIDERY MACHINES
b e r n e t t e E M B R O I D E R Y M A C H I N E W O R K B O O K
©2019 BERNINA of America. Permission granted to copy and distribute in original form only. Content may not be altered or used in any other form or under any other branding.
06042019

Advertisement

Table of Contents
loading

Summary of Contents for Bernina Bernette b79

  • Page 1 E M B R O I D E R Y M A C H I N E W O R K B O O K ©2019 BERNINA of America. Permission granted to copy and distribute in original form only. Content may not be altered or used in any other form or under any other branding.
  • Page 2: Table Of Contents

    Table of Contents Table of Contents ........Centering a Combined Design In the Hoop .. Introduction ..........Check Motif Size ........Setting Up - Machine/Module ....Placement: Absolute Check ....Setting Up - Machine ......Change Thread Color ......Setting Up - Hooping Fabric and Stabilizer .. Change Thread Brand ......
  • Page 3: Introduction

    Introduction b79 Embroidery and Sewing Machine Welcome! Learning to use your new embroidery machine to its fullest capabilities will let you enjoy your machine for many years to come. This workbook is designed to be used as a step-by-step guide to acquaint you with the basic operation of your bernette embroidery machine.
  • Page 4: Setting Up - Machine/Module

    Setting Up - Machine/Module Attaching the Module: • The slide-on table (b79) must be removed. • Make sure there is enough space around the machine and embroidery module to allow the unimpeded movement of the embroidery arm. • Place the machine on a flat surface (such as a table or counter top) sturdy enough to support the weight of the machine with- out sagging.
  • Page 5: Setting Up - Machine

    Setting Up - Machine STITCH PLATE b79: Follow the manual’s instructions to attach the Straight/CutWork Stitch Plate to the machine. This plate will reduce flag- ging of fabric, resulting in improved stitching. NOTE: The machine will recognize the plate attached. LOWERED FEED DOG The feed dog will automatically be lowered when the module is attached.
  • Page 6: Setting Up - Hooping Fabric And Stabilizer

    Setting Up - Hooping Fabric and Stabilizer HOOP FABRIC AND STABILIZER To complete the workbook exercises, hoop fabric and stabilizer together. Find the center of a 10” x 14” piece of fabric; mark the cen- ter horizontal and vertical axis. Loosen the screw or open the quick release device on the outer...
  • Page 7: Setting Up - Attaching The Hoop

    Setting up - Attaching the Hoop Attaching bernette Hoops Raise the needle and the embroidery foot. Position the embroidery hoop underneath the embroidery foot. The needle should be in the highest position when attaching the hoop to prevent snagging fabric and/or bending the needle. Push the embroidery hoop into the embroidery module until it clicks into place.
  • Page 8: Design Library

    Note: The b79 and b70 DECO read multiple design formats. The native format is the BERNINA exp format. Besides the actual exp embroidery file, the BERNINA exp format also includes a .BMP file, a preview of the embroidery motif, and an .INF file which provides the color information.
  • Page 9: Presser Foot Sole Display

    Presser Foot Sole Display When embroidering, the machine will show a recommended presser foot sole in the Presser Foot Display. The recommended presser foot sole is displayed in the Presser Foot Display. Touch the Presser Foot Display icon. The suggested sole (JX in this case) will be displayed with a green check.
  • Page 10: Hoop Selection/Display Menu

    Hoop Selection/Display Menu For best embroidery results, you should embroider a design in the hoop that is closest in size to the design. Embroidery designs will automatically open in the hoop that is closest to the size of the design unless an embroi- dery hoop is already attached to the machine.
  • Page 11: Hoop Calibration

    Hoop Calibration The Large, Medium and Small Hoops must be calibrated when they are new to the machine, and also after every update. The calibration can be done with any of the three hoops, but it needs only be done with one. You will only see the visual for the Medium Hoop regard- less of the hoop being calibrated.
  • Page 12: Editing Designs

    Editing Designs Customize embroidery designs using functions found on your embroidery machine. You will use the functions shown in the chart to customize designs on your particular model of embroidery machine as we go through the editing features on the following pages.
  • Page 13: Set Up For Editing And Stitching

    Set Up For Editing and Stitching Use the features and functions just learned to set up a design, and then stitch it out as we proceed through the next pages. Sele ct the desi gn Select the Embroidery Motifs folder. Select Folder 5, Design #6.
  • Page 14: Editing - Rotate/Resize

    Editing - Rotate/Resize Designs can be rotated in 90° increments using the +90° icon, or in 1° increments. Designs can be resized proportionately to a maximum of 20% up or 20% down by using the Multi-function knobs or the on-screen - / + icons Rotate Motif Using the design from the previous page, select “i”...
  • Page 15: Editing - Mirror Image

    Editing - Mirror Image Design motifs can be mirror imaged both in the left/right position or up/down position. Mir ror Image Le ft/Right Using the same design from the previous page, select “i” to open the Information menu. Touch the Mirror Image Left/Right icon. Mir ror Image Up/Down Touch the Mirror Image Up/Down icon.
  • Page 16: Editing - Adding/Deleting Designs

    Editing - Adding/Deleting Designs Additional designs can be combined directly on screen of the machine. Unwanted designs can be deleted quickly and easily. Adding a second design To give more room to add designs, select the Large Hoop from the Hoop Selection menu. With the design from the previous page on screen, touch the Add Motif (+) icon.
  • Page 17: Centering A Combined Design In The Hoop

    Centering a Combined Design In the Hoop A new design that is opened on the screen will come in centered in the hoop. But if you have combined designs, or have perhaps moved the design around on the screen, the design will need to be centered in the hoop before sending the design to be stitched.
  • Page 18: Placement: Absolute Check

    Placement: Absolute Check The goal of Absolute Check is to check the points and boundaries of the design so that they embroider exactly where you want. You can check the location of any single stitch, even the most complex design. Use the design from the previous page.
  • Page 19: Change Thread Color

    Change Thread Color Quickly change thread color to suit your project and view the changes on the screen. Using the same design from the previous page, select the Color Information tab (palette icon). You can view the individual colors in the design by using the up/down arrows beneath the motif, or by touching a color bar to the right of the motif.
  • Page 20: Changing To Single Color Embroidery

    Changing To Single Color Embroidery To stitch a multi-colored design in one color, set your machine to bypass color changes by select- ing the Single/Multi Color Motif icon. The machine will not stop at the end of the colors in the design.
  • Page 21: Stitching A Design

    Stitching a Design You should already be in the embroidery screen. If not, touch the Embroidery (needle) icon. Engage the Cut Connecting Stitches icon (denoted by a yellow outline around the icon) so that the connecting stitches between the embroidery motifs will be cut. While in the Embroidery screen, press the Start/Stop but- ton to begin stitching.
  • Page 22: Sequence Control

    Sequence Control Use the Sequence Control function when the thread breaks to reposition the needle to start stitching again. The Sequence Control function is also used for advancing or backing up CutWork Designs. If a thread breaks during the embroidery process, the machine will stop and the Sequence Control screen will automatically appear.
  • Page 23: Changing Lettering Size

    Changing Lettering Size Enter single letters or words and use the Resize Motif icon to resize the motif proportion- ally up to 20% larger or smaller. In the Selection menu, select the Embroidery Motif folder. Select Folder 1, Design 13. Optional: Select the Color Information tab (palette) and change the color to black (Isacord 0020).
  • Page 24: Word Art

    Word Art Use Word Art to create curved lettering baselines. You will use the Lower Multi-function (Length) knob or the lower set of -/+ icons to change the baseline. Word Art should still be open in the “i” menu. The word “hand” should still be selected. Turn the Lower Multi-function knob to the right (or use the + icon at the lower part of the screen) to bend the let- ters as shown (maximum of 100).
  • Page 25: Saving And Deleting Designs

    Saving and Deleting Designs Designs can be saved into the Personal Embroidery Motifs Folder on the machine or to a USB stick inserted into the machine. Saved designs can also be retrieved from the Personal Embroidery Motif folder or from the USB stick. Sa vi ng a design t o the machine: The design you wish to save must be open on the embroidery screen.
  • Page 26: Alter Stitch Density-Lettering

    Alter Stitch Density-Lettering Change the stitch density of lettering to complement different fabric types. This is helpful when enlarging lettering. . S t i tc h D en s i ty Select the Alphabets Folder; select Alphabet #5. Enter the letter B; touch Confirm (the green check box). Touch the Hoop Selection icon and select the Large Hoop.
  • Page 27: Reference - Embroidery Needles

    Reference - Embroidery Needles For most embroidery, an embroidery needle is the best choice. These needles are designed with a larger eye than normal to prevent thread fraying, and are also designed to withstand the high speeds of the embroidery process. Needle Use &...
  • Page 28: Reference - Embroidery Threads

    Reference - Embroidery Threads EMBROIDERY THREAD Most designs are digitized for 40-weight thread. 40-weight polyester thread is the most commonly used types by machine embroiderers. Always select high-quality embroidery thread. Bargain brands may cause excessive thread breakage while stitching, and may produce undesirable final results.
  • Page 29: Reference - Stabilizers

    Just Embroider It - e Book: All About Stabilizers on bernina.com. b e r n e t t e E M B R O I D E R Y M A C H I N E W O R K B O O K...
  • Page 30: Reference - Cleaning And Oiling

    Reference - Cleaning And Oiling One of the most important parts of maintaining your machine is proper cleaning and oiling. Below are tips to fol- low, but more complete instructions for your specific model can be found in your machine's manual. It is recommended that you clean and oil every other bobbin, or every 3-4 hours of actual sewing time.
  • Page 31: B79 And B70 Deco Embroidery Functions

    b79 and b70 DECO Embroidery Functions External Buttons External Buttons 1. Start/Stop 1. Start/Stop 2. Presser Foot Up/Down 2. Presser Foot Up/Down 3. Auto Thread Cutter 3. Auto Thread Cutter 4. Light 4. Quick Reverse 5. Slide Speed Control 5. Slide Speed Control 6.

This manual is also suitable for:

Bernette b70

Table of Contents