Table of Contents
Advertisement
Quick Links
Advertisement
Table of Contents

Related Manuals for Bernina Bernette Funlock b44


Summary of Contents for Bernina Bernette Funlock b44
- Page 1 Instruction Manual...
-
Page 3: Table Of Contents
TABLE OF CONTENTS NAME OF PARTS Threading the Lower Looper (Red) Details of machine Threading the Overlock Right Needle (Green) Threading the Overlock Left Needle (Yellow) ACCESSORIES Standard HOW TO CHANGE THREADS Needle Information Tie on method HOW TO OPEN LOOPER COVER HOW TO ADJUST Principal Parts behind the Looper Cover Stitch lenght dial... - Page 4 Decorative Flatlocking Additional Information about Flatlocking How to sew an Overlock Blind Hem How to sew Pin Tucks How to turning Square Corners MACHINE MAINTENANCE Cleaning The Machine Oiling The Machine Replace the Upper Knife OPTIONAL ACCESSORIES Snap–On Type Presser Foot Optional Presser Foot TROUBLESHOOTING FABRIC, THREAD AND NEEDLE CHART...
- Page 5 ⦁ the electricity supply. it has fallen into water. ⦁ 3. Return the machine to your local authorized BERNINA dealer for DANGER! examination or repair. 4. Never operate the machine with any As a protection against electrical shock: 1. The machine should never be left openings blocked.
- Page 6 SERVICING OF DOU- 13. Always use the original BERNINA stitch plate. The wrong stitch plate BLE–INSULATED can cause needle breakage. PRODUCTS 14. This machine is provided with double insulation (except for USA and In a double–insulated product two Canada). Use only original spare systems of insulation are provided instead parts.
-
Page 7: Name Of Parts
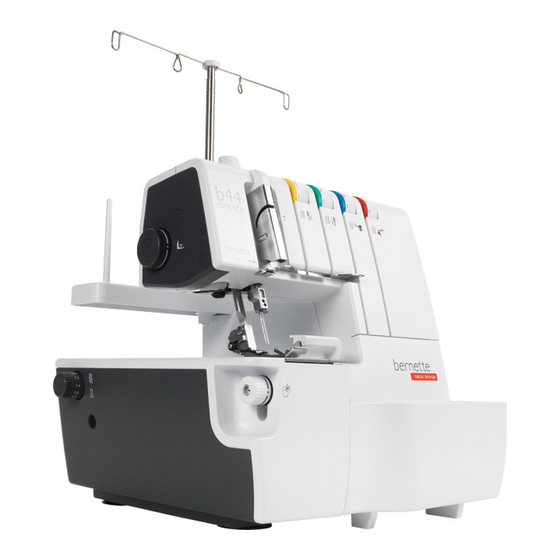
NAME OF PARTS Details of machine Retractable thread stand Sewing table Carrying handle Looper cover Left needle thread tension dial (yellow) Power / Light switch Right needle thread tension dial (green) Stitch length dial Upper looper thread tension dial (blue) Handwheel Lower looper thread tension dial (red) Thread stand... - Page 8 Presser foot lifter Differential dial Cutting width dial Presser foot pressure regulator Standard presser foot Overlock...
-
Page 9: Accessories
ACCESSORIES Standard Screw driver (large size) Oiler Spool net (4x) Spare upper knife (stationary) Spool cap (4x) Brush Needle set (ELx705) Needle Threader / inserter Allen Screw driver (small) Tweezers Upper looper converter (ULC) Spool stabilizer (4x) Dust cover Cut-offs Bin Needle Information This overlock uses a flat shank industrial needle (ELx705) that eliminates the possibility of inserting the... -
Page 10: How To Open Looper Cover
HOW TO OPEN LOOPER COVER CAUTION: Be sure to turn off power switch. 1. Push the cover to the right as far as it will go. 2. Pull cover down toward you. CAUTION: Be sure looper cover is closed when sewing. Principal Parts behind the Looper Cover Upper looper... -
Page 11: Cut-Offs Bin
• Polarized plug information (FOR USA & CANADA ONLY) This appliance has a polarized plug (one blade wider than the other). To reduce the risk of electric shock, this plug is intended to fit in a polarized outlet only way. If the plug does not fit fully in the outlet, reverse the plug. -
Page 12: Preparation For Threading Setting Up The Retractable Thread Stand
PREPARATION FOR THREADING Setting up the Retractable thread stand – Take out the retractable thread stand from the top of Styrofoam, and insert it as shown on the left illustration. – This machine is shipped with the retractable thread stand on the top of styrofoam. –... -
Page 13: How To Disengage Upper Knife
HOW TO DISENGAGE UPPER KNIFE CAUTION: Be sure to turn off power switch. • To place upper knife in nonworking position – Open looper cover (refer page 10). – Pull the upper knife holder to the right as far as it will go. –... -
Page 14: Upper Looper Converter (Ulc)
UPPER LOOPER CONVERTER (ULC) CAUTION: Be sure to turn off power switch. When not threading the upper looper, the upper looper converter must be engaged into the upper looper eye. Use the upper looper converter – To engage the upper looper converter, insert the sharp part into the eye of upper looper. -
Page 15: Sew Rolled Hem
Sew Rolled Hem Set seam width finger knob to "R" to retract the seam width finger and set it for rolled hem. PLEASE NOTE: Be sure to push seam width finger knob as far as it will go in the direction of setting "R". HOW TO REMOVE AND INSERT NEEDLES Needle Position... -
Page 16: To Remove Needle(S)
To Remove Needle(s) Set seam width finger knob to R to retract the seam width finger and set it for rolled hem. PLEASE NOTE: Be sure to disconnect the machine from the electric outlet before removing needle(s). – Turn the hand wheel toward you until the needles are at their highest position. -
Page 17: Selection Of Stitches
SELECTION OF STITCHES This machine is capable of producing various types of stitches according to the combination of needle positions, threading methods, tension adjustment and the use of convertible right looper/converter. Stitch Type Page 2–needle 4–Thread stitch that is ideal for medium 4–Thread Overlock with integrated to heavyweight stretchy fabrics such as double safety seam... - Page 18 Depending on the needle positions used, this machine can sew 2–thread and 3–thread standard width 4 mm overlock and a 6 mm wide overlock seams. Also, for overedging heavyweight fabrics, the seam width can be increased still more by turning the overlock seam width adjustment knob.
-
Page 19: Threading The Machine
THREADING THE MACHINE Threading Diagram • Overlock Stitches – A color coded threading diagram is located inside the looper cover for quick reference. – Thread the machine in the order –( shown at left. PLEASE NOTE: Threads go through the take–up lever cover for Overlock as shown. -
Page 20: Threading The Upper Looper (Blue)
Threading the Upper Looper (Blue) CAUTION: Be sure to turn off power switch. – Thread the upper looper as indicated –( – Raise Presser foot to release tension discs. – Pass thread from back to the front through the thread guide –... -
Page 21: Threading The Lower Looper (Red)
– Thread the looper area of the machine following (4)–(8) the blue color coded thread guides – Thread the hole in the upper looper from front to back PLEASE NOTE: Make sure thread passes behind lower looper. Use tweezers provided in the accessory case to aid in threading the looper. - Page 22 – While holding thread with finger, pass it between the tension discs and pull thread down to make certain it is properly located in between the tension discs – Turn the handwheel toward you until the lower looper extends out 5–10 mm from the stitch plate edge.
-
Page 23: Threading The Overlock Right Needle (Green)
Threading the Overlock Right Needle (Green) (B On Needle Clamp) CAUTION: Be sure to turn off power switch. – Thread the right needle as indicated –( – Raise Presser foot to release Tension discs. – Pass thread from back to the front through the thread guide –... -
Page 24: Threading The Overlock Left Needle (Yellow)
– Continue to thread points –( PLEASE NOTE: Slip thread into the rear slot on the thread guide and bottom slot of take–up lever cover Then slip thread into the right slot on the thread guide , and into the right slot on the thread guide Before threading eye of needle, slip thread behind thread guide located on the bottom of the needle... - Page 25 – Thread the top cover thread guide by pulling the thread towards the left until it slips under guide . Then pull thread along the right side of button as illustrated. – While holding thread with fingers, pass it between the tension discs and pull thread down to make certain it is properly located in between the tension discs –...
-
Page 26: How To Change Threads
HOW TO CHANGE THREADS Tie on method – To change thread type or color, clip thread near the spool. – Place new thread on stand. – Tie new thread and old thread ends together with a square knot. Clip thread tails to 2–3cm (1") length. -
Page 27: How To Adjust
HOW TO ADJUST Stitch lenght dial – The stitch length dial should be set on the • = 2.5 setting for most sewing conditions. – Adjust the stitch length to 2.5 – 4 when sewing heavy weight fabrics. – Adjust the stitch length to 2.5 – 1 when sewing light weight fabrics to obtain excellent seams without puckering. -
Page 28: The Presser Foot Pressure
– As shown on the illustration, turn the dial counter clockwise to increase width of cutting, and clockwise to decrease width of cutting. The presser foot pressure The presser foot pressure of this machine is pre– adjusted at the factory to suit the sewing of medium weight fabrics. -
Page 29: Differential Feed
DIFFERENTIAL FEED – Differential feed is a system which "stretches" or "gathers" the fabric, when the amount of feed of front feed dogs in relation to the rear feed dogs is changed. – The differential feed ratio ranges from 0.6–2.0. Adjustment is made by means of the differential dial pictured at left. -
Page 30: Stretch Overlock (1 - 0.6)
Stretch Overlock (1 0.6) – Stretch overlock is ideal for sewing decorative collars, sleeves, skirt hems, etc. on loosely knit and woven fabrics. • To set the differential feed adjusting dial for stretch – Set differential feed adjusting dial below setting "1". -
Page 31: Chaining Off And Test Sewing
CHAINING OFF AND TEST SEWING – When the machine is completely threaded, bring all of the threads across the stitch plate and slightly to the left under the presser foot. – Hold the threads and apply a slight tension. – Turn the handwheel toward you 2 or 3 complete turns to start the thread chain. -
Page 32: How To Sew An Overlock Stitch 2-Thread Wrapped Overlock (#9/#10)
HOW TO SEW AN OVERLOCK STITCH 2–Thread Wrapped Overlock (#9/#10) PLEASE NOTE: – These are suggested tension settings only. – Tension settings are effected by; 1. Type and thickness of fabric 2. Needle size Refer page 15 3. Size, type and fiber content of thread Refer page 14/15 •... -
Page 33: 2-Thread Overlock (#14/#15)
2–Thread Overlock (#14/#15) PLEASE NOTE: – These are suggested tension settings only. – Tension settings are effected by; 1. Type and thickness of fabric 2. Needle size 3. Size, type and fiber content of thread Refer page 15 • Correct balance Refer page 14/15 –... -
Page 34: 3-Thread Overlock (#3/#4)
3–Thread Overlock (#3/#4) PLEASE NOTE: – These are suggested tension settings only. – Tension settings are effected by; 1. Type and thickness of fabric 2. Needle size 3. Size, type and fiber content of thread Refer page 15 • Correct balance –... -
Page 35: 3-Thread Flatlock (#5/#6)
3–Thread Flatlock (#5/#6) PLEASE NOTE: – These are suggested tension settings only. – Tension settings are effected by; 1. Type and thickness of fabric 2. Needle size 3. Size, type and fiber content of thread Refer page 15 • Correct balance Refer page 14/15 –... -
Page 36: 2-Thread Flatlock (#11/#12)
2–Thread Flatlock (#11/#12) PLEASE NOTE: – These are suggested tension settings only. – Tension settings are effected by; 1. Type and thickness of fabric 2. Needle size 3. Size, type and fiber content of thread Refer page 15 • Correct balance Refer page 14/15 –... -
Page 37: 3-Thread Super Stretch (#2)
3–Thread Super Stretch (#2) PLEASE NOTE: – These are suggested tension settings only. – Tension settings are effected by; 1. Type and thickness of fabric 2. Needle size 3. Size, type and fiber content of thread Refer page 15 • Correct balance Refer page 14/15 –... -
Page 38: 4-Thread Overlock With Integrated Safety Seam (#1)
4–Thread Overlock with integrated safety seam (#1) PLEASE NOTE: – These are suggested tension settings only. – Tension settings are effected by; 1. Type and thickness of fabric 2. Needle size 3. Size, type and fiber content of thread Refer page 15 •... -
Page 39: How To Sew A Rolled Hem
HOW TO SEW A ROLLED HEM – This machine can sew four types of rolled hems. – Rolled hemming is done by rolling and overedging the fabric edge. – Light weight fabrics such as lawn, voile, organdy, crepe, etc. perform the best. –... -
Page 40: Additional Information About Rolled Hemming
Additional information about rolled hemming – Hold the thread chain when you begin sewing to keep it from curling into the seam. – Place a slight tension on the material in the sewing direction and a finer seam finish can be obtained. -
Page 41: 3-Thread Narrow Seam (#7)
3–Thread Narrow Seam (#7) PLEASE NOTE: For a beautiful rolled hem thread the upper looper with wooly nylon and the needle and lower looper with light weight regular thread. • Correct balance Refer page 15 – Set each tension dial to settings shown at left and test sew on a sample of your fabric Refer page 14/15 3–Thread Narrow Seam #7... -
Page 42: 2-Thread Rolled Hem (#13)
2–Thread Rolled Hem (#13) PLEASE NOTE: For a beautiful rolled hem thread the lower looper with wooly nylon and the needle with light weight regular thread. • Correct balance – Set each tension dial to settings shown at left Refer page 15 and test sew on a sample of your fabric Refer page 14/15 2–Thread Rolled Hem #13... -
Page 43: Stitch Variations And Sewing Techniques
STITCH VARIATIONS AND SEWING TECHNIQUES How To Sew a Flatlock Decorative Seam A flatlock stitch is achieved by adjusting the tension of the 2–thread or 3–thread overlock stitch, sewing the seam, and then pulling the fabric apart to flatten the seam. -
Page 44: Decorative Flatlocking
Decorative Flatlocking – Place the movable upper knife in the nonworking position (page 13). The fabric is not trimmed on this stitch. – Fold fabric wrong sides together. – Position the fabric so the seam is sewn with part of the stitch extending off the fabric. –... -
Page 45: How To Sew An Overlock Blind Hem
How to sew an Overlock Blind Hem The excess fabric is trimmed and the hem is sewn and the raw edges are overlocked in one operation. The overlock blind hem is best suited for sewing knit wear. It provides a durable finish that is almost invisible. -
Page 46: How To Turning Square Corners
– Fold the fabric with the wrong sides together and sew. – Press the pin tucks in the same direction. How to turning Square Corners • Outside Corner – Cut out approximately 2 cm (51/64") from the corner, in line with the overlock seam edge. 2 cm 2 cm 2 cm... - Page 47 • Inside Corner – Cut inside corner up to seam line as shown. – Sew along seam line. – Sew up to end of fold. (Leave needle in fabric) PLEASE NOTE: Presser foot has been removed to show detail. – Raise presser foot.
-
Page 48: Machine Maintenance
MACHINE MAINTENANCE An overlock machine requires more maintenance than a conventional machine for two reasons: 1. A lot of lint is produced due to the cutting action of the knives. 2. An overlock runs at a very high speed and needs to be oiled frequently to lubricate the internal working parts. -
Page 49: Replace The Upper Knife
Replace the Upper Knife CAUTION: Before replacing the upper knife, disconnect power line plug from the wall receptacle. – The upper knife should be changed when it becomes dull. – The upper knife can be replaced according to the directions provided, however if there are any difficulties experienced, consult your dealer representative to make the replacement. -
Page 50: Optional Accessories
OPTIONAL ACCESSORIES The following optional presser feet specially prepared for this machine are available at extra–charge. PLEASE NOTE: Do not use presser foot made for other machi- nes. Use of such presser foot may result in inter- ference with the needle and knife and can be hazardous. -
Page 51: Optional Presser Foot
Optional Presser Foot • Elasticator Foot – This foot is used for attaching elastic tape to the garment and the amount of contraction of the elastic tape can be adjusted as required. • Blind stitch Foot – This foot is for sewing cuffs on knit fabrics, skirt and trouser seams where seam should not be visible. -
Page 52: Troubleshooting
TROUBLESHOOTING Condition Cause Remedy Page Fabric does not Lengthen stitch length. feed well. Increase presser foot pressure for heavy weight fabric. Decrease presser foot pressure for light weight fabric. Needle breaks. Insert needle correctly. Do not pull fabric while sewing. Tighten needle set screw. -
Page 53: Fabric, Thread And Needle Chart
FABRIC, THREAD AND NEEDLE CHART Woven Fabric Thread Needle ELx705 Lawn Cotton: #100 Organdy Silk/ Rayon: #100 Light weight #80/12 Voile Spun: #80 – #90 Crepe Polyester: #80 – #100 Muslin Cotton: #60 – #80 Seersucker Silk/ Rayon: Medium weight Satin #90/14, #80/12 Spun:... -
Page 54: Specification
Type 4C–316C / 4C–326C / 4C–326G / 4C–345G for (USA/Canada) for other countries Dimensions (L x B x H) mm 336 x 263 x 294 Weight (kg) 7.2 kg EN – 12/2016 – 1st Edition 5040005.0.04 / G8P01 © BERNINA International AG Steckborn CH, www.bernina.com... - Page 56 EN – 12/2016 – 1st Edition 5040005.0.04 / G8P01 © BERNINA International AG www.mybernette.com/yellow-shirt Steckborn CH, www.bernina.com...
Need help?
Do you have a question about the Bernette Funlock b44 and is the answer not in the manual?
Questions and answers