
Related Manuals for Xo XOUIM1565S


Summary of Contents for Xo XOUIM1565S
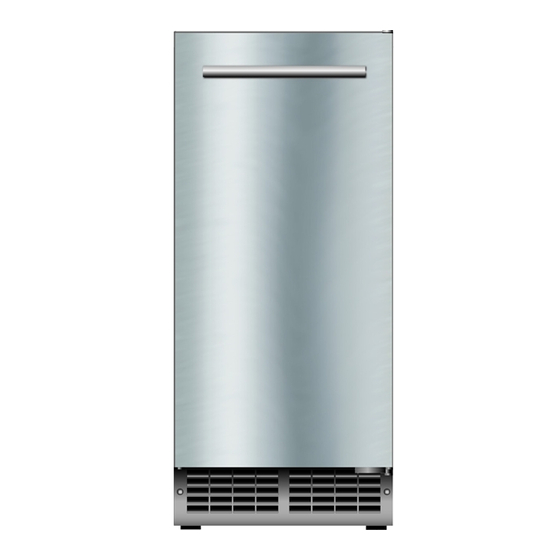
- Page 1 XOUIM1565S & XOUIM1565SP I worked really hard on this manual - INDOOR / OUTDOOR so please read it... UNDERCOUNTER GOURMET ICE MAKER...
- Page 2 Before you proceed, take just a moment to register your XO at: www.xoappliance.com/register-your-product/ REGISTRATION HELPS YOU BY - Ensuring warranty coverage should you need service Providing ownership verification for insurance purposes Let’s XO notify you in the event of product changes or recalls.
-
Page 3: Where Things Are
where things are Before You Get Started 4 - 7 Installer Checklist Find Your Model Safet y Instructions Electrical and Grounding Instructions Installation Inst ruc tions 8 - 1 7 izes and Installation Dimensions Plumbing With & Without Drain Pump Reversing the Door Outdoor Use 18 - 20... - Page 4 heres’s ten steps for a quick & easy install Inspect cabinet opening for water, drain and electrical connections. The 1/4” O.D. water supply line must include isolation valve and should include an inline water filter (consult manual). Do NOT use a self-piecing valve for the supply connection. Water supply must have a minimum pressure of 20 psi and a maximum of 80 psi.
- Page 5 INDOOR / OUTDOOR GOURMET ICE MAKER XOUIM1565S XOUIM1565SP take a minute to circle your model above and record your serial number here in case you need it later...
- Page 6 For maximum efficiency, keep the door tightly shut unless removing ice. Before installing, allow your XO unit to sit upright for 2 hours at the install site. This will allow the cooling system to stabilize after transportation. Failure to follow this step may cause problems.
- Page 7 In regions where high humidity exists (greater than 70%) condensation may appear on the door and/or door Your XO unit is built to operate on 115V 60Hz and gaskets. This is normal and will disappear as humidity should be plugged directly into a dedicated 15 amp drops.
- Page 8 ALL XO UNDERCOUNTER UNITS ARRIVE PRE-WIRED WITH LOW PROFILE PLUGS FOR EASY INSTALLATION 34” MINIMUM (864mm) 7" (178mm) 4" (100mm) 15 ” (381mm) MINIMUM WHEN INSTALLING WITH THE HINGE SIDE NEXT TO A WALL - LEAVE ADEQUATE SPACE FOR DOOR HANDLE (2 1/4”)
-
Page 9: Top View
( or small, as the case would be height & width XOUIM1565G & XOUIM1565GP ICE MAKER 3/4” HIGH (857mm) 14-7/8” WIDE (378mm) depth º TOP VIEW 22-5/8” (575mm) THE OVERALL DEPTH SHOWN (22-5/8”) INCLUDES THE DOOR WITHOUT HANDLE. - Page 10 before you install check a few things Water source valve 115V~60Hz Water source tub Drain hose Is the installation location COOL, DRY, LEVEL and away from direct sun. The water supply valve must provide positive shut off capability and be readily accessible. Does the unit have a dedicated 115V three prong grounded outlet? (use GFI outdoors) The Cold Water supply is 1/4”...
-
Page 11: Water Quality
All water contains some impurities and minerals. Your XO Ice Maker is designed to produce crystal clear, gourmet ice. It does this by reducing the mineral content in the water as the ice is forming. PURER WATER YIELDS PURER ICE. -
Page 12: Rear View
Water supply should be between 20psi and 80psi. Attach the drain to the connection indicated here If you are installing an XOUIM1565S unit with a gravity drain, the line must be pitched down WATER 1/4”... - Page 13 INSTALLING THE XOUIM1565S without a drain pump. Position the ice maker in front of the opening. Level the unit using the leveling legs. Wash and flush the water supply tube and connect the unit to the cold water isolation valve.
- Page 14 with drain pump INSTALLING THE XOUIM1565SP with DRAIN PUMP. Position the ice maker in front of the opening. Level the unit using the leveling legs. Wash and flush the water supply tube and connect the unit to the cold water isolation valve. Cut the 3/8”...
- Page 15 Your XO Ice Maker is shipped with the door hinge on the right hand side. Reversing the door is easy, simply follow these steps, you will need a #2 Phillips Head Screwdriver. TOP HINGE 1. While supporting the door, remove the two (2) screws (shown in RED) that hold the Top Hinge in place.
- Page 16 reversing the door cont. 3. At the rear of the unit, there are three (3) screws along the top. Remove these screws. TOP COVER On the top front of the unit, there is one (1) additional screw on the left hand side, remove this screw. The Top Cover plate will now lift off.
-
Page 17: For Outdoor Use
When using your XO Ice Maker outdoors - follow these additional steps. performance and the physical location of the unit. heat or direct sun, In outdoor installation care must be taken to protect the unit from excessive dusty or damp conditions or in a location where it may be rained on or splashed by water. -
Page 18: Features & Specs
features & specs Produces up to 65lbs of crystal clear, gourmet ice per day Rectangular Bell Shaped Cubes - designed to melt slowly and cool beverages while minimizing dilution Gravity drain and pump drain models available Reversible finger-print resistant stainless steel door Front venting - designed for under counter installation Rated for Indoor or Outdoor use (50 - 90 ) Automatically pauses ice production when bin is full... - Page 19 operating Initial operation ① Open the water supply valve connected with the ice maker. ② Insert the plug of the ice maker into the electric outlet. ③ Open the door and turn the switch to the “ICE” position.” ④ Discard the first batch of ice. ⑤...
- Page 20 operating cont. Operation time It takes about 20-35 minutes to produce a set of 24 ice pieces. The length of one cycle of the ice maker (ice production and ice removal) differs depending upon the cleanness of the ice maker, the surrounding temperature, and the temperature of the water supplied to the ice maker.
-
Page 21: Stainless Steel
stainless steel cleaning the exterior Stainless Steel: Stainless steel does not stain, corrode, or rust as easily as ordinary steel, but it is not stain or corrosion proof. Stainless steels can discolor or corrode if not maintained properly. Stainless steels differ from ordinary carbon steels by the amount metals such as chromium and nickel used in the alloy. - Page 22 washing (interior) Proper maintenance, cleaning and santizing is essential to ensure your ice is safe, fresh and odor free. Cleaning the nozzle / ice slide / water tank 1. Open the door and remove two front injection bolts on the top cover. 2.
- Page 23 washing (interior) cont. Proper maintenance, cleaning and santizing is essential to ensure your ice is safe, fresh and odor free. 5. Clean the gap of the nozzle frame fixed on the vessel sheet (water tank). 6. Lift the drain connection inside the vessel sheet (water tank), clean it, and drain the water.
-
Page 24: Water Tank
washing (interior) cont. Proper maintenance, cleaning and santizing is essential to ensure your ice is safe, fresh and odor free. Cleaning the ice tank and water tank filters WATER TANK ICE TANK Always unplug the unit before performing maintenance. Open the door of the Ice Maker and remove the filter screens from the bottom of the water tank and ice tank (position indicated above) Rinse them clean thoroughly with running water Replace the tank filters in the positions shown. - Page 25 the condenser improve efficiency & performance Cleaning the condenser Remove dust and dirt from the surface of the condenser coils with a vacuum cleaner Remove two screws on the front panel at the center of the inside Vacuum the condenser coils Reassemble the panel using the two screws to after cleaning...
- Page 26 Maintaining the ice maker according to these instructions will minimize unwanted repairs and extend the unit’s service life. Maintenance activities must be performed either by the consumer or by an authorized service technician at required intervals. If you are unfamiliar with sanitization procedures, contact your dealer or XO Customer Service at 973-403-8900 for service. GENERAL: Thoroughly clean the ice maker every three to six months for efficient operation.
- Page 27 cleaning cont. If necessary, remove the top cover and disassemble the evaporator cover, water curtain, ice guide and nozzle frame. Place all components into a basin to soak with approximately 3 quarts of the detergent water mixture for 5 to 20 minutes depending on how much lime scale build up is present..
- Page 28 Maintaining the ice maker according to these instructions will minimize unwanted repairs and extend the unit’s service life. Maintenance activities must be performed either by the consumer or by an authorized service technician at required intervals. If you are unfamiliar with sanitization procedures, contact your dealer or XO Customer Service at 973-403-8900 for service. GENERAL: Sanitize the ice maker every month for safe and efficient operation.
-
Page 29: Maintenance Schedule
sanitizing cont. Make sure the switch is in the “OFF” position and restore power by plugging the unit in or turning on the breaker. AUTOMATIC SANITIZING: Start the automatic sanitizing process by turning the switch to the “WASH” position. This will also sanitize the piping. The automatic sanitizing cycle takes 21 minutes to complete. - Page 30 winterizing Where seasonal installation ambient temperatures fall below 50 F Clean and sanitize your system Turn off the power Empty the water container completely Disconnect the pump hose - this requires the removal of the back panel Close the water supply valve and disconnect the water supply line from the rear of the unit Turn on the power and set the switch to the “WASH”...
-
Page 31: Troubleshooting
troubleshooting PROBLEM POSSIBLE CAUSE CHECK THIS Unit does not operate Ice maker is unplugged Plug ice maker in Breaker tripped Reset breaker - if it happens again, call for service Switch turned to “OFF” Turn switch to “ICE” The ice tank is full Ice detection sensor is activated Cubes are too large Low ambient temperature... - Page 32 OUTSIDE U.S. This warranty does not apply to, and XO is not responsible for, any warranty claims made on products sold or used outside the 48 continental United States.
Need help?
Do you have a question about the XOUIM1565S and is the answer not in the manual?
Questions and answers