
Related Manuals for Makita XEC01 Series


Summary of Contents for Makita XEC01 Series
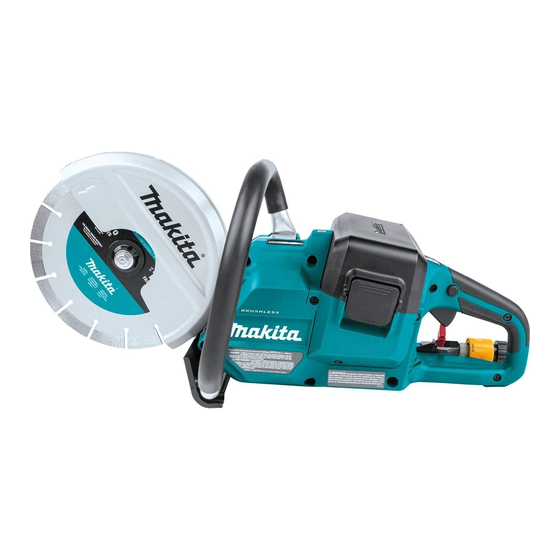
- Page 1 INSTRUCTION MANUAL MANUAL DE INSTRUCCIONES Cordless Power Cutter Cortadora de Concreto Inalámbrica XEC01 IMPORTANT: Read Before Using. IMPORTANTE: Lea antes de usar.
-
Page 2: Specifications
ENGLISH (Original instructions) SPECIFICATIONS Model: XEC01 Diamond wheel diameter 230 mm (9″) Max. wheel thickness 3.0 mm (1/8″) Max.cutting depth 88 mm (3-1/2″) Rated speed 6,600 /min Rated voltage D.C. 36 V Max. permitted pressure of feed-water 5.0 bars Overall length 554 mm (21-3/4″) Net weight 5.6 - 6.3 kg (12.3 - 13.9 lbs) - Page 3 Personal Safety Maintain power tools and accessories. Check for misalignment or binding of moving parts, break- Stay alert, watch what you are doing and use age of parts and any other condition that may common sense when operating a power tool. affect the power tool’s operation.
- Page 4 12. Hold the power tool by insulated gripping sur- Cordless cutter safety warnings faces only, when performing an operation where the cutting accessory may contact hidden wir- The guard provided with the tool must be ing. Cutting accessory contacting a “live” wire may securely attached to the power tool and make exposed metal parts of the power tool “live”...
- Page 5 When wheel is binding or when interrupting Symbols a cut for any reason, switch off the power tool and hold the power tool motionless until The followings show the symbols used for tool. the wheel comes to a complete stop. Never attempt to remove the wheel from the cut while diameter the wheel is in motion otherwise kickback may...
-
Page 6: Parts Description
It will also void the Makita warranty for the Makita tool and Charge the battery cartridge if you do not use charger. -
Page 7: Functional Description
FUNCTIONAL CAUTION: Always install the battery cartridge fully until the red indicator cannot be seen. If not, DESCRIPTION it may accidentally fall out of the tool, causing injury to you or someone around you. CAUTION: Do not install the battery cartridge CAUTION: Always be sure that the tool is forcibly. -
Page 8: Overheat Protection
A switch in need of repair placed under one of the following conditions. may result in unintentional operation and serious personal injury. Return tool to a Makita service center Overload protection for proper repairs BEFORE further usage. -
Page 9: Electric Brake
Installing or removing abrasive cut- off wheel / diamond wheel ► 1. Switch trigger 2. Lock-off button CAUTION: Use only the Makita wrench to NOTICE: Do not pull the switch trigger hard install or remove the wheel. without pressing in the lock-off button. This can CAUTION: cause switch breakage. - Page 10 Connecting to water supply Prepare a water hose. Remove the nut on the coupling sleeve and pass the water hose through the nut. Insert the end of the hose into the coupling sleeve and then tighten the nut. ► 1. Hex bolt 2. Outer flange (black) 3. Abrasive cut- off wheel / diamond wheel 4.
-
Page 11: Operation
Push the coupling sleeve into the water inlet until it Hold the tool firmly. Grasp the handle with your right locks with a click. hand and the grip with your left hand. To prevent electric shock by accidental cutting of an electric cable, always hold the grip by the designated portion as shown in the figure. -
Page 12: Cleaning The Tool
Discoloration, deformation or cracks may result. To maintain product SAFETY and RELIABILITY, repairs, any other maintenance or adjustment should be performed by Makita Authorized or Factory Service Centers, always using Makita replacement parts. ► 1. Inhalation vent 2. Exhaust vent 12 ENGLISH... -
Page 13: Changing The V-Belt
Hook the new V-belt to the pulley (small). Put the Changing the V-belt other end of the V-belt onto the half periphery of the pulley (large) and then turn the bolt on the pulley (large) Remove the battery cartridge and the wheel. clockwise using the box wrench. -
Page 14: Troubleshooting
Before asking for repairs, conduct your own inspection first. If you find a problem that is not explained in the manual, do not attempt to dismantle the tool. Instead, ask Makita Authorized Service Centers, always using Makita replace- ment parts for repairs. -
Page 15: Optional Accessories
OPTIONAL ACCESSORIES CAUTION: These accessories or attachments are recommended for use with your Makita tool specified in this manual. The use of any other accessories or attachments might present a risk of injury to persons. Only use accessory or attachment for its stated purpose. -
Page 16: Especificaciones
ESPAÑOL (Instrucciones originales) ESPECIFICACIONES Modelo: XEC01 Diámetro de la rueda de diamante 230 mm (9″) Grosor máx. de la rueda 3,0 mm (1/8″) Profundidad de corte máxima 88 mm (3-1/2″) Velocidad especificada 6 600 r/min Tensión nominal 36 V c.c. Presión máxima permitida del agua para alimentación 5,0 bars Longitud total... - Page 17 No maltrate el cable. Nunca utilice el cable No permita que la familiaridad adquirida debido para transportar, jalar o desconectar la herra- al uso frecuente de las herramientas haga que se mienta eléctrica. Mantenga el cable alejado del sienta confiado e ignore los principios de seguri- calor, aceite, objetos cortantes o piezas móvi- dad de las herramientas.
- Page 18 Uso y cuidado de la herramienta a batería Use solamente ruedas de corte de diamante o reforzadas adheridas para su herramienta Recargue sólo con el cargador especificado eléctrica. El que un accesorio pueda ensam- por el fabricante. Un cargador que es adecuado blarse en su herramienta eléctrica no garantiza para un solo tipo de batería puede generar riesgo una operación segura.
- Page 19 Mantenga a las personas alrededor a una Nunca coloque su mano cerca del accesorio distancia segura del área de trabajo. Cualquier giratorio. El accesorio puede tener un retroceso persona que ingrese al área de trabajo deberá brusco sobre su mano. usar equipo de protección personal.
- Page 20 12. Utilice las baterías únicamente con los produc- corriente directa o continua tos especificados por Makita. Instalar las baterías en productos que no cumplan con los requisitos velocidad especificada podría ocasionar un incendio, un calentamiento excesivo, una explosión o una fuga de electrolito.
-
Page 21: Descripción De Las Piezas
Pare siempre la ope- lesiones personales y daños. Asimismo, esto inva- ración y cargue el cartucho de batería cuando lidará la garantía de Makita para la herramienta y el note menos potencia en la herramienta. cargador Makita. No cargue nunca un cartucho de batería que esté... -
Page 22: Descripción Del Funcionamiento
DESCRIPCIÓN DEL PRECAUCIÓN: Introduzca siempre com- pletamente el cartucho de batería hasta que FUNCIONAMIENTO el indicador rojo no pueda verse. Si no, podría accidentalmente salirse de la herramienta y caer al suelo causando una lesión a usted o alguien a su PRECAUCIÓN: Asegúrese siempre de que la alrededor. -
Page 23: Protección Contra Sobrecarga
Regrese la herramienta al centro de servicio ticamente. En este caso, apague la herramienta y detenga Makita para las reparaciones apropiadas ANTES de la aplicación que causó que la herramienta se sobrecar- continuar su uso. -
Page 24: Montaje
AVISO: No jale fuertemente el gatillo interruptor sin presionar el botón de desbloqueo. Esto podría PRECAUCIÓN: dañar el interruptor. Use solamente la llave Makita para instalar o extraer la rueda. Encendido de la lámpara PRECAUCIÓN: Cuando instale la rueda, asegúrese de apretar el perno firmemente. - Page 25 Conexión al suministro de agua Prepare una manguera de agua. Retire la tuerca en el manguito de acoplamiento y haga pasar la manguera de agua a través de la tuerca. Inserte el extremo de la manguera en el manguito de acoplamiento y luego apriete la tuerca.
-
Page 26: Operación
Empuje el manguito del acoplamiento en la entrada Sostenga la herramienta firmemente. Agarre el mango con para agua hasta que quede asegurado con un clic. su mano derecha y la empuñadura con su mano izquierda. Para evitar descargas eléctricas al cortar accidentalmente un cable eléctrico, sostenga siempre la empuñadura por la porción designada, como se muestra en la figura. -
Page 27: Mantenimiento
Para mantener la SEGURIDAD y FIABILIDAD del pro- ducto, las reparaciones, y cualquier otra tarea de man- tenimiento o ajuste deberán ser realizadas en centros de servicio autorizados o de fábrica Makita, empleando siempre repuestos Makita. ► 1. Ventilación de entrada 2. Ventilación de salida... - Page 28 Cambio de la correa en V AVISO: Nunca gire la llave de bujías en sentido inverso al de las manecillas del reloj. El hacerlo así aflojaría el perno en la polea (grande) y resul- Retire el cartucho de la batería y la rueda. taría en un desempeño deficiente.
-
Page 29: Resolución De Problemas
Antes de solicitar alguna reparación, primero realice una inspección por su cuenta. Si detecta algún problema que no esté explicado en el manual, no intente desensamblar la herramienta. En vez de esto, solicite la reparación a un centro de servicio autorizado de Makita, usando siempre piezas de repuesto Makita. Estado de la anomalía Causa probable (avería) -
Page 30: Accesorios Opcionales
PRECAUCIÓN: Estos accesorios o aditamen- tos están recomendados para utilizarse con su herramienta Makita especificada en este manual. El empleo de cualquier otro accesorio o aditamento puede conllevar el riesgo de lesiones personales. Utilice los accesorios o aditamentos solamente para su fin establecido. - Page 32 Para reducir la exposición a estos productos químicos: trabaje en un área bien ventilada y póngase el equipo de seguridad indicado, tal como las máscaras contra polvo que están especialmente diseñadas para filtrar partículas microscópicas. Makita Corporation 3-11-8, Sumiyoshi-cho, Anjo, Aichi 446-8502 Japan 885786-942...
Need help?
Do you have a question about the XEC01 Series and is the answer not in the manual?
Questions and answers