Table of Contents
Advertisement
Quick Links
Advertisement
Table of Contents

Subscribe to Our Youtube Channel
Related Manuals for FS FS-CC3XU2


Summary of Contents for FS FS-CC3XU2
- Page 1 FS-CC3XU2 FS VIDEO CONFERENCE CAMERA Quick Start Guide V1.0...
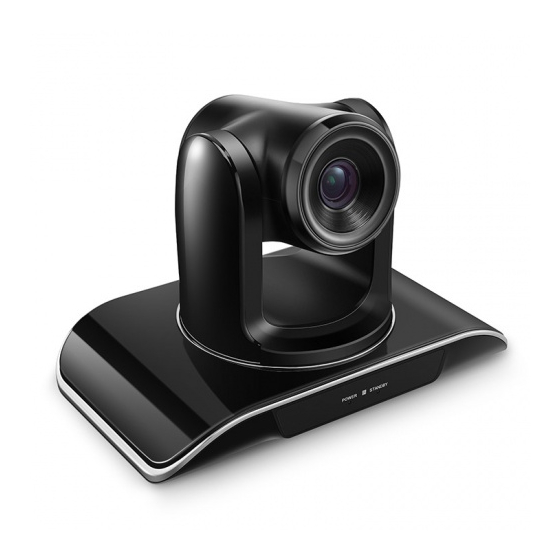
- Page 2 Introduction FS provides professional USB, Plug-N-Play PTZ camera for small conference rooms, to save you manpower and equipment costs and maximize your team's collaboration. POWER STANDBR FS-CC3XU2 Accessories Serial Port Control Cable x1 Power Cord x1 Power Adapter x1 USB 3.0 Cable x1...
-
Page 3: Hardware Overview
Hardware Overview Front Panel LEDs POWER STANDBR LED Color Description Red Light The power is on POWER/ STANDBY Green Light Standby Back Panel Ports RS-485 DC12V IN RS-232 OUT... - Page 4 Ports Description IR remote control receiver USB 2.0 Type-B port RS-232 IN RS-232 IN connection RS-232 OUT RS-232 OUT connection RS-485 RS-485 connection DC 12V DC 12V jack Bottom Panel Button 1 2 3 4 5 6 1 2 3 4 5 6 7 8 Button Description Camera Address Set...
-
Page 5: Remote Control Introduction
Remote Control Introduction CAMERA SELECT PRESET RESET POSITION DOWN HOME PT/RESET MENU PAN-TILT ZOOM ZOOM SLOW FAST NEAR AUTO MANUAL FOCUS FOCUS... - Page 6 finger to stop; MODE NEAR: Manually near focus button, clearer for the nearby object, loose finger to stop. L/R DIRECTION Not applicable for the FS-CC3XU2 camera. /SET Auto focusing button. AUTO FOCUS ZOOM FAST+: Zoom in at fast speed;...
-
Page 7: Mounting Camera
Mounting Camera (1) Surface Installation Put the camera on the table, and make sure the camera in level. If you want to put the camera on oblique surface, please make sure the angle of inclination less than 15 degree for ensuring camera pan and tilt working in normal operation. -
Page 8: Ceiling Mount Installation
(3) Ceiling Mount Installation 1. Fixed the three plastic expansion screws to the ceiling. 2. Mounting the bracket vertically to the ceiling with three KA4 screws. - Page 9 3. Rotate the camera clockwise to install it.
-
Page 10: Device Connection
USB connection. Optional: Connect an external monitor to your computer. 2. Make a video conference. Run your video application (Zoom, Skype for Business, Google Hangouts, Cisco WebEx, GoToMeeting, and etc.) and select FS Video Conference Camera as your video device. -
Page 11: Support And Other Resources
Contact Us Product Warranty FS ensures our customers that any damage or faulty items due to our workmanship, we will o er a free return within 30 Days from the day you receive your goods. This excludes any custom made items or tailored solutions.
Need help?
Do you have a question about the FS-CC3XU2 and is the answer not in the manual?
Questions and answers