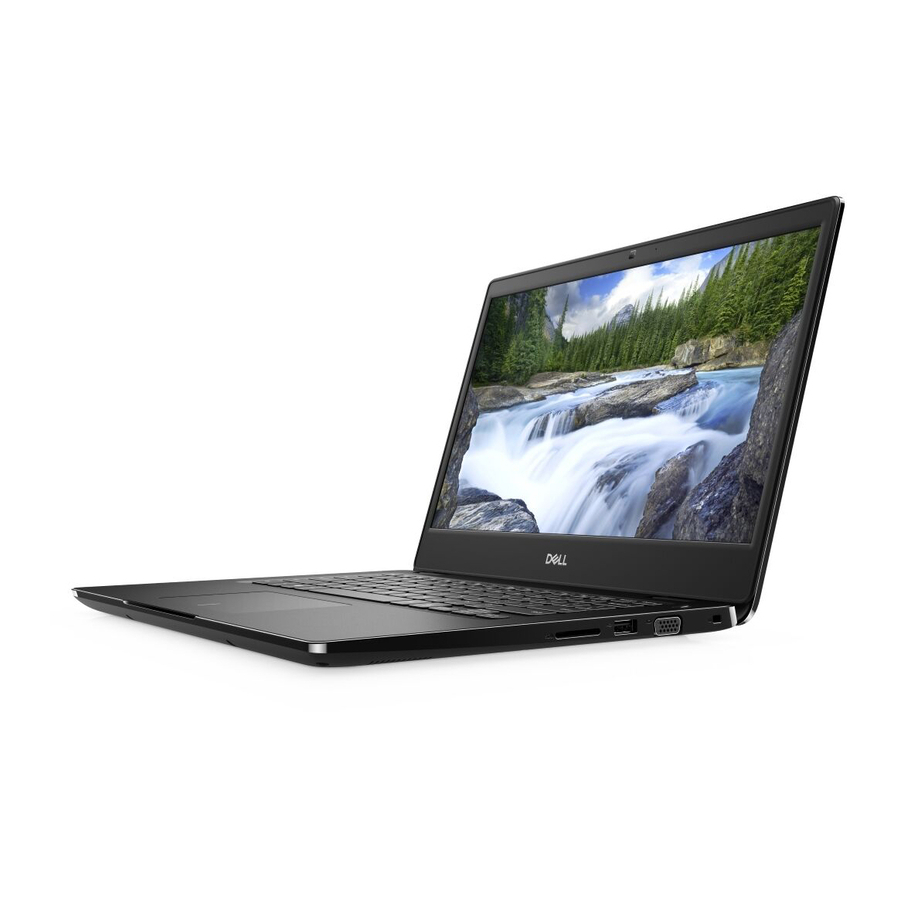
Dell Latitude 3400 Service Manual
Hide thumbs
Also See for Latitude 3400:
- User manual ,
- Service manual (139 pages) ,
- Setup and specifications manual (39 pages)

Related Manuals for Dell Latitude 3400


Summary of Contents for Dell Latitude 3400
- Page 1 Dell Latitude 3400 Service Manual Regulatory Model: P111G Regulatory Type: P111G001...
- Page 2 UPOZORENJE UPOZORENJE ukazuje na opasnost od oštećenja opreme, telesnih povreda ili smrti. © 2019. Dell Inc. ili podružnice. Sva prava zadržana. Dell, EMC, i drugi žigovi su žigovi Dell Inc. ili njegovih podružnica. Drugi žigovi su vlasništvo njihovih vlasnika. 2019 - 05...
-
Page 3: Table Of Contents
Contents 1 Rad na računaru........................... 5 Bezbednosna uputstva................................. 5 Isključivanje računara — Windows 10..........................5 Pre rada u unutrašnjosti računara............................6 Posle rada u unutrašnjosti računara............................ 6 2 Tehnologija i komponente......................7 DDR4....................................... 7 Funkcije USB-a..................................8 USB tipa C.....................................10 Intel Optane memory................................10 Omogućavanje Intel Optane memorije......................... - Page 4 5 Troubleshooting........................103 Poboljšana procena sistema pre pokretanja (ePSA) – dijagnostika................103 Pokretanje ePSA dijagnostike.............................103 Dijagnostika..................................104 M-BIST..................................104 L-BIST....................................104 Diagnostic LED................................... 104 LED za status baterije............................... 105 6 Dobijanje pomoći........................107 Kontaktiranje kompanije Dell............................. 107 Contents...
-
Page 5: Rad Na Računaru
što je određeno u dokumentaciji proizvoda, ili na osnovu smjernica servisa na mreži ili telefonskog servisa i tima za podršku. Šteta usled servisiranja koje nije ovlastila kompanija Dell nije pokrivena vašom garancijom. Pročitajte i poštujte bezbijednosna uputstva koja ste dobili uz proizvod. -
Page 6: Pre Rada U Unutrašnjosti Računara
NAPOMENA Uvjerite se da su računar i svi priključeni uređaji isključeni. Ako se računar i priključeni uređaji ne isključe automatski prilikom isključivanja operativnog sistema, pritisnite i držite dugme za uključivanje/isključivanje oko 6 sekundi da biste ih isključili. Pre rada u unutrašnjosti računara Informacije o ovom zadatku Da biste izbegli oštećenje računara, prođite kroz sledeće korake pre nego što počnete sa radom u unutrašnjosti računara. -
Page 7: Tehnologija I Komponente
Tehnologija i komponente DDR4 DDR4 (double data rate fourth generation) memory is a higher-speed successor to the DDR2 and DDR3 technologies and allows up to 512 GB in capacity, compared to the DDR3's maximum of 128 GB per DIMM. DDR4 synchronous dynamic random-access memory is keyed differently from both SDRAM and DDR to prevent the user from installing the wrong type of memory into the system. -
Page 8: Funkcije Usb-A
Figure 3. Curved edge Memory Errors Memory errors on the system display the new ON-FLASH-FLASH or ON-FLASH-ON failure code. If all memory fails, the LCD does not turn on. Troubleshoot for possible memory failure by trying known good memory modules in the memory connectors on the bottom of the system or under the keyboard, as in some portable systems. - Page 9 poznatiji kao USB 2.0 i 1.1, tim redom, sporiji režimi i dalje rade na 480 Mb/s i 12 Mb/s, tim redom, odnosno i dalje se koriste radi održavanja kompatibilnosti sa prethodnim verzijama. USB 3.0/USB 3.1 Gen 1 ostvaruje mnogo bolje performanse usled tehničkih promena navedenih u nastavku: •...
-
Page 10: Usb Tipa C
USB tipa C USB tipa C je novi fizički konektor malih dimenzija. Konektor može da podrži različite nove USB standarde kao što su USB 3.1 i USB power delivery (USB PD). Alternativni režim USB tipa C je novi standard konektora koji je veoma malih dimenzija. Zauzima trećinu veličine starog USB-a tipa A. Ovo je jedinstveni standard konektora koji svaki uređaj može da koristi. -
Page 11: Omogućavanje Intel Optane Memorije
Omogućavanje Intel Optane memorije Koraci 1. Na traci zadataka kliknite na okvir za pretragu, pa ukucajte „Intel Rapid Storage Technology“. 2. Kliknite na Intel Rapid Storage Technology. 3. Na kartici Status kliknite na Enable (Omogući) da biste omogućili Intel Optane memoriju. 4. -
Page 12: Ekvivalent Za Nvidia Geforce Mx130
Ekvivalent za NVIDIA GeForce MX130 Tabela 4. Specifikacije za Nvidia GeForce MX130 Karakteristika Specifikacije Grafička memorija 2 GB GDDR5 Tip sabirnice PCI Express 3.0 Memorijski interfejs GDDR5 Brzina radnog takta 1122–1242 (pojačanje) MHz Maksimalna dubina boje nema Maksimalna vertikalna brzina osvežavanja nema Operativni sistemi grafičke kartice/podrška za Video API Windows 10/DX 12/OGL4.5... -
Page 13: Major Components Of Your System
Major components of your system 1. Base cover 2. Power adapter port Major components of your system... - Page 14 15. System fan 16. Heatsink NOTE: Dell provides a list of components and their part numbers for the original system configuration purchased. These parts are available according to warranty coverages purchased by the customer. Contact your Dell sales representative for purchase options.
-
Page 15: Uklanjanje I Instaliranje Komponenti
Uklanjanje i instaliranje komponenti Recommended tools The procedures in this document require the following tools: • Phillips #0 screwdriver • Phillips #1 screwdriver • Plastic scribe NOTE: The #0 screw driver is for screws 0-1 and the #1 screw driver is for screws 2-4. Secure Digital kartica Uklanjanje Secure Digital kartice Preduslovi... -
Page 16: Poklopac Osnove
Postavljanje Secure Digital kartice Koraci 1. Umetnite Secure Digital karticu u odgovarajući priključak tako da legne u ležište. 2. Sledite procedure u odeljku Posle rada u unutrašnjosti računara. Poklopac osnove Uklanjanje poklopca osnove Preduslovi 1. Sledite proceduru u odeljku Pre rada u unutrašnjosti računara 2. - Page 17 2. Podignite poklopac osnove i nastavite da otvarate desnu stranu poklopca osnove. Uklanjanje i instaliranje komponenti...
- Page 18 3. Podignite desnu stranu poklopca osnove [1], a zatim ga uklonite sa sklopa oslonca za dlan i tastature [2]. Montiranje poklopca osnove Koraci 1. Pod uglom postavite poklopac osnove sa sklopa oslonca za dlanove i tastature [1]. Uklanjanje i instaliranje komponenti...
- Page 19 2. Zategnite devet neispadajućih zavrtanja koji učvršćuju poklopac osnove za sklop oslonca za dlan i tastature. Uklanjanje i instaliranje komponenti...
-
Page 20: Baterija
• Ako se baterija zaglavi u računaru zbog širenja, ne pokušavajte da je izvadite jer probijanje, savijanje ili pritiskanje litijum-jonske baterije može da bude opasno. U tom slučaju kontaktirajte Dell tehničku podršku da biste dobili pomoć. Idite na www.dell.com/contactdell. •... - Page 21 2. Ponovo postavite četiri (M2x3) zavrtnja koji učvršćuju bateriju za sklop oslonca za dlan i tastature [1]. 3. Podignite bateriju sa sklopa oslonca za dlan i tastature [2]. Uklanjanje i instaliranje komponenti...
- Page 22 Montiranje baterije Koraci 1. Poravnajte otvore za zavrtnje na bateriji sa otvorima za zavrtnje na sklopu oslonca za dlanove i tastature [1]. 2. Ponovo postavite četiri (M2x3) zavrtnja koji učvršćuju bateriju za sklop oslonca za dlan i tastature [2]. Uklanjanje i instaliranje komponenti...
- Page 23 3. Povežite kabl baterije na matičnu ploču. Uklanjanje i instaliranje komponenti...
-
Page 24: Čvrsti Disk
Sledeći koraci 1. Ponovo postavite poklopac osnove 2. Ponovo postavite SD memorijsku karticu 3. Sledite proceduru u odeljku Posle rada u unutrašnjosti računara Čvrsti disk Removing the hard drive assembly Prerequisites 1. Follow the procedure in before working inside your computer 2. - Page 25 Installing the hard drive assembly Steps 1. Align the screw holes on the hard drive assembly with the screw holes on the palm rest and keyboard assembly [1]. 2. Replace the four (M2x4.5) screws that secure the hard drive assembly to the palm rest and keyboard assembly [2]. Uklanjanje i instaliranje komponenti...
- Page 26 3. Adhere the tape that secures the hard drive cable to the system board [1]. 4. Connect the hard drive cable to the system board [2]. Uklanjanje i instaliranje komponenti...
-
Page 27: U/I Ploča
Next steps 1. Replace the battery cable. 2. Replace the base cover 3. Replace the SD memory card 4. Follow the procedure in after working inside your computer U/I ploča Removing the IO board Prerequisites 1. Follow the procedure in before working inside your computer. - Page 28 Installing the IO board Steps 1. Using the alignment posts, place the I/O board on the palm rest and keyboard assembly [1]. 2. Replace the two (M2x3) screws that secure the I/O board to the palm rest and keyboard assembly [2]. Uklanjanje i instaliranje komponenti...
- Page 29 3. Adhere the I/O board cable to the palm rest and keyboard assembly [1]. 4. Connect the I/O board cable to the system board and close the latch to secure the cable [2]. Uklanjanje i instaliranje komponenti...
-
Page 30: Tabla Osetljiva Na Dodir
Next steps 1. Replace the hard drive assembly. NOTE: Required for systems with 42 Whr battery 2. Replace the battery. 3. Replace the base cover. 4. Replace the SD memory card. 5. Follow the procedure in after working inside your computer. - Page 31 5. Remove the four (M2x2) screws that secure the touchpad to the palmrest and keyboard assembly [1]. 6. Lift the touchpad off the palmrest and keyboard assembly [2]. Uklanjanje i instaliranje komponenti...
- Page 32 Montiranje sklopa table osetljive na dodir Informacije o ovom zadatku NAPOMENA Proverite da li je tabla osetljiva na dodir poravnata sa vođicama na sklopu oslonca za dlanove i tastature i da li je razmak na obe strane table osetljive na dodir jednak. Koraci 1.
- Page 33 5. Postavite nosač table osetljive na dodir u slot na sklopu oslonca za dlan i tastature [1]. 6. Ponovo postavite tri (M2x2) zavrtnja koji učvršćuju nosač table osetljive na dodir za sklop oslonca za dlan i tastature [2] i zalepite traku koja učvršćuje nosač...
-
Page 34: Memorijski Moduli
Sledeći koraci 1. Ponovo postavite bateriju 2. Ponovo postavite poklopac osnove 3. Ponovo postavite SD memorijsku karticu 4. Sledite proceduru u odeljku Posle rada u unutrašnjosti računara Memorijski moduli Removing the memory module Prerequisites 1. Follow the procedure in before working inside your computer 2. -
Page 35: Sim Card
NOTE: If you do not hear the click, remove the memory module and reinstall it. Next steps 1. Replace the battery cable. 2. Replace the base cover 3. Replace the SD memory card 4. Follow the procedure in after working inside your computer SIM Card Removing the SIM card Prerequisites... - Page 36 Installing the SIM card Steps 1. Open the latch that covers the SIM card slot to release it from the system [1]. 2. Insert a needle in the slot and push it to eject the SIM card tray [2]. 3. Pull the SIM card try and place the SIM card on the SIM cad tray [3] and [4]. 4.
-
Page 37: Wlan Kartica
5. Follow the procedures in After working inside your computer. WLAN kartica Removing the WLAN card Prerequisites 1. Follow the procedure in before working inside your computer 2. Remove the SD memory card 3. Remove the base cover 4. Disconnect the battery cable. - Page 38 Installing the WLAN card About this task CAUTION: To avoid damage to the WLAN card, do not place any cables under it. Steps 1. Insert the WLAN card into the connector on the system board [1]. 2. Connect the WLAN cables to the connectors on the WLAN card [2]. 3.
-
Page 39: Poluprovodnički Disk/Intel Optane Memorijski Modul
Next steps 1. Disconnect the battery cable. 2. Replace the base cover. 3. Replace the SD memory card. 4. Follow the procedure in after working inside your computer. Poluprovodnički disk/Intel Optane memorijski modul Removing the M.2 2280 Solid-state drive or Intel Optane memory— Optional Prerequisites NOTE:... - Page 40 3. Slide and remove the thermal plate from the solid-state drive/Intel Optane card slot [3]. 4. Remove the single (M2x2) screw that secures the solid-state drive/Intel Optane card to the palmrest and keyboard assembly [1]. 5. Slide and lift the solid-state drive/Intel Optane card off the palmrest and keyboard assembly [2]. Uklanjanje i instaliranje komponenti...
- Page 41 Installing the M.2 2280 Solid-state drive or Intel Optane memory - Optional Steps 1. Slide and insert the tab solid-state drive/Intel Optane card into the solid-state drive/Intel Optane card slot [1]. 2. Replace the single (M2x2) screw that secures the solid-state drive/Intel Optane card to the palmrest and keyboard assembly [2]. Uklanjanje i instaliranje komponenti...
- Page 42 Uklanjanje i instaliranje komponenti...
- Page 43 3. Align and replace the thermal plate on the solid-state drive/Intel Optane card slot [1,2]. 4. Replace the single (M2x3) screw that secures the thermal plate to the palmrest and keyboard assembly [3]. Next steps 1. Replace the battery cable. 2.
- Page 44 Installing the Solid-state drive bracket Steps 1. Align and replace the solid-state drive bracket on the palmrest and keyboard assembly [1]. 2. Replace the single (M2x3) screw that secures the solid-state drive bracket to the palmrest and keyboard assembly [2]. Uklanjanje i instaliranje komponenti...
- Page 45 Next steps 1. Replace the battery cable. 2. Replace the base cover 3. Replace the SD memory card 4. Follow the procedure in after working inside your computer Removing the M.2 2230 Solid-state drive Prerequisites 1. Follow the procedure in before working inside your computer 2.
- Page 46 4. Remove the single (M2x2) screw that secures the solid-state drive to the solid-state drive bracket [1]. 5. Slide and remove the solid-state drive off the solid-state drive slot [2]. Uklanjanje i instaliranje komponenti...
- Page 47 Installing the M.2 2230 Solid-state drive Steps 1. Insert the solid-state drive into the solid-state drive slot on the system board [1]. 2. Replace the single (M2x3) screw that secures the solid-state drive to the solid-state drive bracket [2]. Uklanjanje i instaliranje komponenti...
- Page 48 3. Align and replace the thermal plate on the solid-state drive [1,2]. 4. Replace the single (M2x3) screw that secures the thermal plate to the palmrest and keyboard assembly [3]. Uklanjanje i instaliranje komponenti...
-
Page 49: Zvučnici
Next steps 1. Replace the battery cable. 2. Replace the base cover 3. Replace the SD memory card 4. Follow the procedure in after working inside your computer Zvučnici Removing the speakers Prerequisites 1. Follow the procedure in before working inside your computer 2. - Page 50 3. Lift the speakers, along with the cable, off the palm rest and keyboard assembly. Uklanjanje i instaliranje komponenti...
- Page 51 Installing the speakers About this task NOTE: If the rubber grommets are pushed out when removing the speakers, push them back in before replacing the speakers. Steps 1. Using the alignment posts and rubber grommets, place the speakers in the slots on the palm rest and keyboard assembly. Uklanjanje i instaliranje komponenti...
- Page 52 2. Route the speaker cable through the routing guides on the palm rest and keyboard assembly [1]. 3. Connect the speaker cable to the system board [2]. Uklanjanje i instaliranje komponenti...
-
Page 53: Ventilator Sistema
Next steps 1. Replace the battery cable. 2. Replace the base cover 3. Replace the SD memory card 4. Follow the procedure in after working inside your computer Ventilator sistema Removing the system fan Prerequisites 1. Follow the procedure in before working inside your computer. - Page 54 2. Unroute the VGA board cable and the display cable from the routing guides on the fan [1]. 3. Disconnect the fan cable from the system board [2]. 4. Remove the two (M2x3) screws that secure the fan to the palmrest and keyboard board assembly [1]. Uklanjanje i instaliranje komponenti...
- Page 55 5. Lift the fan off the palmrest and keyboard board assembly [2]. Installing the system fan Steps 1. Align the screw holes on the fan with the screw holes on to the palm rest and keyboard board assembly [1]. 2. Replace the two (M2x3) screws that secure the fan to the palm rest and keyboard board assembly [2]. Uklanjanje i instaliranje komponenti...
- Page 56 3. Connect the fan cable to the system board [1]. 4. Route the VGA board cable and the display cable through the routing guides on the fan [2]. Uklanjanje i instaliranje komponenti...
-
Page 57: Rashladni Element
5. Connect the VGA board cable [1], and the display cable [2, 3] to the system board. Next steps 1. Replace the battery. 2. Replace the base cover. 3. Replace the SD memory card. 4. Follow the procedure in after working inside your computer. - Page 58 Montiranje rashladnog elementa – UMA Koraci 1. Postavite rashladni element na matičnu ploču i poravnajte otvore za zavrtnje na rashladnom elementu sa otvorima za zavrtnje na matičnoj ploči [1]. 2. Prema određenom redosledu (naznačenom na rashladnom elementu) pritegnite četiri neispadajuća zavrtnja kojima je rashladni element pričvršćen za matičnu ploču [2].
- Page 59 Sledeći koraci 1. Ponovo postavite bateriju 2. Ponovo postavite poklopac osnove 3. Ponovo postavite SD memorijsku karticu 4. Sledite proceduru u odeljku Posle rada u unutrašnjosti računara Uklanjanje rashladnog elementa – neintegrisanog Preduslovi 1. Sledite proceduru u odeljku Pre rada u unutrašnjosti računara 2.
- Page 60 Postavljanje rashladnog elementa – neintegrisanog Koraci 1. Postavite rashladni element na matičnu ploču i poravnajte otvore za zavrtnje na rashladnom elementu sa otvorima za zavrtnje na matičnoj ploči [1]. 2. Prema određenom redosledu (naznačenom na rashladnom elementu) pritegnite sedam neispadajućih zavrtanja kojima je rashladni element pričvršćen za matičnu ploču [2].
-
Page 61: Vga Priključna Ploča
Sledeći koraci 1. Ponovo postavite bateriju 2. Ponovo postavite poklopac osnove 3. Ponovo postavite SD memorijsku karticu 4. Sledite proceduru u odeljku Posle rada u unutrašnjosti računara VGA priključna ploča Removing the VGA daughterboard Prerequisites 1. Follow the procedure in before working inside your computer. - Page 62 3. Remove the two (M2x3) screws that secure the VGA daughterboard to the palmrest and keyboard assembly [1]. 4. Lift the VGA daughterboard away from the system [2]. Uklanjanje i instaliranje komponenti...
- Page 63 Postavljanje VGA priključne ploče Koraci 1. Postavite VGA priključnu ploču i poravnajte otvore za zavrtnje na njoj sa otvorima za zavrtnje na sklopu oslonca za dlan i tastature [1]. 2. Ponovo postavite dva zavrtnja (M2x3) kojima je VGA priključna ploča pričvršćena za sklop oslonca za dlan i tastature [2]. 3.
-
Page 64: Ploča Dugmeta Za Napajanje
Sledeći koraci 1. Ponovo postavite bateriju 2. Ponovo postavite poklopac osnove 3. Ponovo postavite SD memorijsku karticu 4. Sledite proceduru u odeljku Posle rada u unutrašnjosti računara Ploča dugmeta za napajanje Removing the power button board with optional fingerprint reader Prerequisites 1. - Page 65 4. Remove the single (M2x3) screw that secures the power button board to the palmrest and keyboard assembly [1]. 5. Lift the power button board, along with the cable off the palmrest and keyboard assembly [2]. Uklanjanje i instaliranje komponenti...
- Page 66 Installing the power button board with optional fingerprint reader Steps 1. Place the power-button board into the slot on the palmrest and keyboard assembly [1]. 2. Replace the single (M2x3) screw that secures the power button board to the palmrest and keyboard assembly [2]. 3.
-
Page 67: Matična Ploča
Next steps 1. Replace the display assembly. 2. Replace the system fan. 3. Replace the battery. 4. Replace the base cover. 5. Replace the SD memory card. 6. Follow the procedure in after working inside your computer. Matična ploča Removing the system board Prerequisites 1. - Page 68 a) Power button board [1]. b) Fingerprint reader (optional) [2]. c) IO board [3]. d) Touchpad [4]. e) Keyboard [5]. 2. Disconnect the following cables from the system board: a) DC-in [1, 2]. b) Speaker [3]. Uklanjanje i instaliranje komponenti...
- Page 69 3. Remove the three (M2x3) screws and two (M2x2) screws that secure the system board to the palmrest and keyboard assembly [1]. 4. Lift the system board off the palm-rest and keyboard assembly [2]. Uklanjanje i instaliranje komponenti...
- Page 70 Installing the system board Steps 1. Align the screw hole on the system board with the screw hole on the palmrest and keyboard assembly [1]. 2. Replace the three (M2x3) screws and two (M2x2) screws that secure the system board to the palmrest and keyboard assembly [2]. Uklanjanje i instaliranje komponenti...
- Page 71 3. Connect the following cables to the system board: a) DC-in [1, 2]. b) Speaker [3]. Uklanjanje i instaliranje komponenti...
- Page 72 4. Connect the following cables to the system board: a) Power button board [1]. b) Fingerprint reader (optional) [2]. c) IO board [3]. d) Touchpad [4]. e) Keyboard [5]. Uklanjanje i instaliranje komponenti...
-
Page 73: Sklop Ekrana
Next steps 1. Replace the display assembly. 2. Replace the heatsink. 3. Replace the system fan. 4. Replace the SSD. 5. Replace the Memory. 6. Replace the WLAN. 7. Replace the battery. 8. Replace the base cover. 9. Replace the SD memory card. - Page 74 3. Unroute the display cable from the routing guides on the palmrest and keyboard assembly [1]. 4. Remove the six (M2.5x5) screws that secure the left and right hinges to the system board, and palmrest and keyboard assembly [2]. Uklanjanje i instaliranje komponenti...
- Page 75 5. Lift the palmrest and keyboard assembly at an angle [1]. 6. Continue to lift the palmrest and keyboard assembly until it separates from the hinges [2]. Uklanjanje i instaliranje komponenti...
- Page 76 7. Slide and remove the palmrest and keyboard assembly off the display assembly. Uklanjanje i instaliranje komponenti...
- Page 77 8. After performing all the preceding steps, you are left with display assembly. Installing the display assembly About this task NOTE: Ensure that the hinges are opened to the maximum before replacing the display assembly on the palmrest and keyboard assembly. Steps 1.
- Page 78 2. Press the hinges down on the system board, and palmrest and keyboard assembly [1]. 3. Seat the palmrest and keyboard assembly on the display assembly [2]. Uklanjanje i instaliranje komponenti...
- Page 79 4. Replace the six (M2.5x5) screws that secure the left and right hinges to the system board, and palmrest and keyboard assembly [1]. 5. Route the display cable through the routing guides on the palmrest and keyboard assembly [2]. Uklanjanje i instaliranje komponenti...
- Page 80 6. Affix the antenna cables to the system board [1]. 7. Connect the display cable to the connector on the system board [2]. Uklanjanje i instaliranje komponenti...
-
Page 81: Okno Ekrana
Next steps 1. Replace the WLAN. 2. Replace the battery. 3. Replace the base cover. 4. Replace the SD memory card. 5. Follow the procedure in after working inside your computer. Okno ekrana Uklanjanje okvira ekrana Preduslovi 1. Sledite proceduru u odeljku Pre rada u unutrašnjosti računara 2. - Page 82 3. Podignite okvir ekrana sa sklopa ekrana. Uklanjanje i instaliranje komponenti...
- Page 83 Montiranje okvira ekrana Koraci 1. Uklonite okvir ekrana sa zadnjeg poklopca ekrana. Uklanjanje i instaliranje komponenti...
- Page 84 2. Nežno pritisnite okvir ekrana da ulegne na mesto. Uklanjanje i instaliranje komponenti...
-
Page 85: Ploča Ekrana
Sledeći koraci 1. Ponovo postavite sklop ekrana 2. Postavite WLAN karticu. 3. Ponovo postavite bateriju 4. Ponovo postavite poklopac osnove 5. Ponovo postavite SD memorijsku karticu 6. Sledite proceduru u odeljku Posle rada u unutrašnjosti računara Ploča ekrana Uklanjanje ploče ekrana Preduslovi 1. - Page 86 3. Odlepite traku kojom je kabl ekrana pričvršćen za zadnji deo ploče ekrana [1]. 4. Podignite rezu i izvucite kabl ekrana iz konektora za kabl ploče ekrana [2]. 5. Podignite ploču ekrana sa zadnjeg poklopca ekrana [3]. Uklanjanje i instaliranje komponenti...
- Page 87 NAPOMENA Ne vucite i ne odvajajte rastegljive (SR) trake od ploče ekrana. Nema potrebe da odvajate nosače od ploče ekrana. 6. Nakon obavljanja svih navedenih koraka ostaje vam ploča ekrana. Uklanjanje i instaliranje komponenti...
- Page 88 Postavljanje ploče ekrana Koraci 1. Stavite ploču ekrana na ravnu i čistu površinu. Uklanjanje i instaliranje komponenti...
- Page 89 2. Povežite kabl ekrana sa konektorom na zadnjoj strani ploče ekrana i zatvorite rezu da biste učvrstili kabl [1]. 3. Zalepite traku koja pričvršćuje kabl ekrana na zadnji deo ploče ekrana [2]. 4. Okrenite ploču ekrana i postavite je na zadnji poklopac ekrana [3]. Uklanjanje i instaliranje komponenti...
- Page 90 5. Poravnajte otvore za zavrtnje na ploči ekrana sa otvorima za zavrtnje na zadnjem poklopcu ekrana [1]. 6. Ponovo postavite šest (M2x2) i dva (M2x3) zavrtnja koji pričvršćuju ploču ekrana na zadnji poklopac ekrana [2]. Uklanjanje i instaliranje komponenti...
-
Page 91: Kabl Ekrana
Sledeći koraci 1. Ponovo postavite okvir ekrana. 2. Ponovo postavite sklop ekrana 3. Postavite WLAN karticu. 4. Ponovo postavite bateriju 5. Ponovo postavite poklopac osnove 6. Ponovo postavite SD memorijsku karticu 7. Sledite proceduru u odeljku Posle rada u unutrašnjosti računara Kabl ekrana Uklanjanje kabla ekrana Preduslovi... - Page 92 Koraci 1. Uklonite kabl kamere i kabl ekrana iz vođica za usmeravanje na zadnjem poklopcu ekrana [1,2]. 2. Odlepite lepljivu traku koja pričvršćuje kabl kamere [3]. 3. Podignite kabl ekrana i kabl kamere sa zadnjeg poklopca ekrana. Uklanjanje i instaliranje komponenti...
- Page 93 Montiranje kabla ekrana Koraci 1. Postavite kabl ekrana i kabl kamere na zadnji poklopac ekrana. Uklanjanje i instaliranje komponenti...
- Page 94 2. Provucite kabl kamere i kabl ekrana kroz vođice za usmeravanje na sklopu zadnjeg poklopca ekrana i antene [1,2]. 3. Zalepite lepljivu traku koja pričvršćuje kabl kamere [3]. Uklanjanje i instaliranje komponenti...
-
Page 95: Port Adaptera Za Napajanje
Sledeći koraci 1. Ponovo postavite ploču ekrana. 2. Ponovo postavite okvir ekrana. 3. Ponovo postavite sklop ekrana 4. Postavite WLAN karticu. 5. Ponovo postavite bateriju 6. Ponovo postavite poklopac osnove 7. Ponovo postavite SD memorijsku karticu 8. Sledite proceduru u odeljku Posle rada u unutrašnjosti računara Port adaptera za napajanje Removing the power adapter port... - Page 96 Montiranje porta adaptera za napajanje Koraci 1. Postavite port adaptera za napajanje u priključak na sklopu oslonca za dlan i tastature [1]. 2. Ponovo postavite jedan zavrtanj (M2x3) kojim je port adaptera za napajanje pričvršćen na sklop oslonca za dlan i tastature [2]. 3.
-
Page 97: Kamera
Sledeći koraci 1. Postavite WLAN karticu. 2. Ponovo postavite bateriju 3. Ponovo postavite poklopac osnove 4. Ponovo postavite SD memorijsku karticu 5. Sledite proceduru u odeljku Posle rada u unutrašnjosti računara Kamera Removing the camera Prerequisites 1. Follow the procedure in before working inside your computer 2. - Page 98 Follow the below procedure to remove the camera in systems with the Touch functionality. 4. Peel the tape that secures the camera off the display back-cover [1]. 5. Lift the camera module from the display back-cover [2]. Uklanjanje i instaliranje komponenti...
- Page 99 Installing the camera Steps 1. Connect the camera cable to the camera module [1]. 2. Route the camera cable through the routing channels [2]. 3. Using the alignment post, adhere the camera module on the display back-cover [3]. Uklanjanje i instaliranje komponenti...
- Page 100 Following is the procedure to install the camera in systems with the Touch functionality. 4. Align and replace the camera module on the display back-cover [1]. 5. Adhere the tape that secures the camera off the display back-cover [2]. Uklanjanje i instaliranje komponenti...
-
Page 101: Sklop Oslonca Za Dlan I Tastature
Next steps 1. Replace the display panel. 2. Replace the display bezel. 3. Replace the display assembly. 4. Replace the WLAN. 5. Replace the battery. 6. Replace the base cover. 7. Replace the SD memory card. 8. Follow the procedure in after working inside your computer. - Page 102 10. Remove the touch pad assembly 11. Remove the VGA daughter board 12. Remove the power button board 13. Remove the speakers 14. Remove the system fan 15. Remove the heatsink 16. Remove the system board 17. Remove the display assembly About this task After performing the preceding steps, you are left with the palmrest and keyboard assembly.
-
Page 103: Troubleshooting
Pokrenite dijagnostičko podizanje sistema na bilo koji od načina navedenih u nastavku: Koraci 1. Uključite računar. 2. Dok se sistem računara pokreće, pritisnite taster F12 kada se prikaže Dell logotip. 3. U meniju za pokretanje sistema izaberite opciju Diagnostics (Dijagnostika) pomoću strelica nagore/nadole, pa pritisnite taster Enter. NAPOMENA Prikazuje se prozor Enhanced Pre-boot System Assessment (Poboljšana procena sistema pre podizanja) -
Page 104: Dijagnostika
Dijagnostika Tabela 5. Dijagnostika M-BIST L-BIST Svrha dijagnostičke alatke Procenjuje ispravnost matične ploče Proverava da li matična ploča napaja LCD ekran da bi postojala dodatna rešenja za primenom testa šine za napajanje LCD ekrana koji probleme „No Power“, „No Post“ i omogućava izdvajanje problema „No Video“... -
Page 105: Led Za Status Baterije
NOTE: The diagnostic pattern consists of a two-digit number being represented by a first group of LED blinks (1–9) in amber, followed by a 1.5 s pause with the LED off, and then a second group of LED blinks (1–9) in white. This is then followed by a three second pause, with the LED off, before repeating over again. - Page 106 • S4 – Sistem troši najmanje energije u odnosu na druga stanja mirovanja. Sistem je skoro u isključenom stanju, osim male količine energije. Kontekstualni podaci se zapisuju na hard disku. • S5 (ISKLJUČENO) – Sistem je isključen. Troubleshooting...
-
Page 107: Dobijanje Pomoći
Informacije o ovom zadatku Dell nudi nekoliko opcija za onlajn i telefonsku podršku i servis. Dostupnost zavisi od zemlje i proizvoda, a neke usluge možda neće biti dostupne u vašoj oblasti. Ako želite da kontaktirate Dell u vezi prodaje, tehničke podrške ili pitanja u vezi korisničkih usluga: Koraci 1.
Need help?
Do you have a question about the Latitude 3400 and is the answer not in the manual?
Questions and answers