
Related Manuals for XS Scuba MultiMax


Summary of Contents for XS Scuba MultiMax
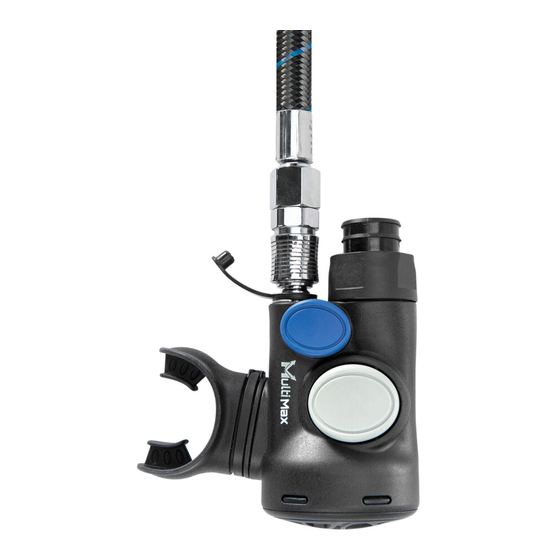
- Page 1 XS Scuba MultiMax Breathable Inflator Service Manual MultiMax Breathable Inflator Service Manual www.XSscuba.com...
-
Page 2: Table Of Contents
XS Scuba MultiMax Breathable Inflator Service Manual Document Change Notice (DCN) Page # Rev. Date Revision Made 06/01/2020 First Release Introduction This manual outlines manufacturer prescribed mechanically inclined, is using the proper tools, servicing procedures for the regulator product parts and procedures prescribed within. If you do not fully understand all of the procedures outlined described within. It covers disassembly, cleaning, in this manual, contact XS Scuba and speak with a inspection, reassembly, adjusting and testing of said regulator product. This publication assumes that the Technical Advisor before proceeding any further. technician performing the service is experienced, Table of Contents MultiMax Disassembly 6 Introduction Cleaning Procedures Warnings, Cautions and Notes Preparing and Inspecting Parts... -
Page 3: Maintenance Schedules
XS Scuba MultiMax Breathable Inflator Service Manual Maintenance Schedules 8. Unless otherwise instructed, the following is Breathable inflators, such as the MultiMax, are subjected assumed: to a variety of environmental elements that over time can a. When instructed to remove, unscrew or affect their performance. Salt, sand, sediment, chlorine loosen a threaded part, turn the part and other chemicals all take their toll on a breathable counterclockwise. The manual abbreviates inflator. Soft parts wear out and lubricants break down counterclockwise with CCW. and wash away. As an XS Scuba Dealer, you are advised b. When instructed to install, screw in or tighten to inform your staff and customers that the XS Scuba a threaded part, turn the part clockwise. MultiMax requires servicing at least once a year. Under The manual abbreviates clockwise with CW. certain circumstances service is required every 3-6 months. Some of those circumstances are: 9. The following abbreviations are used throughout this manual: 1. Frequent or improper use a. HP = High Pressure – the pressure entering a 2. Inadequate routine freshwater rinsing regulator from the cylinder e.g. 3000psi 3. Regulator use in dirty or polluted waters... -
Page 4: Pre-Test & Inspection Prior To Disassembly
XS Scuba MultiMax Breathable Inflator Service Manual Pre-Test and Inspection Prior to Disassembly It is good practice to inspect the MultiMax prior to disassembly and to document your findings. This will help you identify any problems so you can be sure that these problems get remedied during service. You can use the following checklist for items to document. Characterize the overall condition of the MultiMax. Is it “like new” or is it scratched, nicked or heavily corroded? Observe the condition of the braided hose where it exits the crimped ferrules. If the braid is pulling out of the crimps or if the fibers are abraded, document and plan on replacing it. If the MultiMax is attached to a regulator first stage, attach an intermediate pressure gauge to the first stage and record the medium or interstage pressure. Record the value. Pressurize the MultiMax and submerge in a tub of water. Are there any leaks? If so, document where the leaks are coming from. Purge the MultiMax. Is the purge strong or weak? Is there free flow or leaking after purging? Attach to magnehelic or conduct a subjective breathing evaluation to evaluate the opening effort. Document your findings. Operate the power inflation button. Does it provide a nice, strong inflation? Does it get stuck or leak? Operate the oral inflation button. Does it seal off the exhaust valve, routing your exhalation out the corrugated hose connection? Does it get stuck or leak? Required Tool List Part # Description Application TL111 O-ring pick Removing o-rings Small Flat Head Screwdriver... -
Page 5: Exploded Diagrams And Part Lists
XS Scuba MultiMax Breathable Inflator Service Manual MULTIMAX BREATHABLE INFLATOR Part # Description RK14 Service Kit, MultiMax RP370-45 Svc Kit for QD Coupler RP370-01 1" Hose Connector Assy. RP370-02 Threaded Collar RP370-03 Hose Connector RP370-04 O-ring BP625 Retainer Pin RP370-06... -
Page 6: Multimax Disassembly
XS Scuba MultiMax Breathable Inflator Service Manual MultiMax Disassembly Procedure b. Lift off purge cover (41), diaphragm washer (40) and diaphragm (39) 1. Remove the MultiMax from the corrugated hose. Option 1 – Leave the hose connecter attached to the corrugated hose a. Unthread collar (2) from the MultiMax body (8). b. Pull the hose connector (3) out of the body (8). c. Remove the o-ring (4) from the hose connector (3). 3. Remove power inflator button assembly a. Using an appropriately sized coin (U.S. nickel),... - Page 7 XS Scuba MultiMax Breathable Inflator Service Manual e. Remove the inflation button assembly (14) and the spring (13) from the main body (8). b. Lift opposing edges of the exhaust valve (like a taco) to expose the spokes of the exhaust retainer (17). i. As before, if you have strong fingers, engage the spokes and spin out the exhaust retainer (17) ii. Otherwise, use a pair of 90° pliers or circlip pliers to engage the spokes and spin out the exhaust retainer. f. Remove the small o-ring (12) from the inflation button (14) CAUTION: The inflation button assembly NOTE: Inspect the exhaust valve (16). If it is (14), which is comprised of a button and shaft, is not clean and has well defined edges, it may remain in designed to come apart. Do not try to separate them. place and reused. This is usually the case. It is not considered a mandatory replacement part. 4. Remove the exhaust assembly c. Remove the o-ring (18) from the exhaust retainer (17). a. Remove the exhaust cover (15) i. If you have strong fingers, it may be possible to unscrew by hand ii. Otherwise, unscrew it by using a pair of 90° pliers or circlip pliers to engage either side of the cross member.
- Page 8 XS Scuba MultiMax Breathable Inflator Service Manual 5. Remove the oral inflation assembly NOTE: If the o-ring does not come out on the button shaft, it may still be seated in the main body. a. Using a 5.5 mm socket or nut driver, remove Please locate and remove it. the nyloc nut. 6. Disassemble the breathing valve a. Carefully pull off the dust cap (6). b. Remove the exhaust seal (20) b. Using a small, flat head screwdriver, disengage the C-clip (7). Exercise caution not to bend it as it will normally get re-used. c. Remove the oral button (24), spring (23), washer (22), and o-ring (21). c. With your forefinger, push on the inlet stem to remove the entire breathing valve sub-assembly from the main body (8). If the oring (21) doesn’t come out with the oral button assembly, it probably remains nestled in the main body (8). Locate and remove it. d. Separate the breathing valve assembly i. While holding the valve housing (35) stationary with a small crescent wrench, remove the inlet stem (28) with a 13 mm open-end wrench.
- Page 9 XS Scuba MultiMax Breathable Inflator Service Manual i. Using a 5.5 mm socket or nut driver, remove the nyloc nut (19). e. Separate the inlet stem (28) assembly i. Using thumb and forefinger, remove the crown orifice (30) from the inlet stem (28) by pulling it straight out. NOTE: The parts are inside the valve housing (35) are under spring tension. When removing the nut, the parts could eject out of the valve housing unless you cover it with your hand. ii. Locate and identify the nut (19), washer (38), lever (37), valve housing (35), spring (34), stem and seat assembly. ii. Remove the o-ring (29) from the crown orifice (30) iii. Remove the housing insert (36) from the valve housing (35). iii. Remove the two o-rings (27) from the inlet stem (28). iv. Remove the seat (31), by retracting the seat retainer (33). f. Separate the valve housing (35) assembly www.XSscuba.com...
- Page 10 XS Scuba MultiMax Breathable Inflator Service Manual 7. Mouthpiece a. Inspect the mouthpiece (25) and tie wrap (44). If they are in good condition, they can remain in place and get cleaned with the main body (8). 8. Remove hose connector (3) a. When you removed the MultiMax from the BC, if you left the hose connector assembly on, you can remove it now. Unthread the collar (2) from the body (8). b. Pull the hose connector (3) out of the body (8). c. Remove the o-ring (4) from the hose connector (3). www.XSscuba.com...
-
Page 11: Cleaning Procedures
XS Scuba MultiMax Breathable Inflator Service Manual Cleaning Procedures WARNING: Do not allow any acidic solution or other cleaning agent, other than dish soap, to enter All reusable parts, metallic and soft, should be cleaned in a the inside of the hose(s). Doing so may cause a warm (not over 120°F / 50°C) dish soap and water solution. breakdown of the inner hose lining which can lead to Use a soft, nylon bristle brush to remove any stubborn obstruction of the air passage way. deposits. The dish soap helps to remove grease and old lubricant. Preparing and Inspecting Parts Plastic and Rubber Parts Nitrox Preparation After cleaning, rinse in fresh water. If your local tap water is hard, consider using distilled water. Dry with hyper-filtered If you are preparing the regulator to place back into nitrox service (O2 not to exceed 40%), you should use compressed air. powderless latex or nitrile gloves to keep finger oils off of Metallic Parts the clean parts. O-rings: All O-rings should be replaced at every servicing. WARNING: Be sure to use hand and eye New O-rings should be inspected for contamination and/ protection when handling chemical cleaning solutions. -
Page 12: Recommended Cleaners And Lubricants
XS Scuba MultiMax Breathable Inflator Service Manual Recommended Cleaners and Lubricants Lubricant / Cleaner Application Source Liquid dishwashing detergent Degreaser for all metallic parts; Household grade - “Dawn” works diluted with warm water general cleaning solution for plas- very well tic and rubber parts Vinegar (acetic acid)-diluted Removes corrosion and mineral Household grade build up from metallic parts Oakite31 diluted with water Use in sonic cleaner to clean Oakite Products, Inc. metal parts 50 Valley Road Berkeley Heights, NJ 07922 www.chemetallna.com Christo-lube MCG 111 o-ring dressing XS Scuba 4040 W Chandler Ave. Santa Ana, CA 92704 866.977.2822 www.XSscuba.com... -
Page 13: Multimax Reassembly
XS Scuba MultiMax Breathable Inflator Service Manual MultiMax Reassembly Procedure e. Install a new, lubricated o-ring (10) on to the threaded cap (9) 1. Install power inflator button assembly a. Install a new, lubricated o-ring (12) on to the power inflator button assembly (14). f. Thread the cap (9) into the main body (8). Tighten with a coin until lightly snug. b. Pass the shaft of the button assembly (14) through the spring (13) and insert through the main body (8). 2. Install the oral inflation assembly a. Generously lubricate o-ring (21) and install into the main body (8). c. Install a new, lubricated o-ring (12) into the cone seat (11). b. Pass the stem of the oral button assembly (24) through the conical spring (23) and the metal washer (22). The large diameter of the spring d. While depressing the power inflator button, thread (23) goes up against the button. The narrow end the cone seat (11) on to button shaft (14). - Page 14 XS Scuba MultiMax Breathable Inflator Service Manual b. Install the exhaust valve retainer. i. Lift the opposing edges of the exhaust valve (16) like a taco, to engage your thumb and forefingerin between the spokes of the exhaust valve retainer (17). ii. Thread the exhaust valve retainer (17) into the main body (8). Thread it in as far as you can using your fingers. Thread it in the remainder of the way using use a pair of 90° d. While pressing the oral button, place the oral seal pliers or circlip pliers until it bottoms out. (20) over the end of the shaft with the exposed metal center of the oral seal (20) facing up. e. Install a new nyloc nut (19) on to the shaft. Thread it on with a 5.5 mm socket until snug. The oral seal should be secure on the shaft and without any wobble or play. CAUTION: Over-torqueing the exhaust valve retainer (17) will result in one or more broken spokes. This requires that the exhaust valve retainer (17) be replaced. c. Install the exhaust valve cover (15). 3. Install the exhaust assembly i. Thread it on with your fingers or use a pair of 90° pliers or circlip pliers until it reaches a hard stop. a. Install a new, lubricated o-ring (18) on to the exhaust valve retainer (17). It is assumed that the...
- Page 15 XS Scuba MultiMax Breathable Inflator Service Manual 4. Building the valve housing assembly d. Place the stem and seat assembly face down on top of the valve assembly tool. a. If the seat retainer (33) has been removed from the stem (32), slide it up the stem (32) and back into place. e. Place the spring (34) over the stem (32). b. Install a new seat (31) by pressing it into the seat retainer (33). It should sit flush with the seat retainer (33) walls. f. Lower the valve housing (35) over the stem (32) and spring (34) and thread on to the valve assembly tool. The square portion of the stem (32) seems to find its way into the square hole of c. Install the housing insert (36) into the valve the valve insert (36). housing (35). www.XSscuba.com...
- Page 16 XS Scuba MultiMax Breathable Inflator Service Manual g. Install the lever (37). NOTE: When threading the valve housing (35) on i. The lever (37) MUST be oriented opposite to the valve assembly tool, if the square portion of the the oval hole. stem (32) does not align with the square hole in the valve insert (36), it will unseat the valve insert (36). CAUTION: When installing the lever (37), it must If this happens, remover the valve insert (36), rotate be oriented opposite the oval outlet hole. the stem (32) with a small pair of pliers so that the square portion of the stem (32), is parallel with the slot of the valve housing (35). See image below. h. Place washer (38) over the threads. i. Thread nyloc nut (19) on to the threaded shaft. Now you can add the white valve insert (36). Make sure that it is seated all the way down on to the valve housing (35). www.XSscuba.com...
- Page 17 XS Scuba MultiMax Breathable Inflator Service Manual b. Install new, lubricated o-rings on to the inlet stem (28). i. Using a 5.5 mm socket or nut driver, drive the c. Press fit the crown orifice (30), o-ring side first, into nut (19) until there is one thread showing above the inlet stem (28). the nut (19). This is the preliminary adjustment. 6. Assembling the breathing valve j. Separate the valve assembly from the valve assembly tool. a. Thread the inlet stem assembly and the valve housing assembly together. When doing this, press down on the lever (37) to retract the seat (31). This keeps the seat away from the crown orifice (30), preventing unnecessary wear while the parts are being rotated. 5. Assembling the inlet stem a. Install a new, lubricated o-ring (29) on to the crown orifice (30). CAUTION: While mating the inlet stem assembly to the valve housing assembly, press down on the lever (37) to retract the seat (31). This keeps the seat away from the crown orifice (30), preventing unnecessary wear while the parts are being rotated.
-
Page 18: Adjusting And Testing
XS Scuba MultiMax Breathable Inflator Service Manual b. Using a small crescent wrench on the valve housing (35) and a 13 mm wrench on the inlet stem (28), tighten the two subassemblies until snug. 7. Installing the breathing valve into the body a. Respecting the indexing flats inside the body (8) and on the valve housing (35), and with the lever facing away from the mouthpiece (25), insert the c. Install the dust cap (6). Seat it into the groove just entire breathing valve assembly into the body (8). above the C-clip (7). 8. Final assembly occurs during Testing and b. Align the C-clip (7) with the lower of two grooves Adjusting on the inlet stem (28) and squeeze into place using pliers wrapped with tape to protect the finish. Adjusting and Testing NOTE: There are two adjustments on the MultiMax. - Page 19 XS Scuba MultiMax Breathable Inflator Service Manual 1. Pressurize the unit NOTE: The nyloc nut (19), after setting it earlier to its preliminary setting of just one thread showing, will a. Attach the Multimax to properly functioning first probably not even need adjustment. stage regulator (preferably the customer’s first stage) or directly to a flow bench. If you do not a. The nyloc nut (19) plays a role in setting the lever know the exact intermediate pressure leaving the height and lever tension. While pressurized, the tip customer’s first stage, then use 140 psi, which is of the lever should be approximately 2 mm below a very common intermediate pressure. Be sure the rim of the body (8) and have less than 1/8” of that the intermediate pressure coming into the “slack”. MultiMax is stable and not creeping up. b. However, if after pressurizing the unit, the lever sits too low or the lever has too much “slack” in it, NOTE: It is always best to adjust the MultiMax you’ll need to tighten the nyloc nut (19) in small to your customer’s first stage. When they bring in their increments. As you do so, the lever should rise, and MultiMax for service, have them bring in their first the “slack” should minimize. stage along with it. c. If you tighten the nyloc nut (19) too much, you will 2. Adjustment of the crown orifice (30)
- Page 20 XS Scuba MultiMax Breathable Inflator Service Manual ii. Fit the purge cover (41) into the retainer ring iii. Secure threaded collar (2) to lock into place (42) iv. If the hose connector (3) was removed from the BC’s corrugated hose, then reattach it to the BC. iii. Press into place by inserting the 4 tabs into the 4 slots. Be sure that the XS Scuba logo is not d. Attach MultiMax to the BC’s corrugated hose upside down. i Insert the cable retaining pin halfway through the hose connector (3) ii Place loop of rapid exhaust cable over the pin iii Engage the pin into the far wall of the hose connector (3) b. If you took the mouthpiece (25) off, replace it now. c. Install hose connector assembly i. Slide o-ring (4) on to the hose connector (3). iv Push the hose over the hose connector (3) being very careful not to let the cable retaining pin disengage from either wall of the hose connector (3) v. Apply a new zip-tie. ii. Insert assembly into the body (8). www.XSscuba.com...
- Page 21 XS Scuba MultiMax Breathable Inflator Service Manual 5. Immersion leak test This completes the reassembly, testing and adjusting of the MultiMax breathable a. Pressurize the Multimax inflator. b. Fill the BC until taut. c. Submerge MultiMax in water and check for leaks 6. Breathing test a. Subjective breathing test i. Breathe in slowly and deeply 4-6 times. The MultiMax should deliver air easily and smoothly. It should not leak afterward. b. Flow bench with magnahelic i. Opening effort should be between 1.4” – 1.7” of H2O (3.5 – 4.5 mbar) 7. Purge Function Test a. Depress the purge cover (41) with your thumb.
-
Page 22: Troubleshooting Guide
XS Scuba MultiMax Breathable Inflator Service Manual Troubleshooting Guide Symptom Possible Cause Solution Intermediate pressure from 1st stage too Refer to 1st Stage Troubleshooting Guide high. It should be between 135 – 147 psi See Adjusting and Testing Step 2 Crown orifice (30) mis-adjusted See Adjusting and Testing Step 3 Air leak or freeflow from the Valve adjustment nut (19) mis-adjusted Replace as needed 2nd stage Crown orifice (30) and/or LP seat (31) See Adjusting and Testing Step 3 damaged or worn Replace lever Lever too high Lever bent See Adjusting and Testing Step 2 Crown orifice (30) mis-adjusted See Adjusting and Testing Step 3 Valve adjustment nut (19) misadjusted Inhalation effort too high Refer to 1st Stage Troubleshooting Guide Intermediate pressure from 1st stage too low. It should be between 135 – 147 psi 1st stage filter partially clogged Service 1st stage Lever set too low... - Page 23 XS Scuba MultiMax Breathable Inflator Service Manual www.XSscuba.com...
- Page 24 XS Scuba MultiMax Breathable Inflator Service Manual XS Scuba, Inc. 4040 W. Chandler Avenue - Santa Ana, CA 92704 Tel: 866.977.2822 - Local Tel: 714.424.0434 Fax: 800.248.5430 - Local Fax: 714.424.0454 WARNING USA Email: info@XSscuba.com XS Scuba equipment is for use only by persons trained and certified International Email: export@XSscuba.com by a nationally recognized scuba training agency. XS Scuba and the XS Scuba logo are trademarks of XS Scuba, Inc. facebook.com/XSscuba which may be registered in certain jurisdictions. All other names are trademarks of their respective owners. @XSscuba All products and prices are subject to change without notice. © Copyright 2017 by XS Scuba, Inc. - All Rights Reserved. www.XSscuba.com @XSscuba www.XSscuba.com...
Need help?
Do you have a question about the MultiMax and is the answer not in the manual?
Questions and answers