Table of Contents
Advertisement
Quick Links
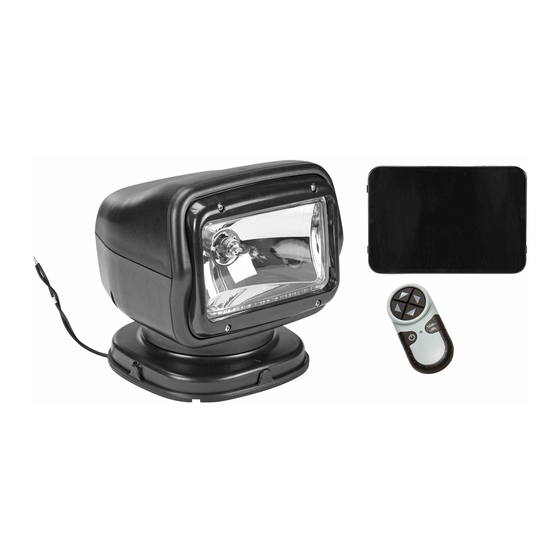
65W Golight Radioray Motorized Halogen Spotlight,
225,000 Candela, (1) Wireless Handheld Remote, Black
Congratulations
You are now the owner of one of the finest remote control searchlights available today. Thank you for letting Larson Electronics assist you in your lighting
application needs. We're proud of our products and the technology that we've developed to ensure our customers the most durable, versatile and
powerful searchlights in the lighting industry.
Please read these instructions before using your new Golight Radioray.
The Golight RadioRay Mod el
attached to a vehicle. The 2-Speed Searchlight with Directional Flexibility is controlled by
a wireless remote, which gives the operator a full 370°horizontal rotation and a 135°
vertical tilt with fingertip control.
The RadioRay provides superior light penetration in a halogen configuration or with
The RadioRay® Includes:
• RadioRay® Searchlight
• Wireless Remote Control
• 2 A23 12V Batteries
• Permanent Mounting Gasket
• Rockguard (not Available with LED units)
MOUNTING INSTRUCTIONS
Determine the location for the light on your vehicle or boat. The small arrow on the base
indicates the normal forward direction of the light. The light will rotate to the left of this
arrow approximately 185 and to the right approximately 185. The beam will angle down about 45 and angles up to 90. The location should take into
consideration this beam movement to ensure optimum usability.
Once the position and orientation are decided upon—use the black rubber gasket as a footprint to mark the mounting of base to vehicle. Drill 1/4
inch hole though mounting surface in the middle of the footprint for passage of the power cord. Use silicone sealant to fill opening around power
cord.
IMPORTANT: Allow 3" of cord to remain under the light to ensure full 370 rotation.
You should choose screw or bolt fasteners appropriate to the surface to which you intend to attach the light. If you intend to use the four small
plastic caps provided to cover the screw heads once installed, a #8 round head is recommended.
The black gasket should be installed on the lamp base prior to attachment to the vehicle surface. NOTE: The small drain hole in the edge of the
gasket should normally face opposite the forward direction of the vehicle—opposite the arrow molded in the front of the base. Silicone or other like
sealants should not be used around the base gasket as it will limit the light's ability to drain excess water properly.
The 12 Volt DC power wire should be joined to the leads under the lamp with
appropriate automotive wire attachments. The light is not polarity sensitive. Power
should be fused at 10 Amps and be on a dedicated circuit, or wired to an appropriate
automotive relay system.
PROGRAMMABLE REMOTE INSTRUCTIONS
The Golight RadioRay is controlled with a programmable remote with 2187 different
channels. This feature allows you the freedom to change the channel selection,
and the receiver relearns the new selection.
PROGRAMMING THE TRANSMITTER.
This light has been pre-programmed at the factory, and it is not necessary to re-
program the transmitter, unless you experience outside interference.
Larson Electronics, LLC
Instruction Manual
2000, 2051, 9000, 9051
are designed to be permanently
Phone: (800) 369-6671
1. IMPORTANT: Disconnect power by removing fuse or
disconnecting vehicle battery.
2. Remove battery cover from remote control.
3. Set the 7 dip switches to a selection of your choice. There are 3
positions on each; positive, negative and neutral. Use a small
screwdriver and select a position for each dip switch. *Please
note that the orientation of the +/– switch positions may vary
among different models of wireless remote controls.
4. Insert both A23 12V batteries with the +/– in the same direction.
Be sure batteries have adequate charge.
5. Replace battery cover.
a. Depress the on/off button and hold it down. Red LED
will light.
b. While holding the on/off button down, reinstall the
power (replace fuse or connect vehicle battery).
c. Keep your finger on the on/off button for 5-6 seconds.
and then release. The light should now be programmed.
Fax: (903) 498-3364
www.larsonelectronics.com
GL-2051GT
1 of 3
Advertisement
Table of Contents

Related Manuals for Larson Electronics Golight Radioray GL-2051GT


Summary of Contents for Larson Electronics Golight Radioray GL-2051GT
- Page 1 Congratulations You are now the owner of one of the finest remote control searchlights available today. Thank you for letting Larson Electronics assist you in your lighting application needs. We’re proud of our products and the technology that we’ve developed to ensure our customers the most durable, versatile and powerful searchlights in the lighting industry.
- Page 2 Remove the batteries by gripping the positive end of each battery and lifting. For information regarding the proper disposal/recycling of the batteries contact Larson Electronics at (800) 369-6671 Use only 12v-A23 batteries in the Golight remote control USAGE: »...
- Page 3 THESE INSTRUCTIONS MAY NOT COVER ALL DETAILS OR VARIATIONS OF THIS PRODUCT FOR YOUR EQUIPMENT OR INSTALLATION REQUIREMENTS. SHOULD FURTHER INFORMATION NOT COVERED BY THESE INSTRUCTIONS BE REQUIRED, PLEASE CONTACT LARSON ELECTRONICS BY EMAIL AT SALES@LARSONELECTRONICS.COM OR BY PHONE AT 1-800-369-6671 FOR FURTHER ASSISTANCE.
Need help?
Do you have a question about the Golight Radioray GL-2051GT and is the answer not in the manual?
Questions and answers