Table of Contents
Advertisement
Quick Links
Advertisement
Table of Contents

Related Manuals for Gin Gliders Genie Lite 2 Series


Summary of Contents for Gin Gliders Genie Lite 2 Series
- Page 2 pilot manual v2.1 03/2017...
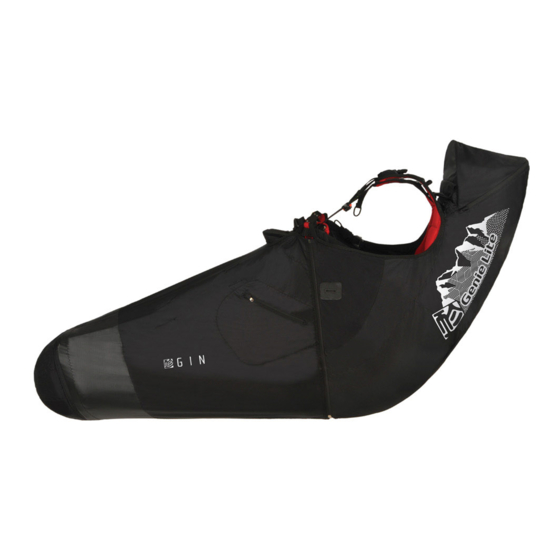
- Page 3 XC pilot harness...
-
Page 4: Table Of Contents
Contents Thank you ..............5 Warning ..............6 About Gin Gliders ............7 Introducing the Genie Lite 2 ..........8 Specifications ..............9 Before you fly ............13 Flying with the Genie Lite 2 .........25 Maintenance and repairs ..........28 Final words ...............31 Technical data ............32 Materials ..............33... -
Page 5: Thank You
Thank you..for choosing Gin Gliders. We are confident you’ll enjoy many rewarding experiences in the air with your GIN harness. This manual contains important safety, performance and maintenance information. Read it before your first flight, keep it for reference, and please pass it on to the new owner if you ever re-sell your rescue. -
Page 6: Warning
Because it is impossible to anticipate every situation or condition that can occur while paragliding, this manual makes no representation about the safe use of the paragliding equipment under all conditions. Neither Gin Gliders nor the seller of GIN equipment can guarantee, or be held responsible for, the safety of yourself or anyone else. -
Page 7: About Gin Gliders
About Gin Gliders Dream In forming Gin Gliders, designer and competition pilot Gin Seok Song had one simple dream: to make the best possible paragliding equipment that pilots all over the world would love to fly—whatever their ambitions. At Gin Gliders, we bring together consultant aerodynamists, world cup pilots, engineers and paragliding school instructors, all dedicated to fulfilling this dream. -
Page 8: Introducing The Genie Lite 2
Introducing the Genie Lite 2 The Genie Lite 2 is for sport and XC pilots who want a light cocoon harness with all the essential features and no compromises in comfort. Comfortable and aerodynamic Drawing on our technology from the Genie Race 3, the Genie Lite 2 has been designed for maximum XC comfort. -
Page 9: Specifications
Specifications The Genie Lite is EN and LTF certified. Certification number: EAPR-GZ-0443/15 Size Weight (kg) Pilot height (cm) <165 160-175 170-185 >180 Delivery package 1 Harness 1 Carbon seat plate and foot plate 1 Cocoon 1 Flight deck (integrated into cocoon) 1 Rescue deployment handle 1 Rescue bridle 2 GIN 30mm carabiners... - Page 10 Components of the Genie Lite 2 Back Protection The Genie Lite comes with the Ginsoft Lite 2 14cm mousse bag foam back protector. The back protector is devided into separate compartments to help dissipate air evenly in the event of a hard impact. This protects the pilot as much as possible in the event of an incident, but it cannot completely eliminate the risk of injury.
-
Page 11: Before You Fly
Gin Gliders recommends that assembly be carried out in the following order. If you are in any doubt whatsoever about this procedure, please seek professional advice from your instructor, GIN dealer or importer. - Page 12 WARNING: Forgetting to loop the leg straps Installing the seat plate behind the seat plate will place the pilot in The seat plate is removable and can be accessed by a panel at the rear of the seat. Simply remove by great risk of falling out of the harness.
- Page 13 Installing the back protector To install the back protector in the Genie Lite harness, first open the under seat pocket. Inside is a zippered compartment to hold the back protector in the optimum position. Open the zipper and insert the back protector with the narrow end first.
- Page 14 Cocoon Connection The Genie Lite 2 comes with an adjustable, lightweight cocoon. The cocoon helps to improve the aerodynamics of the harness to maximize the your flying performance. Connection 1. Attach the velcro of the cocoon to the bottom of the harness 2.
- Page 15 Rescue Installation and compatibility check aspect of rescue installation, seek professional Gin Gliders recommend that rescue installation is performed properly by a competent person. The advice! rescue parachute is a pilots last resort and failure to pack or connect the reserve parachute in the correct way may cause death or severe injury.
- Page 16 IMPORTANT: The deployment bag of other manufacturers’ rescue systems may have different loop positions which may cause a Attaching the rescue deployment bag to the harness deployment handle deployment failure. The rescue container for this harness comes with its own deployment handle. This handle and its strap must be connected to the deployment bag of the parachute.
- Page 17 GIN Square Type Inner Bag IMPORTANT: Without the loop extender the For use with square type rescue containers (Yeti, One G) it may be neccessary to use the rescue handle rescue loop may pull tight on the rescue before loop extender. For proper deployment the rescue handle should be connected to the center loop of the the pins are released, this will casue the rescue rescue inner bag.
- Page 18 Maillon rapid cover to prevent excess friction. Rubber- bands should also be used to secure the attachment and prevent excess friction. Recommended by GIN: 8mm stainless steel screwgate maillon 8mm square maillon Breaking load: 28kN Maillon connection (Recommended by Gin Gliders)
- Page 19 WARNING: When installing the reserve make Rescue installation guide sure the reserve handle is up and the reserve It is very important to properly install the rescue parachute. If the parachute is not folded correctly or lines are facing down. the lines are not placed properly then a serious if not fatal accident could result.
- Page 20 *view inside the harness...
- Page 21 Storage Back pocket The back pocket is designed to store the pilots rucksack and other light accessories during flight. Hydration pocket / personal belongings Located inside the back pocket is a smaller pocket that can hold a camelback or other small belongings. Above the hydration pocket is a RED loop that can be used to suspend a camelback.
- Page 22 Adjustments NOTE: Make sure that the rescue system has After choosing a harness that is close to your body size, adjust your harness to suit your physique been installed before making adjustments. and flying style. It is important to adjust it correctly to ensure you can easily slide into the sitting position after take off.
- Page 23 Lateral Straps (1) The lateral straps adjust the angle between the thighs and the back. Lengthening the straps increases the angle and vice-versa. The easiest way to adjust them correctly is during a flight in calm air. Remember that flying in the supine position (i.e. leaning back), reduces the stability of the harness and increases the risk of riser twists after a deflation.
- Page 24 Cocoon Adjustment The cocoon should be tight and the harness fabric should be smooth and wrinkle free to create the best aerodynamic shape. The nose of the cocoon should form a straight line and point slightly down. Tighten the orange line to raise the nose of the cocoon, loosen to allow the nose to drop and extend the length of the cocoon.
-
Page 25: Flying With The Genie Lite 2
Flying with the Genie Lite 2 IMPORTANT: Use a complete and consistent system of pre-flight checks and repeat the same sequence every flight. General warnings and advice Before every flight, check the following: Are you in good physical and mental condition? Are you familiar and compliant with all applicable laws and regulations in your area? Are you within the certified weight range of your paraglider? Do you have the necessary valid insurance cover (e.g. - Page 26 Are all pockets closed properly and any loose items tied down safely? IMPORTANT: In normal flight, periodically feel Is the air chamber intake open and clear? the position of the rescue handle so that the Have you closed your leg and chest straps? Double check before you take off! action of reaching for the rescue handle is Rescue Deployment instinctive in an emergency.
- Page 27 Landing with the Genie Lite Before landing, slide your legs forward in the harness so that you adopt the standing position. NEVER land in the seated position—it is very dangerous even if you have back protection. Standing up before landing is an active safety precaution. Miscellaneous Towing The Genie Lite 2 can can be used for towed launches.
-
Page 28: Maintenance And Repairs
Maintenance and repairs IMPORTANT: Any repairs should only be carried out by the manufacturer or by an approved agent. This will ensure that the correct The materials used in this harness have been carefully selected for maximum durability. Nevertheless, materials and repair techniques are used. keep your harness clean and airworthy to ensure the longest possible period of safe operation. - Page 29 Repairs The manufacturer or an approved specialist should carry out any repair that involves critical parts of the harness. This will ensure that the correct materials and repair techniques are used. Storage Stored at a temperature between 10° and 25° C and in relative humidity between 50 and 75%. Make sure too that the harness is not stored in a place where animals such as mice or cats could use it as a place to sleep.
- Page 30 The synthetic materials used in a harness must be disposed of properly. If you are not able to arrange appropriate disposal, Gin Gliders will be happy to recycle the harness for you. Send the harness with a short note to this effect to Gin Gliders Inc.
-
Page 31: Final Words
Final words... Most of us today live in a dependent society where we are regulated and protected. There are few opportunities for individuals to develop the self-responsibility that is the foundation of safety in extreme sports such as paragliding. Most accidents are caused by getting into situations that are too demanding for your level of experience. -
Page 32: Technical Data
Technical data Size Weight (kg) Pilot height (cm) <165 160-175 170-185 >180 Height of attachment points (cm) Carabiner distance (cm) 36-49 37-51 38-53 39-55 Certification The Genie Lite has EN and LTF certification, max load 120DaN Genie Lite harness: (EN/LTF) EAPR-GZ-0443/15 Parachute container Integrated container underneath seat plate Back protection... -
Page 33: Materials
Materials Harness fabric Outer 100D JR honeycomb PU 58” Inner Oxford 210D SD PU 58” Webbing Nylon66 Thread 100% Polyester, P/F 210D/9 bonded, P/F 210D/4 bonded & P/F 210D/6 bonded... - Page 34 Pilot details / Proof of ownership 1. Owner Name: Address: Phone: Email: 2. Owner Name: Address: Phone: Email: 3. Owner Name: Address: Phone: Email:...
- Page 35 Harness details Size Colour Serial Number Check flight (date): Mark and signature: Inspections and repairs overview Date Work carried General conditions Completed by Stamp and signature on delivery (name)
-
Page 36: Harness Diagram
Harness diagram 1. Back pocket 2. Rescue container 3. Foot plate 4. Upper cocoon adjustment 5. Lower cocoon adjustment 6. Speed system hook 7. Speed system Pulley 8. Speed bar 9. Back protector 10. Rescue handle 11. Hook knife 12. Back support... - Page 37 Dream. Touch. Believe www.gingliders.com...
Need help?
Do you have a question about the Genie Lite 2 Series and is the answer not in the manual?
Questions and answers