Table of Contents
Advertisement
Advertisement
Table of Contents

Related Manuals for Karsan Jest Electric


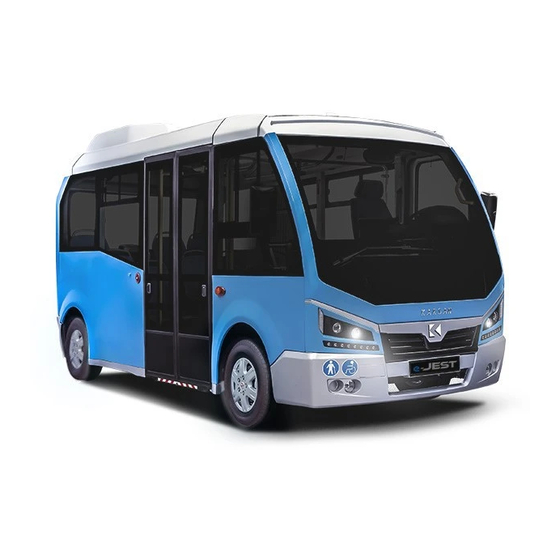
Summary of Contents for Karsan Jest Electric
- Page 3 PREFACE Dear New JEST ELECTRIC Owner, Thank you for choosing KARSAN JEST ELECTRIC. You made the best choice. You now own a new minibus of which every detail has been designed for your comfort and commercial success. Now you have a modern,powerful,strong business tool.
-
Page 4: Table Of Contents
1.1.4 Symbols .......................................6 1.1.5 Service and Maintenance ................................6 1.1.6 Use of Genuine Parts and Accessories ............................7 1.1.7 KARSAN Services and Environment ..............................7 1.1.8 Using Mobile Phones and Other Accessories ...........................7 1.2 Labels Used on The Vehicle ................................8 VEHICLE IDENTIFICATION .....................................9 2.1 Vehicle ID Plate ....................................9... - Page 5 CONTENTS 2.5.8 Multimedia Screen ................................23 2.4.3 Left Control Lever ................................24 WINDSHIELD WIPERS ..................................25 2.4.4 Right Control Lever ................................25 2.4.5 Engine Start-Stop Button ..............................26 2.4.6 Mirror Control Buttons ................................26 2.4.7 Window - Ramp Buttons ............................... 27 2.4.8 Parking Brake ..................................
- Page 6 CONTENTS 4.5 Tyres Rotation ....................................38 EMERGENCY EXIT OF THE VEHICLE ................................39 5.1 Emergency Exits .................................... 39 MAINTENANCE ......................................40 6.1 Vehicle Exterior ..................................... 40 6.2 Vehicle Interior ....................................40 6.3 Corrosion Protection ..................................40 6.4 Corrosion Protection & Exterior Care ............................... 41 CORROSION .......................................
-
Page 7: Purpose Of This Manual
JEST models, therefore some options and/or INFORMATION specifications may be different. technical information, design specifications and technical drawings are valid on the issue date and are not binding. KARSAN has the right to change the specifications without any prior declaration. -
Page 8: Symbols
SAFETY INFORMATION General 1.1.4 Symbols 1.1.5 Service and Maintenance To explain information clearly, notification To ensure the most economical, efficient working symbols are used in this manual. vehicle, periodical maintenance should be done. Ensure the periodical maintenance and service INFORMATION OPTION work is performed by an authorized service center according to the owners manual, warranty... -
Page 9: Use Of Genuine Parts And Accessories
Mobile phones can cause driver distraction. It genuine approved KARSAN spare parts. at KARSAN service stations will ensure the is Agaınst the law in many cities and towns. ideal driving experience. Therefore the clean Therefore the use of mobile devices are not In case of injuries and damages caused by environment can be achieved. -
Page 10: Labels Used On The Vehicle
SAFETY INFORMATION Prior to Operating Your New JEST 1.2 Labels Used on The Vehicle ATTENTION! ATTENTION! IN CASE OF EMERGENCY PUSH AND ROTATE THE ARM TO OPEN THE DOOR IN CASE PULL THE HANDLE OF EMERGENCY EMERGENCY EXIT... -
Page 11: Vehicle Identification
VEHICLE INFORMATION Vehicle Identification 2.1 Vehicle ID Plate 2.1.1 Vehicle Identification Number(VIN) 5000 kg Please refer to VIN for all maintenance and VIN label is located on the driver door inside vehicle inquiries. panel and the right front mudguard. INFORMATION The information on the label is required for properly identifing the vehicle for licensing and service aar... -
Page 12: Capacities, Specifications
VEHICLE INFORMATION Capacities, Specifications 2.2 Technical Specifications Type Electric Traction Motor Max. Power (kW) Max. Torque (Nm) Top Speed (km/h) ELECTRIC MOTOR Turning Radius (mm) 6800 Range (km) - NEDC 80 (33kWh) / 110 (44 kWh) (Single Battery) Range (km) - Optional 90 (33kWh) / 125 (44 kWh) (Single Battery) Start Grade (%) Emergency Hammers... - Page 13 VEHICLE INFORMATION Capacities, Specifications 2.2 Technical Specifications Front axle Independent, MacPherson, Coil Springs & Telescobic Shock Absorber SUSPENSION SYSTEM Rear axle Semi-trailing , Coil Springs & Telescobic Shock Absorber, Rear ARB Tire Size 215 / 75 R 16C TIRES & WHEELS Rear wheel rims 6J / 16 Overall Length...
-
Page 14: Dimensions
VEHICLE INFORMATION Technical Specifications 2.3 Dimensions 1200 mm 3750 mm 895 mm 2446 mm (With Mirrors) 1700 mm 1200 mm 5845 mm... -
Page 15: Driver's Area
VEHICLE INFORMATION Driver’s Area 2.4 Instrument and Control Panel M rror Control 2.4.1 Cluster 2.4.2 Touch Screen Left Control Cluster 2.4.3 Left Control Lever Lever 2.4.4 Right Control Lever 2.4.5 Start - Stop R ght Control Lever 2.4.6 Mirror Control 2.4.7 Window&Ramp Start-Stop Buttons... -
Page 16: Automatic Driver Window
VEHICLE INFORMATION Automatic Driver Window 2.4.1 Instrument Panel PARK BRAKE EV Range : 110 km 60 % Ext Range : 310 km POWER MODE MODE MODE kW/100 km ◦ ◦ ◦ ◦ 21.07.2015 13:50 002637 km 1. Speedoemeter 3. Battery Charge Level 5. -
Page 17: Symbols
VEHICLE INFORMATION Symbols Pictograms Hazard Warning Light ASR System Indicator Light Steering Oil Level Warning Light Serious Failure High Voltage System Warning Light Tire Pressure Monitorinbg Warning Engine Coolant Temperature Is Rear Fog Lamp Activated Turn Signal Activated, Left High Electronic Stability Control Indicator Front Fog Lamp Activated Turn Signal Activated, Right... - Page 18 VEHICLE INFORMATION Symbols Fuel Level Warning Light Immobilizer Indicator Light Limited Performance Indicator Service Indicator Light Lamp Cruise Control Indicator Light Eco Mode Indicator Light MODE POWER Seat Belt Warning Light Power Mode Indicator Light INFORMATION MODE When the ignition key is activated, all warning lamps light up once and disappear.
-
Page 19: Tpms
VEHICLE INFORMATION TPMS 2.4.2 Touch Screen Tire pressures (psi) and temperatures (˚C) are displayed in this screen. Due to warning type colors on the illustration changes. Each color has a different meaning. Red: High Pressure Warning, Fast Leak, Sensor Failure Blue: Sensor Battery Low Yellow:... -
Page 20: Diagnostic Screen
VEHICLE INFORMATION Touch Screen 2.5.2 Diagnostic Screen Temperatures and states of the components below are displayed in this screen. • DC-DC Converter • Inverter • HV Battery • Charger States are denoted with the messages below; • ACTIVE • NOT ACTIVE •... -
Page 21: Climate Control Screen
VEHICLE INFORMATION Touch Screen 2.5.3 Climate Control Screen Windshield+Body+Foot Vent Set Temperature Buttons Set Temperature Buttons Heat ON/OFF Button Cool ON/OFF Button Fresh Air ON/OFF Button Windshield Vent A/C unit, defroster unit and mirrors are controlled via this screen. Body+Foot Vent 3 Speed Fan Button Mirror Heater On/Off Button Front Window Demist ON/OFF... -
Page 22: Light Control Screen
VEHICLE INFORMATION Touch Screen 2.5.4 Light Control Screen Rear Fog ON/OFF Button Front Fog ON/OFF Button Route Sign Light ON/OFF Button Interior White Light ON/OFF Button Interior Blue Light ON/OFF Button Internal and external lamps are controled via this screen. -
Page 23: Energy Control Screen
VEHICLE INFORMATION Touch Screen 2.5.5 Energy Control Screen ECO Mode ON/OFF Button Auto ON/OFF Button EV ON/OFF Button Energy Flow Button Rex ON/OFF Button Energy Charging Button PWR Mode ON/OFF Button... -
Page 24: Trip Screen
VEHICLE INFORMATION Touch Screen 2.5.7 Trip Screen Trip related information is displayed on this screen. -
Page 25: Multimedia Screen
VEHICLE INFORMATION Touch Screen 2.5.8 Multimedia Screen Multimedia controls are on this screen. • Radio • • Bluetooth Components can be selected via multimedia source buttons. -
Page 26: Left Control Lever
VEHICLE INFORMATION High Beam Headlights, Direction Signals, Horn 2.4.3 Left Control Lever Right Signal High Beam Headlights Horn When the low beam headlights are activated pull To activate the right signal, push the lever up. To sound the horn, push the left control arm and release the left control arm to the driver once. -
Page 27: Windshield Wipers
VEHICLE INFORMATION Windshield Wipers 2.4.4 Right Control Lever Left Signal Windshield Wiper Windshield Washer To activate the left signal, push the lever down. By pushing the right control lever to the up Pull the right control lever forward. Water will be position,wiper will be activated.Control lever sprayed to the front window and wiper will work has 3 positions;... -
Page 28: Engine Start-Stop Button
VEHICLE INFORMATION Adjusting the Position of the Mirrors 2.4.5 Engine Start-Stop Button 2.4.6 Mirror Control Buttons Access Access Left Mirror Selected Right Mirror Selected This starts and stops the engine. The green led Position of the mirrors can be adjusted by using lights remains lit on as long as the vehicle is on. -
Page 29: Window - Ramp Buttons
VEHICLE INFORMATION Accessible Passenger Ramp & Windows 2.4.7 Window - Ramp Buttons 2.4.8 Parking Brake Access Access Moves driver’s side window upwards. Moves driver’s side window downwards. Moves wheelchair ramp upwards. Moves wheelchair ramp downwards. Driver’s side window and wheelchair ramp are Parking brake is activated by pressing the button controlled by using the button group below. -
Page 30: Power On Switch
VEHICLE INFORMATION Main Power 2.4.9 Power On Switch Access This is the main power switch. This switch must be in open position to operate the vehicle. -
Page 31: Seat Adjustment
They are mandatory in many places. stops. Karsan recommends that the driver and all passengers always wear seat belts. If the safety belt is not fastened properly,it may lose its effectiveness and potentially cause The Driver’s seat should be adjusted properly to... -
Page 32: Safety Belt
VEHICLE INTERIOR Use of Safety Belt 3.2 Safety Belt Removing General No modifications or additions should be made by the user which will either prevent the safety belt adjusting devices from operating to remove slack, or prevent the seat belt assembly from being adjusted to remove slack. -
Page 33: Sunvisor
VEHICLE INTERIOR Driver Comfort 3.3 Sunvisor 3.4 Interior Rear View Mirror 3.5 Digital Display Operation Operation Set Clock There are sunvisors to improve safety by The Interior rear view mirror can be manually On the digital display the time and outside protecting the driver’s eyes. -
Page 34: Sliding Passenger Windows
VEHICLE INTERIOR Passenger Comfort 3.8 Get Off Buttons 3.6 Sliding Passenger Windows 3.7 Roof Hatch Operation Operation Operation It is used by the passengers to inform the driver There is a handle lock on the sliding passenger To avoid improper usage,there are plastic covers that they wish to exit the vehicle at the next window. -
Page 35: Tyre Selection
TYRES & RIMS Tyre Selection 4.1 Tyre Specifications 4.1.1 Tyre Sizes 4.1.2 Tyre Pressures Technical Specifications Choosing the proper tyre Tyre pressure affects the traction control directly. The pressure of the front and rear tyres should be adjusted as 70 PSi or 4.75 bar (cold). INFORMATION During driving period tyre pressure increases. -
Page 36: Winter / Snow Tyre
Nails,stones penetrating into the tyre pressures on the same axle should be equal. threads may cause tyre pressure lost. Different pressures may cause undesired For the proper tyre type, request information • Check the tyres periodically. brake performance. from KARSAN authorized service stations. -
Page 37: Snow Chain
TYRES & RIMS Snow Chain 4.3 Snow Chain 4.4 Tyre Replacement Usage Storage / Seasonal Replacement Requirements Snow chains increase the traction control on the During seasonal replacement,all tyres must be icy and snowy road conditions. changed. They can only be used on front tyres. Removed tyres must be kept hanged horizontally. - Page 38 TYRES & RIMS Tyre Replacement Removing the Wheel Bolts Lifting the Vehicle Lift the vehicle by using a proper type of lift Loosen all wheel bolts by using wheel wrench. WARNING device. Remove them according to the shown figure. • Prior to ingthe vehicle;...
-
Page 39: Tyre Replacement
TYRES & RIMS Replacement 4.4.2 Tyre Replacement Mounting the Tyres WARNING • Spare tyre is located on the vehicle only to use temporarily till the damaged tyre is repaired or replaced. • Keep the spare tyre ready to use after using it temporarily. -
Page 40: Tyres Rotation
10,000 km (6,250 miles), or sooner if irregular wear develops. Tire rotation is preventative maintenance to INFORMATION ensure proper vehicle operations. To check the tyre threads regularly please contact KARSAN authorized service stations. -
Page 41: Emergency Exit Of The Vehicle
EMERGENCY Emergency Exit of the Vehicle 5.1 Emergency Exits Emergency Hammers Your vehicle is equipped with emergency hammers. These hammers can be used to brake the emergency exit windows. WARNING • Remove the hammer. • Strike the window with hammer •... -
Page 42: Maintenance
Prior to washing the vehicle,ensure that the • Cleaning the electrical parts should be done aluminium parts. This may result in damage to engine is stopped and the transmission cools by authorized KARSAN service stations. the protective coating and cause discolouration down. or paint deterioration. •... -
Page 43: Corrosion Protection & Exterior Care
To protect the painted surfaces,humidity,snow To prevent corrosion,take the vehicle to an vehicle via automatic washing machine and other corrosive residues due to the weather authorized KARSAN service station to clean for this period.Only use hand washing conditions must be cleaned carefully. properly. - Page 44 Cleaning of New Vehicles Pressurized washing system can only be used after 2 months for the new vehicles. For this process use tap water and KARSAN approved cleaning agents. For pressurized washing system you can use cold or hot water. Depending on the manufacturer, %1 or %5 cleaning agent can be added to the water.
-
Page 45: Corrosion
This salt remains on the mudguards by using Karsan touch-up paint before rust and other painted surfaces. Paint Maintenance begins to form. First, remove the dirt and grease with a clean soft cloth. - Page 46 NOTES MAINTENANCE...
- Page 47 MAINTENANCE NOTES...
- Page 48 Telefon: +90 (224) 484 21 70 Faks: +90 (224) 484 21 69 Descriptions, images, illustrations and informations given in this booklet are valid on issue date. Karsan reserves the rights to change the information and properties given in this booklet with out any prior notice.
Need help?
Do you have a question about the Jest Electric and is the answer not in the manual?
Questions and answers