
Related Manuals for Samsung YP-M1JCB


Summary of Contents for Samsung YP-M1JCB
-
Page 1: Mp3 Player
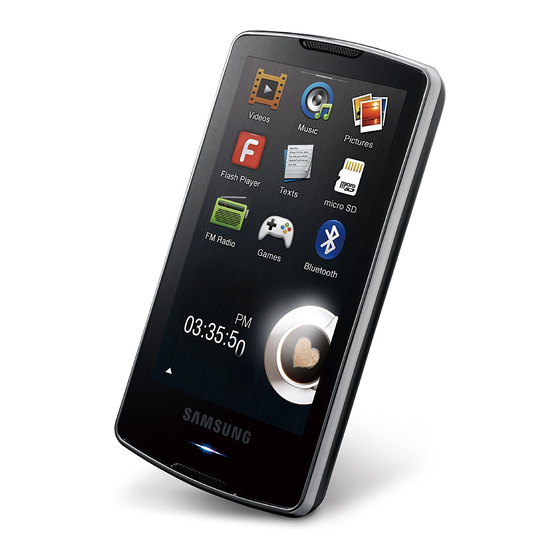
MP3 Player user manual imagine Thank you for purchasing this Samsung product. To receive a more complete service, please register your product at www.samsung.com/register the possibilities YP-M... - Page 2 You can change and decorate buttons and icons on the background. ACOUSTIC WONDER Your new MP3 player has built-in DNSe™ (Digital Natural Sound engine), Samsung’s unique sound technology created to deliver richer, deeper sound for an unbelievable listening experience.
-
Page 3: Safety Information
safety information What the icons and signs in this user manual mean : Means that death or serious personal injury is a risk. WARNING Means that there is a potential risk for personal injury or material damage. CAUTION To reduce the risk of fi re, explosion, electric shock, or personal injury when using your MP3 player, follow these basic safety precautions: CAUTION... -
Page 4: Protect Yourself
Do not use the product if the screen is cracked or broken. Broken glass or acrylic could cause injury to your hand or face. Bring the product to a Samsung service centre to replace the screen. Damage caused by careless handling will void the warranty. - Page 5 Prevent any foreign particles or dust from entering into the product. Do not place the product near magnetic objects. Be sure to backup important data. Samsung is not responsible for data loss. Use only accessories provided by or approved by Samsung.
-
Page 6: Table Of Contents
contents THE BASICS What’s included Your MP3 player Resetting the system Charging the battery Caring for the battery Turning the Power on & off Controlling the volume Disabling the touch screen Browsing for fi les using “fi le browser” Deleting fi les with “fi le browser” Checking the status indicators Using the touch screen Setting the main menu display... - Page 7 contents EMODIO WATCHING A VIDEO LISTENING TO MUSIC VIEWING PICTURES PC requirements Using EmoDio Watching a video Video playback display Touch icons for playback control Creating chapters Screen capture Using bookmarks Using the video menu Listening by category Music playback display Touch icons for playback control Repeating a section Creating a playlist on your MP3 player...
- Page 8 contents READING TEXT USING THE EXTERNAL MEMORY CARD LISTENING TO FM RADIO PLAYING VIDEO GAMES Reading text Using bookmarks Using the text menu Inserting the external memory card Removing the external memory card Playing a fi le in the external memory card To transfer a fi...
- Page 9 contents USING BLUETOOTH SETTING THE ALARM VIEWING DATACASTS VOICE RECORDING ENJOYING FLASH FILES 102 What is Bluetooth? 103 Bluetooth settings 105 Connecting a Bluetooth device 108 Using a Bluetooth stereo headset 109 Using a Bluetooth mobile phone 114 Transferring fi les to/from a Bluetooth device 116 Checking Bluetooth devices 118 Setting the alarm...
- Page 10 contents USING THE CALCULATOR VIEWING THE ADDRESS BOOK TROUBLESHOOTING APPENDIX 124 Using the calculator 125 Viewing the address book 127 Troubleshooting 130 Menu tree 131 Product specifi cations 134 Licence...
-
Page 11: The Basics
WHAT’S INCLUDED Your new MP3 player comes with these accessories. If you’re missing any of these items, please contact a Samsung Customer Service Centre near you. Player Earphones USB Cable The accessories in your box may look slightly different than these. -
Page 12: Your Mp3 Player
YOUR MP3 PLAYER 12 _ the basics Down volume button Press to reduce the volume Up volume button Press to increase the volume Microphone Power & Hold button Press once to lock the touch screen. Press once again to unlock the touch screen. - Page 13 YOUR MP3 PLAYER (Continued) External memory card slot USB connection port Earphones Labelled “L” for the left earpiece and “R” for the right earpiece. Earphone connection jack Also serves as an antenna for the FM Radio in the MP3 player. the basics _ 13...
-
Page 14: Resetting The System
RESETTING THE SYSTEM If your MP3 player won’t turn on, won’t play music, or isn’t recognised by your computer when you connect it, you may have to reset the system. 14 _ the basics Press and hold the [ more than 10 seconds. The system will be initialized. -
Page 15: Charging The Battery
CHARGING THE BATTERY Charge the player before using it for the fi rst time and when you haven’t used it for a while. Screen Display <USB connected> < > - Charging < > - Fully Charged 1. Connect the smaller end of the USB cable to the USB connection port on the bottom of the player. -
Page 16: Caring For The Battery
CARING FOR THE BATTERY Your battery will last longer if you follow these simple guidelines for caring and storing the player. • Recharge the battery within the temperature range of 5°C~35°C (40°F~95°F). • Do not overcharge (longer than 12 hours). Excessive charging or discharging may shorten the battery’s life. -
Page 17: Controlling The Volume
CONTROLLING THE VOLUME You can adjust the volume while a fi le is playing back. Press the [ ], [ DISABLING THE TOUCH SCREEN The Hold function disables the touch screen of your MP3 player, so that if you accidentally bump it while working out, for example-your music won’t be interrupted. -
Page 18: Browsing For Files Using "File Browser
BROWSING FOR FILES USING “File Browser” Search easily for fi les using the “File Browser” function. 1. Select the icon on the main menu screen. 2. Select a desired folder to bring up the fi le list. 3. Select a desired fi le. The fi... -
Page 19: Checking The Status Indicators
CHECKING THE STATUS INDICATORS The player’s current status indicators are displayed on the top of the screen. Alarm Indicator Bluetooth Indicator Memory Card Indicator The screen pictures are for illustration purposes only. The actual screen may differ. NOTE Lock Indicator Current Time Battery Status the basics _ 19... -
Page 20: Using The Touch Screen
USING THE TOUCH SCREEN Tap on the touch screen with your thumb or fi ngertip. Do not use force when touching the touch screen, as it may cause damage to the screen. NOTE To avoid damage to the touch screen, do not use any object other than your thumb or fi... - Page 21 USING THE TOUCH SCREEN (Continued) Tapping Tap on the desired part on the touch screen. Examples To select an item or move to the next screen To display playback information and function icons Run a function by tapping on its icon, or select an item from the list.
- Page 22 USING THE TOUCH SCREEN (Continued) Longer Touch Press and hold the desired part of the touch screen. Examples Moving to the previous playback screen. Creating video chapters 22 _ the basics Press and hold the recently played fi le or to move to the playback screen of the current fi...
- Page 23 USING THE TOUCH SCREEN (Continued) Dragging Tap and drag your thumb or fi ngers to the desired point. Examples Browsing the main menu screen Moving to the previous/ next list Controlling the Play Status Bar Page Move / Playback Searching Moving Widget Icons Drag on an empty space of the touch screen horizontally to browse the main menu screen.
-
Page 24: Setting The Main Menu Display
SETTING THE MAIN MENU DISPLAY In the main menu, tap the [ ] icon at the bottom to display a context menu where you can customize the main menu. To change the main menu style Select a desired main menu style. 24 _ the basics You can change the main menu style. - Page 25 SETTING THE MAIN MENU DISPLAY (Continued) To change the main menu screen layout Tap a main menu icon and drag it to a desired location/page. Drag the main menu icon to the lower menu bar to delete the icon from the main menu.
-
Page 26: Widget Icons
WIDGET ICONS A Widget is a small specialized GUI application on the screen that provides easy access to frequently used functions such as a clock, calendar and note. Place the clock, calendar and other widgets on your main menu screen for convenience, providing direct and easy access. - Page 27 WIDGET ICONS (Continued) Tap to schedule your sleep time. It will automatically turn the power off at the scheduled time. You can set also the sleep time in <Settings> See page 45. You can check the remaining capacity of the battery. You can listen to music or FM radio in the main menu screen without switching to music or FM radio mode.
-
Page 28: Using Widgets
USING WIDGETS To set the current time 1. Tap on the digital or analogue clock widget on the main menu screen. 2. Set each <Year>, <Month>, <Day>, <Hour>, <Min>, <AM, PM>. 3. Tap <OK>. Clock Option <Style>: You can change the style of the clock widget on the main menu screen. - Page 29 USING WIDGETS (Continued) To input a memo 1. Tap on the memo widget on the main menu screen. 2. Select <New Memo>. 3. Enter your memo and tap <OK>. For using the keyboard, see page 35. Memo options <Style>: You can change the style of the memo widget on the main menu screen.
- Page 30 USING WIDGETS (Continued) To view the calendar/schedule You can check your schedules only when the schedule fi le(.ics fi le format) created using MS offi ce outlook has been transferred to <File Browser> <My Pack> 1. Tap on the calendar widget on the main menu screen. 2.
- Page 31 USING WIDGETS (Continued) To change the world time clock You can check the location and date/time of major world cities based on their respective time zone. Before you start - First, you should set the clock to the current time. See page 44.
- Page 32 USING WIDGETS (Continued) To watch a slideshow Tap on the slideshow widget on the main menu screen. The slideshow will start. During the slideshow, tap the screen once to display the icon where you set the options. Slideshow options <Select Slideshow Folder>: You can select a desired folder and have its pictures appear in a slideshow.
-
Page 33: Using The Mini-Player/Quick Tray
USING THE MINI-PLAYER/QUICK TRAY To open the Mini-player/Quick Tray Tap on the top side of the touch screen. To close the Mini-player/Quick Tray Tap on the touch screen. To use the Mini-player You can listen to music or FM radio without moving to the music or FM radio mode by using the Mini-player. - Page 34 USING THE MINI-PLAYER/QUICK TRAY (Continued) To use the Quick Tray Provides quick access to the main menu, selecting sound output, Hold / Display off and Bluetooth stereo headset connecting. 34 _ the basics Moves to the main menu screen. Sets the sound output to Speaker or Earphone.
-
Page 35: Using Virtual Keyboard
USING VIRTUAL KEYBOARD You can use the virtual keyboard to enter text in the widget memo, enter your personal information and rename a Bluetooth device. To enter text Use the virtual keyboard to enter text and tap <OK>. The keyboard type differs depending on the use conditions. NOTE The input mode will switch in the order of the button label... -
Page 36: Switching List Mode
SWITCHING LIST MODE You can switch the current list mode (video, music or text mode) to a desired view mode. Videos In the thumbnail view mode, you can check the last run scene and play time of a video. NOTE Music You can switch the view mode when selecting <Album>... - Page 37 SWITCHING LIST MODE (Continued) Pictures Texts You can check the progress of the text you read. NOTE the basics _ 37...
-
Page 38: Connecting To A Tv
CONNECTING TO A TV Connect the player to your TV with an additional TV-OUT cable and view multimedia fi les, such as photos and videos, on the TV screen. Before you start - In <Settings> mode according to your area. See page 45. 1. -
Page 39: Using Screen Rotation
USING SCREEN ROTATION The player is equipped with the three-axis sensor that detects the tilting angle to rotate the screen vertically or horizontally accordingly. Rotate your player sideways for horizontal view. This feature is available in some list screens and music, picture and text view modes. -
Page 40: Changing The Settings And Preferences
CHANGING THE SETTINGS AND PREFERENCES You can change the pre-set factory values to truly customize your MP3 player. 1. Select the icon on the main menu screen. 2. Select a desired item in the setting list. 3. Select a desired setting option. 4. -
Page 41: Sound Setting Options
CHANGING THE SETTINGS AND PREFERENCES (Continued) Sound Setting Options You can set the master EQ, touch tone and wise volume, etc. Street Mode: Allows you to hear the music outdoors clearly by fi ltering out some of the street noise. Audio Upscaler: This function upscales audio so it sounds closer to its original condition. -
Page 42: Display Setting Options
CHANGING THE SETTINGS AND PREFERENCES (Continued) Display Setting Options Change the font, display off time and brightness of your screen, etc. Font: You can change the font type of the menu language. In some menu languages, <Font> menu will not be displayed. -
Page 43: Language Setting Options
CHANGING THE SETTINGS AND PREFERENCES (Continued) Language Setting Options The menus on your new MP3 player can be set to appear in any one of the available languages. You can change your preference language easily. Menu: Set the menu language. Select from <English>, <... -
Page 44: Time Setting Options
CHANGING THE SETTINGS AND PREFERENCES (Continued) Time Setting Options Setting the time allows you to use the date&time, date type and even time zone. Date&Time: Set the current date and time. Tap on the top or bottom of the digits of <Year>, <Month>, <Day>, <Hour>, <Min>... -
Page 45: System Setting Options
CHANGING THE SETTINGS AND PREFERENCES (Continued) System Setting Options Choose the sleep timer and default setting that’s right for you. My Info: You can set your name and birth date. My Name Setting- Tap on the input area below the <My Name>... - Page 46 CHANGING THE SETTINGS AND PREFERENCES (Continued) System Setting Options (Continued) About: Checks the fi rmware version and memory capacity. Firmware - Displays the current fi rmware version. Memory - <Used> indicates the usage, <Remaining> indicates the remaining capacity and <Total> indicates the total memory capacity. You need to have at least 300 MB of free space on the player for the upgrade.
- Page 47 CHANGING THE SETTINGS AND PREFERENCES (Continued) When the pc connection is set to <MSC> Transferring fi les to removable disk When the player is connected to the PC, it will be recognised as removable disk where you can transfer desired fi les to and from the PC. Before you start - Connect the player to your PC.
- Page 48 CHANGING THE SETTINGS AND PREFERENCES (Continued) When the pc connection is set to <MSC> (Continued) Disconnecting from your PC Follow the steps below to prevent damage to the player and data when disconnecting from your PC. 1. Place the mouse cursor on top of icon on the taskbar at the bottom right corner of the desktop and click the left mouse button.
-
Page 49: Pc Requirements
EmoDio EmoDio is a software application provided for this MP3 player for various content-related services as well as device support. EmoDio is subject to change without prior notice for further improvement. Before you start - For <EmoDio> installation, refer to the Quick Start Guide of the player. -
Page 50: Using Emodio
USING EMODIO EmoDio is the easy-to-use software application that helps you organize your fi les on your PC. With your fi les already sorted and organized in EmoDio, you can quickly transfer them to your MP3 player without searching your entire hard drive for the right fi... - Page 51 USING EMODIO (Continued) Transferring fi les to the player with EmoDio 1. Connect the player to your PC with the USB cable. <EmoDio> will automatically start when the player is connected to your PC. 2. Click <My PC>. 3. Click <Add Folder> or <Add File> at the bottom of <EmoDio>. 4.
-
Page 52: Watching A Video
watching a video As fi le encoding is not necessary, you can enjoy videos as sharp and clear as they were originally produced. Before you start - Turn on the player and check the battery. WATCHING A VIDEO 1. Select the icon on the main menu screen. -
Page 53: Video Playback Display
VIDEO PLAYBACK DISPLAY Tap on the screen if you want to display the video playback information and icons. DNSe Mode Indicator Current /Total Play Time Play Status Bar Bookmark Icon Play/Pause/Search Icon The screen pictures are for illustration purposes only. The actual screen may differ. NOTE Play/Pause/Search Indicator File Name... -
Page 54: Touch Icons For Playback Control
TOUCH ICONS FOR PLAYBACK CONTROL Tap once 3 seconds after the current fi le started playing to play the beginning of the current fi le. Tap twice 3 seconds after the current fi le started playing to play the previous fi le. Press and hold to move backwards in the current fi... -
Page 55: Creating Chapters
CREATING CHAPTERS You can automatically create 5 chapters of the current video, of which you can then tap a desired chapter to move directly to it. 1. Press and hold the screen during video playback. Chapters will be created. 2. Select a desired chapter. The player starts playing the video from the selected chapter. -
Page 56: Using Bookmarks
USING BOOKMARKS To set a bookmark Once you bookmark a specifi c scene that you want to see again, you can enjoy it at any time you want. 1. Tap the [ want during video playback. 2. Select <Add Bookmark>. The currently played/stopped point is set to a bookmark. -
Page 57: Using The Video Menu
What is DNSe? Digital Natural Sound Engine (DNSe) is a sound effect function for MP3 NOTE players developed by Samsung. It provides various sound settings to enhance the type of music you’re listening to. To adjust the brightness You can adjust the brightness of the video screen. -
Page 58: To Select The Screen Size
USING THE VIDEO MENU (Continued) To select the screen size You can select the display size of the video playback. 1. Select <Display> 2. Select a desired screen size. Screen Size Menu <Standard> For some video fi les, the screen size may not be adjusted. NOTE 58 _ watching a video <Screen Size>. - Page 59 USING THE VIDEO MENU (Continued) To view the subtitle You can play a video along with its subtitle if it is included. 1. Select <Display> 2. Tap <On> or <Off>. Each tap of the <On> or <Off> toggles between subtitle on/off. Only the smi fi...
- Page 60 USING THE VIDEO MENU (Continued) To set the horizontal stroke You can fast forward through a fi le at various intervals when you touch the screen to the left or right. Skip a whole fi le or skip several seconds at a time. 1.
-
Page 61: Listening To Music
listening to music You can play and enjoy various music formats. Before you start - Turn on the player and check the battery. LISTENING BY CATEGORY 1. Select the icon on the main menu screen. 2. Select a desired item in the music list. 3. - Page 62 LISTENING BY CATEGORY (Continued) Music List File information including the artist name, album name, music title and genre will be displayed according to the ID3 Tag information on the appropriate music fi le. A fi le without an ID3 Tag is displayed as [Unknown]. Now Playing : Plays a recently played fi...
-
Page 63: Music Playback Display
MUSIC PLAYBACK DISPLAY Tap on the screen if you want to display the music playback icons. The screen pictures are for illustration purposes only. The actual screen may differ. NOTE Current track playing / Total number of tracks Indicator Music Play Screen Play Mode Indicator Current /Total Play Time Play/Pause/Search Icon... -
Page 64: Touch Icons For Playback Control
TOUCH ICONS FOR PLAYBACK CONTROL Tap once after 3 seconds of play to play the beginning of the current track. Tap twice after 3 seconds of play to play the previous fi le. Press and hold to move backwards in the current fi le. Tap to pause during playback. -
Page 65: Repeating A Section
REPEATING A SECTION This function enables you to listen to specifi c parts of a track repeatedly. It’s helpful when learning a language, for example. 1. Tap the [ ] icon at the beginning of the section you want to repeat. The starting point is set and <A 2. -
Page 66: Creating A Playlist On Your Mp3 Player
CREATING A PLAYLIST ON YOUR MP3 PLAYER If you’ve already downloaded fi les to your MP3 player, you can create a “Favourites” playlist without EmoDio or your PC. To add a new playlist 1. Select the 2. Select <Playlists>. 3. Tap the [ 4. -
Page 67: To Delete A Playlist
CREATING A PLAYLIST ON YOUR MP3 PLAYER (Continued) To edit the playlist name 1. Select the 2. Select <Playlists>. 3. Tap the [ 4. Select <Rename>. 5. Tap [ ] in the right corner of the playlist. 6. Edit your playlist name and tap <OK>. For using the keyboard, see page 35. - Page 68 CREATING A PLAYLIST ON YOUR MP3 PLAYER (Continued) To add a fi le to the playlist 1. Select the 2. Select <Music Browser>. 3. Tap the [ 4. Select <Add to Playlist>. 5. Select a desired playlist. 6. Select a fi le to add and tap <OK>. Tap the [ The selected fi...
- Page 69 CREATING A PLAYLIST ON YOUR MP3 PLAYER (Continued) To delete a fi le from a playlist 1. Select the 2. Select <Playlists>. 3. Select a desired playlist. 4. Tap the [ Tap [ 5. Select a fi le to delete and tap <OK>. Tap the [ The selected fi...
-
Page 70: Using The Music Menu
<myDNSe2> in <Settings> What is DNSe? Digital Natural Sound Engine (DNSe) is a sound effect function for MP3 players developed by Samsung. It provides various sound settings to enhance the type of music you’re listening to. 70 _ listening to music ] icon on the music play screen. -
Page 71: To Set The Play Mode
USING THE MUSIC MENU (Continued) To set the play mode Select the playback mode from the options below. 1. Select <Play Mode>. 2. Select a desired play mode. Play Mode Options Normal: Plays all fi les of the current music list in order one time. -
Page 72: To Select The Music Play Screen
USING THE MUSIC MENU (Continued) To select the music play screen Choose a background image from those provided to be displayed as you listen to music. 1. Select <Music Play Screen>. 2. Select a desired music play screen and tap <OK>. Music Play Screen Options Album Art: The album cover image displays if it is included in the ID3 Tag information of the music fi... - Page 73 USING THE MUSIC MENU (Continued) To set the horizontal stroke You can set the stroke interval of scrolling music fi le playback by dragging your thumb or fi ngers horizontally. 1. Select <Horizontal Stroke>. 2. Select a desired horizontal stroke. Select from <1 Song>, <5sec Skip>, <10sec Skip>, <30sec Skip>...
- Page 74 USING THE MUSIC MENU (Continued) To add to alarm sound You can add your favourite music fi le to the alarm sound list, so it can be heard the next time the alarm goes off. See page 118 to set the alarm. 1.
-
Page 75: Viewing Pictures
viewing pictures You can enlarge a picture or set a desired picture as a background image. Before you start - Turn on the player and check the battery. VIEWING PICTURES 1. Select the icon on the main menu screen. 2. Select a desired picture fi le. <Skin>... -
Page 76: Enlarging A Picture
ENLARGING A PICTURE You can zoom in a picture. 1. Tap the [ ] icon on the picture view screen. The zoom bar appears. 2. Use the zoom bar to enlarge the picture as desired. To cancel the picture enlarging, tap once on the touch screen and tap the [ ] icon. -
Page 77: Using The Picture Menu
USING THE PICTURE MENU Before you start - Tap the [ ] icon on the picture view screen. To set the slideshow effect You can set the transition effect for the way the current picture switches to the next one while watching a slideshow. 1. -
Page 78: To Select A Picture As A Background Image
USING THE PICTURE MENU (Continued) Before you start - Select a desired picture and tap the [ picture view screen. To select a picture as a background image You can save a desired picture as a background image for the screen. 1. - Page 79 USING THE PICTURE MENU (Continued) To transfer a picture to a Bluetooth device You can transfer picture fi les to a Bluetooth-compliant external device. 1. Select <Send>. 2. Select a desired Bluetooth device. If there is no Bluetooth device that you want in the list, tap the [ ] icon to scan for new devices.
-
Page 80: Reading Text
reading text Whether it’s a novel, the manuscript of a new story, or your research paper, your MP3 player allows you to read it… all while listening to music! Before you start - Turn on the player and check the battery. Set a preferred text language for text in <Settings>... -
Page 81: Using Bookmarks
USING BOOKMARKS To set a bookmark Set a bookmark to return to that point in the text at any time. 1. Tap the [ while viewing a text fi le. 2. Select <Add Bookmark>. The current page will be bookmarked with the [ symbol displayed on the top in full screen. -
Page 82: Using The Text Menu
USING THE TEXT MENU Before you start - Tap the [ To set the text viewer type Choose what type you’d like the text to appear. 1. Select <Text Viewer Type>. 2. Select a desired text viewer type and tap <OK>. To change the font size You can change the font size of the text. -
Page 83: Using The External Memory Card
Do not insert the memory card upside down or in a wrong direction. Be sure to backup important data. Samsung is not responsible for data loss due to a damaged memory card. - Page 84 PLAYING A FILE IN THE EXTERNAL MEMORY CARD You can play pictures, videos, text and music fi les in the external memory card directly on the player. 1. Select the icon on the main menu screen. 2. Select a desired folder to bring up the fi le list. 3.
-
Page 85: To Transfer A Fi Le In The Memory Card To The Player
TO TRANSFER A FILE IN THE MEMORY CARD TO THE PLAYER You can transfer a fi le in the memory card to the player. 1. Select the icon on the main menu screen. 2. Select a desired folder to bring up the fi le list. 3. -
Page 86: Deleting A Fi Le In The External Memory Card
DELETING A FILE IN THE EXTERNAL MEMORY CARD You can delete a fi le in the memory card directly on the player. 1. Select the icon on the main menu screen. 2. Select a desired folder to bring up the fi le list. 3. -
Page 87: To Transfer A Fi Le In The Player To The Memory Card
TO TRANSFER A FILE IN THE PLAYER TO THE MEMORY CARD You can transfer a fi le in the player to the memory card. 1. Select the icon on the main menu screen. 2. Select a desired folder to bring up the fi le list. 3. -
Page 88: To Use The Mute Function
listening to FM radio You can listen to or record an FM radio program. Before you start - Connect the earphones, then turn on the player, and check the battery. LISTENING TO FM RADIO Select the icon on the main menu screen. FM radio reception will start. -
Page 89: Fm Radio Display
FM RADIO DISPLAY News Today Headline [Manual mode] Manual Mode Icon Next Frequency Icon Current Frequency(MHz) Indicator RDS Indicator Menu Icon Record Icon Preset Mode Icon What is RDS? Radio Data System(RDS) provides the reception and display of messages such as NOTE broadcasting information. -
Page 90: To Search For Fm Stations
TO SEARCH FOR FM STATIONS Press and hold the [ The search will stop at the frequency nearest from the point the icon is released. Tap the [ ] icon to progress through the frequencies one by one in Manual mode. Moves to frequencies whenever the icon is pressed. -
Page 91: Recording Fm Radio
RECORDING FM RADIO To record FM Radio broadcasting You can record an FM radio program at any time while listening to the radio. Select a radio frequency to record on the FM Radio screen and tap the [ The player starts recording. To stop recording 1. -
Page 92: Switching To Preset Or Manual Mode
SWITCHING TO PRESET OR MANUAL MODE To switch to Preset Mode Select this mode if you want to search through your saved FM presets one preset at a time. Tap [ ] in Manual mode. If no preset frequencies are set, the player will not switch to Preset mode. -
Page 93: Using The Fm Radio Menu
USING THE FM RADIO MENU To store stations in the preset memory You can store up to 30 stations in your MP3 player’s memory and return to them with the tap of just one icon. Manual - choose only the stations you want to store 1. -
Page 94: To Listen To Preset Stations
USING THE FM RADIO MENU (Continued) To listen to preset stations Select a desired preset frequency in Preset mode. You can listen to the stored radio frequency. To delete a preset You can remove a preset frequency from the preset list. 1. -
Page 95: To Set The Fm Region
USING THE FM RADIO MENU (Continued) To set the FM region You can change an FM region setting in preparation for overseas travel. 1. Tap the [ 2. Select <FM Region>. 3. Select a desired FM region. Frequency range by region Worldwide Korea Japan... -
Page 96: Playing Video Games
playing video games Your MP3 player comes with exciting games already loaded! PLAYING VIDEO GAMES 1. Select the icon on the main menu screen. 2. Select a desired game. Games may be added or changed without notice. For more information, see the help section of the appropriate game. NOTE 96 _ playing video games... - Page 97 PLAYING VIDEO GAMES (Continued) AstroRanger This is a rhythm beat game where you will gain scores by tapping the object-like button when a target object comes into the target zone according to the selected music. Select music, diffi culty and button type when you start the game.
- Page 98 PLAYING VIDEO GAMES (Continued) Omok2 To win this two person strategy board game, put your pieces in an unbroken row of fi ve stones horizontally, vertically or diagonally before the opponent does. Tap on the area you want to put your stone, and the area is enlarged.
- Page 99 PLAYING VIDEO GAMES (Continued) To play a 2-person Omok game in Bluetooth mode Before you start - If the player is connected to a Bluetooth stereo headset, mobile phone or external device, disconnect it fi rst. Set the Bluetooth mode of the player to on. See page 103. 1.
- Page 100 PLAYING VIDEO GAMES (Continued) PowWow This is a shooting game where you can gain scores by shooting the moving target. Tap the moving target. If you want to reload your gun, tap <Reload> on the screen. WiseStar This is a puzzle game where you will gain space areas by aligning three planets in a raw horizontally or vertically, which will be exploded with a change to the background colour.
- Page 101 PLAYING VIDEO GAMES (Continued) Sudoku Champ This is a board game where you have to fi ll numbers from 1 to 9 in each of not only the 9X9 rows and columns but also 3X3 small cells. Select an empty box and fi ll a number from 1 to 9 only one time each using the number pad below.
-
Page 102: Using Bluetooth
using bluetooth Using Bluetooth wireless, you can connect your player wirelessly to other Bluetooth devices and exchange data with them, talk hands-free or enjoy music using a Bluetooth stereo headset. WHAT IS BLUETOOTH? The Bluetooth device may cause a noise or malfunction, depending on the use conditions. -
Page 103: Bluetooth Settings
When not in use, set the <My Info> <Bluetooth> <On>, the battery usage time is reduced. NOTE The Bluetooth features of the player are optimized with Samsung products. If used with third party products, the Bluetooth features may not work properly. Description of the Bluetooth icons... -
Page 104: To Rename A Bluetooth Device
BLUETOOTH SETTINGS (Continued) Before you start - Tap the [ To set off the Bluetooth mode 1. Select <My Info>. 2. Tap [ ] next to the Bluetooth item. The indicator switches to the [ symbol disappears. To rename a Bluetooth device You can rename a Bluetooth device in the device list. -
Page 105: Connecting A Bluetooth Device
CONNECTING A BLUETOOTH DEVICE If you want to use the Bluetooth function, scan for a Bluetooth device and connect it with your player fi rst. Before you start - First, set the Bluetooth mode of the player to enabled. Also set a desired Bluetooth device to Bluetooth-enabled mode. (refer to the Bluetooth device’s user manual) If the player is connected to a Bluetooth device already, disconnect it fi... - Page 106 CONNECTING A BLUETOOTH DEVICE (Continued) To register a new Bluetooth device Search for a new device and register it with your player. You only need to register it once. 1. Tap the [ Scans for Bluetooth devices available. You can use the Page icon to scroll through the Bluetooth devices in the list and select a desired one.
- Page 107 CONNECTING A BLUETOOTH DEVICE (Continued) To connect a registered Bluetooth device You can connect to a Bluetooth device directly, if it’s already registered with the player. 1. Select and drag a registered Bluetooth device to the ] icon. 2. Select a desired Bluetooth service and tap <OK>. You can use the Page icon in the upper right corner to scroll through the Bluetooth devices in the list and select a desired one.
-
Page 108: Using A Bluetooth Stereo Headset
For some video and music fi les, it may not work during NOTE playback. Use only a Bluetooth-certifi ed stereo headset. This player may not be compatible with all Bluetooth stereo headsets. Bluetooth-compliant Stereo Headsets Company SAMSUNG Sony Ericsson MobiFren MOTOROLA I.Tech 108 _ using bluetooth Model... -
Page 109: Using A Bluetooth Mobile Phone
USING A BLUETOOTH MOBILE PHONE You can make and receive phone calls on your player once you connect a Bluetooth mobile phone. The player will function as a hands-free device. To connect a Bluetooth mobile phone Connect a desired Bluetooth mobile phone. When the connection is successfully done, you will see the [ With some mobile phones, the search device and mobile conversation (placing/receiving calls) functions may not work properly. -
Page 110: To Make A Call Using The Player
USING A BLUETOOTH MOBILE PHONE (Continued) To make a call using the player 1. In the Bluetooth screen, select <Call by Number>. 2. Enter the phone number for the other person. 3. Tap the [ You are now placing a call to the other person. If the connected mobile phone has set shortcut numbers, you can directly make a call on the player by pressing and holding the last number of the NOTE... - Page 111 USING A BLUETOOTH MOBILE PHONE (Continued) To make a call using the call history 1. In the Bluetooth screen, select <Call History>. 2. Select a desired phone number. You are now placing a call to the other person. To delete a phone number in the call history 1.
- Page 112 USING A BLUETOOTH MOBILE PHONE (Continued) To answer the phone 1. You will see <Connect?> when you have an incoming call. 2. Select <Yes>. You can now make conversation. To switch to the mobile phone while talking on the player (YP-M1) While talking on the player, select <Voice to Phone>.
-
Page 113: To Adjust The Volume
USING A BLUETOOTH MOBILE PHONE (Continued) To adjust the volume While talking on the hands-free, press the [ ] button to adjust the volume. To end the phone call Select <Disconnect> while making conversation. The call is hung up. using bluetooth_ 113... -
Page 114: Transferring Files To/From A Bluetooth Device
TRANSFERRING FILES TO/FROM A BLUETOOTH DEVICE You can transfer music, picture and video fi les to Bluetooth-compliant external devices such as an MP3 player, mobile phone, etc. to the player or vice versa. To transfer a fi le on the player to an external device Before you start - Check if the Bluetooth device supports the fi... - Page 115 TRANSFERRING FILES TO/FROM A BLUETOOTH DEVICE (Continued) To exit the File Transfer mode 1. Press and hold the [ Each time you tap the [ screen and you will see the fi le transfer close window. 2. Select <Yes>. The fi le transfer mode is closed. To transfer a fi...
-
Page 116: Checking Bluetooth Devices
CHECKING BLUETOOTH DEVICES To check the Bluetooth device that is connected You can check the name, address and services available of the connected Bluetooth device. 1. Select the connected Bluetooth device. 2. Tap the [ 3. Select <Device Info>. You will see information on the selected device. Service items available in the selected device will be checked. - Page 117 CHECKING BLUETOOTH DEVICES (Continued) To disconnect a Bluetooth device 1. Select the connected Bluetooth device. 2. Tap the [ The Bluetooth device will be disconnected. To remove a registered Bluetooth device Before you start - If the player is connected to the Bluetooth device to remove, disconnect it fi...
-
Page 118: Setting The Alarm
setting the alarm This player has an alarm which can be set to go off at a scheduled time. Before you start - First, you should set the clock for the current time. See page 44. SETTING THE ALARM 1. Select the icon on the main menu screen. -
Page 119: To Delete An Alarm Setting
SETTING THE ALARM (Continued) To turn off an alarm The player will sound the alarm when it reaches the scheduled time. To turn off the alarm, select <Alarm Off>. To delete an alarm setting 1. Tap [ 2. Select an alarm setting to delete. Tap the [ 3. -
Page 120: Viewing Datacasts
viewing datacasts You can automatically receive updated information without having to visit your frequently visited news, blog and UCC sites every time. Before you start - Transfer a desired channel post to the player using <EmoDio>. VIEWING DATACASTS You can view channel posts added to <Datacasts>. 1. -
Page 121: Voice Recording
voice recording You can make a voice recording. VOICE RECORDING To make a voice recording 1. Select the 2. Tap the The player starts recording. Do not put the microphone too close or far away from your mouth as it may cause a poor recording. -
Page 122: To Stop Voice Recording
VOICE RECORDING (Continued) To stop voice recording 1. Tap the A message appears asking you if you want to listen to the fi le you just recorded. 2. Select <Yes> or <No>. Selecting <Yes> will play the just recorded fi le. Selecting <No>... -
Page 123: Viewing Fl Ash Fi Les
enjoying fl ash fi les You can enjoy viewing fl ash fi les(.swf fi le format). VIEWING FLASH FILES 1. Select the icon on the main menu screen. 2. Select a desired fl ash fi le. During playback, tap [ Down, Left, Right] with the <OK>... -
Page 124: Using The Calculator
using the calculator The player includes a convenient calculator. USING THE CALCULATOR 1. Select the icon on the main menu screen. 2. Calculate numbers by tapping on the touch screen. Tap on the [ ] icon to display the numbers with the thousands separator (,). NOTE 124 _ using the calculator... -
Page 125: Viewing The Address Book
viewing the address book You can download a phone number address book using the Bluetooth function and directly call another person on the player. Before you start - First, use the Bluetooth-based fi le transfer function to download the address book from an external device. For more information, refer to <To transfer a fi... - Page 126 VIEWING THE ADDRESS BOOK (Continued) To make a call in the address book 1. Select a name to make a call in the Address Book screen. 2. Select a desired phone number. You are now placing a call to the other person. To insert a picture in the address book 1.
-
Page 127: Troubleshooting
If you have a problem with your new MP3 player, check for a solution in this list. If the problem persists, contact your local Samsung Customer Service Centre. PROBLEM Power will not turn on. Buttons do not work. The screen will not turn on. - Page 128 PROBLEM Battery life differs from what is stated in the manual. EmoDio Program Malfunction Connection to your PC is disabled. The fi le transfer rate is too slow. Player isn’t playing. File upload doesn’t work. 128 _ troubleshooting SOLUTION • The battery life can vary depending on the sound mode and display setting.
- Page 129 fi le or data transmission. If this is the case, it may cause serious damage not only to fi les/data but also to the product. Samsung is not responsible for data loss. • Check if the fi le is in Variable Bit Rate (VBR) format.
-
Page 130: Menu Tree
appendix MENU TREE Here’s a quick look at how the menus and functions are organized on your new MP3 player. Menu Select Screen File Browser Videos Flash Player FM Radio Datacasts Calculator 130 _ appendix Alarm Settings Sound Display Language Music Pictures Texts... -
Page 131: Product Specifi Cations
PRODUCT SPECIFICATIONS Model Name Rating File Compatibility Earphone Output Output Frequency Range Signal to Noise Ratio YP-M1 DC 5.0V / 1 A MPEG1/2/2.5 Layer3 (8kbps ~ 320kbps, 8kHz ~ 48kHz), WMA (8kbps ~ 320kbps, 8kHz ~ 48kHz), AAC-LC (16kbps ~ 256kbps, 8kHz ~ 48kHz), AUDIO AAC-Plus (16kbps ~ 256kbps, 16kHz ~ 44.1kHz), Enhanced-AAC-Plus (16kbps ~ 56kbps, 32kHz ~ 44.1kHz),... - Page 132 Supported Number of Files/Folders Play Time (when using the earphones) Temperature Range for Operation Case Weight Dimensions (WxHxD) Speaker Power Output Impedance Frequency Range FM Radio FM Signal to Noise Ratio FM Useable Sensitiivity FM T.H.D 132 _ appendix File: Max. 5000 Folder : Max.
-
Page 133: Wireless System
PRODUCT SPECIFICATIONS (Continued) Wireless System Bluetooth QD ID Emission Type Transmit Frequency Receive Frequency No. of channels Modulation System Communication Mode Humidity Spec Version Supported Module The contents of this Manual are subject to change without prior notice for further improvement. -
Page 134: Licence
LICENCE The product player accompanying this user manual is licenced under certain intellectual property rights of certain third parties. This licence is limited to private non-commercial use by end-user consumers for licenced contents. No rights are granted for commercial use. The licence does not cover any product player other than this product player and the licence does not extend to any unlicenced product player or process conforming to ISO/IEC 11172-3 or ISO/IEC 13818-3 used or sold in combination... -
Page 135: Correct Disposal Of Batteries In This Product
CORRECT DISPOSAL OF THIS PRODUCT (WASTE ELECTRICAL & ELECTRONIC EQUIPMENT) (Applicable in the European Union and other European countries with separate collection systems) This marking on the product, accessories or literature indicates that the product and its electronic accessories (e.g. charger, headset, USB cable) should not be disposed of with other household waste at the end of their working life. -
Page 136: Contact Samsung World Wide
CONTACT SAMSUNG WORLD WIDE If you have any questions or comments relating to Samsung products, please contact the SAMSUNG Customer Care Centre. Country CANADA 1-800-SAMSUNG(726-7864) MEXICO 01-800-SAMSUNG(726-7864) U.S.A 1-800-SAMSUNG(726-7864) ARGENTINE 0800-333-3733 BRAZIL 0800-124-421, 4004-0000 CHILE 800-SAMSUNG(726-7864) NICARAGUA 00-1800-5077267 HONDURAS 800-7919267... - Page 137 810-800-500-55-500 MOLDOVA 00-800-500-55-500 LITHUANIA 8-800-77777 LATVIA 8000-7267 ESTONIA 800-7267 AUSTRALIA 1300 362 603 NEW ZEALAND 0800 SAMSUNG (0800 726 786) CHINA 400-810-5858, 010-6475 1880 HONG KONG 3698-4698 INDIA 3030 8282, 1800 110011, 1800 3000 8282 INDONESIA 0800-112-8888 MALAYSIA 1800-88-9999 1-800-10-SAMSUNG(726-7864)
- Page 139 REV. 0.0...
Need help?
Do you have a question about the YP-M1JCB and is the answer not in the manual?
Questions and answers