Table of Contents
Advertisement
1. Contents
1. Contents ............................................................................................................................. 1
2. Before Riding ..................................................................................................................... 3
3. Serial Number/Labels Location ...................................................................................... 3
4. Safe Riding .......................................................................................................................... 4
5. Driving ................................................................................................................................ 5
6. Use Genuine Spare Parts ................................................................................................. 5
7. Parts Location ................................................................................................................... 6
.......................................................................................................................... 23
....................................................................................................................... 24
........................................................................................................................... 26
8. How to Start the Engine ................................................................................................. 28
9. How to Ride the Scooter ................................................................................................ 29
............................................................................................................................... 29
..................................................................................................................... 30
............................................................................................................................ 30
................................................................................................................................ 30
10. Maintenance and Adjustment ....................................................................................... 34
............................................................................................................ 9
................................................................................................................... 15
....................................................................................................... 21
.......................................................................................................... 21
............................................................................................................. 22
............................................................................................................... 25
............................................................................................................... 25
...................................................................................................... 26
................................................................................................................... 27
............................................................................................................... 27
....................................................................................................... 28
................................................................................................................ 28
................................................................................................................ 29
............................................................................................................. 29
................................................................................................. 31
.......................................................................................................... 31
......................................................................................................... 32
................................................................................................................... 33
1
Advertisement
Table of Contents

Related Manuals for Sym MAXSYM 400


Summary of Contents for Sym MAXSYM 400
-
Page 1: Table Of Contents
1. Contents 1. Contents ..........................1 2. Before Riding ........................3 3. Serial Number/Labels Location ..................3 4. Safe Riding .......................... 4 5. Driving ..........................5 6. Use Genuine Spare Parts ....................5 7. Parts Location ........................6 ......................9 Combination instrument ........................ - Page 2 ....................34 Importance of maintenance ........................34 Routine checks ....................35 Oil level inspection/oil change ......................37 Transmission oil change ........................37 Fuel inspection ....................38 Coolant level inspection/filling ........................37 Coolant change ....................... 39 Brake system inspection ....................41 Throttle free play inspection ....................
-
Page 3: Before Riding
For a more comfortable and safety riding, please read this manual carefully. For your benefit, please ask your SYM dealer the operating manual and carefully read the following: Correct use of the scooter. Pre-delivery inspection and maintenance. -
Page 4: Safe Riding
Frame Number Vehicle Identification Number 4. Safe Riding It is very important to be relaxed and clothe properly when driving, observe traffic regulations, do not rush, always drive carefully and relaxed. Usually, most people would ride their newly bought scooter very carefully, but after they became familiar with their scooters, they tended to become reckless which may result in an accident. -
Page 5: Driving
Also, it may result in unexpected troubles and lower the scooter’s performance. Always use “SYM Genuine Spare Parts” to keep your scooters pure blood and to ensure its long service life. -
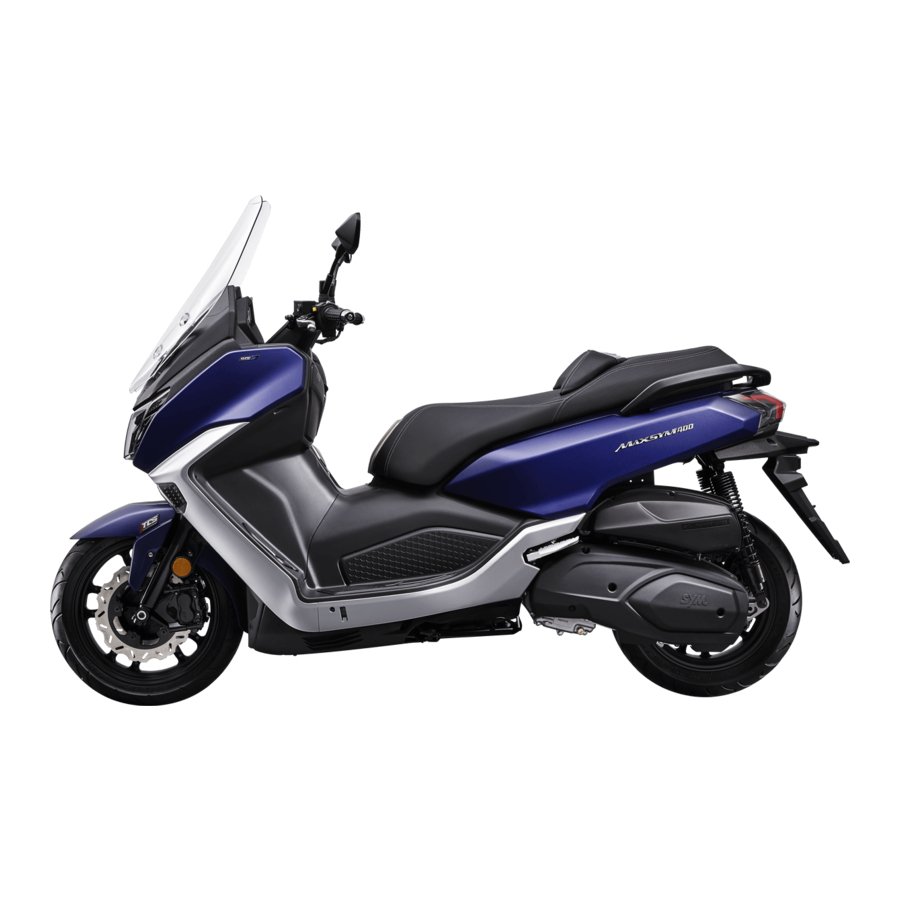
Page 6: Parts Location
7. Parts Location MAXSYM 400 (LZ40W1-EU) 10 11 1. Windscreen 10. V-belt case air cleaner 2. Headlights & position lights 11. Oil drain bolt 3. Front turn indicators 12. Transmission oil drain bolt 4. Front brake calipers 13. Transmission oil filler bolt 5. - Page 7 12 11 1. Rear turn indicators 10. Front fork 2. License plate light 11. Tool kit 3. Passenger footrests 12. Luggage box 4. Exhaust pipe 13. Fuse box 5. Rear/parking brake caliper 14. Battery 6. Rear brake disk 15. Diagnostic tool connector 7.
- Page 8 1. Rear brake lever 8. Front brake lever 2. Rear view mirrors 9. Throttle grip 3. Left handlebar switches 10. USB power outlet 4. Rear brake fluid reservoir 11. Right compartment 5. Combination instrument 12. Ignition switch 6. Front brake fluid reservoir 13.
-
Page 9: Combination Instrument
It displays the condition of the EFi system is working correctly. If there is any problem on the EFi system, the warning indicator remains on all the time. Please contact your SYM authorized dealer if this light goes on all the time. ○... - Page 10 This indicator goes on whenever the ignition switch is in “On” position without engine running or the oil pressure is dangerously low. It should go off immediately after the engine is running. If this indicator goes on, have the scooter checked by an authorized SYM dealer. Refer to page 50 for more information. ○...
- Page 11 ○ N Multi-function Meter ○ ○ ○ ○ ○ a. Side stand down indicator e. Multi-function display b. Luggage box light indicator - Clock c. Fuel gauge - Battery voltage gauge d. Coolant temperature gauge - Odometer - Trip meter - Oil distance meter Side Stand Down Indicator ○...
- Page 12 Coolant Temperature Gauge ○ This digital coolant temperature gauge displays the temperature of engine coolant. The coolant ○ temperature varies with changes in the weather and engine load. If the seventh bar goes on, when the scooter is in operation, stop the engine and move the scooter to a safe place, and check the coolant level in the reserve tank and the radiator fan (page 12).
- Page 13 Push the M button. The hour display stops blinking and the minute display starts blinking. Push the S button to adjust the tens place in the minute display. Push the M button. The tens place stops blinking and the units display starts blinking. Push the S button to adjust the units place in the minute display.
- Page 14 Trip meter This trip meter shows the distance in kilometers since it was last reset to zero. In trip meter mode, quickly push S button twice to reset trip meter. Display range: 0~999.9 km. NOTE : When the figures come to 999.9, they will return to 0 and the trip meter starts working again. ...
-
Page 15: Smart Key System
Smart Key System 1. Smart key 1. Ignition switch 2. Answer back button The smart key system enables you to operate the ignition switch without inserting a key into a key slot. The system runs a two-way authentication between the scooter and the smart key to verify it is a registered smart key. - Page 16 Operation Range of the Smart Key System The operating range of the smart key system is approximately 1 meter from the vehicle mounted antenna. The smart key system uses low-intensity radio waves; the operating range may become wider or narrower. If the smart key is not in the operating range when the ignition switch is in “On”...
- Page 17 ○ If one of the smart keys is lost, use the spare smart key to operate the ignition switch. If the smart keys are lost, contact your authorized SYM dealer for further process. NOTE : Store the spare smart key securely and do not install a battery before you use it.
- Page 18 ○ NOTE : Do not touch the chips or the circuit board to avoid problems. If you lack proper experience or doubt your ability, have the battery changed by your authorized SYM dealer. Declaration of Conformity This smart key system complies with the Radio Equipment Directive (2014/53/EU).
- Page 19 Ignition Switch ○ ○ ○ ○ ○ ○ ○ ○ Ignition Switch Knob Push or turn the knob to operate the ignition switch. This ignition switch knob can be turned when a verified smart key is in operating range. “On” Position ○...
- Page 20 ○ Seat Open Button This seat open button is designed to open the seat. Turn the ignition switch knob to “On” position. Push this button to open the seat. ○ Ignition Switch Ring The ignition switch ring only goes on in the below conditions when a verified smart key is in operating range.
-
Page 21: Right Handlebar Switches
Right Handlebar Switches ○ ○ Engine Stop Switch ○ This switch should normally remain in the position for the scooter to operate. In an emergency, switch to the position to stop the engine. NOTE : Even though the engine stop switch can stop the engine, it does not turn off all the electrical circuits. Normally the engine stop switch should be used to stop the engine. -
Page 22: Front/Rear Brake Lever
○ Hazard Switch position when the ignition switch is in “On” position. All the turn signal lights and Push the switch to turn signal indicators will blink. NOTE : Do not use the hazard lights for a long period of time, or the battery may become totally discharged. ○... -
Page 23: Windscreen
Windscreen This scooter is equipped with a tool-free 2-position adjustable windscreen. Adjust the positions to fit your figure. High position: ○ Low position: ○ ○ ○ To adjust the positions, set the scooter upright with the main stand, hold the windscreen with both hands, and push up ○... -
Page 24: Fuel Tank Cap
Fuel Tank Cap Turn the ignition key to “Fuel Tank Cap” position (page 19) to release the fuel tank cap ○ ○ Fill in the fuel. Do not exceed the bottom of filler neck ○ which is maximum fuel level. ○... -
Page 25: Front Compartment
Front Compartment The 2 front compartments ○ are located beside the ignition switch. The 2 compartments can be opened by pressing the buttons ○ . The hidden compartment ○ is integrated in the right compartment cover. The USB power outlet ○ is in the right compartment. -
Page 26: Side Stand/Parking Brake
NOTE : Do not exceed the maximum weight limit. The luggage box may affected by engine heat. Do not put in valuables, food or objects are flammable or susceptible to heat damage. Take away valuables before leaving the scooter. Side Stand/Parking Brake ○... -
Page 27: Rear View Mirror
NOTE : If it is necessary to park the scooter on a slope, do not let the front wheel direct the lower side; the main stand may not perform correctly and can cause damage to your scooter. Rear View Mirror ○... -
Page 28: Emission Control System
Emission Control System Catalytic Converter This scooter is equipped with a catalytic converter ○ in the exhaust system. Use only unleaded gasoline. Leaded gasoline can cause unrepairable damage to the catalytic converter. ○ CAUTION: Do not park the scooter near possible fire hazards. ... -
Page 29: To Stop The Engine
Never run the engine in the red zone of the tachometer during break-in period. Do not put excessive load on the engine. If any engine problem occurs, have your scooter checked by an authorized SYM dealer. Tips of Fuel Economy Your riding style is one of the major factors of fuel consumption. -
Page 30: Throttle Control
Avoid high engine speeds without engine load. Turn the ignition switch off rather than keeping it idle for a long period of time. Throttle Control ○ ○ To accelerate, slowly open the throttle ○. To decelerate, close the throttle ○. -
Page 31: Advanced Brake Light System
Advanced Brake Light System (ABL) This device is used to decrease the chance of collision from the rear. When applying emergency brakes above 70 km/h of vehicle speeds, the system automatically flashes the brake light ○ to alert rear drivers. ○... -
Page 32: Traction Control System
If the above mentioned happens, turn the ignition switch off and turn it on, then ride the scooter at more than 5 km/h, the ABS indicator should go off. If the indicator does not go off, have your scooter checked by an authorized SYM dealer. CAUTION: ABS cannot protect the rider from all possible hazards and is not a substitute for safe riding practices. -
Page 33: Park The Scooter
If the above mentioned happens, stop the scooter at a safe place and turn the ignition switch off, and turn it on, then start the engine to reset, the TCS indicator should go off. If the TCS indicator does not go off after resetting, have your scooter checked by an authorized SYM dealer as soon as possible. NOTE : ... -
Page 34: Maintenance And Adjustment
Always follow the inspection, maintenance recommendations, and schedules in this owner ’s manual. SYM cannot warn you of every conceivable hazard that can arise in performance. Only you can decide whether or not you should perform a given task. If you lack proper experience or doubt your ability, please contact your authorized SYM dealer for adjustments, maintenance, and repair work. -
Page 35: Oil Level Inspection/Oil Change
The oil change should be done by an authorized SYM dealer. The genuine “SYMOIL” are designed and recommended for your scooter. Please choose oil grade that is equal to (or greater than) SAE 10W-40, API SL. SYM is not responsible for any damage caused by improper oil. - Page 36 Do not let any foreign object into the crankcase. Cleaning of Oil Filter Screen: The oil filter screen ○ should be cleaned by an authorized SYM dealer. Replace the O-ring ○ with a new one before installing the oil filter screen.
-
Page 37: Transmission Oil Change
Transmission Oil Change The transmission oil should be changed by an authorized SYM dealer. The genuine “SYMOIL” are designed and recommended for your scooter. Please choose oil grade that is equal to (or greater than) SAE 85W-140, GL-4 (SAE 85W-90≦0℃). -
Page 38: Coolant Level Inspection/Filling
Coolant Level Inspection / Filling This scooter is filled with high quality coolant that is designed for the cooling system in the factory. It contains a 50% solution of ethylene glycol based antifreeze. Position the scooter on level ground and in an upright position. -
Page 39: Coolant Change
With the front brake reservoirs held horizontal, the brake fluid level in the inspection window must be above the “L” line ○ If the brake fluid level is below the lower level, contact your SYM authorized dealer to adjust the fluid level. - Page 40 Contact an authorized SYM dealer immediately if any brake fluid leakage is found. Front / Rear Brake Pad Inspection: If you feel something is wrong when applying the brakes, have your scooter checked by an authorized SYM dealer. Inspect the front brake pads ○...
-
Page 41: Throttle Free Play Inspection
Check that the throttle grip moves smoothly from full open to close. Check that there is 5°~ 10° ○ of throttle free play when turning the throttle grip back and forth. Have the throttle free play checked by an authorized SYM dealer. ○ Tire / Tire Pressure Inspection ... -
Page 42: Steering/Front Fork Inspection
Compress the front fork by pushing down the steering handle ○ to check that the forks can be operated smoothly. Check that the steering axle locknut is tightened. If any irregularity is found on the handlebar/front fork, contact your authorized SYM dealer. ○ ○... -
Page 43: Fuse Inspection
If a fuse fails, inspect the electrical system to determine the cause, and replace it with a new fuse of proper amperage or have the fuses replaced by an authorized SYM dealer. Do not replace it with any material other... -
Page 44: Battery Inspection
If you ride the scooter rarely, inspect the battery voltage weekly with a voltmeter. If the voltage drops below 12.0 V, use a suitable motorcycle battery charger to charge the battery. Follow the instructions of the battery charger to charge the battery. Contact your authorized SYM dealer for suitable battery chargers. -
Page 45: Spark Plug Inspection
Spark Plug Inspection Have the spark plug checked by an authorized SYM dealer. If the electrodes are contaminated with heavy deposits or the insulator is damaged, replace with a new one. Measure the spark plug gap ○ with a wire type feeler gauge. -
Page 46: Headlight Adjustment
If the air cleaner element is damaged or too dirty, have it changed by an authorized SYM dealer. To install the element, do in the reverse order of the above instructions. This scooter is equipped with a V-belt case air cleaner element. Inspect the V-belt case air cleaner by following the below instructions: ... -
Page 47: Rear Shock Absorber Adjustment
This scooter is equipped with an ECU that can record or collect vehicle data for trouble diagnosis and research. The data must be received by a special diagnostic tool when carrying out maintenance or check- up. SYM will not transfer the data to any third party except: The owner or user agrees. -
Page 48: Taking Care Of Your Scooter
Clean the windscreen with a solution of mild detergent and cold water. Rinse well after cleaning and then dry with a clean soft cloth. If the transparency of the windscreen is reduced by scratches or contamination that cannot be removed, have the windscreen replaced by an authorized SYM dealer. WARNING: ... -
Page 49: Trouble Shooting
○ If the fan is not operating, do not start the engine and transport your scooter to an authorized SYM dealer. If the fan is operating, cool down the engine, inspect the cooling system hose and check if there is a leak. If... -
Page 50: Efi Warning Indicator On
The indicator does not go off when the engine is started (without turning off the system.) Although the scooter can keep normal riding ability without traction control system, SYM suggest you to have your scooter checked by an authorized SYM dealer as soon as possible if any of the above symptoms occurs. -
Page 51: Fuel Gauge Failure
Coolant Temperature Gauge Failure If the coolant temperature gauge has an error, all the seven bars will not go on, have your scooter checked by an authorized SYM dealer as soon as possible. Smart Key System Please check the following situations when the smart key system does not work. -
Page 52: Exterior Lighting Burned-Out
Exterior Lighting Burned-out This scooter is equipped with LED exterior lighting except the license plate light. If any LED exterior lighting fails, have your scooter checked by an authorized SYM dealer. To replace the license plate light, follow the below instructions. -
Page 53: Periodic Maintenance Schedule
13. Periodic Maintenance Schedule Odometer Reading Annual Item Page service 1,000km 10,000km 20,000km 30,000km 40,000km ☆ Valve clearance ☆ Engine air cleaner element* V-belt case air cleaner ☆ element* Second at first 5,000km, every 5,000km ☆ Engine oil* thereafter Second at first 5,000km, every 5,000km Engine oil filter screen* thereafter ☆... - Page 54 : Service annually or at indicated odometer reading intervals, whichever comes first. : Should be performed by an authorized SYM dealer. ☆ For higher odometer readings, repeat at the frequency shown above. If any problem raised about your scooter, please contact your SYM authorized dealer regardless the service schedule.
-
Page 55: Maintenance Record
14. Maintenance Record Performed Mileage Odometer reading Date Note 1,000 km 5,000 km 10,000 km 15,000 km 20,000 km 25,000 km 30,000 km 35,000 km 40,000 km 45,000 km 50,000 km 55,000 km 60,000 km 65,000 km 70,000 km 75,000 km 80,000 km 85,000 km 90,000 km... -
Page 56: Specification
15. 5. Specificat MAXSYM 400 (LZ40W1-EU) Overall length 2,230 mm Overall width 820 mm Overall height 1,455 mm Wheel base 1,555 mm 135 mm Ground clearance 27.5 ∘ Caster 103 mm Trail Frame 2.75 m Min. turning radius 190 kg... - Page 57 MAXSYM 400 (LZ40W1-EU) Front / rear tire 120/70-R15 56S, 160/60-R14 65H Front / rear tire pressure 2.3 kgf/cm (32 psi), 2.5 kgf/cm (35 psi) J15 × MT 3.5, J14 × MT 4.5 Front / rear rim Aluminum alloy Rim material...
Need help?
Do you have a question about the MAXSYM 400 and is the answer not in the manual?
Questions and answers
Salve io ho un maxsym 400 gt si è scaricato la batteria dello scooter cosa posso fare ? Dove si trova la batteria per farla ricaricare?