Dell 7760 User Manual
Advanced projector
Hide thumbs
Also See for 7760:
- Service manual (137 pages) ,
- Setup and specifications manual (42 pages) ,
- Setup and specifications (30 pages)
Table of Contents
Advertisement
Advertisement
Table of Contents

Related Manuals for Dell 7760


Summary of Contents for Dell 7760
- Page 1 Dell Advanced Projector 7760 User’s Guide...
- Page 2 Reproduction of these materials in any manner whatsoever without the written permission of Dell Inc. is strictly forbidden. Trademarks used in this text: Dell and the DELL logo are trademarks of Dell Inc.; DLP and DLP logo are trademarks of T ;...
-
Page 3: Table Of Contents
Setting up the Wireless Display Adapter ..Setting up the Optional Dell WR517 Wireless Receiver 24 Using LAN Display ..... . . -
Page 4: About Your Dell Projector
About Your Dell Projector Your projector comes with all the items shown below. Ensure that you have all the items, and contact Dell if anything is missing. Projector Box Contents Package Contents Power cable VGA cable (VGA to VGA) Remote control... -
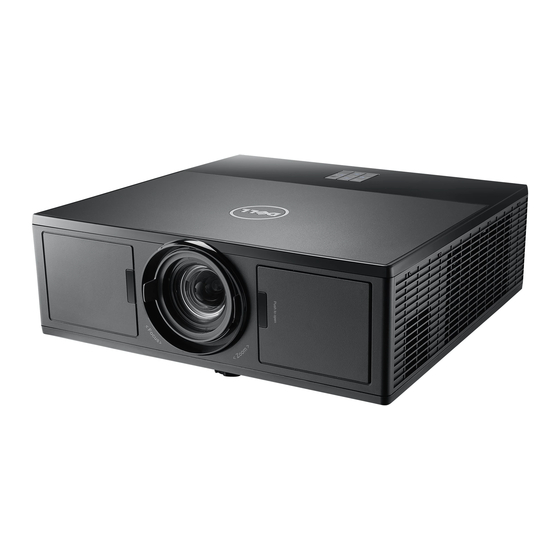
Page 5: Projector Top And Bottom View
Status indicators Power button 20W (2 x 10W) speakers Lens Zoom ring Focus ring Mounting holes for ceiling mount Tilt adjustment wheel NOTE: Ceiling mount screw hole M3 x 6.5 mm depth. Recommended torque < 15 kgf-cm. About Your Dell Projector... -
Page 6: Projector Connections
6 VGA input connector 13 Security cable slot 7 Audio input connector 14 Power cord connector CAUTION: Before you begin any of the procedures in this section, follow the Safety Instructions as described on page 7. About Your Dell Projector... - Page 7 •Recommended Projector Ceiling Mount Kit (P/N: C3505). For more information, see the Dell Support website at dell.com/support. •For more information, see the Safety Information that shipped with your projector. •The 7760 projector can only be used indoors. About Your Dell Projector...
- Page 8 •Adequate instructions for assembly, operation, and maintenance, including clear warnings concerning precautions to avoid possible exposure to laser and collateral radiation in excess of the accessible emission limits in Class 2. About Your Dell Projector...
-
Page 9: Remote Control
Turns the projector on or off. Press to navigate through the On-Screen Display (OSD) Menu items. Right Press to navigate through the On-Screen Display (OSD) Menu items. Down Press to navigate through the On-Screen Display (OSD) Menu items. About Your Dell Projector... - Page 10 Press to navigate through the On-Screen Display (OSD) Menu items. Menu Press to activate the OSD. Source Press to switch between sources: VGA, HDMI 1, HDMI 2, Wireless Display, and LAN Display. Volume up Press to increase the volume. About Your Dell Projector...
- Page 11 Zoom - Press to decrease the image. Mute Press to mute or un-mute the projector speaker. Auto Adjust Press to auto adjust the displayed image. Wireless Press to choose Wireless Display source. Press to choose VGA source. About Your Dell Projector...
- Page 12 Remote Control Operating Range Operating range Angle ±30° Distance 7 m/22.97 feet Angle NOTE: Actual operating range may slightly differ from the diagram. Weak batteries will also prevent the remote control from properly operating the projector. About Your Dell Projector...
-
Page 13: Adjusting Projector Image
Adjusting Projector Image Adjusting Projected Zoom Raising the Projector Height Raise the projector to the desired display angle, and use the front tilt adjustment wheel to fine-tune the display angle. Lowering the Projector Height Lower the projector, and use the front tilt adjustment wheel to fine-tune the display angle. -
Page 14: Adjusting Projector Focus And Zoom
Adjusting Projector Focus and Zoom Open the front side door of the projector. Unlock the lens shift lock, before you adjust the lens shift. Turn the vertical/horizontal lens shift knob to shift the lens. After adjusting the lens shift, lock the lens shift lock. Pull the zoom ring adjustment up and down to zoom in and out. -
Page 15: Adjusting Projector Position
• Lens throw ratio: 1.2 ~ 2.13 • 360 degree free orientation operation You can set up or install the 7760 in the following ways: Case A Case B... - Page 16 Case D Case C Downward Projection Upward Projection Case F Case E Portrait Left Projection Portrait Right Projection Adjusting Projector Image...
-
Page 17: Adjusting Image Corners
Adjusting Image Corners You can use the four corner setting to adjust the shape and size of an image that is unevenly rectangular on all sides. Advanced Settings -> Keystone Settings -> Four Corner At four corner screen, use to select one corner and press to confirm. -
Page 18: Adjusting Image Size
Adjusting Image Size 300.3"(762.76 cm) 240"(609.6 cm) 180"(457.2 cm) 120"(304.8 cm) 60"(152.4 cm) 55"(139.7 cm) 40.47" (102.79 cm) 4.27' (1.3 m) Adjusting Projector Image... - Page 19 Adjusting Image Shape Min Zoom Projection Image size Projector base to Distance Projector base to bottom of image Diagonal top of image (cm) Width (cm) Height (cm) (cm) (inch/cm) 27.2"/69.09 cm 2.64 56"/142.24 cm 3.98 84"/213.36 cm 5.32 113"/287.02 cm 6.66 141"/358.14 cm 169"/429.26 cm...
- Page 20 Adjusting Projector Image...
-
Page 21: Connecting Wireless Display Adapter
Installing Wireless Display Adapter Your projector comes with a secured internal compartment for wireless display adapter. The wireless display adapter is not shipped with your 7760 projector. The internal compartment has a HDMI and USB power port. The installation steps are as below: Open the front side door, making sure projector is already powered off. - Page 22 Attach the wireless display adapter. Replace the top cover and tighten the screw. Connecting Wireless Display Adapter...
-
Page 23: Setting Up The Wireless Display Adapter
Setting up the Wireless Display Adapter Power on the projector. Switch to "Wireless Display" source. Follow the on-screen instructions to proceed with wireless projection. Connecting Wireless Display Adapter... -
Page 24: Setting Up The Optional Dell Wr517 Wireless Receiver
Windows 10, Windows 8.x and Windows 7. The Dell wireless module is not shipped with your 7760 projector. You can purchase it on the Dell website at www.dell.com. Connecting your Dell WR517 wireless receiver with Dell 7760 projector: Use a Philips crosshead screwdriver to fasten the two screws (shipped with the receiver) to the mounting rack on the rear of your projector. - Page 25 Setting up the wireless receiver with a display. Steps 1 & 2. Setting up the wireless receiver with a display. Steps 3, 4 & 5. Connecting Wireless Display Adapter...
-
Page 26: Using Lan Display
Using LAN Display NOTE: LAN display setting steps are the same for Windows and Mac operating system. Enable LAN on Projector Connect the power cable and press the power button. Press the Menu button on your projector control panel or remote control. NOTE: , and buttons to navigate and... - Page 27 Ensure DHCP optional is Off from LAN settings of Advanced Settings menu. Access the Input Source menu, and then select Network source. The LAN Guide Screen shown below appears: Connecting Wireless Display Adapter...
- Page 28 Install the Dell Network Projection on Your Computer Connect the LAN cable to the projector and the computer. NOTE: You can also connect the LAN cable to the projector and the computer via a hub. Follow these steps to settings: DHCP optional change to On.
- Page 29 IP address and Subnet mark, then click OK. Open the Internet browser on your computer, and enter the 10.0.50.100 (default) in the browser's address bar. You will be directed to the Dell 7760 Web Management page. The 7760 Web Management page opens. For first-time use, click Download.
- Page 30 Click Run to proceed with the one-time installation of the software. The installation software will launch. Follow the on-screen instructions to complete setup. Launch the Dell Network Projection App Once the installation is completed, you can double-click icon on the desktop to start the application.
- Page 31 The Dell Network Projection Screen shown below appears: At Dell Network Projection screen, click Find a Projector, and then select Dell_42FE21E1 (random code).. Connecting Wireless Display Adapter...
- Page 32 Click Mirror Off option to start the Dell 7760 network projection. Connecting Wireless Display Adapter...
- Page 33 Understanding the Buttons Item Description Control Toolbar Click to toggle network projection On/Off Mirror Off/On and screen extension. Quality Click to toggle High/Low quality. Audio Click to toggle audio On/Off. Click to activate the conference control Conference settings. Preference Click to activate the fast connection settings. Connecting Wireless Display Adapter...
-
Page 34: Troubleshooting
Troubleshooting Troubleshooting Tips If you experience problems with your projector, see the following troubleshooting tips. If the problem persists, contact Dell. Problem Possible Solution • Ensure that you have chosen the correct No image appears on the screen input source on the INPUT SOURCE menu. - Page 35 Partial, scrolling, or Press the Auto Adjust button on the incorrectly displayed image remote control. If you are using a Dell laptop computer, set the resolution of the computer to 1080p (1920 x 1080): Right-click the unused portion of your ®...
- Page 36 The projector has overheated. The display automatically shuts down. Turn the display on again after the projector cools down. If the problem persists, contact Dell. TEMP light is blinking If the projector fan fails, the projector will amber automatically shut down. Try to clear the projector mode by pressing and holding the Power button for 10 seconds.
- Page 37 Problem (continued) Possible Solution (continued) The remote control is not The battery may be low. If so, replace with operating smoothly or two new AAA batteries. works only within a limited range • Web Control functions were verified on LAN control support IE9, IE10, and IE11.
-
Page 38: Guiding Signals
One of the fans has failed. The AMBER breakdown projector automatically shuts down. Flashing If the problem persists, contact Dell. LD driver Air vents might be blocked or the LD overheated driver has overheated. The projector will automatically shut down. Turn... -
Page 39: Maintenance
Maintenance Replacing Remote Control Batteries NOTE: Remove the batteries from the remote control when not in use. Press the tab to lift the battery compartment cover. Check the polarity (+/-) marking on the batteries. Insert the batteries and align their polarity correctly according to the marking in the battery compartment. - Page 40 Slip the battery cover back. Maintenance...
-
Page 41: Specifications
Specifications Light Valve 0.65" 1080p S600HB DMD, DarkChip3™ Brightness 5400 ANSI Lumens (Max.) Contrast Ratio 1800:1 Typical (Full On/Full Off) 100000:1 High Contrast Ratio Uniformity 85% Typical (Japan Standard - JBMA) Number of Pixels 1920 x 1080 (1080p) Aspect Ratio 16:9 Displayable Color 1.07 billion colors... - Page 42 Audio 2 speakers x 10 watt RMS Noise Level Normal mode: 36 dB(A) Eco mode: 32 dB(A) Projector Weight < 24.47 lbs (11.1 Kg) Dimensions (W x D x H) 15.94 x 15.24 x 5.08 inches (405 x 387 x 129 5.08"(129 mm) Environmental Operating temperature: 5 °C - 40 °C (41 °F-...
- Page 43 Microphone input: One 3.5 mm stereo mini phone jack (Pink). USB (type B) port: One mini USB slave for firmware upgrade. 5V/1.8A output: Two USB type A 5V DC / 1.8 A outputs (one in internal compartment) for supporting wireless display dongle. RS232 port: One 9-pin D-sub for RS232 communication.
-
Page 44: Additional Information
Additional Information For additional information on how to use your projector, please see the Dell Projectors User Guide at www.dell.com/support/manuals. Additional Information... -
Page 45: Contacting Dell
Dell provides several online and telephone-based support and service options. Availability varies by country and product, and some services may not be available in your area. To contact Dell for sales, technical support, or customer service issues: 1 Visit go to www.dell.com/contactDell. - Page 46 13 VGA input connector 6 Tilt adjustment wheel VGA output (monitor loop through) connector 6 Adjusting the Projector Zoom Contact Dell 4 and Focus Focus ring 14 Front side door 14 Horizontal lens shift knob 14 Dell Lens shift lock 14...
- Page 47 I/O Connectors 42 Light Valve 41 Noise Level 42 Number of Pixels 41 Power Consumption 41 Power Supply 41 Projection Distance 41 Projection Lens 41 Projection Screen Size 41 Projector Weight 42 Uniformity 41 Video Compatibility 41 support contacting Dell 44 Index...
Need help?
Do you have a question about the 7760 and is the answer not in the manual?
Questions and answers