
Related Manuals for Samsung DVD-VR470M


Summary of Contents for Samsung DVD-VR470M
- Page 1 DVD & VCR user manual imagine the possibilities Thanks you for purchasing this Samsung product. To receive a more complete service, please register your product at www.samsung.com/global/register DVD-VR470M DVD-VR475M...
-
Page 2: Getting Started
Getting Started Warning TO REDUCE THE RISK OF ELECTRIC SHOCK, DO NOT REMOVE THE COVER (OR BACK). NO USER-SERVICEABLE PARTS ARE INSIDE. REFER SERVICING TO QUALIFIED SERVICE PERSONNEL. CAUTION RISK OF ELECTRIC SHOCK DO NOT OPEN This symbol indicates “dangerous voltage” inside the product that presents a risk of electric shock or personal injury. -
Page 3: Precaution
Precaution Important Safety Instructions Read these operating instructions carefully before using the unit. Follow all the safety instructions listed below. Keep these operating instructions handy for future reference. Read these instructions. Keep these instructions. Heed all warnings. Follow all instructions. Do not use this apparatus near water. -
Page 4: Holding Discs
Disc Handling • Use discs with regular shapes. If an irregular disc (a disc with a special shape) is used, this DVD Recorder & VCR may be damaged. Holding discs • Avoid touching the surface of a disc where recording is performed. DVD-RAM, DVD±RW and DVD±R •... - Page 5 • This unit can play back DVD+R discs recorded and fi nalised with a Samsung DVD video recorder. It may not be able to play some DVD+R discs depending on the disc and the condition of the recording.
-
Page 6: Disc Format
COPY PROTECTION • Many DVD discs are encoded with copy protection. • This product incorporates copyright protection technology that is protected by methods claims of certain U.S. patents and other intellectual property rights owned by Macrovision Corporation and other rights owners. Use of this copyright protection technology must be authorised by Macrovision Corporation, is intended for home and other limited viewing uses... -
Page 7: Table Of Contents
Contents Getting Started Warning ...2 Precaution ...3 Important Safety Instructions ...3 Handling Cautions ...3 Maintenance of Cabinet ...3 Disc Handling ...4 Disc Storage...4 Disc Specifications ...4 Contents ...7 General Features...9 Before reading the user’s manual ...10 ... - Page 8 DTV Functions Basic Functions...39 Display Screen ...39 Select Audiotrack ...39 Setting the Favorite Channel ...40 Changing the Subtitle Language ...40 Using the digital text service ...40 Guide ...41 Guide Timer Recording ...41 Playback Region code (DVD-Video only) ...42 ...
-
Page 9: General Features
Anynet+ is a function that can be used to operate the recorder using a Samsung TV remote control, by connecting the HDD & DVD RECORDER to a SAMSUNG TV using an HDMI Cable. (This is only available with SAMSUNG TVs that support Anynet+.) -
Page 10: Before Reading The User's Manual
All rights reserved; No part or whole of this user’s manual may be reproduced or copied without the prior written permission of Samsung Electronics Co. How to use the DVD Recorder & VCR Step 1 : Select the disc type Please check available disc type before recording. - Page 11 Step 3 : Recording There are two diff erent recording methods, Direct Recording (recording a programme you are currently watching) and Timer Recording. Timer recording is classifi ed as follows: Recording mode : HQ (high quality mode), HSP, SP (standard quality mode), LSP, ESP, LP, EP, SLP (Long duration mode) according to the recording mode.
-
Page 12: Preparing The Remote Control
Unpacking Accessories Check for the supplied accessories below. Video/Audio Cable RF Cable for TV Batteries for Remote Control (AAA Size) Remote Control Instruction Manual Quick Guide Registration Card Preparing the Remote Control Install Batteries in the Remote Control • Open the battery cover on the back of the remote control. - Page 13 Controllable TV Codes BRAND BUTTON SAMSUNG TV +01, +02, +03, +04, +05, +06, +35 AKAI TV +12 BANG & OLUFSEN TV +22 BLAUPUNKT TV +09 BRANDT TV +14 BRIONVEGA TV +22 TV +21 CONTINENTAL EDISON TV +24 FERGUSON TV +14...
-
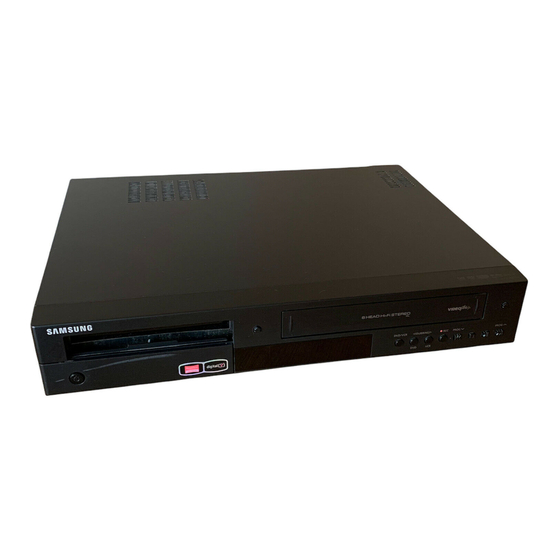
Page 14: Description
Description Front Panel (DVD-VR470M) Front Panel (DVD-VR475M) DVD DECK DVD OPEN/CLOSE BUTTON VCR DECK VCR EJECT BUTTON STANDBY/ON BUTTON VIDEO INPUT JACK (AV3 IN) AUDIO INPUT JACK (AV3 IN) FRONT PANEL DISPLAY DVD/VCR SELECT BUTTON DUBBING BUTTONS RECORD BUTTON PROG , SKIP BUTTONS STOP BUTTON PLAY/PAUSE BUTTON... -
Page 15: Rear Panel
Rear Panel (DVD-VR470M) AUDIO L, R OUT JACKS DIGITAL AUDIO OUT JACK (COAXIAL) AUDIO/VIDEO JACK (AV OUT) AV1 (TV) IN/OUT SCART AV2 (EXT) SCART Rear Panel (DVD-VR475M) Front Panel Display DVD or CD media is loaded. Record function is activated. DVD is activated. -
Page 16: Tour Of The Remote Control
Tour of the Remote Control Your DVD Recorder & VCR remote control will work with Samsung televisions and compatible brands. DVD Button Press this when you use a DVD. 2. TV Button Press this to operate TV. 3. FAV LIST When you use DTV, press this button to switch between favorite list. -
Page 17: Connecting & Setting Up
Connecting & Setting Up Connecting DVD Recorder & VCR to the TV using the RF Cable Make sure that both the television and the DVD Recorder & VCR are switched off before connecting the cables. Remove the aerial or network input cable from the television. -
Page 18: Case 2 : Connecting Dvd Recorder & Vcr To A Satellite Receiver Or Other Equipment
Case 2 : Connecting DVD Recorder & VCR to a Satellite Receiver or Other Equipment You can connect your DVD Recorder & VCR to a Satellite receiver or other DVD Recorder & VCR using a SCART cable if the appropriate outputs are available on the equipment chosen. -
Page 19: Connecting The Component Video Cable
Connecting the Component Video Cable You will enjoy high quality accurate colour reproduction images. Component video seperates the picture element into black and white(Y), blue(P ), red(P present most clear and clean images. Connect Component video cable (not supplied) between the COMPONENT VIDEO OUT jacks on the rear of the DVD Recorder &... -
Page 20: Connecting Hdmi/Dvi To A Tv (Dvd-Vr475M Only)
In this case, set the digital audio output to PCM or DTS off . If you connect the HDMI cable between Samsung TV, you can operate easily DVD Recorder & VCR using the TV remote control. (This is only available with Samsung TVs that support Anynet+(HDMI- CEC).) (See pages 30~31) -
Page 21: Connecting External Devices
Connecting External Devices Case1 : Connecting an external devices to the AV3 jacks You can connect other audio/video equipment to your DVD Recorder & VCR using audio/video cables if the appropriate outputs are available on the equipment chosen. Connect one end of the video cable into the VIDEO input jack on the front of the DVD Recorder &... -
Page 22: System Setup
System Setup 12:00 Timer Title List Timer - Standard Timer - VideoPlus+ Timer Timer List Edit Dubbing Disc Setting Setup > Move Return Exit -:-- Initial Installation Country : United Kingdom English Language : English Français Español Time Zone : GMT + 00:00 Deutsch Daylight Saving Time : Off... -
Page 23: Clock Set
Auto Scanning Digital 610.000MHz, BW:8MHz, FFT:Auto Radio YLE TV1 YLE PEILI YLE TV2 YLEN KLASSINEN YLE FST5 YLE FSR+ YLE24 YLEMONDO YLE Teema YLE X3M Progress Signal status Auto Scanning Name ---- ---- ---- Progress EXIT 12:00 Clock Set Set the time and date. Day Month Year 01 01 2008 Tue Hour Min Auto Adjust... -
Page 24: Daylight Saving Time
12:00 Clock Set Title List Time Zone Daylight Saving Time : Off Timer Auto Adjust : Off Edit Present Time : --- --.--.---- --:-- Dubbing Disc Setting Setup > Move Return Exit 12:00 Clock Set Title List Time Zone Daylight Saving Time : On Timer Auto Adjust : Off... -
Page 25: Tuner Preset
12:00 Tuner Preset Title List Auto Preset Digital Manual Setup Timer Digital Channel List Edit Digital Favourite Channel Analog Manual Setup Dubbing Analog Channel List Disc Setting Setup > Move Return Exit 12:00 Tuner Preset Title List Auto Preset Digital Manual Setup Timer Digital Channel List Edit... -
Page 26: Digital Manual Setup
12:00 Tuner Preset Title List Auto Preset Digital Manual Setup Timer Digital Channel List Edit Digital Favourite Channel Analog Manual Setup Dubbing Analog Channel List Disc Setting Setup > Move Return Exit Manual Scanning Country United Kingdom Channel type Digital Scan Mode √... -
Page 27: Digital Channel List
DTV list 001 BBC ONE 002 NO Name CH 007 NO Name CH 030 CBBC Channel 040 BBC NEWS 24 051 BBCi 800 PARIS PREMIERE Edit FAV Renumber Remove Page Return Radio list 001 BBC ONE 002 NO Name CH 007 NO Name CH 030 CBBC Channel 040 BBC NEWS 24... -
Page 28: Dvd Auto Chapter
Features 12:00 Title List DVD Auto Chapter : 5 Min Format DVD-RW : VR 5 Min Timer EZ Record : Off 15 Min Edit VCR Function Anynet+ (HDMI CEC) : On Dubbing Language Follow : On Disc DVD Bilingual Rec. : Main Setting DVB-T Auto Subtitle : On... -
Page 29: Vcr Function Setting
Unformatted Disc. Formatting. Please wait. -:-- Features Title List DVD Auto Chapter : 5 Min Format DVD-RW : VR Timer EZ Record : Off VCR Function Edit Anynet+ (HDMI CEC) : On Dubbing Language Follow : On Disc DVD Bilingual Rec. : Main Setting DVB-T Auto Subtitle : On... -
Page 30: Auto Repeat
Anynet+ is a function that can be used to operate the recorder using a Samsung TV remote control, by connecting the DVD Recorder & VCR to a SAMSUNG TV using an HDMI Cable. (see pages 20) (This is only available with SAMSUNG TVs that support Anynet+.) -
Page 31: Language Follow (Dvd-Vr475M Only)
Language Follow (DVD-VR475M only) This sets the menu language of external devices connected to a Samsung TV using Anynet +, so they match the language setting of the TV. To activate this, Anynet+ (HDMI CEC) must be set to On. -
Page 32: Setting Up The Options
12:00 Language List : English Disc Menu : English Timer Audio : Original Edit Subtitle : Auto DVB-T Audio : English Dubbing DVB-T Subtitle : English Disc Setting Setup > Move Return Exit 12:00 Options Title List Language Parental Timer Front Display : Auto Edit... -
Page 33: If You Forgot Your Password
12:00 Parental Title List Program Grade : Off Rating Level : Off Grade 17 Timer Change Password Grade 16 Edit Grade 15 Grade 14 Dubbing Grade 13 Disc Grade 12 Setting Grade 11 Setup Move Return Exit > 12:00 Parental Title List Program Grade : Off... -
Page 34: Setting Up The Video Options
12:00 Setup Title List Tuner Preset Clock Set Timer Video Edit Audio Features Dubbing Options Disc Setting Setup Move Return Exit > 12:00 Video Title List TV Type : 4:3 Letter Box 16:9 Resolution (HDMI) : Auto 4:3 Letter Box Timer Video (HDMI) : YCbCr... -
Page 35: Component Out
12:00 Video Title List TV Type : 4:3 Letter Box Resolution (HDMI) : Auto Timer Video (HDMI) : YCbCr ✔ YCvCr Edit Picture Control : Standard AV1 Output : Video Dubbing Component Out : On Disc Progressive : On Setting Setup Move Return... -
Page 36: Progressive Scan
12:00 Video Title List TV Type : 4:3 Letter Box Resolution (HDMI) : Auto Timer Video (HDMI) : YCbCr Edit Picture Control : Standard AV1 Output : Video Dubbing Component Out : On Disc Progressive : On Setting Setup Move Return Exit >... - Page 37 12:00 Audio Title List Digital Out : On Downmix : Dolby Surround Dolby Surround Timer Audio DRC : Standard Normal Edit Audio (HDMI) : Auto Scan Audio : On Dubbing Surround : Off Disc DV Audio Input : Stereo1 Setting AV Audio Input : Stereo Setup...
- Page 38 12:00 Audio Title List Digital Out : On Downmix : Dolby Surround Timer Audio DRC : Standard Edit Audio (HDMI) : Auto Scan Audio : On Dubbing Surround : Off Disc DV Audio Input : Stereo1 Setting AV Audio Input : Stereo Setup >...
-
Page 39: Dtv Functions
DTV Functions Audio Track ENG MPEG > Change Basic Functions Display Screen After the television channels have been stored, you will see the following picture(banner) each time you switch channels. You can use this function when you see DVB-T. 1. Press the button once to display the channel and the channel name. -
Page 40: Setting The Favorite Channel
Favourite DTV 1 001 NO Name CH 002 BBC NEWS 24 Remove Add Current Page Return Subtitle ENG > Change B B C Wednesday 3 Aug News Multiscreen 1001 News Headlines Sport Weather Finance BBCi INDEX Today on BBCi Today's regional headlines from BBC News . -
Page 41: Guide
DTV Guide 16:29 WED 27 OCT 2007 13:59 -14:05 Day Afterd Day... THU 22 DEC 16:00 16:30 17:00 Scooby. Scrappy BBC ONE ..BBC TWO I Dream This is BBC THREE BBC THREE Escape to the Ready Steady Cook CBBC Channel Country Timer Rec... -
Page 42: Playback
Playback This section introduces basic functions of playback and playback by disc type. Read the following information before playing a disc. Region code (DVD-Video only) Both the DVD Recorder & VCR and the discs are coded by region. These regional codes must match in order for the disc to play. -
Page 43: Discs That Cannot Be Played
Discs that cannot be played • DVD-Video with a region number other than “2” or “ALL” • 3.9 GB DVD-R Disc for Authoring. • A DVD-RW(V)/-R(V)/+R disc which has been recorded and not fi nalised in a diff erent manufacturer’s recorder. •... -
Page 44: Using The Disc Menu & Title Menu
Some functions may perform diff erently or be disabled depending on the disc type. If this occurs, refer to the instructions written on the disc case. Be especially careful that children’s fi ngers are not caught between the disc tray and the tray chassis when it closes. ... -
Page 45: Using The Playback Related Buttons
Using the playback related buttons Searching through a Chapter or Track ZXCVBKL During play, press the SEARCH ( FF1 DVD-VIDEO/DVD-RAM/ FR1 ±RW/±R FF1 MPEG4 FR1 FF1 AUDIO CD FR (CD-DA) • You can scan the programme in reverse. •... - Page 46 Slow Motion Play ZXCVKL D In pause mode, press the SEARCH ( • If you press the SEARCH ( ) button, Slow 3 Slow 2 Slow 1 • If you press the SEARCH ( ) button, Slow 3 ...
-
Page 47: Using The Anykey Button
Title 2/12 Chapter Time 00:00:52 ENG Dolby D 2ch(1/1) Audio 00:00:52 Remain Subtitle Angle <Adjust Title Chapter 2/12 Time 00:00:52 Audio ENG Dolby D 2ch(1/1) Remain 00:00:52 Subtitle Angle <Adjust Using the ANYKEY button The ANYKEY functions allows you to easily search for a desired scene by accessing title, chapter, track and time. -
Page 48: Remain
Title Chapter 3/12 Time 00:00:52 Audio ENG Dolby D 2ch(1/1) Remain 00:00:52 Subtitle Angle >Move Title 3/12 Chapter Time 00:00:52 ENG Dolby D 2ch(1/1) Audio 00:00:52 Remain Subtitle Angle <Adjust Title Chapter 3/12 Time 00:00:52 Audio ENG Dolby D 2ch(1/1) Remain 00:00:52 Subtitle... -
Page 49: Playing An Audio Cd/Mp3
➀ ➁ 12:00 Music ) Surround : Off Q TRACK01.CDA Play 00:00:19 ➃ 9 1/15 q9 TRACK01.CDA 9 TRACK02.CDA 9 TRACK03.CDA 9 TRACK04.CDA 9 TRACK05.CDA 9 TRACK06.CDA ➄ > Move Exit Playing an Audio CD/MP3 Buttons on the Remote Control used for Audio CD(CD-DA)/MP3 playback ▲▼... -
Page 50: Playing An Mp3 Disc
➀ ➁ 12:00 Music ) Surround : Off Q SONG01.MP3 Play 00:00:19 ➃ q9 SONG01.MP3 9 1/15 9 SONG02.MP3 9 SONG03.MP3 9 SONG04.MP3 9 SONG05.MP3 9 SONG06.MP3 ➄ > Move Return Exit 12:00 Photo Picture 1 / 10 Slideshow Page 1 / 2 Move Return ... -
Page 51: Playing A Divx
12:00 Music Q SONG01.MP3 Play 00:00:19 q9 SONG01.MP3 9 1/15 Do you want to view 9 SONG02.MP3 9 SONG03.MP3 the photo with MP3? 9 SONG04.MP3 9 SONG05.MP3 9 SONG06.MP3 > Move Return Exit 12:00 DivX Album File Stop 00:00:19 DIVX01.AVI DIVX02.AVI >... -
Page 52: Playing Back A Vhs Tape (Vcr)
Playing back a VHS Tape (VCR) Insert a standard VHS tape into the VCR deck. • When a videotape is inserted, power will turn on automatically. Press the PLAY ( ) button on the remote control or on the front panel of the unit. -
Page 53: Variable Search System
Variable Search System Each time you record a cassette on this DVD Recorder & VCR, an index is automatically marked on the tape when recording is started.The Search function allows you to fast-forward or rewind to a specifi c index and start playback from that point. •... -
Page 54: Recording
This DVD Recorder & VCR can record on the following discs. • DVD-VR470M DVD-RW DVD-R DVD-RAM • DVD-VR475M DVD-RW DVD-R DVD-RAM DVD+RW Compatibility between Samsung and Other Company’s Recorder Recording Recording Disc Types format Device Samsung DVD- VR Mode Other Company... -
Page 55: Recording Formats
Recording Formats Since available functions diff er depending on the disc type, select a disc that best fi ts your preferences. Unformatted Disc. Formatting. Please wait. DVD-RAM/-RW(VR)/-R(VR) • This mode involves multiple editing functions (such as deletion of the whole title, partial deletion of a title, etc.). -
Page 56: Recording Mode
Recording Mode Select one of eight recording modes by pressing the REC MODE button repeatedly while the unit is in Stop mode for the desired recording time and picture quality. In general, picture quality improves as the recording time decreases. In AUTO mode, the most suitable record mode is adjusted automatically, according to remaining time on the disc and length of the timer recording. -
Page 57: Unrecordable Pictures
Unrecordable pictures Video with copy protection cannot be recorded on this DVD Recorder & VCR. When the DVD Recorder & VCR receives a copy- guard signal while You cannot record copy protected movie. recording, recording stops and the following message appears on the screen. -
Page 58: Recording Immediately
AV 1 Before you start 3. Press the REC button. 2. Press the REC MODE button repeatedly to select the recording Mode 3. When your DVD Recorder & VCR is in the Stop mode, set the operation 4. Press the REC button on your DVD Recorder & VCR when the image To pause recording Press the PAUSE( To stop recording... -
Page 59: Recording Through A Dv Input Jack
► < Move Exit You can not change the recording mode and the programme while recording. Recording will stop automatically if there is no free space left for recording. Up to 99 titles can be recorded onto a DVD-RW/-R disc. ... -
Page 60: Making A One Touch Recording (Otr)
Making a One Touch Recording (OTR) One-Touch Recording (OTR) allows you to add recording time in preset minute increments up to 8 hours by pressing the REC button repeatedly. Press the buttons or number buttons to select the PROG/TRK ( / ) station to record. -
Page 61: Making A Timer Recording
12:00 Timer List Timer - Standard Timer - Video PLus+ Timer Timer List Edit Dubbing Disc Setting Setup > Move Return Exit 12:00 Timer - Standard No. Media Date Start End Prog. Mode PDC Edit No.01 ► --/-- --:-- --:-- ---- ►... - Page 62 Recording Mode (VCR) AUTO : Select when you want to set video quality automatically. It depends on remaining time on the VCR tape. SP : Standard Play, for best picture quality. LP : Long Play, for maximum recording time (2 times SP). ...
-
Page 63: Editing The Timer List
12:00 Timer List Timer - Standard Timer - Video PLus+ Timer Timer List Edit Dubbing Disc Setting Setup Move Return Exit > 12:00 Timer List No. Media Date Start End Prog. Mode PDC Edit ► DVD 01/01 12:00 12:00 Prog. 1 SP Edit ►... -
Page 64: Using The Videoplus+ Feature
12:00 Timer Title List Timer - Standard Timer - Video Plus+ Timer Timer List Edit Dubbing Disc Setting Setup Move Return Exit > 12:00 Timer - VIDEO Plus+ Title List Set ShowView code number. [0~9] Timer Edit Dubbing Disc ◄ Standard Setting Setup <... -
Page 65: Basic Vcr Recording
Basic VCR Recording Before starting Check TV channel and Antenna connections. Check the remaining time on the tape. You can record a TV show in progress by inserting a blank tape and pressing the l (REC) button. You can even add time in preset increments up to 6 hours by pressing the l (REC) button repeatedly. -
Page 66: To Pause Recording
DVD-RW Stop Stop 0:00:00 0:00:37 Rem 02:00 Rem 01:59 Prog. 1 Prog. 1 Mon 01 Jan. 2007 12:00 To pause recording Press the PAUSE( ) button to pause a recording in progress. • Press the PAUSE( ) button again to resume recording. •... -
Page 67: Dubbing To Dvd Or Video
12:00 Dubbing Title List Simple Dubbing VIDEO - > DVD DV Dubbing DVD - > VIDEO Timer Edit Dubbing Disc Setting Setup Move Return Exit > 12:00 Dubbing Title List Simple Dubbing DV Dubbing Timer Edit Do you want to copy DVD contents to Video? Dubbing Disc Setting... - Page 68 12:00 Dubbing Title List Simple Dubbing VIDEO - > DVD DV Dubbing DVD - > VIDEO Timer Edit Dubbing Disc Setting Setup Move Return Exit > 12:00 Dubbing Title List Simple Dubbing DV Dubbing Timer Edit Do you want to copy video contents to DVD? Dubbing Disc Setting...
-
Page 69: Dv Dubbing
12:00 Dubbing Title List Simple Dubbing DV Dubbing Timer Edit Dubbing Disc Setting Setup > Move Return Exit 12:00 DV Dubbing Title List DV Simple Dubbing DV One Touch Dubbing Timer Edit Dubbing Disc Setting Setup > Move Return Exit ... -
Page 70: Editing
Editing This section introduces basic functions of DVD editing and explains both edit functions for the recording on a disc and edit functions for the entire disc. Title List (Original) 12:00 Title Length Edit JAN/01/2007 00:00:11 ® JAN/01/2007 00:00:09 ® JAN/01/2007 00:01:36 ®... -
Page 71: Basic Editing (Title List)
12:00 Title Name Sports(A1) A B C D E F G H K L M N O ! @ # P Q R S U V W X Y v w x % ^ & Backspace Space Delete Clear Finish Move Return Exit... -
Page 72: Locking (Protecting) A Title
Title List (Original) 12:00 Select the protection status for this title. JAN/01/2007 01:00 AV1 01.Jan.2007 12:06 > Move Return Exit Title List (Original) 12:00 Title Length Edit JAN/01/2007 00:00:11 ® JAN/01/2007 00:00:09 ® JAN/01/2007 00:01:36 ® JAN/01/2007 00:00:11 ® JAN/01/2007 01:00 AV1 01.Jan.2007 12:06 >... -
Page 73: Erasing A Chapter (Chapter Erase)
Chapter Erase (Original) 12:00 Chapter No. 1 / 7 Title No.02 Check Erase Modify 01 00:00:03 02 00:00:42 03 00:00:04 Move Copy 04 00:00:03 05 00:00:11 06 00:00:04 Move Return Exit Chapter Erase (Original) 12:00 Chapter No. 1 / 1 Title No.02 Check Erase... -
Page 74: Erasing A Section Of A Title (A-B Erase)
A-B Erase 12:00 Title No. 03 Start Start 00:00:02 Erase 00:00:02 Title No. 2 Finish 01.Jan.2007 14:15 End 00:00:00 > Move Return Exit A-B Erase 12:00 Title List No. 03 Start Start 00:00:02 Erase 00:00:15 Title No. 2 Finish 01.Jan.2007 14:15 End 00:00:15 >... -
Page 75: Dividing A Title Into Two (Divide Title)
Divide Title (Original) 12:00 Title No. 01 Point Divide Start 00:00:02 00:00:02 Title No. 1 01.Jan.2007 14:15 End 00:00:00 Move Return Exit > Divide Title (Original) 12:00 Title No. 01 Point Divide Start 00:00:02 00:00:10 Title No. 1 01.Jan.2007 14:15 End 00:00:10 >... -
Page 76: Advanced Editing (Playlist)
Create Playlist 12:00 Scene No. 01 Start Start 00:00:01 Make Title No. 01 00:00:01 Finish Playlist No. 01 01.Jan.2007 14:15 End 00:00:00 > Move Return Exit Create Playlist 12:00 Scene No. 01 Start Start 00:00:01 Make Title No. 02 00:00:30 Finish Playlist No. -
Page 77: Playing Titles In The Playlist
Playlist 12:00 Title Length Edit 1 / 3 Play JAN/01/2007 00:00:11 Title Erase JAN/01/2007 00:00:09 Title Name JAN/01/2007 00:01:36 JAN/01/2007 01:00 AV1 01.Jan.2007 12:06 > Move Return Exit Playlist 12:00 Title Length Edit 1 / 3 Play JAN/01/2007 00:00:11 Title Erase JAN/01/2007 00:00:09 Title Name... -
Page 78: Disc Setting
12:00 Disc Name Disc_ A B C D E F G H K L M N O ! @ # P Q R S v w x U V W X Y % ^ & Backspace Space Delete Clear Finish Move Return Exit... -
Page 79: Formatting A Disc
12:00 Disc Format List Disc Name : Disc Name Disc Protect : Not Protected Timer Disc Format : VR Mode Select the recording format. Edit Disc Finalise : Unfinalised Disc Information Dubbing Erese All Titles Disc VR Mode Video Mode Setting Setup >... -
Page 80: Unfinalising A Disc (V/Vr Mode)
12:00 Disc Finalise Title List Disc Name : Disc Name Disc Protect : Not Protected Timer Disc Format : VR Mode Do you want to unfinalise disc? Edit Disc Finalise : Unfinalised Disc Information Dubbing Erese All Titles Disc Finalise Unfinalise Setting Setup... -
Page 81: Disc Information
12:00 Disc Information Disc Name Media DVD-RW Format VR Mode Title No. Original 1 / Playlist 0 Protected Not Protected Date 1.01.2007 ~ --.--.---- HQ : 0H59M HSP : 1H29M SP : 2HOM Remainder LSP : 2H29M ESP : 2H59M LP : 4H0M EP : 6H1M SLP : 8HOM 4.6 / 4.7GB Return... -
Page 82: Reference
Reference Troubleshooting (DVD) If your product malfunctions, go through the check points below before contacting a Samsung authorized service centre. Problem • Check whether the power cord is securely plugged into the power outlet. No power. • Did you press the... - Page 83 • Read the table of contents and then fi nd and read the sections describing your problem, and follow the directions given. Other problems • Turn the unit off and on. • If your problem still persists, contact your nearest Samsung service centre. Explanation/Solution is displayed on front panel. English - 83...
-
Page 84: Troubleshooting (Vcr)
Troubleshooting (VCR) Before contacting a Samsung authorized service centre, perform the following simple checks. Problem No power You cannot insert a video cassette The television programme was not recorded Timer recording was unsuccessful No playback picture or the picture is... -
Page 85: Specifications
Specifi cations Power requirements Power consumption Weight General Dimensions Operating temp. Other conditions Video input (Rear) Input Audio input (Rear) Front input Audio (DVD, VCR) Audio (DVD only) Output Video (DVD, VCR) Tape format Colour system Tuning system Video S/N Resolution Audio S/N Audio frequency... -
Page 86: Warranty
UNITED KINGDOM This Samsung product is warranted for the period of twelve (12) months from the original date of purchase, against defective materials and workmanship. In the event that warranty service is required, you should return the product to the retailer from whom it was purchased. - Page 87 Contact SAMSUNG WORLD WIDE If you have any questions or comments relating to Samsung products, please contact the SAMSUNG customer care centre. Region Country CANADA North America MEXICO U.S.A ARGENTINE BRAZIL CHILE NICARAGUA HONDURAS COSTA RICA ECUADOR EL SALVADOR Latin America...
- Page 88 Correct Disposal of This Product (Waste Electrical & Electronic Equipment) (Applicable in the European Union and other European countries with separate collection systems) This marking shown on the product or its literature, indicates that it should not be disposed with other household wastes at the end of its working life.
Need help?
Do you have a question about the DVD-VR470M and is the answer not in the manual?
Questions and answers