Table of Contents
Advertisement
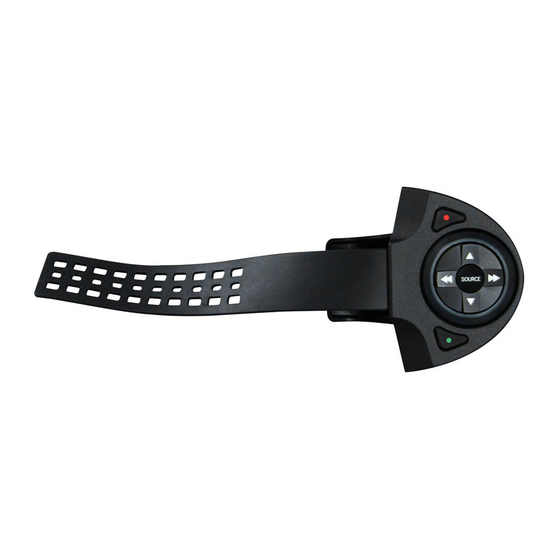
Wireless SWC universal add-on
US. PAT. NOS. 8014920 and 8214105
INTERFACE FEATURES
• Designed to be compatible with most major radio brands
• Auto detects radio being connected, and presets controls
• Ability to dual assign steering wheel control buttons
• Retains settings even after the battery has been disconnected
INTERFACE COMPONENTS
• A) AXSWC-RF transmitter • B) AXSWC-RF interface • C) Keypad • D) Trim ring • E) AXSWC-RF harness
• F) Female 3.5mm connector with Brown and Brown/White wires
A
AxxessInterfaces.com
B
C
E
© COPYRIGHT 2020 METRA ELECTRONICS CORPORATION
D
F
AXSWC-RF
I N S TA L L AT I O N I N S T R U C T I O N S
TOOLS REQUIRED
• Cutting tool • Crimping tool • Tape
• Connectors (example: butt-connectors, bell
caps, etc.)
CAUTION!
All accessories, switches, climate
controls panels, and especially air bag indicator
lights must be connected before cycling the
ignition. Also, do not remove the factory radio
with the key in the on position, or while the
vehicle is running.
REV. 1/21/20 INSTAXSWC-RF
Advertisement
Table of Contents

Summary of Contents for Axxess AXSWC-RF
- Page 1 • Retains settings even after the battery has been disconnected INTERFACE COMPONENTS • A) AXSWC-RF transmitter • B) AXSWC-RF interface • C) Keypad • D) Trim ring • E) AXSWC-RF harness • F) Female 3.5mm connector with Brown and Brown/White wires...
-
Page 2: Table Of Contents
– Mounting the AXSWC-RF Transmitter ....................3 2. Update the AXSWC-RF to the latest software. AXSWC-RF Installation Note: To update the AXSWC-RF, go to axxessinterfaces.com and download the Axxess Updater. – Connections to be Made ........................4 - Setting up the AXSWC-RF .......................5 OVERVIEW –... -
Page 3: Overview
(Figure A) (Figure C) 1. Place the button pad in the AXSWC-RF with the Volume Up arrow (▲) in the location where you want it to be. (Figure A) 2. Snap the trim ring onto the AXSWC-RF to secure the keypad in place. (Figure B) 3. -
Page 4: Connections To Be Made
Brown/White wires) into the male 3.5mm connector of the AXSWC-RF harness. 3. For all other radios: Plug in the male 3.5mm connector of the AXSWC-RF into the back of the a. For Eclipse radios: Connect the Eclipse steering wheel control wires (normally Brown aftermarket radio, designated for an external steering wheel control interface. -
Page 5: Setting Up The Axswc-Rf
Step 2. Note: If the next function on the list is not on the AXSWC-RF press Volume Up for 1 second, 2. After a few of seconds, the LED should stop flashing rapidly, and go out for approximately 2 until the LED comes on, and then release Volume Up. -
Page 6: Button Assignment Legend
18. Temp Down 6. Once the LED goes off the Changing Radio Type mode will end. You can now test the AXSWC-RF. Note: If at any time the user fails to press any button for a period longer than 10 seconds this * Update: Some newer radios use this command to activate Android/Apple voice commands. -
Page 7: Radio Legend
1. Turn on the ignition but do not start the vehicle. 1. Eclipse (Type 1) 9. Valor 2. Press and hold down the AXSWC-RF button, that you want to assign a long press function to, 2. Kenwood 10. Clarion (Type 2) for about 10 seconds until the LED on the AXSWC-RF interface rapidly flashes. -
Page 8: Dual Assignment Legend
DUAL ASSIGNMENT INSTRUCTIONS TROUBLESHOOTING Dual Assignment Legend 1. Verify that you have 12-volt DC on the Red accessory wire of the AXSWC-RF, using a multimeter. Button Number New Button Action 2. Reconfirm that you have a good ground to the solid Black wire of the AXSWC-RF. -
Page 9: Led Feedback
3.5mm jack as needed. If you have performed any of the steps above, reset the AXSWC-RF by pressing the reset button on the AXSWC-RF for 3 seconds, release, then wait until the LED goes solid (approximately 20 seconds). - Page 11 REV. 1/21/2020 INSTAXSWC-RF...
- Page 12 AXSWC-RF I N S TA L L AT I O N I N S T R U C T I O N S IMPORTANT If you are having difficulties with the installation of this product, please call our Tech Support line at 1-800-253-TECH. Before doing so, look over the instructions a second time, and make sure the installation was performed exactly as the instructions are stated.
Need help?
Do you have a question about the AXSWC-RF and is the answer not in the manual?
Questions and answers