Advertisement
Quick Links
Advertisement

Related Manuals for Vicoustic VicBooth Ultra 1x2

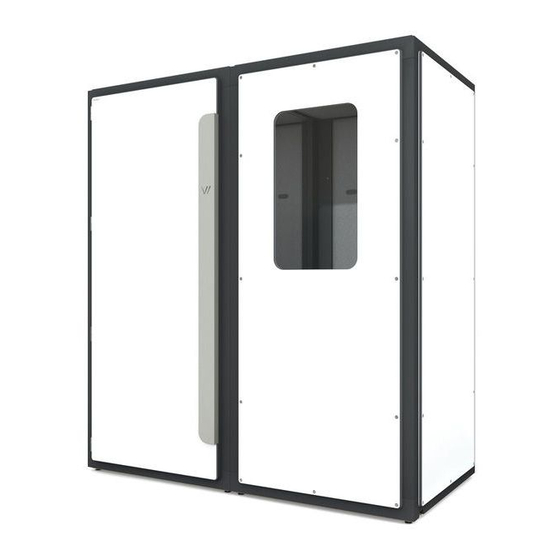
Summary of Contents for Vicoustic VicBooth Ultra 1x2
- Page 1 Installation Manual...
-
Page 3: Material Needed
Material Needed Included Ceiling | 2uni. Door | 1 uni. Lateral | 5 uni. Floor | 2 uni. Structure | 8 uni. 64 uni. 32 uni. 32 uni. 30 uni. 84 uni. 30 uni. 12 uni. 6 uni. 8 uni. 16 uni. - Page 4 Remove the floor panels and the 3 PET layers from each of the floor structures. Place the Floor Structures on the ground according to the diagram. Trim the supplied foam seal to match the base width. Apply foam seal on one side of the contact surface to ensure an acoustic seal. Step’...
- Page 5 Join the floor structures using the 63mm screws (K) and the flat heads (E). Use the 4mm Hex Keys (X). Step’ s Material...
- Page 6 Unscrew the four floor levelers of the outside corners of the set to half their length (about 15 mm - 0.59 in), as shown in the diagram. The other levelers remain retracted. ~15mm | 0.59’ ’ Level the floor structure using the 5mm Hex Key (X), adjusting the four levelers of the outside corners. Once the structure is levelled on both axes, the levellers that were collected should be adjusted so that they touch the floor.
- Page 7 Insert wooden dowels (A) in the floor structure according to the diagram. Step’ s Material Screw the metal fittings (B) in the floor structure according to the diagram. Step’ s Material...
- Page 8 Insert the locking cams (C) in the Structure Pillars and insert the wooden dowels (A) in the top end of the structure pillars. Step 1 Step’ s Material 1 uni. Step 2...
- Page 9 Apply the foam seal on one side of the contact surface of the structure pillars to ensure an acoustic seal. (only applies on 2 pillars, on the side that is in contact between the parts). Step’ s Material Foam seal...
- Page 10 Fit the structure pillars on the floor structure according to the diagram and rotate the locking cams (C) by hand using a screwdriver - make sure the beams are completely inserted before rotating the locking cams to the locked position. Step’...
- Page 11 Join the structure pillars using the 31mm screws (G) and the flat heads (E). Use the 4mm Hex Keys (X). Step’ s Material...
- Page 12 Remove the top covers and the ceiling panels from the ceiling structure - the PET and Vicycle layers stay attached to the top cover. Trim the supplied foam seal to match the ceilling width. Apply the foam seal on one side of the contact surface to ensure an acoustic seal. Step’...
- Page 13 Screw the metal fittings (B) in the ceilling structure according to the diagram. Step’ s Material...
- Page 14 Fit the ceiling structure on top of the structure pillars according to the diagram and rotate the locking cams (C) by hand using a screwdriver - make sure the structures are completely inserted before rotating the locking cams to the locked position. Step’...
- Page 15 Join the ceilling structures using the 63mm screws (K) and the flat heads (E). Use the 4mm Hex Keys (X). Step’ s Material Fit the side panels - this step must be executed by two persons. Make sure the side panels are placed in the correct position according to the diagram below.
- Page 16 Make sure the holes are aligned before placing the screws (You can use two screwdrivers to help align the holes in the center of the panel). We advise one person to align the panels with the help of the screwdrivers and the other one to fasten the screws.
- Page 17 Carefully separate the Door Frame from the Door. Fit the Door Frame using the 45mm screws (H) on the top and lower ends, and the 31mm screws (G) on the sides. Use the flat heads (E) and the 4mm Hex Keys (X). Step’...
- Page 18 Use the spacer provided to ensure even spacing of the door frame. Tighten the bolts following the order of fixing the screws as described in the diagram and the indications concerning the type of screws to be used. You can also use the metal spacer as a bottle opener. Fit the door by carefully sliding the hinges down into the hinge shaft on the Door Frame.
- Page 19 In some cases, due to the unevenness of the floor, slight bend can occur on the door frame. It may be necessary to loosen and/or tighten some fixing screws on the door frame so that it stays as parallel as possible to the door and guarantees perfect contact between the two surfaces.
- Page 20 Place the top covers on the ceiling structures according to the diagram. Fit the ceiling panels using the “J” screws. Fit the ceiling panels using the “J” screws. Step’ s Material...
- Page 21 Fit the ceiling panels using the “I” screws - make sure the ventilation slots are aligned with the slots on the underside of the top panels. Step’ s Material...
- Page 22 If you need to insert a cable into VicBooth Ultra, you must do so from the inside out. Lift the cable entry cover and force the plug through the layers of PET so that it runs out through the cutout made for this purpose.
- Page 24 Rua Quinta do Bom Retiro Nº 16, Armazém 9 2820-690 Charneca da Caparica, Portugal T (+351) 212 964 100 Info and Sales E sales@vicoustic.com www.vicoustic.com © Vicoustic, 2020 | V3 No parts of this document might be copied and/or published without written consent of Vicoustic.
Need help?
Do you have a question about the VicBooth Ultra 1x2 and is the answer not in the manual?
Questions and answers