Table of Contents
Advertisement
Quick Links
Advertisement
Table of Contents

Summary of Contents for Olitech EasyFlip OLT 2908
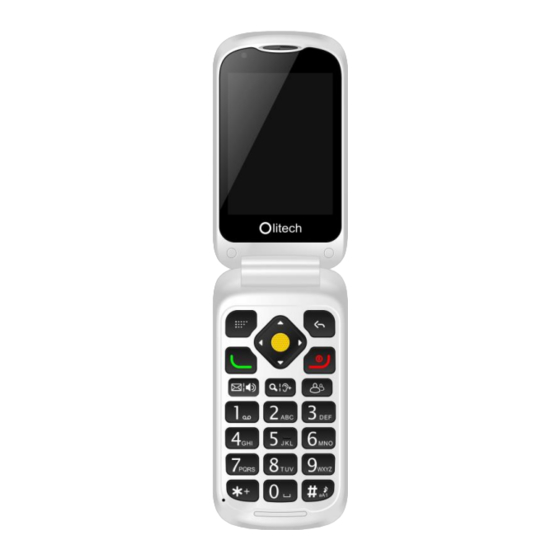
- Page 1 EasyFlip Quick Set-Up Guide V2 Model number: OLT 2908...
-
Page 2: Table Of Contents
Contents Sim insertion ..........3 Powering on/off ..........3 Icon view (incl. Shortcut keys) ...... 4 Screen and keypad backlight settings ..5 Save contacts to phonebook ......6 Photo/speed dial ..........6 Ringtone ............7 Answer mode ..........7 Voice output ........... -
Page 3: Sim Insertion
Olitech strongly advise that users review the SIM insertion instructions in the EasyFlip User Manual V2 (pages 10 – 15) and/or the instructional videos the Olitech website (see page 16). Please obtain assistance to insert the SIM if you deem necessary. -
Page 4: Icon View (Incl. Shortcut Keys)
3-4 seconds, use the navigation key to highlight your desired action and press the yellow key to select. Icon view (including Shortcut keys) Icon view allows the main menu to be displayed as either one icon per page or six icons per page. The default icon view is one icon per page. -
Page 5: Screen And Keypad Backlight Settings
To activate and program the shortcut keys: 1. Open Menu (if in one icon mode) 2. Scroll to and select Settings 3. Select Phone settings 4. Select Shortcut keys 5. Select On 6. Scroll through and select preference for each arrow (options include phonebook, call logs, music, camera, settings, SOS (setting), alarm, file manager, gallery, calculator, shortcut key). -
Page 6: Save Contacts To Phonebook
Save contacts to phonebook 1. Select Phonebook/Contacts 2. Select Add new contact 3. Edit name and phone number (required) and add photo, voice recording and individual ringtone (optional). 4. Select Save Photo/speed dial Eight quick dial phone numbers can be programmed to the EasyFlip. -
Page 7: Ringtone
2. Select Options 3. Select Edit to manually enter details (name, phone number, photo, name recording and ringtone) OR Import from phonebook to add a saved contact 4. Select Save Ringtone 1. Scroll to and select Settings 2. Select Audio settings 3. -
Page 8: Voice Output
Activating the loudspeaker answer mode will also direct outgoing calls to loudspeaker when they are initiated. Audio can be switched from loudspeaker to the standard speaker during a call by pressing the direct access loudspeaker key (key above the number 1 key). To modify the answer modes: 1. -
Page 9: Amplify Handset Volume
Voice output: Activate talkback When Talkback is active, text present on screen and the action of keys is voiced out. Incoming text messages and incoming caller’s details are also voiced out. To activate/deactivate this setting: 1. Scroll to and select Settings 2. -
Page 10: Silent Mode
To use this function please ensure the Amplify receiver volume key is On in the phones settings: 1. Scroll to and select Settings 2. Select Audio settings 3. Select Amplify receiver volume so that ”On” is present Silent mode When in the main menu the phone can be changed to silent mode by pressing and holding the hash (#) key for three seconds. -
Page 11: Volume Key/Torch Key Status
Volume key/torch key status To eliminate the chance that the volume settings and/or torch may be activated when holding the phone, the volume and torch keys can be activated/deactivated within the phones settings. If the volume keys are deactivated, the loudspeaker and earpiece volume boost can still be activated/deactivated using their dedicated keys. -
Page 12: Deactivate Sms Popup
4. Select Message font size 5. Scroll to and select desired message font size. This font size will be displayed when message threads are open (not in primary inbox). Deactivate SMS/MMS popup notification 1. Scroll to and select Settings 2. Select Message settings 3. -
Page 13: Low Battery Notification
6. If you would a text message sent when emergency key activated ensure Send message is ticked. 7. If you would like a google link containing the phones location sent when emergency key activated ensure Send location is ticked. 8. To edit the emergency text message select Emergency message, edit message and select OK. -
Page 14: Menu Visibility
Menu visibility Menu visibility allows the following menu items to be shown/hidden: message, call logs, photo dial, phonebook, camera, multimedia, safety, organiser and App. If “Message” is hidden, the direct access message key will become non- functional. To show/hide menu items: 1. -
Page 15: Use Camera And View Images
3. Select date you want to save an event to 4. Select Options 5. Select Add event 6. Edit details 7. Select Save Use camera & view images 1. Scroll to and select Camera 2. Photos can be taken using the yellow “select” 3. -
Page 16: Manual Navigation Mode
To exit this mode press the star key for 2-3 seconds. Resources In addition to this Quick Setup Guide, Olitech offer support regarding the EasyFlip setup, use and troubleshooting via the below methods: 1. EasyFlip User Manual V2: provided with purchase and online at www.olitech.com.au/manuals...


Need help?
Do you have a question about the EasyFlip OLT 2908 and is the answer not in the manual?
Questions and answers