
Related Manuals for Plastica Self-Build Eco Wooden Pool


Summary of Contents for Plastica Self-Build Eco Wooden Pool
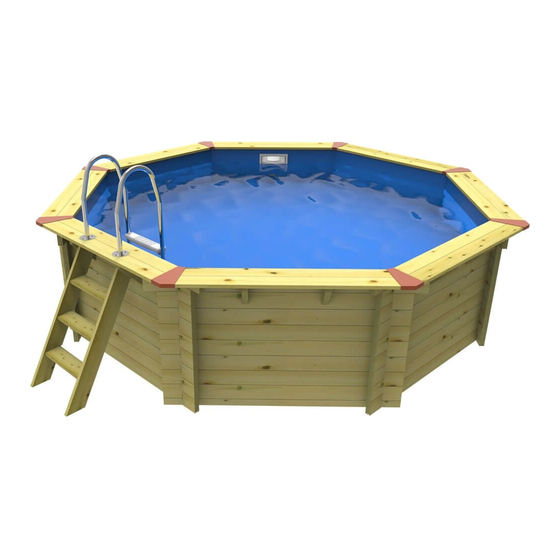
- Page 1 Self-Build Eco Wooden Pool Corner Pool Installation Manual it’ s WPM 05 January 2010 edition www.plasticapools.com...
-
Page 2: Table Of Contents
Self Build Eco Wooden Pool Corner Pool Contents Introduction Recommendations for Storage Section D: Filtration Equipment after Delivery General Description General Safety Precautions Positioning the Equipment Required Tools Plumbing the Pipe Work Kit Contents Fill the Pool Section A: Preparation of the Base Section E: Fitting the Top Shelving Option I: Subsoil Base... -
Page 3: Introduction
Introduction You are advised to read this whole book before starting your project. In the event of any problems or questions please contact your dealer immediately who will be please to help. Warranty claims will not be entertained if there is delay in reporting a problem or these instructions have not been followed. -
Page 4: Preparation Of The Base
SECTION A: Preparation of the Base OPTION I: Subsoil Base • Although the recommended base is concrete (see Option II below) you may choose to construct your pool on undisturbed subsoil. You must satisfy yourself that your site conditions are suitable. If your site is wet and prone to ground water or flooding use a concrete base. -
Page 5: Decide The Layout Of Your Pool
SECTION B: Assembly of the Shell Decide the Layout of your Pool • Refer to the Pool Layout drawing. • Decide where you would like the pool ladders. Choose a convenient position to have your ladders that will suit your long term pool usage. - Page 6 • Please note that although you are constructing a Corner Pool all of the pools we manufacture as standard, are of an octagonal form. • Find two standard half height planks that have flat bases and have two tongues facing upwards. Place these flat side down on your pool base.
-
Page 7: Install The Return Inlet
Install the Return Inlet • Locate the return flow fitting. Ensure that all screws, rubber gaskets and other parts are carefully stored [see figure 9]. • Take the main body of the fitting and fit it into the pool wall from the inside so the flat face is against the inside pool wall and the 1½”... -
Page 8: Fitting The Wooden Vertical Support Planks
Fitting the Wooden Vertical Support Planks • Locate the wooden vertical support planks and 5mm x 100mm screws • Refer to your pool layout drawing for the positions. • The vertical support planks are designed to be fixed so their edge is against the pool wall [see figure 17]. -
Page 9: Fitting The Liner
SECTION C: Fitting the Liner Fitting the Linerlock • Linerlock is the white plastic extrusion that the pool liner hangs from. • Although the linerlock can be cut straight at a 90 degree angle a neater finish and better fixed liner will be achieved by cutting at 22½... -
Page 10: Preparation For Liner Fitting
• Around the perimeter of the pool where the wall meets the floor cut the felt with scissors to be an exact fit [see figures 21 & 22]. Figure 21 Figure 22 Preparation for Liner Fitting • The liner will be much easier to fit on a warm sunny day as this makes the material supple. Before fitting place the liner in a warm sunny position. -
Page 11: Fitting The Liner
Fitting the Liner • It is absolutely essential that ALL foreign bodies are excluded from between the liner and the underlay, which means that the underlay and the liner should be thoroughly cleaned (vacuumed) before installation. • Before fitting the liner ensure each fitting (return, skimmer & light) has gaskets fitted and marker screws installed. •... -
Page 12: Cutting In The Pool Flow Fittings
Cutting in the Pool Flow Fittings • Cutting the liner and fitting the flow fittings should be done with care and not rushed, it is wise to have a person outside the pool so they can pass you tools and equipment. •... -
Page 13: Filtration Equipment
SECTION D: Filtration Equipment General Description • To keep your swimming pool water clear and healthy it needs to be filtered and treated with chemicals. For details about chemical water treatment please consult your supplying dealer. • Swimming pool water is drawn through the skimmer into the pump. The pump then pushes the water through the sand filter where dirt is trapped. -
Page 14: Fill The Pool
Figure 42 Figure 43 Figure 44 • Connect the other end of the hose to the inlet return ball valve [see figure 42]. Now connect the hose from the pump to the skimmer [see figures 43 & 44]. Figure 45 Figure 46 •... -
Page 15: Fitting The Top Shelving
SECTION E: Fitting the Top Shelving Position the Top Shelving • The top shelving comes as 16 pieces, 8 inner planks and 8 outer planks. • Lay the inner planks around the pool, resting them on the pool wall and top shelving brackets. •... -
Page 16: Secure The Top Shelving
Secure the Top Shelving • If necessary remove temporary screws added earlier. • Use the 4mm x 63mm screws to fix the top shelving down to the shelving support brackets and pool wall. • Pilot drill and countersink each hole. •...
Need help?
Do you have a question about the Self-Build Eco Wooden Pool and is the answer not in the manual?
Questions and answers