Table of Contents
Advertisement
Quick Links
Owner's Manual & Safety Instructions
Save This Manual
operating, inspection, maintenance and cleaning procedures. Write the product's serial number in the
back of the manual near the assembly diagram (or month and year of purchase if product has no number).
Keep this manual and the receipt in a safe and dry place for future reference.
Email our technical support at: productsupport@harborfreight.com
When unpacking, make sure that the product is intact
and undamaged. If any parts are missing or broken,
please call 1-888-866-5797 as soon as possible.
©
Copyright
2019 by Harbor Freight Tools
No portion of this manual or any artwork contained herein may be reproduced in
any shape or form without the express written consent of Harbor Freight Tools.
Diagrams within this manual may not be drawn proportionally. Due to continuing
improvements, actual product may differ slightly from the product described herein.
Tools required for assembly and service may not be included.
Keep this manual for the safety warnings and precautions, assembly,
Visit our website at: http://www.harborfreight.com
®
. All rights reserved.
Read this material before using this product.
Failure to do so can result in serious injury.
SAVE THIS MANUAL.
19l
Advertisement
Table of Contents

Related Manuals for Diamondback 57087


Summary of Contents for Diamondback 57087
- Page 1 Owner’s Manual & Safety Instructions Save This Manual Keep this manual for the safety warnings and precautions, assembly, operating, inspection, maintenance and cleaning procedures. Write the product’s serial number in the back of the manual near the assembly diagram (or month and year of purchase if product has no number). Keep this manual and the receipt in a safe and dry place for future reference.
-
Page 2: Important Safety Information
If in doubt, use the next heavier gauge. The smaller the gauge number, the heavier the cord. 6. MAKE WORKSHOP KID PROOF with padlocks, master switches, or by removing starter keys. Page 2 For technical questions, please call 1-888-866-5797. Item 57087... - Page 3 5. Use only 3-wire extension cords that have 3-prong grounding plugs and 3-pole receptacles that accept the tool’s plug. Item 57087 For technical questions, please call 1-888-866-5797. Page 3...
- Page 4 14. Keep the guard in place while through-sawing. an uncontrolled workpiece to lift up and Verify that the spreader lines up with out of the saw toward the operator. the blade to prevent binding. Page 4 For technical questions, please call 1-888-866-5797. Item 57087...
- Page 5 19. WARNING – To reduce the risk of electrocution, which cannot be built into this product, keep all connections dry and off the ground. but must be supplied by the operator. Do not touch plug with wet hands. Item 57087 For technical questions, please call 1-888-866-5797. Page 5...
-
Page 6: Vibration Safety
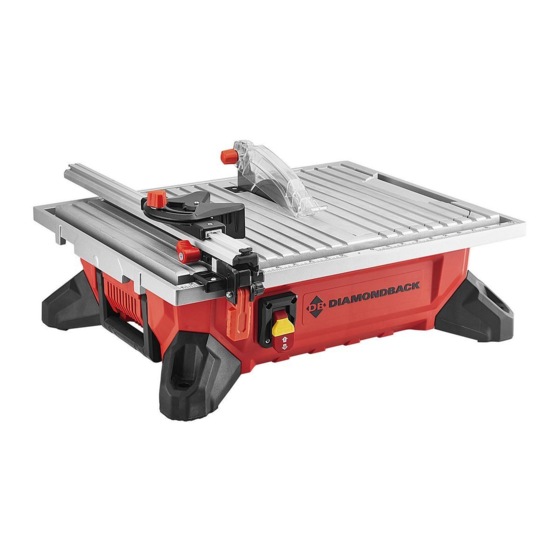
SaVE tHESE inStructiOnS. Specifications Electrical Rating 120VAC / 60 H z / 6.5 A Motor No Load Speed 3450 RPM Max. Blade Diameter 7" Arbor Size 5/8" Page 6 For technical questions, please call 1-888-866-5797. Item 57087... - Page 7 Handle power cord power Switch: The Power Switch includes a Key for safety. The Tile Saw switch cannot be turned on without the key. Remove the Safety Key after use. Item 57087 For technical questions, please call 1-888-866-5797. Page 7...
-
Page 8: Mounting The Saw
Flange, leaving Inner Flange on the Spindle. 4. Replace Spindle Nut. Make sure flat side Outer Flange of Spindle Nut touches Outer Flange. Spindle 5. Tighten Spindle Nut securely using wrenches. Slotted Wrench Wrench Page 8 For technical questions, please call 1-888-866-5797. Item 57087... -
Page 9: Installing The Blade Guard
Knob Fence rail Locking right side Lever Fence rail left side 3. Align Knob Nut on Locking Lever with the corresponding slot on the Rip Fence. Knob nut rip Fence Item 57087 For technical questions, please call 1-888-866-5797. Page 9... - Page 10 1. Remove Bevel Table. Firmly push the Overflow 2. Replace Bevel Table, making sure Drain into the hole in the bottom of water reservoir. it fits properly in place. Overflow Drain reservoir Page 10 For technical questions, please call 1-888-866-5797. Item 57087...
-
Page 11: Tool Set Up
This tool is intended for use on extra length to allow free movement while working. man-made masonry and tile products only. Item 57087 For technical questions, please call 1-888-866-5797. Page 11... - Page 12 5. Insert the Safety Key and lift the Power reach. Store the Safety Key separate from Switch up to the ON position. the tool and out of children′s reach. Blade Fence Miter Workpiece Gauge Locking Lever Page 12 For technical questions, please call 1-888-866-5797. Item 57087...
- Page 13 Store the Safety Key separate from 4. Insert the Safety Key and lift the Power the tool and out of children′s reach. Switch up to the ON position. Bevel table Blade Bevel Workpiece Item 57087 For technical questions, please call 1-888-866-5797. Page 13...
-
Page 14: Cleaning, Maintenance, And Lubrication
Also, clean the following after only by a qualified service technician. every use, and as needed during extended use: • Rails • Water Tray (empty out sediment and water) • Pump filter and housing Page 14 For technical questions, please call 1-888-866-5797. Item 57087... -
Page 15: Troubleshooting
See table a on page 3. Follow all safety precautions whenever diagnosing or servicing the tool. Disconnect power supply and remove the Safety Key before service. Item 57087 For technical questions, please call 1-888-866-5797. Page 15... -
Page 16: Please Read The Following Carefully
LICENSED TECHNICIANS, AND NOT BY THE BUYER. THE BUYER ASSUMES ALL RISK AND LIABILITY ARISING OUT OF HIS OR HER REPAIRS TO THE ORIGINAL PRODUCT OR REPLACEMENT PARTS THERETO, OR ARISING OUT OF HIS OR HER INSTALLATION OF REPLACEMENT PARTS THERETO. Page 16 For technical questions, please call 1-888-866-5797. Item 57087... - Page 17 If product has no serial number, record month and year of purchase instead. note: Some parts are listed and shown for illustration purposes only, and are not available individually as replacement parts. Item 57087 For technical questions, please call 1-888-866-5797. Page 17...
-
Page 18: Parts List
Miter Gauge Capacitor Clip Cross Head Screw Capacitor Gauge Lock Knob Power Cord C Ring Cord Protection Ring Warning Label Cord Clamp Plate Locknut Cord Wrap Pointer Wrench Clip Bolt Page 18 For technical questions, please call 1-888-866-5797. Item 57087... -
Page 19: Assembly Diagram
Diagram Item 57087 For technical questions, please call 1-888-866-5797. Page 19... - Page 20 Limited 90 Day Warranty Harbor Freight Tools Co. makes every effort to assure that its products meet high quality and durability standards, and warrants to the original purchaser that this product is free from defects in materials and workmanship for the period of 90 days from the date of purchase.
Need help?
Do you have a question about the 57087 and is the answer not in the manual?
Questions and answers
how to remove the safety key
To remove the safety key on a Diamondback 57087, turn the power switch off and pull out the safety key. The saw cannot be turned on without the key, so remove it after use for safety.
This answer is automatically generated