
Related Manuals for Lampa action cam 38866


Summary of Contents for Lampa action cam 38866
- Page 1 Art. 38866 TELECAMERA per SPORT TELECOMANDO E KIT ACCESSORI MANUALE SPORT CAMERA + REMOTE AND ACCESSORY KIT...
- Page 3 TELECAMERA per SPORT +TELECOMANDO E KIT ACCESSORI Manuale SPORT CAMERA + REMOTE AND ACCESSORY KIT Manual...
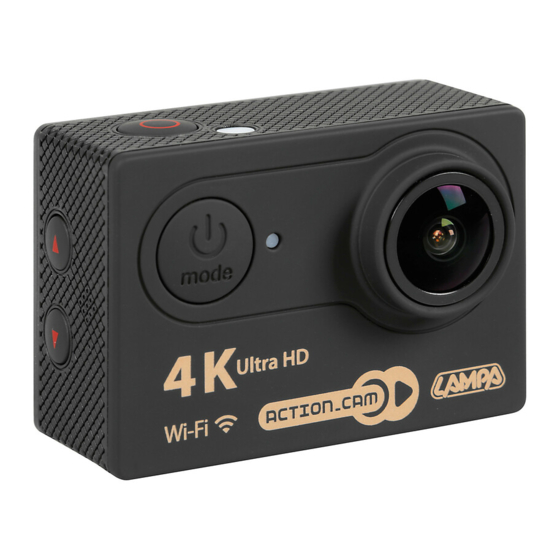
- Page 4 DECRIZIONE PRODOTTO 1 Tasto scatto/selezione 2 Indicatore di stato 8 Tasto UP 3 Tasto accensione/modalità 9 Tasto DOWN 4 Microfono 10 Altoparlante 5 Lente 11 Schermo 6 Alloggiamento micro SD 12 Vano batteria 7 Porta microUSB 13 Porta micro HDMI Pulsante foto 2.4G TELECOMANDO Pulsante video...
- Page 5 ACCESSORI Fissaggio Cover Clip 1 Attacco 1 Impermeabile A Manubrio Attacco 2 Attacco 3 Attacco 4 Attacco 5 Attacco 6 Attacco 7 Attacco 8 Attacco 9 Lacci Caricatore Cavo Usb Batteria Chiusura Laccetti Stracio Lente Protettiva...
-
Page 6: Montare La Telecamera
MONTARE LA TELECAMERA... -
Page 7: Pulsanti E Funzioni
PULSANTI E FUNZIONI Accensione: Premete il tasto Accensione/Modalità. Spegnimento: Tenete premuto il tasto Accensione/Modalità. Accendete la videocamera e premete ripetutamente il tasto Accensione/Modalità per scorrere le varie funzioni/ impostazioni. Troverete: Video Photo Burst foto Time Lapse Settings Registrazione video Video Scatta una singola fotografia Photo Scatta una sequenza... -
Page 8: Risoluzione Video
PULSANTI E FUNZIONI Midland Action-Cam può essere utilizzata in varie situazioni: nelle vostre attività sportive, in auto o come macchina fotografica. Premete il tasto Scatto/Selezione per entrare nel menu Impostazioni (settings); per scorrere le varie modalità premete ripetutamente il tasto Accensione/Modalità e successivamente il tasto Scatto/Selezione per selezionare l’opzione desiderata. - Page 9 PULSANTI E FUNZIONI Looping video (Ripetizione automatica dei video): off/on (4K e 2.7K non supportata). Time Stamp (Mostra data e ora): Off / Data / Data e ora Exposure (Esposizione): +-2.0 / +-1.7 / +-1.3 / +-1.0 / +-0.7 / +-0.30/0 Photo resolution (Risoluzione foto): 12M / 8M / 5M / 4M Burst photo (Sequenza foto): 3 foto in 1.5 secondi...
- Page 10 PULSANTI E FUNZIONI Video Per registrare video, verificate innanzitutto che la videocamera sia in modalità Video. Se l’icona del video non compare sul display premete il tasto Accensione/Modalità finchè viene visualizzata. Per iniziare la registrazione premete il tasto Scatto/Selezione. Action- Cam emetterà...
-
Page 11: Time Lapse
PULSANTI E FUNZIONI Time Lapse (FOTO AD INTERVALLI) Per scattare una serie di foto ad intervalli regolari, la funzione Conti- nuous Lapse deve essere attiva e Action-Cam deve essere in modalità Time Lapse. Se l’icona relativa a questa funzione non è presente sul display, premete il tasto Accensione/ Modalità... -
Page 12: Microsd Card
ISTRUZIONI PLAYBACK (Riproduzione video e foto) 1 Verificate che Action-Cam sia in modalità Videocamera (Camera). 2 Premete il tasto Up/Riproduzione per entrare nel menu Playback (Riproduzione). 3 Premete ripetutamente il tasto Accensione/ Modalità per scorrere le modalità Video e Foto. 4 Selezionate l’opzione desiderata premendo il tasto Scatto/Selezione. - Page 13 ISTRUZIONI APP VIDEOCAMERA (Collegamento alla App Ez iCam) L’Applicazione Ez iCam vi permette di controllare la videocamera a distanza utilizzando uno smartphone o un tablet. Le caratteristiche permettono il pieno controllo della videocamera, di vedere in diretta, riprodurre e condividere le foto/filmati selezionati. 1 Scaricate la App Ez iCam sul vostro smartphone o tablet presso lo store Apple App o Google Play.
- Page 14 2.4G TELECOMANDO Resistente all’acqua fino a 3 m. Pulsante foto Pulsante video Il telecomando si connette automaticamente alla videocamera quando viene accesa. VIDEO Per registrare un video, verificare che la videocamera sia in modalità VIDEO. Premere il pulsante grigio VIDEO. La videocamera emette un suono e il led inizia a lampeggiare per indicare che la registrazione è...
- Page 15 2.4G TELECOMANDO FOTO Per scattare una foto, verificare che la videocamera sia in modalità FOTO Premere il pulsante rosso FOTO. La videocamere emette il suono dell’otturatore per indicare che la foto è stata scattata. MULTISCATTO Per scattare una serie di foto, verificare che la videocamera sia in modalità...
-
Page 16: Garanzia
La garanzia non copre: • Deterioramento del prodotto da un uso normale • Difetti causati da uso improprio o collegamento ad accessori o software non originali LAMPA La garanzia non è applicabile: • Se il prodotto è stato smontato, modificato o riparato. - Page 18 THE BASICS 1 Shutter/Select Button 8 Up Button 2 Charging Status Light 9 Down Button 3 Power/Mode Button 10 Speaker 4 Microphone 11 Screen 5 Lens 12 Battery compartment 6 MicroSD Slot 13 Micro HDMI Port 7 Micro USB Port Photo button 2.4G REMOTE Video button...
- Page 19 ACCESSORIES Waterproof Handle Bar Clip Mount 1 Housing Pole Mount Helmet Mount 2 Mount 3 Mount 4 Mount Mount 5 Mount 6 Mount 7 Clip 2 Charger USB Cable Tethers Battery Protective Bandages Lens cloth backdoor...
-
Page 20: Mounting Your Camera
MOUNTING YOUR CAMERA Attach your camera to helmets, gear and equipment... -
Page 21: Burst Photo
BUTTON AND FUNCTION To power ON: Press the Power/Mode button. To power OFF: Press and hold the Power/Mode button. Turn camera ON and repeatedly press the Power/Mode button to cycle through camera modes and settings. The modes will appear in following order: Video Photo Burst foto... -
Page 22: Video Resolution
BUTTON AND FUNCTION SETTINGS Press the Shutter/Select button to enter the settings menu. Repeatedly press the Power/Mode to cycle through options and press the Shutter/Select button to select the desired option. Or use the Up/Playback or Down/Wi-Fi button to cycle through the various options. - Page 23 BUTTON AND FUNCTION Looping Video: On/Off Time Stamp: Off/Date/Date & Time Exposure: +-2.0/+-1.7/+-1.3/+-1.0/+-0.7/+-0.30/0 Photo resolution: 12M / 8M / 5M / 4M Burst Photo: 3 photos Time Lapse: 2s / 3s / 5s / 10s / 20s / 30s / 60s Continuous Lapse: Off/On Power Frequency: 50Hz / 60Hz / Auto Language: English / French / Spanish / Italian/ German /...
- Page 24 BUTTON AND FUNCTION VIDEO To record video verify the camera is in Video mode. If the Video icon on your camera’s LCD screen is not showing, press the Power/Mode button repeatedly until it appears. To start recording: Press the Shutter/Select button. The camera will emit one beep and the Camera Status Light will flash while recording.
- Page 25 BUTTON AND FUNCTION TIME LAPSE To capture a Time Lapse verify the camera is in Continuous Lapse is ON and the camera is in Time Lapse mode. If the Time Lapse icon on your camera’s LCD screen is not showing, press the Power/Mode button repeatedly until it appears.
-
Page 26: Storage/Microsd Cards
BUTTON AND FUNCTION PLAYBACK Playing Videos and Photos 1 Verify the camera is in Camera Modes. 2 Press the Up/Playback button to enter the Playback menu. 3 Repeatedly press the Power/Mode button to cycle through Video and Photo. 4 Press the Shutter/Select button to select desired option. 5 Use the Up/Playback or the Down/Wi-Fi button to cycle through the various options. -
Page 27: Camera App
BUTTON AND FUNCTION CAMERA APP The Ez iCam APP allows you to control your camera remotely using a smartphone or tablet. Features include full camera control, live preview, photo playback and sharing of select content and more. 1 Download the Ez iCam APP to your smartphone or tablet at the Apple Store or Google Play. -
Page 28: Video Button
2.4G REMOTE Photo button Video button 3 m / 10 ft waterproof VIDEO To record video, verify that the camera is in VIDEO mode To start recording: Press Grey Video Button. The camera will emit one beep and the Camera Light will flash while recording. To stop recording: Press the Grey Video Button again. - Page 29 2.4G REMOTE PHOTO To capture a Photo, verify that the camera is in PHOTO mode. To take a photo: Press the Red Photo Button. The camera will emit a camera shutter sound. BURST PHOTO To capture a burst photo, verify that the camera is in BURST PHOTO mode. To take a Burst Photo series: Press the Red Photo Button.
-
Page 30: Limited Warranty
• The product deterioration by normal use. • Defects caused by misuse with, or connection to, any accessory or software not genuine LAMPA. Warranty is not enforceable: • If the product has been dismantled, modified or repaired by anyone other than the authorized service centre or if it’s epaired using unauthorized... - Page 32 LAMPA S.p.A. Via G. Rossa, 53/55 - 46019 Viadana (MN) ITALY Tel. +39 0375 820700 UNI EN ISO 9001:2008 Certified Company www.lampa.it...
Need help?
Do you have a question about the action cam 38866 and is the answer not in the manual?
Questions and answers