Table of Contents
Advertisement
Advertisement
Table of Contents

Subscribe to Our Youtube Channel
Related Manuals for Centurion SECTOR Series

Summary of Contents for Centurion SECTOR Series
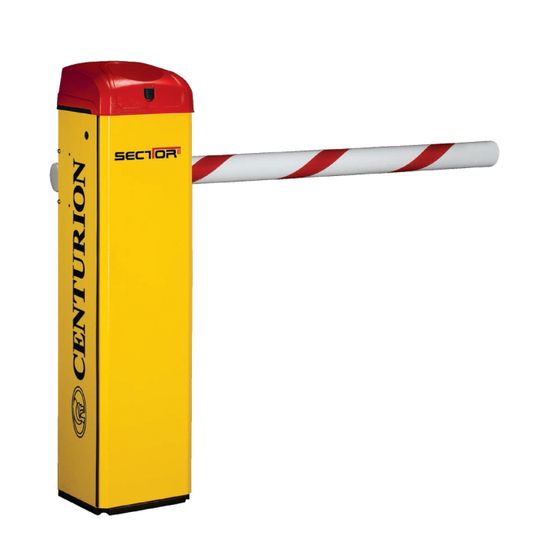
- Page 1 SECTOR installation manual HIGH-VOLUME INDUSTRIAL TRAFFIC BARRIER...
- Page 2 50 countries worldwide CENTURION SYSTEMS (Pty) Ltd reserves the right to make changes to the products described in this manual without notice and without obligation of CENTURION SYSTEMS (Pty) Ltd to notify any persons of any such revisions or changes.
-
Page 3: Table Of Contents
Contents Mechanical Setup page 1 page 2 Electrical Setup page 2 Commissioning and Handover page 3 IMPORTANT SAFETY INSTRUCTIONS Declaration of conformity page 5 General description page 6 Lightning protection page 6 Specifications page 7 Physical dimensions page 7 Technical specifications page 7 Barrier housing specifications page 8... - Page 4 Concrete plinth/foundation page 26 Fitting the pole page 27 Levelling the boom pole page 28 Balancing the spring page 28 Failsafe/Lock Mode page 29 Manual release page 29 14. Electrical setup page 30 Connecting all wiring page 30 15. Simple Mode: Option 1 (recommended) electrical connections page 31 16.
-
Page 5: Mechanical Setup
Mechanical setup These abbreviated instructions are for the experienced installer who needs a checklist to get a standard installation up and running in the minimum of time. Detailed installation features and functions are referred to later in this manual. Heed necessary site considerations Page 12 Check cabling requirements Page 19... -
Page 6: Electrical Setup
Electrical setup Connect all wiring Page 30 Commissioning and handover Set the limits and features Page 39 Set additional features via the Page 41 menus, if required Carry out professional Page 61 handover to client Page 2... -
Page 7: Important Safety Instructions
Make sure that an earth leakage circuit breaker with a threshold of 30mA is fitted upstream of the system Never short circuit the battery and do not try to recharge the batteries with power supply units other than that supplied with the product, or by Centurion Systems Page 3... - Page 8 Always check the obstruction detection system, and safety devices for correct operation Centurion Systems does not accept any liability caused by improper use of the product, or for use other than that for which the automated system was intended This product was designed and built strictly for the use indicated in this documentation.
-
Page 9: Declaration Of Conformity
1. Declaration of conformity Manufacturer: Centurion Systems (Pty) Ltd Unit 13 Production Park Intersection Newmarket Road & Epsom Avenue North Riding Gauteng South Africa Declares that the product: Product name: SECTOR Traffic barrier Product options: All variants Conforms with the following specifications:... -
Page 10: General Description
The SECTOR electronic controller utilises the same proven surge protection philosophy that is used in all CENTURION products. While this does not guarantee that the unit will not be damaged in the event of a lightning strike or power surge, it greatly reduces the likelihood of such damage occurring. -
Page 11: Specifications
500 transmitter buttons Receiver frequency 433MHz Can operate off a solar supply, consult Centurion Systems for assistance Can increase battery capacity for longer standby times Boom pole raise and lower times are both individually configurable to suit individual installation requirements Based on 25°C ambient temperature and unit not in direct sunlight... -
Page 12: Barrier Housing Specifications
Barrier housing specifications SECTOR 3 SECTOR 4.5 SECTOR 6 Coastal plains Application Inland areas Marine areas SECTOR 3 -no airborne salt Zinc-passivated Grade 430 stainless Grade 316 Main housing surface mild steel with steel with epoxy brushed protection epoxy coating coating stainless steel Base frame surface... -
Page 13: Icons Used In This Booklet
4. Icons used in this manual This icon indicates tips and other This icon denotes variations and information that could be useful other aspects that should be during the installation considered during installation This icon indicates warning, caution or attention! Please take special note of critical aspects that MUST be adhered to in order to prevent injury Page 9... -
Page 14: Product Identification
5. Product identification FIGURE 2. PRODUCT IDENTIFICATION SECTOR enclosure Boom pole (3m, 4.5m and 6m) Gearbox assembly (3m, 4.5m and 6m) Boom coupler Spring locating washer 10. Boom retainer Spring bush (3m, 4.5m and 6m) 11. Door Counterbalance assembly (3m, 4.5m 12. -
Page 15: Required Tools And Equipment
6. Required tools and equipment Spanner – 17mm; 13mm Screwdriver – 3.5mm flat and 6mm Philips Hammer Electric drilling machine G-clamp x 2 Pick Crimping tool and pin lugs Self-locking pliers (vice-grip) Pliers Side cutters Masonry bits – 6mm; 20mm; (for sites with rawlbolt foundation plates) Steel bits –... -
Page 16: Preparation Of Site
7. Preparation of site General considerations for the installation Consider the following checklist when determining the safety and suitability of the site: Check that all local authority requirements will be met Check that the usage (duty cycle) of the site and the length of the boom pole required, are within the barrier specifications Check that there is sufficient clearance on the side of the roadway to mount the barrier... -
Page 17: Loop Detectors And Associated Functionality
8. Loop detectors and associated functionality FLUX OB onboard vehicle loop detector Description Certain SECTOR models provide an onboard single-channel inductive loop detector known as the FLUX OB, eliminating the need for a separate detector. This highly sensitive loop detector can be used for the connection of closing loops and does not require additional relays and bases to be fitted, saving time and money. - Page 18 Uni-directional Free-exit switch The switch is used to select between uni- and bi-directional traffic. If the switch is in the ON position, the loop detector will generate a “raise” pulse whenever a vehicle is detected on the Free-exit loop. If, however, the switch is in the OFF position, a raise pulse will only be generated if a detect signal is received from the Free-exit loop only, and never when a signal is received from the Free-exit loop and the closing loop simultaneously (bi-directional traffic)
-
Page 19: Flux Ob Diagnostics
Detect indicator LED This green LED indicator is illuminated when there is a vehicle detected. This LED can also be used to determine the loop frequency. Reset or power up, count the number of times the Detect LED flashes. Multiply this number by 10KHz. For example: if the LED flashes eight times, then the loop frequency is approximately 80KHz Commissioning the FLUX OB With the loop connected, apply power to the SECTOR controller. - Page 20 Separate loop detector module If your SECTOR vehicle traffic barrier has not been fitted with an onboard inductive loop detector, it is possible to install an external detector using one or both of the bases provided on the SECTOR termination board. Bases are provided for both Free-exit and closing loop connections.
-
Page 21: Selecting Operating Mode
However, the loop can be made to function as a closing loop if ILAC Mode is enabled. ILAC Mode, which is comparable to PIRAC Mode as found on CENTURION gate motors, causes the boom to auto-lower as soon as the inductive loop is cleared, i.e. the vehicle moves off. -
Page 22: Plc Mode
As with Simplex Mode described above, the input activates the moment that the button is pressed. CENTURION recommends that an inductive loop detector, such as the one provided onboard, is used as the closing loop. This also acts as a safety loop while the vehicle is present on the loop detector. -
Page 23: Cabling Requirements
The cable requirements differ according to the mode that you have selected. All cables must be routed in conduit unless underground cable is being used For the detection of vehicles, CENTURION recommends installing Inductive Loop Detectors in preference to infrared beams 1. -
Page 24: Free-Exit For Bi-Directional Traffic
3b. Free-exit for bi-directional traffic To mains supply Direction of travel exiting FIGURE 7. FREE-EXIT FOR UNI-DIRECTIONAL TRAFFIC CABLING x refers to the distance required between the loops for free-exit Free-exit for uni-directional traffic, x must be greater than 1000mm If FLUX OB is fitted, set the UNI-DIR FRX dipswitch to the ON position For bi-directional traffic, x must be less than the length of an average motor vehicle (between 1000mm and 2000mm). -
Page 25: Orientation
11. Orientation It is always recommended to mount the barrier with its access door facing the oncoming traffic. This ensures that if a vehicle accidentally hits the pole, the pole is knocked away from the barrier housing, not back onto the barrier housing, potentially damaging the housing. -
Page 26: Right Hand
Right Hand A Right Hand barrier is defined as a unit installed on the right hand side of the road from which the traffic approaches. The door always faces oncoming traffic. Boom pole The default orientation is the operator on the right hand side of the roadway, Access door with the pole pointing to the left -... -
Page 27: Conversion From Right Hand To Left Hand
12. Conversion from right hand to left hand Remove the counterbalance spring Remove the boom pole. With the door and electronics assembly removed, make sure the spring is under minimum tension. To achieve this, it is advisable to have the boom pole in the raised position. -
Page 28: Remove The Coupler
SECTOR enclosure Boom Fit the coupler puller coupler 14. With the boom pole removed, fit the bolt coupler puller to the boom coupler with two M8 bolts and nuts. Coupler puller FIGURE 15. REMOVING THE COUPLER SECTOR enclosure Boom coupler Coupler puller FIGURE 16. -
Page 29: Fit The Coupler
SECTOR enclosure Boom coupler Fit the coupler 18. With the counterbalance assembly under minimum tension – i.e. with the boom pole in the raised position – fit the boom coupler. FIGURE 20. FITTING THE COUPLER 19. Engage the boom coupler/output shaft splines so that the boom coupler is in its Boom closest vertical position. -
Page 30: Sector Installation
13. SECTOR installation Enclosure positioning SECTOR barrier Determine correct position for the barrier to be installed. The dotted line denotes recommended dimensions of the concrete foundation 300mm 300mm Concrete foundation FIGURE 23. CONCRETE FOUNDATION Access door Check orientation of the door Direction of traffic FIGURE 24. -
Page 31: Fitting The Pole
Holding down bar The enclosure is clamped down Concrete plinth between the holding down bar and the concrete plinth Align the enclosure and make sure the two Anchor bolt anchor bolts go through the holes on the Cable holding down bar as shown in Figure 27. conduits FIGURE 27. -
Page 32: Levelling The Boom Pole
Levelling the boom pole Adjustment link Using a 17 spanner, loosen the lock nuts on the adjustment link. Turn the adjustment link to level the boom pole. Tighten the lock nuts. Lock nuts Both of the lock nuts will loosen/tighten in the same direction. This might not be the expected direction - if the lock nut does not loosen/tighten try the other direction... -
Page 33: Failsafe/Lock Mode
Failsafe/Lock mode Top locking stop When the barrier is in Failsafe mode, the Bottom boom pole can be manually moved by locking stop hand. In Lock mode, the boom pole is locked in the raised or lowered position and cannot be moved by hand. -
Page 34: Electrical Setup
14. Electrical setup 1. Always check that the circuit breaker in the electrical panel is in the OFF position, and that all high voltage circuits (more than 42.4V) are completely isolated from the mains supply before doing any work. The pole must be raised before isolating system. 2. -
Page 35: Simple Mode: Option 1 (Recommended) Electrical Connections
15. Simplex Mode: Option 1 (Recommended) - electrical connections OPTION 1 CENTURION transmitter with Safety onboard receiver loop OPTION 2 SMARTGUARD Courtesy keypad light 12V+ 12V- OPTION 3 L N E SOLO or Lattice proximity access control system Earth 12V+... - Page 36 Option 1 All connections are made to the termination board and NOT the controller (Refer to page 8) The different inputs to and outputs from the termination board, react according to the following when Simplex Mode is selected: MI: In this mode, the memory input acts simply to raise and lower the boom pole with sequential activations Lower: A dedicated input to only lower the boom pole Raise: A dedicated input to only raise the boom pole...
-
Page 37: Simple Mode: Option 2 - Electrical Connections
16. Simplex Mode: Option 2 - electrical connections OPTION 1 CENTURION transmitter with onboard receiver Safety loop OPTION 2 SMARTGUARD keypad Courtesy 12V+ light 12V- OPTION 3 SOLO or Lattice proximity access L N E control system 12V+ Earth 12V-... - Page 38 Option 2 All connections are made to the termination board and NOT the controller (Refer to page 8) The different inputs to and outputs from the termination board, react according to the following when Simplex Mode is selected: Safety Beam: Infrared safety beams can be used as an alternative to an inductive loop, but not recommended MI: In this mode, the memory input acts simply to raise and lower the boom pole with sequential activations...
-
Page 39: Complex Mode: Option 1 (Basic) Electrical Connections
17. Complex Mode: Option 1 (Basic) - electrical connections OPTION 1 Safety loop Memory input Courtesy light Magnetic card reader 12V+ 12V- L N E OPTION 2 SMARTGUARD Earth keypad 12V+ 12V- Two pole mains OPTION 3 isolator SOLO or Lattice proximity access control system 12V+... - Page 40 Option 1: Basic All connections are made to the termination board and NOT the controller (Refer to page 8) The different inputs to and outputs from the termination board, react according to the following when Complex Mode is selected: Safety Beam: Although not recommended, this input can be used if a closing loop detector is not fitted.
-
Page 41: Complex Mode: Option 1 (Tickect Vend) Electrical Connections
18. Complex Mode: Option 2 (Ticket vend) - electrical connections Safety loop Ticket Vend Option 2: Ticket vending entry points All connections are made to the termination board and NOT the controller (Refer to page 8) The different inputs to and outputs from the termination board, react according to the following when Complex Mode is selected: Safety Beam: Although not recommended, this input can be used if a closing loop detector is not fitted. -
Page 42: Free-Exit Loop - Electrical Connections
19. Free-exit loop - electrical connections Closing loop Free-exit loop Option A: Free-exit single lane, unidirectional traffic (Refer to page 19) All connections are made to the termination board and NOT the controller (Refer to page 30) Please note the following: FRX: The free-exit loop detector must be fitted. -
Page 43: Setting Up The Limits And Features For The Sector Barrier
20. Setting up the limits and features for the SECTOR barrier Menu level Menu level Exit Up/Dn FIGURE 38. SECTOR CONTROLLER Setting up the limits When setting up the SECTOR barrier system via the LCD display, all the steps that have to be followed are clearly provided via the display. - Page 44 When not in Setup Mode, ie Normal Mode, the round ( ) button is used as a test button for operating the system. The up/down buttons are not used unless the diagnostic screens have been selected to appear in normal mode, in which case these buttons allow switching from one screen to the next For each feature a Factory Default setting has been programmed into the controller.
-
Page 45: Sector Menu Navigation
21. SECTOR menu navigation map Setting limits 1.1. Setup wizard Safety 2.1. Collision force 2.1.1. Raise collision force 2.1.2. Lower collision force 2.2. Collision count 2.3. Alarm output 2.4. LCK input as ESTOP 2.5. External boom 2.5.1. Indicator output status indication 2.5.2. - Page 46 Loop detector 6.1. ILAC control ILD input to Aux Out 6.3. Rollback time 6.4. FRX loop direction 6.5. Inductive loop 6.5.1.1.Presence alarm 6.5.1. Presence alarm alarms status 6.5.1.2.Presence time function 6.5.2. Break-in alarm 6.5.3. Alarm output TVI output 7.1. TVI output function 7.2.
- Page 47 Remote controls Press button of valid transmitter (if menu locked) 10.1. Add remotes 10.2.1.Delete by ID 10.2. Delete remotes 10.2.2.Delete button 10.2.3.Delete by button 10.2.4.Delete-Not-Present 10.2.5.Delete all remotes 10.3. Edit remote button 10.4. Autolearn remotes 10.5. Tx menu locked 10.6. Onboard receiver enable/disable Page 43...
-
Page 48: Sector Controller Features
22. SECTOR controller features Menu 2 - Safety (collision force) Collision force The collision force can be set independently for raising or lowering from minimum to maximum in five discrete steps. A sixth step will disable collision sensing entirely, allowing maximum force to be achieved. The motor will only shut down when its stall point is reached. - Page 49 Partly open indication Opening indication Closing indication Partly closed indication Closed indication Pedestrian indication Unknown indication An example of where the External Gate Status Indication will typically be used is where two D-Series operators have been connected for interlocking purposes, i.e. one cannot be operated while the other one is in motion. In such a case, the XIO of one operator will be connected to LCK of the other, XIO set as the desired indication, and the indication set to be ON only for a CLOSED status.
- Page 50 Menu 4 - Modes of Operation Refer to “Select Operating Mode” on page 17 for an explanation of the four different Modes of Operation available: Simplex, Complex, PLC and Spike. Menu 5 - Run profile Refer to “Select Operating Mode” on page 17 for an explanation of the four different Modes of Operation available: Simplex, Complex, PLC and Spike.
- Page 51 Crawl Distance Sets the final crawl distance in degrees of travel of the boom pole when reaching an endpoint Torque Limit Sets the maximum torque delivered by the motor. This is useful in cases where limited push force is required Loop Stop Distance Sets the distance over which a moving boom pole will stop after a safety input is triggered...
- Page 52 Menu 8 - ChronoGuard (Time-periods)(a world first) ChronoGuard allows automatic activation or time-barring (prevented operation) of specific controller inputs, and the time-barring of specified remote control buttons used together with the onboard receiver. The Real Time Clock and Calendar will keep time for a minimum of one hour without any power. Time-periods A Time-period is defined by a start and end date and time.
- Page 53 Disables operation of the round test button on the controller Menu 10: Remote controls Learn up to 500 CENTURION NOVA remote control transmitter buttons. Using one button as a shift button, each transmitter can operate up to six functions. Each transmitter learned into the system is assigned a unique transmitter ID.
- Page 54 It is possible to artificially increase the number of buttons of a multi- button transmitter by using a two button combination One of the buttons is used as a shift button to allow the other buttons to be used again in combination with this button. In other words the user will press and hold the shift button, before pressing one of the other buttons to create a new button The shift button cannot be used as a button on its own, it must always...
-
Page 55: Diagnostics
23. Diagnostics Diagnostic LEDs The SECTOR controller has a series of diagnostic LEDs which indicate the state of the inputs. Normally-open inputs are indicated by a red LED, and normally-closed inputs by a green LED. An illuminated red LED indicates that the signal is present (e.g. barrier raise pressed), while a non-illuminated green LED indicates that the signal is absent (i.e. -
Page 56: Lcd Display
LCD display The SECTOR controller’s LCD display shows valuable information regarding the status of the system. 0:00 CLOSED FIGURE 40. SECTOR CONTROLLER LCD 1. Battery icon Indicates the state of charge of the battery. Four solid bars = full capacity Two solid bars = 50% capacity No solid bars, with the icon flashing = battery empty... -
Page 57: Buzzer Feedback
Buzzer feedback A warning buzzer will sound (where applicable) as per the table below: Gate User can Inhibitor Priority Number Fault continues correct name of beeps type to operate error Continuous tone Break-in alarm Alarm for 30 seconds Continuous tone Presence alarm Alarm until ILD is cleared... -
Page 58: Factory Defaults Schedule
24. Factory defaults schedule South African standard profile - ZA Parameter Description Unit Minimum Default Maximum Menu 1 - not applicable Menu 2 Raising collision force Level Lowering collision force Level Collision count Collisions Alarm output B, T, A, X, L Buzz LCK as ESTOP Yes or No... - Page 59 South African standard profile - ZA Parameter Description Unit Minimum Default Maximum Menu 6 ILAC control On/Off Rollback time Mm:ss 00:01 00:10 00:15 FRX loop direction Uni/bi Presence alarm status On/Off Presence time Mm:ss 01:00 01:00 04:00 Break-in Alarm On/Off Alarm output L, X, A, T, B Menu 7...
-
Page 60: Description Of Terminal Functions
25. Description of terminal functions 24V + Positive battery connection. Battery terminal normally indicated as + or red (right hand) 24V - Negative battery connection. Battery terminal normally indicated as - or black (left hand) Motor Motor output – connects to the thick blue motor wire Motor Motor output –... - Page 61 The memory input. (A normally-open potential-free input). The memory input counts and stores each trigger impulse. The boom pole will stay raised until the same number of closing signals is applied to the closing input, such as the closing loop. This input is typically used in conjunction with the Complex (CMX) Mode of Operation LCK/STP Holiday Lockout or boom stop input.
-
Page 62: Faultfinders Guide
Tighten drive-arm or contact local Primary drive-arm is loose CENTURION agent on the output shaft Contact local CENTURION agent to service gearbox Boom pole starts Collision sensitivity set Adjust collision sensitivity to a lowering, then too high... -
Page 63: Peripheral Equipment
Check the “Mains Present” icon on the main diagnostic screen or switch to the battery charger diagnostic screen and check the charging voltage – right hand voltage. This should indicate XV Check that the mains power is turned on (check 220-240V AC on the mains connector) Check that the red LED on the side of the charger is lit Check the charger’s supply fuse Check that the white battery charger connector is making proper contact... - Page 64 27. Ancillary equipment A number of additional devices are available which can be interfaced with the SECTOR traffic barrier to increase security or otherwise enhance the installation. SECTOR breakaway coupling The SECTOR breakaway coupling is a handy boom coupling that minimises damage to the boom pole by causing it to swing away to the side if struck by a vehicle.
- Page 65 FIGURE 46. Midi Traffic Light For more information on the SECTOR breakaway coupler, TRAPEX, CLAWS, FLUX 11 or any other CENTURION-supported products, please refer to the documentation included with the respective products or contact Centurion Systems directly. Page 61...
-
Page 66: Installation Handover
Centurion Systems (Pty) Ltd does not accept any liability caused by improper use, of the product, or for use other than that for which the automated system was designed. - Page 67 Notes...
- Page 68 0.07.A.0012 SECTOR Installation manual www.centsys.com...
Need help?
Do you have a question about the SECTOR Series and is the answer not in the manual?
Questions and answers
Wanna place new sensors on Centurionboomgate howto go about itpls
when opening the boom gate moving very fast and past the limit hitting the wall behind it