
Related Manuals for TCi ambiento Series


Summary of Contents for TCi ambiento Series
- Page 1 Version 1.0 Artikel-Nr/Part-No: 7864 Ludwig-Rinn-Str. 10-14 D - 35452 Heuchelheim Phone: +49-(0)641-96284-0 Fax: +49-(0)641-96284-28 www.ambiento.de...
-
Page 2: Table Of Contents
Inhaltsverzeichnis HAFTUNG / COPYRIGHT....................4 BEVOR SIE BEGINNEN ..................... 6 ........................6 ILLKOMMEN ........................6 ICHERHEIT ...................... 8 ICHERHEITSHINWEISE PRODUKTBESCHREIBUNG ................... 10 ........................10 AMBIENTO ......................10 ECHNISCHE ATEN ........................12 ONTAGE ..........18 NSTALLATION ETRIEBSSYSTEM UND INTERGLAS OUCH 3.41 R ...................... - Page 3 List of Content LIABILITY / COPYRIGHT ....................5 BEFORE YOU BEGIN ......................7 ......................... 7 ELCOME ..........................7 AFETY ...................... 9 AFETY NSTRUCTIONS PRODUCT DESCRIPTION ....................11 ........................11 AMBIENTO ......................11 ECHNICAL ........................13 OUNTING ......... 19 NSTALLATION OF PERATING SYSTEM AND EHINDGLAS OUCH...
-
Page 4: Haftung / Copyright
Dieses Handbuch, sowie die Hard- und Software, die es beschreibt, ist urheberrechtlich geschützt und darf ohne ausdrückliche schriftliche Genehmigung der tci GmbH in keiner Weise vervielfältigt, übersetzt oder in eine andere Darstellungsform gebracht werden. Windows™, Windows XP™, Windows7 und Windows CE™... -
Page 5: Liability / Copyright
Note developed the texts, illustrations and programs. However, errors can not be completely ruled out. tci GmbH, shall neither warrant nor be held legally responsible for consequences which occur due to incorrect data. Information concerning errors are welcome at any time. -
Page 6: Bevor Sie Beginnen
2. Bevor Sie beginnen 2.1 Willkommen Vielen Dank, dass Sie sich für ein Markenprodukt der Firma entschieden haben. Auf den folgenden Seiten erhalten Sie grundlegende Informationen über das von Ihnen gewählte Produkt. Lesen Sie diese Informationsbroschüre bitte sorgfältig. Informationen über die eingebauten Komponenten erhalten Sie über die mitgelieferten Handbücher der einzelnen Hersteller. -
Page 7: Before You Begin
2. Before you begin 2.1 Welcome Thank you for choosing a product. On the following pages, you will find fundamental information about the product you have chosen. Please read the information brochure carefully. The operating manuals provided by the individual manufacturers contain Information on the built-in components. -
Page 8: Sicherheitshinweise
2.3 Sicherheitshinweise Bedeutung der Warnsymbole Gefährliche Spannung: Das Blitzsymbol mit einem Pfeil am Ende in einem gleichseitigen Dreieck warnt Sie vor nicht isolierter gefährlicher Spannung innerhalb des Produkts, die einen elektrischen Schlag verursachen kann. Hinweise: Das Ausrufungszeichen in einem Dreieck macht Sie auf wichtige Bedienungs- und Wartungshinweise für Ihr Gerät aufmerksam. - Page 9 2.3 Safety instructions Explanation of WARNING Symbols The lightning flash with arrowhead symbol, within an equilateral triangle, is intended to alert the user to the presence dangerous voltage within the inside of the product that may be sufficient level to constitute a risk of electric shock. The exclamation point within an equilateral triangle is intended to alert the user to the presence of important operating and servicing instructions.
-
Page 10: Produktbeschreibung
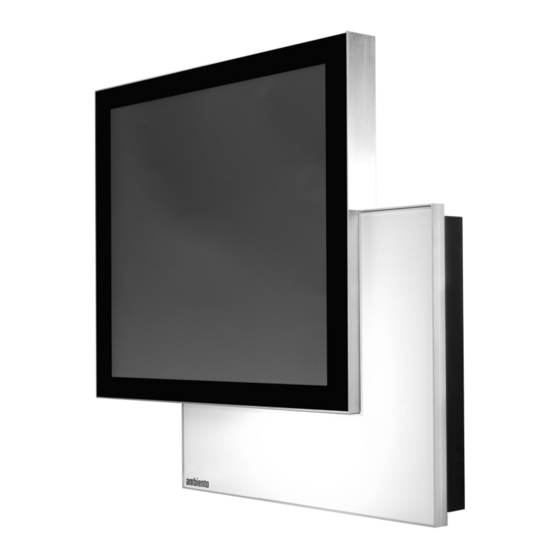
3 Produktbeschreibung 3.1 ambiento Die Symbiose aus Schönheit und Intelligenz - ambiento ist mehr als ein Steuerungsgerät. Es ist ein funktionelles Designobjekt, dessen Aussehen Sie optimal auf Ihre Bedürfnisse abstimmen können. Als Browser-Terminal stellt der ambiento die Oberflächen webbasierender Programme dar. Daher kann er hervorragend in IP-Lösungen verschiedener Hersteller integriert werden. -
Page 11: Product Description
3. Product Description 3.1 ambiento ambiento is not just another piece of equipment. It is a sophisticated control system designed to meet your precise requirements. As a browser terminal ambiento offers the user an interface for web-based programs. It is thus ideal for integration into third-party IP solutions. -
Page 12: Montage
3.3 Montage Anbringung der Wandmontageplatte nur durch autorisiertes Fachpersonal und Elektriker. Die tci GmbH kann keine Haftung für die montierte Wandplatte und deren Funktion übernehmen. Eine Prüfung durch Fachpersonal ist erforderlich. Montage nur senkrecht! Montage nur im spannungsfreien Zustand der Zuleitungen. -
Page 13: Mounting
3.3 Mounting Mounting of the wall mounting plate only by authorized technical personal and electrician. tci GmbH cannot take over adhesion for the installed wall plate and their function. An examination by technical personnel is necessary. Only in vertical mounting! Assembly only in the unstressed condition of the inlets. - Page 14 Schritt 3: Schrauben Sie nun die Wandmontageplatte an Schritt 4: ambiento in Wandmontagepatte einhängen: Der ambiento wird zuerst in die oberen Laschen der Wandmontageplatte eingehängt, dann nach unten geklappt. Schritt 5: Sichern Sie den ambiento an der Wand- montageplatte von Unten mit den Verschluss- schrauben.
- Page 15 Step 3: Now screw on the wall fastening panel. Step 4: Hang up the ambiento into the wall fastening panel: First, the ambiento is hung up in the upper hangers of the wall fastening panel and then clicked/fold down. Step 5: Ensure/ interlock the ambiento at the wall fastening from below with the locking screws.
- Page 16 Schritt 6: Schließen Sie nun alle Versorgungsleitungen an. Sie können nun die Spannungsversorgung für den ambiento unter Strom setzen. Sollte der ambiento nicht automatisch starten, betätigen Sie nun den Taster hinter dem KNX- Anschluss PE Erdung muss angeschlossen werden! Es besteht Lebensgefahr durch einen elektrischen Schlag, wenn z.B.
- Page 17 Step 6: Now you can connect all wires and supply the cables with power. If the unit do not start automatically, please push the button behind the KNX connection. PE ground must be connected! There is mortal danger by an electrical impact, if the outer hull of the inlet is damaged e.g.
-
Page 18: Installation Betriebssystem Und Hinterglas Touch
3.4 Installation Betriebssystem und Touch (hinterglas) Sofern das Gerät ohne Betriebssystem geliefert wurde und mit Touch ausgerüstet ist, müssen Sie folgende Schritte unternehmen: 1) Schließen Sie Tastatur/Maus und Externes CD/DVD-ROM an. Hierzu stehen Ihnen die zwei USB-Schnittstellen am Gehäuse (nur 1x bei EIB-Schnittstelle), sowie 1xUSB Intern, zur Verfügung. -
Page 19: Resistive Touch
3.4 Installation Operating System and Touch If the ambiento is delivered without operating system but it is equipped with touch, please install as following Steps: 1) Connect keyboard/mouse and external CD/DVD-ROM. Please use the two USB- Connection on outside of the housing (only 1x USB is useable by equipping with EIB- connection) and 1xUSB internal, see chapter 3.6. -
Page 20: Bedienelemente
3.5 Bedienelemente und USB-Anschluß Die Bedienung des ambiento erfolgt über den Touchscreen. Zusätzlich zum Touchscreen gibt es folgende Bedienelemente: Touchblocker: Auf dem Desktop bzw. auf dem mitgelieferten Datenträger befindet sich eine Software mit dem Namen Touchblocker. Durch diese Software wird der Touch für 60 Sekunden blockiert. -
Page 21: Operation Parts
3.5 Operating elements and USB-connection The operation ambiento is made by the Touchscreen. Additionally to the Touchscreen there are the following control elements: Touchblocker: On the desktop or the provided data storage you will find the software called touchblocker. With this software the touch will be blocked for 60 sec. In this time you can clean the touch with micro fiber cloth without cleaning agents Ludwig-Rinn-Str. -
Page 22: Einstellung Bewegungsmelder
3.6 Einstellungen Bewegungsmelder Bitte beachten Sie, dass der Bewegungsmelder durch die PreVision Control überwacht und verwaltet wird. Der Bewegungsmelder ist in im Lieferzustand aktiviert. Wenn sie den Bewegungsmelder deaktivieren möchten gehen Sie wie folgend vor: 1) Rufen Sie im PreVision Control Client unter Konfiguration „Programm“ auf: 2) Loggen Sie sich nun ein Siehe dazu Handbuch PreVison Control 3) Wählen Sie im Menübaum links „Generell“... -
Page 23: Setting Motion Detector
3.6 Settings motion detector Please consider that the motion detector is controlled and managed by the PreVision Control. At the scope of delivery it is activated. If you will disable the motion detector, please follow this points: 1) First open in the Prevision Control Client under Configuration the point „Program“: 2) Please login, by questions have a look into the manual PreVison Control 3) Please open in the menu tree on the left side „General“... -
Page 24: Einstellungen Energieverwaltung
3.7 Einstellungen Energieverwaltung Bitte beachten Sie, dass die Energieverwaltung gegenüber herkömmlichen PCs durch die PreVision Control überwacht und verwaltet wird. Es ist daher dringend erforderlich, dass bei den Einstellungen der Energieverwaltung das Ausschalten des Bildschirms immer auf „NIE“ gestellt ist. Siehe Screenshot: Achtung bei Hinterglas Touch: Sollte doch einmal diese Einstellung falsch eingestellt sein, können Sie nur mit Hilfe einer externe Maus/Tastatur über den USB-Anschluss den Bildschirm wieder aktivieren. -
Page 25: Setting Energy Management
3.7 Settings energy management Please consider that the energy management comparing to conventional is controlled and managed by the PreVision Control. Therefore it is strongly needed that in the settings energy management the deactivation of the display always stands on “Never”. See screenshot: Attention to realglass touch: If you have made the wrong options, you can wakeup your ambiento only with mouse/keyboard (USB). -
Page 26: Knx Schnittstelle
3.8 KNX/EIB Schnittstelle Anwendung Die Schaltung dient der Herstellung einer bidirektionalen Datenverbindung zwischen ambiento Installationsbus EIB/KNX. Der USB-Anschluss ist vom EIB/KNX Bus galvanisch getrennt. Die Schaltung ist kompatibel mit dem KNX Medium TP1 (EIB), die Firmware unterstützt das Protokoll EMI1. Belegung Anschlüsse Anschluss von USB-Stecker USB-Buchse (K1):... -
Page 27: Knx Interface
3.8 KNX/EIB Interface Purpose This board is used to establish a connection between ambiento and the installation bus EIB/KNX. The USB connector has a galvanic separation from the EIB/KNX bus. The circuit is compatible with KNX medium TP1 (EIB), the firmware supports protocol EMI1. -
Page 28: Manuelle Einrichtung Der Knx Schnittstelle
3.81 Manuelle Einrichtung der KNX Schnittstelle (Optional) Zur manuellen Umstellung der KNX-Adresse können Sie das knxtool.ambiento.de Softwaretool downloaden. Wenn Sie die Software öffnen sehen sie dieses Fenster: Die Schaltfläche „View“ ermöglicht die Umschaltung zwischen DEC- und HEX-Darstellung für die Adresse. Tragen Sie die neue Adresse in das Feld ein und klicken Sie anschließend auf die Schaltfläche „Write“. - Page 29 3.81 Manuel configuration of the KNX interface (Optionally) For manual changing of the KNX adress you can download under knxtool.ambiento.de software tool After open the software you will see this window: The button „View“ offers the possibility to change between DEC and HEX of the adress. Please enter now the new adress into the field and confirm with „Write“.
-
Page 30: Eg-Konformitätserklärung
3.9 EG-Konformitätserklärung Für das folgend bezeichnete Erzeugnis ambiento wird die Übereinstimmung mit Bestimmungen der nachstehenden EG Richtlinien bestätigt. EMV-Richtlinie 2004/108/EG Niederspannungsrichtlinie 2006/65/EG Zur Beurteilung der elektromagnetischen Verträglichkeit des Erzeugnisses wurden folgende Normen herangezogen: EN 55022 : 2006 Klasse A EN 55024 : 1998 + A1 : 2001 + A2 : 2003 EN 61000-3-2 : 2006 EN 61000-3-3 : 1995 + A1 : 2001 + A2 : 2005 EN 61326-1 : 2006... -
Page 31: Ec Confirmation Declaration
3.9 EC-Declaration of Conformity The product described in this manual ambiento Hereby the agreement with regulations of the following EC guidelines is confirmed. EMC directive 2004/108/EG Low voltage directive 2006/65/EG To evaluate the electromagnetic compatibility of these products, the following standards were taken into consideration: EN 55022 : 2006 class A EN 55024 : 1998 + A1 : 2001 + A2 : 2003... -
Page 32: Lieferumfang
Wir beantworten Ihre Fragen oder lösen Ihre Probleme so schnell wie möglich. 5.2 Gerätepass Mit dem tci-Gerätepass haben Sie auf einen Blick alle wichtigen Informationen zu Ihrem System parat: Auf der Forderseite des Gerätepasses befindet sich die Support-Telefonnummer und Email-Adresse. -
Page 33: Scope Of Delivery
On the configuration card you’ll find all basic information of your system: At the front you see the phone-no and the and the email-adresse of the tci support. At the head of the back is stated the serial number, which is assigned only for your system. The number below is the device- or type number, which are identical to our internal system description. -
Page 34: Herstellergarantie
Die tci - Gesellschaft für technische Informatik mbH (TCI) gewährt ihrem Käufer eine 12-monatige Produktgarantie auf von TCI hergestellte Produkte. Tritt bei einem von TCI hergestellten Produkt innerhalb von 12 Monaten nach Lieferung ein Mangel auf, wird TCI diesen unter nachgenannten Voraussetzungen nach eigener Wahl entweder durch Lieferung eines Neugerätes, Austausch von Teilen oder durch Reparatur beseitigen. -
Page 35: Manufacturer's Guarantee
Within the scope of the guarantee, TCI will bear all costs related to the replacement of parts or the repair of products or product parts during the term of this guarantee, insofar as the defect has occurred during proper use of the product. Any costs incurred for the determining of the defect as well as costs of mounting and demounting at the customer’s premises are to be... - Page 36 Ludwig-Rinn-Str. 10-14 D - 35452 Heuchelheim Phone: +49-(0)641-96284-0 Fax: +49-(0)641-96284-28 www.ambiento.de Seite 36 von 36...
Need help?
Do you have a question about the ambiento Series and is the answer not in the manual?
Questions and answers