Advertisement
Quick Links
CAMPSITE SELECTION
Avoid areas with overhead
•
power lines and tree limbs
Turn the engine off and
•
engage the parking brake
HOW TO STORE
1. Clean and dry the tent
2. Fold the tent over using the
ladder and zip up the cover
3. Secure the tent with the
tent tie straps
4. Store in a cool, dry place
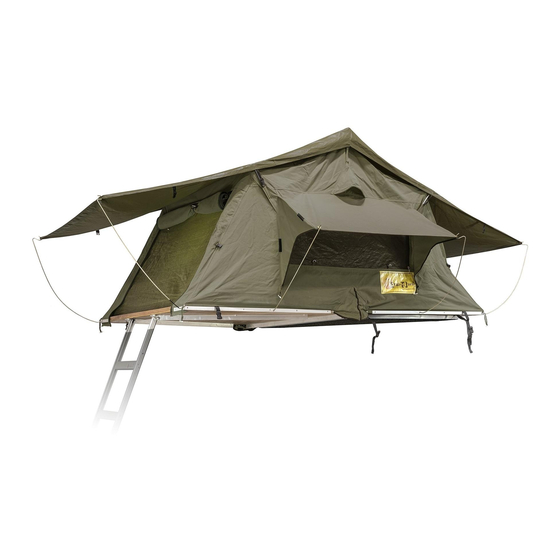
rooftop tent must be side mounted as shown above, therefore Vehicles
must have cross bars installed (factory or aftermarket).
WARRANTY INFORMATION
Napier tents have a one (1) year warranty period from the time of purchase against defects in improper
workmanship. Normal wear and tear, seam leakage through needle holes, and improper use, abuse, or
alteration are not covered under the warranty policy. Napier Outdoors will replace or repair defective parts.
Replacement parts may be new or re-built at Napier's sole discretion. E-Warranty claim forms can be
completed online at www.napieroutdoors.com/warranty. Proof of purchase (receipt) must be provided. If you
do not provide proof of purchase, or if your warranty period has ended, replacement parts can be purchased.
To order replacement parts, contact Napier Outdoors at 800-567-2434 (9:00am – 5:00pm EST),
visit www.napieroutdoors.com, or email customerservice
REV 1 - 01/28/20
ROOFTOP TENT OWNER'S MANUAL
napieroutdoors.com.
@
CAUTION
Do not use candles, matches, or open flames of any kind in or
•
near the tent
Do not cook inside the tent
•
Build campfires downwind and several meters away from the
•
tent. Be sure to fully extinguish fires before leaving a
campsite or before retiring for the night
Exercise extreme caution when using fuel-powered lanterns or
•
heaters inside or around the tent. Use battery-operated
lanterns whenever possible
Do not refuel lamps, heaters, or stoves inside the tent
•
Extinguish or turn off all lanterns before going to sleep
•
Do not smoke inside the tent
•
Do not store flammable liquids inside the tent
•
Allow adequate ventilation inside the tent at all times
•
Ensure the ladder is set up securely, on a dry, level surface.
•
Ensure nylon lock nuts are tightened before and after long trips.
•
WARNING
Improper installation or use of your tent may result in serious
•
injury or death. Please ensure ladder is set up on grass or is
safely secured before use, and follow these installation
instructions carefully to ensure proper set-up. Check with
your vehicle manufacturer for specified loading capacity of
roof rack.
Keep all flame and heat sources away from the tent fabric.
•
The tent is made with flame-resistant fabric which meets
CPAI-84 specifications. This does not make it fireproof. The
fabric will burn if left in contact with any flame source. The
application of any foreign substance to the tent fabric may
render the flame-resistant properties ineffective.
To prevent carbon monoxide from entering the tent area, do
•
not cook inside the tent, and do not use a gas heater in the
tent. Carbon monoxide is dangerous to your health.
Advertisement

Subscribe to Our Youtube Channel
Related Manuals for Napier ROOFTOP TENT


Summary of Contents for Napier ROOFTOP TENT
- Page 1 WARRANTY INFORMATION your vehicle manufacturer for specified loading capacity of Napier tents have a one (1) year warranty period from the time of purchase against defects in improper roof rack. workmanship. Normal wear and tear, seam leakage through needle holes, and improper use, abuse, or Keep all flame and heat sources away from the tent fabric.
-
Page 2: Package Contains
Open loop straps and Velcro straps on sides of tent. Lift open If you are missing parts, please contact Napier Outdoors tent to take out ladder and parts. Close tent to begin set-up at 800-567-2434 Monday-Friday or email customerservice @ napieroutdoors.com... - Page 3 Pre-installation set-up (To be completed on ground or flat surface) A) Remove plastic end caps. Leave off until step 11. B) Slide the 10mm nylon locking nuts into the To begin, align the holes in the mounting tracks over the four pre-drilled holes near the center of inner slot in the center of the mounting tracks.
- Page 4 A) Secure the two long-looped straps. B) Undo the two long-looped straps. Flip the tent base over. Fasten the ladder brackets (i) to the holes near the end of the tent base using the bolts on the ladder brackets; 13mm steel bolt, washer and nut (ii).
- Page 5 ATTACHING TO VEHICLE cross bars Have someone help you lift the tent on top of your A) Assemble the channel sliders and steel mount B) Once assembled, slide the 13mm bolts with vehicle corss bars (cover can be on or off). The plates together using the 13mm x 70mm or 50mm channel sliders through the mounting tracks.
-
Page 6: Tent Setup
TENT SETUP Unzip travel cover and release Velcro ladder Disengage ladder and fully extend it from tent base so that it Adjust ladder height using locking levers to straps. Undo the straps across the tent. is parallel to the ground. be at desired height.
Need help?
Do you have a question about the ROOFTOP TENT and is the answer not in the manual?
Questions and answers