Table of Contents
Advertisement
Quick Links
Advertisement
Chapters
Table of Contents

Related Manuals for HOLDEN Trailblazer RG 2017


Summary of Contents for HOLDEN Trailblazer RG 2017
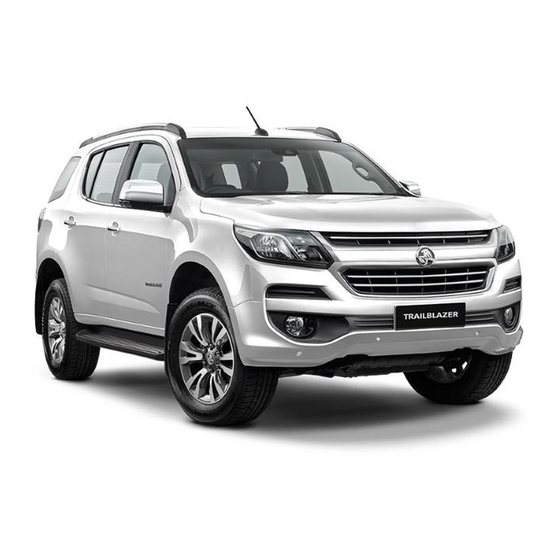
- Page 1 MY17 RG Trailblazer Owner’s Manual...
- Page 2 It also helps us let you know if there is an existing safety recall or rework on your vehicle. To update your details, please take a few minutes to fill in and mail the form at the back of the Service & Warranty Booklet or visit Holden’s website at: www.holden.com.au/forms/change-of-owner-details...
-
Page 3: Table Of Contents
Contents Introduction ..... . 2 In Brief ......5 Keys, Doors, and Windows . -
Page 4: Introduction
Introduction Introduction... - Page 5 Introduction Your vehicle is a designed The table of contents at the Danger, Warning, and combination of advanced beginning of this manual and Caution technology, safety, environmental within each section shows where friendliness and economy. the information is located. Danger This Owner's Manual provides The index will enable you to you with all the necessary...
- Page 6 Introduction NOTES...
-
Page 7: In Brief
In Brief In Brief Instrument Panel Instrument Panel Overview Instrument Panel Instrument Panel Overview ..5 Initial Drive Information Remote Keyless Entry (RKE) System ......6 Remote Vehicle Start . -
Page 8: System
In Brief 5. Instrument Panel Electronic Stability Control Initial Drive Overview 0 63 (ESC) 0 201 Information 6. Horn 0 65 18. Shift Lever 0 193 Driver's Airbag. See Airbag and 19. Steering Wheel Remote Keyless Entry Seat Belt Tensioner Light 0 73 Adjustment 0 64 (RKE) System 7. -
Page 9: Remote Vehicle Start
In Brief Starting the Vehicle The engine will continue to run for Press to lock all doors and the 10 minutes. Repeat the steps for a tailgate. 10-minute time extension. Remote The hazard lamps flash once start can be extended only once. and any open windows Canceling a Remote Start automatically close. -
Page 10: Seat Adjustment
In Brief Seat Adjustment Seat Backrests Seat Positioning To lower the seat cushion, push the lever down several times. 1. Recline the seatback by To raise the seat cushion, pull pulling the lever. the lever up several times. 1. Move the seat forwards or 2. -
Page 11: Head Restraint Adjustment
In Brief Recline the seatback by sliding Head Restraint the switch forwards or Adjustment backwards. See Power Seat Adjustment 0 35. Seat Height Move the seat forwards or backwards by sliding the switch. See Power Seat Adjustment 0 35. To raise the head restraint, pull Seat Backrests the head restraint upwards. -
Page 12: Safety Belts
In Brief Safety Belts Mirror Adjustment Exterior Mirrors Interior Mirror 1. Withdraw the belt from the reel. The control for the power mirrors are located on the driver`s door. 2. Pull the metal tongue across The adjustment is performed by your body into the buckle, until Select the relevant exterior mirror tilting it to a suitable position. -
Page 13: Steering Wheel Adjustment
In Brief Steering Wheel Exterior Lighting High Beam/Low Beam Adjustment To flash the headlamps, pull the lever. : With automatic light system, 1. To unlock, move the turn the switch to activate or To switch from low to high beam, lever down. -
Page 14: Horn
In Brief Turn and Lane-Change Signals Hazard Warning Flashers Horn Push the lever in the direction Press to turn the hazard Press the steering wheel is turned. warning flasher on or off, when the ignition is in any position. A green arrow on the instrument panel flashes when the lamps See Hazard Warning Flashers 0 92. -
Page 15: Washer And Wiper Systems
In Brief Washer and Wiper See Windshield Wiper/Washer 0 66 Rear Window Wiper/Washer and Wiper Blade Systems Replacement 0 237. Windscreen Wipers Windscreen Washer To activate the rear window wiper/ washer: Press the lower position for Pull the lever towards you to continuous operation 1x : Single wipe wash the windscreen. -
Page 16: Climate Controls
In Brief Climate Controls See Climate Control Systems 0 177 or Electronic Climate Control System 0 179. Transmission Transmission To wash the rear window: Push the lever forwards Washer fluid is sprayed onto the rear window and the wiper operates. P : Park R : Reverse N : Neutral... -
Page 17: Parking
In Brief To engage P or R, push the release If the vehicle is on a level For vehicles with a diesel button on the front of the shift lever. surface or uphill gradient, engine, before switching off, do engage first gear or set the shift not accelerate. - Page 18 In Brief Check that the warning Warning (Continued) indicators illuminate when turning the ignition on. Never remove the key while the See Warning Lights, Gauges, and vehicle is moving, as this will lock Indicators 0 69. the steering. Starting the Engine 0: (LOCK) The key can only be inserted and removed from this position.
-
Page 19: Keys, Doors, And Windows
Keys, Doors, and Windows Keys, Doors, and Keys and Locks The key operates all doors and the ignition. Windows Keys Unlock all doors and the tailgate " by pressing once. Keys and Locks The hazard lamps flash twice. Keys ......17 Caution Remote Vehicle Start . -
Page 20: Remote Vehicle Start
Replacement keys ambient conditions, the key's If a key is lost, a replacement can location and the area be ordered through any Holden between them. Dealer. Take care that no button is pressed unintentionally,... - Page 21 Keys, Doors, and Windows When the engine starts, the park A maximum of two remote starts, (Remote Vehicle Start) : This lamps will turn on and remain on as or a single start with an extension, button will be on the RKE long as the engine is running.
-
Page 22: Caution
Keys, Doors, and Windows The malfunction indicator lamp Do not place heavy objects on is on. the transmitter. The engine coolant temperature Keep the transmitter away from is too high. water and direct sunlight. The oil pressure is low. If the transmitter gets wet, wipe it with a soft cloth. -
Page 23: Manual Door Locks
Keys, Doors, and Windows Manual Door Locks Door Lock Snibs Central Locking System Doors may be locked and unlocked by pressing buttons on: The driver s door armrest The key from inside or outside the vehicle Note The driver's door must be closed for the driver's door to lock. -
Page 24: Safety Locks
Keys, Doors, and Windows Central locking button Safety Locks To activate: Rotate the switch in a clockwise direction. To open a door when the child security rear door lock is activated: Open the door from the outside. Side Steps Locks and unlocks all doors. Warning Press to lock. -
Page 25: Doors
Keys, Doors, and Windows Doors Note Closing Adding heavy accessories to the tailgate may affect its ability to Tailgate remain open. Opening Danger It can be very dangerous to drive with the tailgate open. Carbon monoxide (CO) gas can enter the vehicle. -
Page 26: Vehicle Security
Keys, Doors, and Windows Vehicle Security If the alarm was triggered during alarm activation, the horn will sound three times and the Anti-theft Alarm System hazard warning flashers will activate three times. The system monitors the doors, ignition, bonnet and tailgate. Status LED The system is activated: Thirty seconds after locking the... -
Page 27: Immobiliser
If the control indicator continues LED flashes slowly. to flash or illuminate, try to start If a fault occurs, contact a Holden Warning the engine using the spare key. Dealer. Have the vehicle checked by a... -
Page 28: Folding Mirrors
Keys, Doors, and Windows L: Left side mirror selected When the vehicle is parked, the If one mirror has been manually mirrors may be folded flat against extended or folded, the other mirror R: Right side mirror selected the side of the vehicle. can be extended or folded : No mirrors selected electronically by pressing the... -
Page 29: Interior Mirrors
Keys, Doors, and Windows Interior Mirrors To reduce headlamp glare from Windows following vehicles, pull the lever on the underside of the mirror housing. Manual Rearview Mirror Power Windows Automatic Dimming Manual Anti-glare Warning Rearview Mirror (If equipped) Take care when operating the power windows. - Page 30 Keys, Doors, and Windows To stop the window at the desired the window can still close on an position while the window is in object in its path. Use care when automatic operation, pull up or using the override mode. press down and release the switch to the same direction of the Warning...
-
Page 31: Heated Rear Window
Keys, Doors, and Windows Child Safety System for Initialising the Power Windows Heated Rear Window Windows If the windows cannot be closed automatically (e.g. after disconnecting the vehicle battery), activate the window electronics as follows: 1. Switch the ignition on. 2. -
Page 32: Sun Visors
Keys, Doors, and Windows Caution (Continued) Warning Do not scratch or damage the Do not place the sun visor in such defroster wires when you clean or a position that it reduces visibility work around the rear window. of the roadway, traffic or other objects. - Page 33 Keys, Doors, and Windows Warning Do not hold onto the assist grips while seated in the vehicle.
-
Page 34: Seats And Restraints
Seats and Restraints Seats and Curtain Airbag System ..48 Head Restraints Replacing Airbag System Parts Restraints after a Crash ....49 Warning Child Restraints This safety feature is not intended... - Page 35 Seats and Restraints Height Adjustment Height Adjustment Second Row Seats Head Restraints on Front Seats Pull the head restraint up. To move down, press the locking button and push the head Pull the head restraint up. restraint downwards. Pull the head restraint up. To move down, press the locking To move down, press the locking button and push the head...
-
Page 36: Front Seats
Seats and Restraints Height Adjustment Third Row Front Seats Adjust the seat so that your legs Seats are slightly angled when against the pedals. Seat Position Adjust the backrest angle to easily reach the steering wheel Warning with arms slightly bent. See Steering Wheel Adjustment 0 64. -
Page 37: Power Seat Adjustment
Seats and Restraints Try to move the seat back and forth Seat Height Warning to ensure the seat is locked in The vehicle may have seat height place. adjustment. Do not adjust the driver's seat Seat Backrests when the vehicle is moving as the seat could move suddenly causing the driver to lose control. -
Page 38: Heated Front Seats
Seats and Restraints Recline the seatback by sliding the switch forwards or backwards. Seat Height Move the seat forwards or To warm the seat: backwards by sliding the switch. 1. Start the engine. Seat Backrests 2. Press the switch Low heat setting - 1 LED To lower the seat cushion, push illuminates the switch downwards. -
Page 39: Rear Seats
Unrestrained Do not fit any seat cover luggage or passengers on a (including genuine Holden folded seatback could be thrown accessory covers) to heated within or ejected from the vehicle seats. - Page 40 Seats and Restraints To allow access to the third row seats, fold the second row seats forwards: 1. Push the head restraints down to their lowest position. 4. Move the seat towards the Warning front. 5. Fold up against the front seats. When second row seats are being adjusted, folded or tumbled, keep hands, arms, legs and feet away...
-
Page 41: Third Row Seats
Seats and Restraints Seat position instructions are To raise the second row seats: Caution displayed on the back of the seats. 1. Raise the seat back rearwards. Never fold the seat backrest when the seat belts are buckled or pulled out. Note 2. - Page 42 Ensure the seat belts are Removing second and/or third removed from the belt holders row seats is not recommended. when the seat is occupied. If the seats must be removed, contact a Holden Dealer. Incorrect disassembly may cause serious injuries. (Continued)
-
Page 43: Seat Belts
Seats and Restraints Armrest Seat Belts Warning (Continued) If a cargo barrier is installed, the third row seats should not be occupied. Seat Positioning Unfold the armrest by pulling Warning downwards from the top. Seat belts are designed to bear upon the bony structure of the body, and should be worn low across the front of the pelvis or... - Page 44 Seats and Restraints Warning (Continued) Warning (Continued) Warning Seat belts should be adjusted as or prevent the seat belt assembly Incorrect handling (e.g. removal firmly as possible, consistent with from being adjusted to remove or fitting of belts or belt buckles) comfort, to provide the protection slack.
-
Page 45: Three-Point Seat Belt
Seats and Restraints Three-Point Seat Belt Height Adjustment Fitting Loose or bulky clothing hinders the belt from fitting snugly. Do not place 1. Pull the belt out slightly. objects such as handbags or mobile phones between the belt and 2. Pull the button. Withdraw the belt from the reel, your body. -
Page 46: Safety Belt Use During
Seats and Restraints Removing Safety Belt Use During Verify that the belts have no sign of deterioration or have not been Pregnancy jammed by a sharp object. Seat Belt hardware should be kept Warning dry and free of dust or debris. As necessary, exterior hard surfaces The lap belt must be positioned and seat belt webbing may be lightly... -
Page 47: Replacing Safety Belt System Parts After A Crash
Seats and Restraints Airbag System Caution Warning (Continued) When deployed, airbags inflate The complete belt system Do not use a rearward facing within milliseconds. They also should be inspected and child restraint on a seat protected deflate so quickly that it is often verified by a technician on a by an airbag in front of it! unnoticeable during the collision. -
Page 48: Front Airbag System
Seats and Restraints Front Airbag System Warning (Continued) Warning vehicle is hit from the rear or is The horn pad must not be involved in a rollover. Seat belts covered with adhesive or any must be worn by all passengers other material. -
Page 49: Side Airbag System
Seats and Restraints Side Airbag System Front airbags will inflate in certain SIAB deploy in most, but not all, severe frontal or near frontal severe side impacts. impacts. Front airbags are not Side Impact Airbags (SIAB) are Because there is limited time designed to inflate if the vehicle is stored in the sides of the front seats, available to detect some side... -
Page 50: Curtain Airbag System
Seats and Restraints Curtain Airbag System Warning Do not fit unauthorised seat covers as they may impair the deployment of the Side Impact Airbags (SIAB). Do not position your body or any object (including pillows) between front seats and doors. Do not lean on, or sleep against, the door. -
Page 51: Replacing Airbag System Parts
It is recommended that this work be the vehicle. by an airbag in front of it! carried out by a Holden Dealer or Do not lean on, or sleep against approved repairer. The child could be seriously the front or rear doors. - Page 52 Seats and Restraints When engaged, this feature Warning (Continued) prevents the seat belt from being loosened without releasing the Holden strongly recommends that buckle. you refer to your specific State or To engage: Territory regulations to determine which child restraint and seat 1.
- Page 53 Seats and Restraints Selecting the Right System Young Children Booster Seats Infants Forward facing child seats are for Booster seats are for when children use when the child is able to sit and outgrow a typical forward facing Rearward facing infant capsules are easily hold their head upright.
-
Page 54: Where To Put The Restraint
Seats and Restraints The lap belt rests low and snug Warning (Continued) Warning (Continued) across the hips, not across the stomach. Remember that it is safest for purchase a child restraint which The sash belt is centred on the children to be seated in the rear carries the appropriate Standards shoulder and chest. -
Page 55: Isofix Child Restraint
Fasten vehicle-approved ISOFIX If unsure about installing a child child restraint systems to the restraint, contact an approved ISOFIX mounting brackets. restraint fitting station or a Holden Dealer. Note A. Front of vehicle Ensure that seat belt buckles are The child restraint tether anchors... - Page 56 If unsure about installing a child restraint anchor fitting, contact an approved restraint fitting station or a Holden Dealer. Note Note If the child restraint has a single If the child restraint has a double...
-
Page 57: Storage
Storage Storage Storage Front Storage Compartments Storage Compartments Instrument Panel Storage Instrument Panel Storage ..55 Glove Box ..... 56 Cupholders . -
Page 58: Glove Box
Storage A bottle holder is located at the front Glove Box Cupholders of the door storage compartment. Warning To avoid scalding, never place hot drinks in the cup holders. Do not place uncovered containers of liquid in the cup holder while the vehicle is in motion. -
Page 59: Sunglasses Storage
Storage Cupholders are located at each side Armrest Storage of the third row. Sunglasses Storage Cupholders are located in the second row armrest. Press the latch and lift the armrest To access, fold the armrest down. lid upward. To open : Push the rear part of the cover. -
Page 60: Rear Storage
Storage Rear Storage Storage compartments are located Additional Storage in the third row. Features Third Row Storage Load Compartment Storage Box Boot Cover The vehicle may have a load compartment cover. Warning Do not place any items on top of the cargo blind. - Page 61 Storage 3. Insert the cover into the recess on the driver s side. 4. Insert the cover into the recess on the passenger s side to engage. 1. Guide the seat belts through To extend the cover: the belt holders. 6.
-
Page 62: Roof Rack System
Storage Roof Rack System Distribute the load evenly and secure tightly with straps. When carrying loads on the roof rack (elevated load), avoid hard braking, abrupt swerving or sharp steering. Roof rack elevated loads alter the vehicle's road handling. Warning 13. -
Page 63: Information On Loading The Vehicle
Storage Information on Do not place any objects on the Loading the Vehicle instrument panel. Ensure the backrests are Danger securely engaged. Do not stack objects higher than Do not place unsecured objects the front seats. in the passenger compartment. Do not allow passengers to sit on the folded seatbacks while the vehicle is in motion. -
Page 64: Instruments And Controls
Instruments and Controls Instruments and Charging System Light ..73 Information Displays Malfunction Indicator Lamp ..73 Driver Information Controls Brake and Clutch System Centre (DIC) ....78 Warning Light . -
Page 65: Instrument Panel Overview
Instruments and Controls Transmission Messages ..84 Instrument Panel Overview Vehicle Reminder Messages . . . 85 Vehicle Speed Messages ..85 Trip Computer Trip Computer ....85 Vehicle Personalisation Vehicle Personalisation . -
Page 66: Steering Wheel Adjustment
Instruments and Controls 9. Vehicle Ahead Indicator 0 75 25. Airbag and Seat Belt Tensioner Controls Light 0 73 10. Brake and Clutch System Warning Light 0 73 26. Trailer Indicator Light 0 78 Steering Wheel Adjustment 11. Traction Control System 27. -
Page 67: Steering Wheel Controls
Instruments and Controls Steering Wheel Controls Horn The Cruise Control and the Forward Collision Alert can be operated by the controls on the steering wheel. The infotainment system can be Press operated by the controls on the See Cruise Control 0 204. steering wheel. -
Page 68: Windshield Wiper/Washer
Instruments and Controls Windshield Wiper/Washer HI : Continuous wipe, fast speed Automatic wiping with rain sensor (If equipped) For a single wipe of the windscreen Windscreen Wiper when the windscreen wipers are off, INT : automatic wiping with rain push the lever upwards. sensor Adjustable Wiper Interval The rain sensor detects the amount... -
Page 69: Rear Window Wiper/Washer
Instruments and Controls High sensitivity : Turn adjuster sensitivity when the ignition is Caution wheel downwards switched on, the windscreen wipers operate once to check the system. Do not operate the windscreen Caution Windscreen Washer washer for more than a few seconds or when the washer fluid Switch off the windscreen wiper reservoir is empty. -
Page 70: Power Outlets
Instruments and Controls To activate the rear window wiper/ Note Power Outlets washer: The rear window wiper comes on automatically when the windscreen Press the lower position for wiper is on and reverse gear is continuous operation. engaged. See Auto wipe in reverse Press the upper position for gear under Vehicle intermittent operation. -
Page 71: Warning Lights, Gauges, And Indicators
Instruments and Controls Do not exceed the maximum Warning Lights, power consumption of 120 watts. Gauges, and The power outlet is deactivated Indicators 10 minutes after the ignition is turned off or a door is opened. The following warning lights and The power outlet does not reminders may appear on the operate if the battery voltage... -
Page 72: Odometer
Instruments and Controls Odometer Tachometer Fuel Gauge Shows distance travelled in Shows engine speed in thousands Shows the level of fuel in the tank. kilometres. of revolutions per minute (RPM). If the fuel level is low: Drive at a low engine speed/range Trip Odometer illuminates. -
Page 73: Engine Coolant Temperature
See Fuses 0 244 and Turn and area, a warning chime will activate, Lane-Change Signals 0 93. and the Driver Information Center will also display a message. Seek the assistance of a Holden Dealer. -
Page 74: Safety Belt Reminders
Instruments and Controls Safety Belt Reminders If the driver seat belt is already If the passenger seat belt is fastened, neither the control buckled, neither the chime nor the indicator nor the chime comes on. light comes on. See Seat Belts 0 41. The front passenger seat belt warning light and chime may turn on If Seat Belt Reminder is active the... -
Page 75: Airbag And Seat Belt Tensioner
Airbag and Seat Belt light is working. malfunction in the Diesel Particle Filter (DPF). Contact a Holden Tensioner Light If the warning light Dealer. illuminates while the engine is... -
Page 76: Antilock Brake System (Abs)
ABS switched on if the manual parking and the regular brakes. illuminates or flashes green. brake is applied, see Parking Contact a Holden Dealer Brake 0 200. Flashes to indicate that the Descent immediately. Control (DCS) is activated, reducing If the parking brake has not been the vehicle s speed. -
Page 77: Lane Departure Warning (Ldw)
If equipped, this light, located in Electronic Stability the center of the instrument panel, If the light does not illuminate, comes on briefly while starting the contact a Holden Dealer. Control (ESC) Indicator vehicle. Light illuminates when the ESC is If it does not come on, have the deactivated. -
Page 78: Traction Control System (Tcs)
Have the cause of the fault fixed by When the Light Flashes First and temperature is low. a Holden dealer. Then Is On Steady See Starting the Engine 0 189. Flashes If the light flashes for about a minute... -
Page 79: Low Fuel Warning Light
If the oil level is normal, If the light remains on, contact a illuminates yellow. have the system checked by the Holden Dealer. nearest Holden Dealer. It illuminates when the rear fog light See Immobiliser 0 25. is on. Low Fuel Warning Light... -
Page 80: Cruise Control Light
Instruments and Controls Cruise Control Light Information Displays illuminates on the instrument Driver Information panel when the cruise control Centre (DIC) has been set. The light extinguishes when The Driver Information Centre is cruise control is turned off. located on the instrument cluster. The Driver Information Centre See Cruise Control 0 204. -
Page 81: Vehicle Messages
Instruments and Controls Use the adjusting knob to scroll Vehicle Messages If parking assist is activated through the items in each menu or If the vehicle speed exceeds the Messages are displayed on the DIC to set a numeric value. adjusted speed value or may be audible as a warning Press the SET/CLR button to select... -
Page 82: Brake System Messages
The message will display when the is a fault in the battery charging The message is displayed when tailgate is open. system. Contact a Holden Dealer. Descent Control System (DCS) Close the tailgate completely. is active and vehicle speed Brake System Messages exceeds 30 km/h. -
Page 83: Engine Oil Messages
Instruments and Controls Have the problem repaired by a extinguishes. This may take up to Caution Holden Dealer as soon as 30 minutes. See Diesel Particulate possible. Filter 0 191. Engine damage may result if the Diesel Partic. Filter is Full engine is turned off immediately. -
Page 84: Key And Lock Messages
This message displays if there is a bulb needs to be replaced. problem with the Electronic Stability Anti-theft Alarm System Control and/or Traction Control Object Detection System system. Contact a Holden Dealer. Messages Messages ESC OFF Theft Attempted Park Assist Off... -
Page 85: Service Vehicle Messages
Seek the assistance of a Pressure Monitor System 0 251, the DIC if there is a problem with Holden Dealership or Authorized and Tyre Pressure 0 250. the vehicle. Take your vehicle to a Repair Shop. See Steering 0 186. - Page 86 See but the vehicle speed is too high. is a problem with the four-wheel Manual Mode 0 194. drive system. Contact a Holden To Exit 4WD Low Slow to 5 km/h Grade Braking Active Dealer. This message displays if a...
- Page 87 Combined Trip 1 and Trip 2. Service Parking Assist Fuel Range. This message displays if there is a Instantaneous fuel economy. problem with the PA system. Timer. Contact a Holden Dealer. Outside Air Temperature. Some modes can be reset by pressing the SET/CLR button.
- Page 88 Instruments and Controls Digital Speedometer See Low Fuel Warning Light 0 77 To reset the driving time to zero, and Driver Information Centre press and hold the SET/CLR button This mode indicates the vehicle (DIC) 0 78. for more than 1 second. speed.
- Page 89 Instruments and Controls To change between menus, press Speed Warning Eco Index the MENU button. This mode allows you to set the This feature provides feedback to warning signal for the desired the driver with a relative value of Battery Voltage speed.
- Page 90 Instruments and Controls Vehicle 1. Press MENU until Vehicle Remaining Oil Life Information Menu is Personalisation Displays the estimate of the oil's displayed. remaining useful life. The settings can be personalised in 2. Rotate the adjuster wheel to If Remaining Oil Life 99% is scroll through the following the Driver Information Centre (DIC) displayed, that means 99% of...
- Page 91 Instruments and Controls 3. Press and hold theSET/CLR button on the end of the turn signal lever to reset the oil life to 100%. 4. Turn the ignition off. Battery Voltage Displays the current battery voltage.
-
Page 92: Lighting
Lighting Lighting Battery Power Protection ..96 Exterior Lighting Exterior Lamp Controls Exterior Lighting Light Switch with Automatic Exterior Lamp Controls ..90 Light Control Automatic Light Control ..91 Headlamp High/Low-Beam Changer . -
Page 93: Automatic Light Control
Lighting This function operates with a short : Sidelights, number plate lights Warning delay in dependence of lighting and instrument panel lamps are conditions. illuminated Always switch the high beam If the windscreen wipers continue to : Headlights headlights to low beam when you operate 8 cycles when it is dark approach oncoming vehicles or When lights are on, the control... -
Page 94: Headlight Range
Lighting Headlight Range 3 : All the seats occupied plus load Hazard Warning Flashers compartment full with the Adjustment permissible load on the rear axle. 3 : One person in the driver's seat, plus load compartment full with the permissible load on the rear axle. Daytime Running Lamps (DRL) DRL increase the visibility of the... -
Page 95: Turn And Lane-Change
To switch the front fog lamps on: If water does collect in the lamp times (six times when a trailer is 1. Rotate the lamp control to contact a Holden Dealer. connected). To cancel a lane change function, push the lever in either direction. -
Page 96: Interior Lighting
Lighting Interior Lighting Load Compartment Courtesy Lamps Lamps Instrument Panel Illumination Control Press The lamps illuminate when a door or The light automatically switches on the tailgate is opened. when a door is opened and turns off after doors are closed. To adjust the instrument lighting brightness: 1. -
Page 97: Reading Lamps
Lighting Sun Visor Lamps Warning Do not leave the courtesy lamp on while driving in the dark. Reading Lamps Slide the switch: OFF : Remains off when doors are Illuminates when the vanity mirror opened or closed. cover is opened, see Sun DOOR : Automatically switches on Visors 0 30. -
Page 98: Lighting Features
Lighting Lighting Features standard setting is activated 30 seconds after the driver's door is closed. Entry Lighting The activation time can be changed, Entry lighting provides additional refer to Settings in the Infotainment security when returning to the System. vehicle at night. To operate: on the key. -
Page 99: Infotainment System
Infotainment System Infotainment Vehicle Positioning ... 122 Theft-Deterrent Feature ..151 Problems with Route Overview ..... 151 System Guidance . -
Page 100: Introduction
Infotainment System Introduction functions may grey out when they Danger are unavailable. Many infotainment Two infotainment systems are features are also available through Taking your eyes off the road for available. the steering wheel controls. too long or too often while using This section describes the Before driving: any infotainment feature can... - Page 101 Infotainment System operation support of the Turn to increase or Turn to manually select a infotainment system. Contact your decrease the volume. station. dealer for assistance. 2. RADIO BACK Infotainment System Press to change the audio Press to return to the source between AM The infotainment system is previous screen in a menu.
-
Page 102: Steering Wheel Controls
Infotainment System Volume 5. Continue dragging and (Previous) : Touch to go to the dropping application icons as previous Home Page. Turn to increase or decrease the desired. (Next) : Touch to go to the next volume. Home Page. 6. Press to exit edit mode. -
Page 103: Using The System
Infotainment System If an iPhone is connected, Using the System button press and hold to enter the Press this button to decline Touchscreen Buttons Siri function. an incoming call or end a Touchscreen buttons show on the (seek) current call. screen when available. -
Page 104: Am-Fm Radio
Infotainment System Settings 2. Drag the icon to the Radio applications tray. Touch the SETTINGS icon to To remove an item from the AM-FM Radio display the Settings menu. See applications tray, drag the icon Settings 0 138. Playing the Radio from the applications tray back Applications Tray to the Home Page. -
Page 105: Radio Reception
Infotainment System Slide a finger to the right or left Balance: Touch Press BACK on the faceplate to to scroll through each page of more sound from the left or right return to the Home Page or touch favorites. speakers. The middle position to return for the previous page. -
Page 106: Radio Reception
Infotainment System especially around tall buildings or Advantages of DAB Linking and/or DAB to FM hills, causing the sound to fade in Linking in the DAB menu (see DAB stations are indicated by and out. below). the programme name instead of the broadcasting frequency Interference caused by stations that are on nearby frequencies... -
Page 107: Fixed Mast Antenna
Infotainment System DAB announcements DAB to FM Linking Select one of the categories and choose a specific item to display Besides their music programmes, a If this function is activated, the detailed information. lot of DAB stations also broadcast device switches over to a announcements of various corresponding FM station of the Note... -
Page 108: Audio Players
Infotainment System Audio Players USB MP3 Player and USB Drives Caution The USB MP3 players and USB USB Port drives connected must comply To avoid damaging the antenna or with the USB Mass Storage the roof panel, be sure to remove The vehicle may have a USB port Class specification (USB MSC). - Page 109 Infotainment System Use the following when playing an USB Menu Artists: active USB source: Touch Menu to display the USB 1. Touch to view the list of artists (Play) : Press to play the current menu. The following may be stored on the USB.
-
Page 110: Auxiliary Jack
Infotainment System 2. Select a genre to view a list of Audiobooks: can be resumed by changing the all content of that genre. audio source from Bluetooth to USB 1. Touch to view the audiobooks cable. 3. Select artist to view a list of stored on the device. -
Page 111: Bluetooth Audio
Infotainment System MEDIA screen button to scroll Bluetooth Audio Bluetooth Audio Menu through audio source screens, until Touch the MENU screen button to If equipped, music may be played AUX Input source screen displays. display the Bluetooth Audio menu. from a paired Bluetooth device. See The following may be available: Playing from the AUX Port Bluetooth (Voice Recognition) 0 135... -
Page 112: Using The Navigation
Infotainment System Navigation Map View Navigation Voice Preferences Routing Preferences Touch the Navigation Voice Using the Navigation Preferences list item to adjust the Display Places of Interest voice preferences. System Icons The following options can be Personal Data Touch the NAV button on the Home adjusted: Page or the Nav icon in the Cancel/Resume Route... - Page 113 Infotainment System When this setting is OFF, only the Display Places of Interest Icons Map View short alert tone is played when Places of Interest (POI) icons can Touch to select the desired map approaching the maneuver. be displayed on the map using view.
- Page 114 Infotainment System The audio status screen contains Automatic: Adjusts the screen These preferences are used for all the following elements: background automatically routes generated. depending on the exterior Station Frequency Route segment preferences are lighting conditions. other options showing on the Artist Information Routing Preferences menu.
- Page 115 Infotainment System Contacts Touch Delete All My POIs to Map Adjustments delete the entire list of 1. Touch Edit Contacts to display ZOOM /+ can be used to adjust categories. A pop-up displays the Contacts to edit. the scale of view on the map. When asking to confirm the deletion.
-
Page 116: Maps
Infotainment System Touch a finger twice on a the form of an arrow is displayed Detailed Areas location on the map; the map to indicate the direction. The Road network attributes are zooms in one level to the arrow is shown in relation to the contained in the map database for location that was touched current vehicle heading. - Page 117 Infotainment System Any address information about the vehicle's current location will be shown, including the street, city, and state names. Tap on this callout to save the current address to the vehicle The estimated time to the address book. destination displays. Touch the Arrival button to toggle to duration and to the distance of the destination.
-
Page 118: Destination
Infotainment System The No GPS symbol appears when selected to plan a route. Some The navigation system has an alert there is no Global Positioning destination items may be grayed out feature. The navigation system may System (GPS) satellite signal. When if no destination was previously need to get the attention of the the GPS is gone, the vehicle... - Page 119 Infotainment System pressed, the activity indicator Special Characters Contacts displays in the list of possible As the characters are typed on the Select the CONTACTS button to matches. keyboard, a pop-up of the letter view the vehicle's contact list or a touched displays above the key that connected Bluetooth device.
- Page 120 Infotainment System Favorite Destinations Touch and hold on the favorite If the system has an active location while viewing a contact route, a pop-up will display, Destinations can be saved as on the Contact Details List. The What would you like to do with Favorites for recall later.
- Page 121 Infotainment System Estimated Time of Arrival (ETA) Destination show the turn list. When entering and Distance a turn list, the next maneuver Touch the DESTINATION screen instruction is spoken. When under route guidance, the button to add a waypoint or change the destination while viewing the system shows the ETA or travel The turn list title is the name or...
- Page 122 Infotainment System Saved Trips The waypoint list is sorted in When either a waypoint trip is order with the next waypoint at first created, or additional Waypoint trips can be saved for the top of the list. Each waypoint waypoints are added to an later recall.
-
Page 123: Settings
Infotainment System Settings Prompt Length : Touch to change Low Fuel Alert the prompt length to Short or Long. Touch Settings on the Home Page Audio Feedback Speed : Touch to to adjust features and preferences, change the audio feedback speed to such as Time and Date, Language, Slow, Medium, or Fast. -
Page 124: Global Positioning
Infotainment System If the remaining driving distance is This system might not be available The vehicle is approaching a tall available from the system, this is or interference can occur if any of building or a large vehicle. included in the alert. the following are true: The surface streets run parallel Signals are obstructed by tall... -
Page 125: Problems With Route
Infotainment System This is the first navigation use It could take a long time to If the System Needs after the map data is updated. operate automatic rerouting Service during high-speed driving. The 12-volt battery is If the navigation system needs disconnected for several days. -
Page 126: Voice Recognition
Infotainment System As the map data is updated, more Voice Recognition Using Voice Recognition detail can become available for Voice recognition becomes available Voice recognition allows for areas that previously had limited once the system has been hands-free operation within the detail. - Page 127 Infotainment System There are two voice prompt modes to complete the task, or the session Helpful Hints for Speaking supported: is terminated, the voice recognition Commands dialog stops. Long verbal prompts: The longer Voice recognition can understand prompts provide more An example of this type of manual commands that are either naturally information regarding the...
- Page 128 Infotainment System Speak the command naturally, other POIs, say the name of a can be made by manually selecting not too fast, not too slow. Use category like Restaurants, the item, or by speaking the line direct commands without a lot of Shopping Malls, or Hospitals.
- Page 129 Infotainment System If in voice recognition, and Back is button is touched in a radio screen, Play Artist <artist name> : stated all the way through to the the voice commands for radio and Begin playback of the media initial screen, then Back is stated media features are available.
- Page 130 Infotainment System name is the name displayed on the My Media : Begin a dialog to system is between 4,000 and 8,000, screen when the device is first enter the desired media content. the content cannot be accessed selected as an audio sourced. directly with one command like Handling Large Amounts of Media Play <song name>.
- Page 131 Infotainment System The access commands for playlists, Destination Place of Interest : Call <contact name> At Home, artists, and genres are prohibited Begin a dialog to enter a destination At Work, On Mobile, or On after the number of this type of Place of Interest category or major Other : Initiate a call to an entered media exceeds 4,000.
-
Page 132: Bluetooth (Overview)
Infotainment System Voice Mail : Initiate a call to voice Phone Pair cell phone(s) to the vehicle. mail numbers. The system may not work with all cell phones. See Pairing in Bluetooth (Overview) Voice Pass-Thru this section. Voice pass-thru allows access to the The Bluetooth-capable system can voice recognition commands on the interact with many cell phones,... -
Page 133: Controls)
Infotainment System Vehicles with a Bluetooth system Infotainment System Controls Pairing can use a Bluetooth-capable cell For information about how to A Bluetooth-enabled cell phone phone with a Hands-Free Profile to navigate the menu system using the must be paired to the Bluetooth make and receive phone calls. - Page 134 Infotainment System If multiple paired cell phones are shown on the display. After the 2. Select Phones. within range of the system, the PIN is successfully entered or 3. Touch the next to the phone system connects to the paired the code is confirmed, the to disconnect and follow the on cell phone in the order that they...
- Page 135 Infotainment System Switching to Handset or the phone settings and operation. 3. Select the name or number Verify the cell phone supports this to call. Handsfree Mode feature. Making a Call Using the To switch between handset or When supported, the Contacts and handsfree mode, touch the Phone Keypad Recent Calls menus are...
- Page 136 Infotainment System Declining a Call Touch Ignore on the infotainment 4. Once all calls are merged, the display. Merge button becomes an There are a few ways to decline Unmerge button. Touch to a call: Switching Between Calls (Call unmerge the calls. Some Waiting Calls Only) phone service carriers may not Press...
-
Page 137: Recognition)
Infotainment System 2. While in the Call View, touch Bluetooth (Voice Use the Voice Keypad command to raise the Interaction for international numbers or special Recognition) Selector. numbers which include * or #. Using Bluetooth Voice 3. Select Keypad and enter the Once connected, the person called Recognition number. -
Page 138: Text Messaging
Infotainment System Using the Voice Keypad Text Messaging Note Command There may be previous If equipped, the infotainment system configuration required in your 1. Press . The system responds may allow text messages to be mobile to have this function Command Please, followed received and replied to. -
Page 139: Apple Carplay And Android Auto
Infotainment System Select a Predefined Message : Memory Full To use Android Auto and/or Apple Touch to select from a set of quick CarPlay: This message may display if there is messages. Touch the message no more room on the phone to store 1. -
Page 140: Settings
Infotainment System Android Auto is provided by Google Note Settings and is subject to Google s terms To end Android Auto, disconnect the The Settings menu allows and privacy policy. CarPlay is phone from the USB port or change adjustment of different vehicle and provided by Apple and is subject to the USB setting on the phone . - Page 141 Infotainment System Valet Mode (If Equipped) Number of Favorites Shown: Vehicle Touch to set the number of This will lock the infotainment 1. Press Settings on main screen favorites to display. Select Auto, system and steering wheel controls. of Infotainment System. 5, 10, 15, 20, 25, 30, 35, 40, 45, It may also limit top speed, power, 2.
- Page 142 Infotainment System Select On or Off. Select the desired option from Voice Mail Numbers: This the list. feature displays the voice mail Comfort and Convenience number for all connected Remote Door Unlock. Chime Volume. phones. The voice mail number Select All Doors or may be changed by touching the Press or + to set the chime...
- Page 143 Infotainment System Prompt Length: Select Short for Rear Camera or Continue. Touch the Back brief, direct feedback or Long for screen button to go back to the Touch to display the Rear Camera more information feedback. last menu. menu. See Driver Assistance Touch Back to go to the Systems in the owner manual.
-
Page 144: Trademarks And License Agreements
Infotainment System ® Trademarks and and iPod touch are trademarks of Schedule I: Gracenote EULA (if Apple Inc., registered in the U.S. equipped) License Agreements and other countries. Android Auto is a trademark of Trademarks and Licence Google Inc.; Apple CarPlay is a Agreements trademark of Apple Inc. - Page 145 Infotainment System the "Powered by Gracenote" logo content providers shall be entitled to Servers, including all ownership are either registered trademarks or all of the benefits and protections rights. Under no circumstances will trademarks of Gracenote in the set forth herein that are available to Gracenote become liable for any United States and/or other Gracenote.
- Page 146 Infotainment System Software or Gracenote Servers are © 2014. Gracenote, Inc. All Rights PERSONAL AND error-free or that functioning of Reserved. NON-COMMERCIAL USE OF A Gracenote Software or Gracenote CONSUMER TO (i) ENCODE MPEG4 AVC (H.264) Servers will be uninterrupted. VIDEO IN COMPLIANCE WITH Gracenote is not obligated to THIS PRODUCT IS LICENSED...
- Page 147 Infotainment System ® Map End User License © United States Postal Service 2014. Prices are not established, Agreement MPEG Layer-3 audio coding controlled, or approved by the technology licensed from END USER TERMS ® United States Postal Service . The Fraunhofer IIS and Thomson.
- Page 148 Infotainment System be transferred or sold as a complete comprehensive geographic data, NON-INFRINGEMENT, set as provided to you and not as a any of which may lead to incorrect MERCHANTABILITY, subset thereof. results. SATISFACTORY QUALITY, ACCURACY, TITLE AND FITNESS Restrictions No Warranty FOR A PARTICULAR PURPOSE.
- Page 149 Infotainment System FROM THE USE OR POSSESSION under, applicable export laws, rules Government End Users OF THIS DATA; OR FOR ANY and regulations. Entire Agreement: If the Data is being acquired by or LOSS OF PROFIT, REVENUE, These terms and conditions on behalf of the United States CONTRACTS OR SAVINGS, OR constitute the entire agreement...
- Page 150 Infotainment System CONTRACTOR (MANUFACTURER/ Unicode Part C EULA SUPPLIER) Copyright © 1991-2014 Unicode, Copyright 2014, Software Systems NAME: Inc. All rights reserved. Distributed GmbH & Co. KG. All Rights under the Terms of Use in http:// Reserved. HERE North America, LLC www.unicode.org/copyright.html.
- Page 151 Infotainment System all copies of the Software, including MERCHANTABILITY OR FITNESS OR CONSEQUENTIAL DAMAGES all intellectual property rights FOR A PARTICULAR PURPOSE. OF ANY CHARACTER ARISING AS therein. Unless required by ANY WARRANTIES OR OTHER A RESULT OF THIS LICENSE OR applicable law you may not PROVISIONS OFFERED BY THE OUT OF THE USE OR INABILITY...
-
Page 152: Infotainment
Infotainment System above, please contact the any sponsorship, approval, Introduction Manufacturer or contact QSSC at or endorsement by such companies 175 Terence Matthews Crescent, of this product. Infotainment Kanata, Ontario, Canada K2M 1W8 (licensing@qnx.com). Two infotainment systems are available. Linotype This section describes the Helvetica is a trademark of Linotype infotainment system without built-in... -
Page 153: Theft-Deterrent Feature
Infotainment System functions may grey out when they Overview Warning are unavailable. Many infotainment features are also available through Taking your eyes off the road for the steering wheel controls. too long or too often while using Before driving: any infotainment feature can cause a crash. -
Page 154: Home Page
Infotainment System USB/Bluetooth Music/ previously paired phone or Audio : Touch to select AM, FM, Movies/Pictures: Press to establish a new Bluetooth USB/iPod/Bluetooth Audio, or AUX. go to the next content. enabled phone connection.) Gallery : Touch to view a picture or Press and hold to fast watch a movie. -
Page 155: Steering Wheel Controls
Infotainment System Note 1. Volume button If the customer's connected phone supports Speech The edit mode exits after a Move the button upward to Recognition, press and hold timeout of inactivity of VOL + button to increase the button to activate the 30 seconds. -
Page 156: Operation
Infotainment System Operation Note 4. Select a Preset tone setting or When changing the audio source, a a Custom tone setting and the Radio Controls difference in volume may be Fader/Balance: experienced. The infotainment system is operated Preset by using the pushbuttons, menus Settings Talk, Rock, Jazz, Pop, shown on the display, and steering... - Page 157 Infotainment System Setting the Month and Day 2. TouchRadio. 3. Select language displayed on the Infotainment system. Format 3. Touch Manage Favourites, then select the number of favorite Vehicle 1. Press , then touch Settings. list on the radio screen. 1.
- Page 158 Infotainment System Remote Window Apple CarPlay (If available) 3. Select on or off. Operation: Select on On: If you connect the 1. Press , then touch Settings. or off. device through USB port, it 2. TouchApple CarPlay. will be launched Bluetooth automatically.
-
Page 159: Am-Fm Radio
Infotainment System 2. TouchReturn to Factory Radio Direct Tune Settings. From the AM or FM menu: Restore Vehicle Settings: AM-FM Radio 1. TouchTune. Restore all vehicle settings. Playing the Radio 2. Enter the station number. Clear All Private Data: 3. TouchGo. : Press to go to the Home Page. -
Page 160: Radio Reception
Infotainment System 3. Touch and hold any of the especially around tall buildings or preset buttons to save the hills, causing the sound to fade in Setting the RDS function in the FM current radio station to that and out. radio RDS supported. - Page 161 Infotainment System DAB Radio Up to 5 favorites pages can be Categories saved, and each page can store up 1. From the DAB menu, press Listening to DAB radio to five radio station. theCategories to display the 1. Press on the control panel. DAB category list.
-
Page 162: Fixed Mast Antenna
Infotainment System 2. Select the desired option. (All, To configure the DAB settings Caution News, Weather, Sports, options: Finance, Travel, Event, 1. From the DAB menu, find the To avoid damaging the antenna or Special, Radio info, Warning, desired setting by touching the roof panel, be sure to remove Traffic, Alarm) the antenna before entering the... -
Page 163: Audio Players
Infotainment System Audio Players USB Supported Folder Structure USB Port (Audio System) The infotainment system supports The infotainment system can play USB Port up to 15 stages of folder structure. the music files contained in the USB storage device or iPod/iPhone Connecting a USB Storage Using the USB Port products. - Page 164 Infotainment System Using USB Storage Devices and performance of the USB hub. Some iPod/iPhone product iPod/iPhone If there is not enough power models may not support the supply, it may not operate connectivity or functionality of Use a USB or flash memory type normally.
- Page 165 Infotainment System Changing to Next/Previous Files Touch to change to the next file. Touch within five seconds of the playback time to play the previous file. Returning to the Beginning of the Current File Refer to the table for the If the USB device is already classification items related to the connected:...
- Page 166 Infotainment System Browse Music iPod/iPhone Player To remove the device, select another function, then remove the 1. TouchBrowse Music. This feature is limited to models device. supporting the iPod/iPhone 2. Touch the desired music. connection. Pause Tone Settings Playing Music Files Touch to pause.
- Page 167 Infotainment System ON: Plays all files randomly. USB Port (Picture System) 3. Touch OFF: Returns to normal The infotainment system can view Some features are disabled while playback. picture files stored on a USB the vehicle is in motion. storage device and devices that Using the iPod Menu Viewing a Slide Show support Media Transfer...
- Page 168 Infotainment System 2. Touch the appropriate menu: Playable codec format: H.264 If the USB device is already codec. connected: Slide Show Time: Allows selection of the slide show Playable Audio format: MP3, 1. Press interval. AC3, AAC, WMA. 2. TouchGALLERY. Clock, Temp.
-
Page 169: Auxiliary Devices
Infotainment System Scanning Forwards or Backwards Clock Temp. Display: Playing Music Allows selection of On or To play music from the device, if the Touch and hold during Off to show the clock and device is already connected: playback to rewind or fast forward. temperature on the full Release the button to resume screen. -
Page 170: Bluetooth (Overview)
Infotainment System Phone Pair cell phone(s) to the vehicle. Vehicles with a Bluetooth system The system may not work with can use a Bluetooth-capable cell all cell phones. See Pairing phone with a Hands-Free Profile to Bluetooth (Overview) later in this section. make and receive phone calls. - Page 171 Infotainment System vehicle before it can be used. See When the Bluetooth device and 6. When the Bluetooth device and your mobile phone manufacturer's infotainment system are infotainment system are user guide for Bluetooth functions successfully paired, the phone book successfully paired, the phone before pairing the mobile phone.
- Page 172 Infotainment System 7. Touch Yes on the pop-up 5. Input the Personal 3. Touch Bluetooth, then Device screen of the Bluetooth device Identification Number (PIN) Management. and infotainment system. code (default: 1234) to the 4. Touch the desired device to Bluetooth device.
- Page 173 Infotainment System 3. Touch Bluetooth, then Device versions over 1.2 must be indicates only the hands-free Management. registered and connected to the function is enabled. vehicle. 4. Touch the name of the device indicates only Bluetooth to be disconnected. From the cell phone or Bluetooth music is enabled.
- Page 174 Infotainment System music function. For example, It takes time to transmit data Touch to resume. if you convert to Bluetooth from the Bluetooth device to the Playing the Next Song hands-free while playing Phone infotainment system. music, the music is If the cell phone or Bluetooth Touch discontinued.
-
Page 175: Hands-Free Phone
Infotainment System Hands-Free Phone Make outgoing calls using the Turning the Microphone On call list. and Off General Information : Press to answer incoming calls. Touch to turn the microphone on Vehicles with a Hands-Free Phone or off. : Press to end a call, decline a system can use a Bluetooth-capable call, or cancel an operation. - Page 176 Infotainment System Using the Contacts Menu setting on your device is turned off, Searching for a Name failure message is displayed on the 1. Touch Contacts on the phone Select characters by using the Infotainment system. screen. keypad on the phone book screen. As characters are selected, the Searching for Contacts Entries 2.
-
Page 177: Hands-Free Phone
Infotainment System Trademarks and Missed calls. License Agreements Received calls. 3. Select the contact entry to call. Trademarks and Licence Making a Call with Speed Dial Agreements Numbers Touch and hold the speed dial number using the keypad on the phone screen. - Page 178 Infotainment System Android Auto is a trademark of Google Inc.; Apple CarPlay is a trademark of Apple Inc. Made for iPod and Made for iPhone mean that an electronic accessory has been designed to connect specifically to iPod or iPhone respectively, and has been certified by the developer to meet Apple performance standards.
-
Page 179: Climate Controls
Climate Controls Climate Controls Climate Control Temperature (C) Systems Air recirculation Climate Control Systems Heated rear window Warning Climate Control Systems ..177 Air conditioning Electronic Climate Control Do not sleep in a vehicle with the System . - Page 180 Driving in recirculation mode for a climate control systems by a prolonged period of time can Holden Dealership Network or If no cooling or drying is required, make you sleepy. Periodically turn switch the air conditioning system Authorized Repair Shop.
-
Page 181: System
Climate Controls Turn the temperature control Electronic Climate Demisting and defrosting (D). knob (C) to the blue area for Control System Temperature (E). cooling. Heated rear window (G). Turn the air distribution knob (A) Warning Air recirculation (H). to the desired position. AUTO : Automatic mode, all Do not sleep in a vehicle with the Adjust the fan control knob (B) to... - Page 182 Climate Controls Turn the fan control knob (A) to Demisting and Defrosting the Warning the desired speed. Windows Maximum Heating The exchange of fresh air is Press button (D). reduced in air recirculation mode. Use the maximum heating mode for Recirculation will switch to In operation without cooling, the quick heating.
- Page 183 Climate Controls If no cooling or drying is required, The preselected temperature is Rear Air Conditioning System switch the cooling system off to automatically regulated. In the save fuel. automatic mode, the fan speed and air distribution automatically Automatic Mode AUTO regulate the air flow.
-
Page 184: Rear Air Conditioning
Climate Controls Rear Air Conditioning Rotate clockwise to increase Air Vents air flow. System Air flows to the rear passenger Adjustable Air Vents The rear air conditioning system compartment via the overhead operates in conjunction with the At least one air vent must be open air vents. -
Page 185: Fixed Air Vents
Climate Controls Direct the air flow by swivelling and Warning turning the slats. Do not attach any objects to the Fixed Air Vents slats of the air vents. Risk of Additional air vents are located damage and injury in case of an beneath the windscreen, door accident. -
Page 186: Air Intake
Climate Controls Maintenance Passenger Compartment Air Filter Air Intake The filter removes contaminants such as pollen and dust from the air entering the vehicle. Maintenance of the pollen filter is required. Refer to the Service/ Warranty Booklet. Air Conditioning Regular Operation To ensure efficient performance, switch the air conditioning system... -
Page 187: Driving And Operating
Driving and Operating Driving and Interruption of Power Lane Departure Supply ..... . 194 Warning (LDW) ... . . 215 Operating Drive Systems Fuel... -
Page 188: Driving Information
Driving and Operating Driving Information Ensure that there are no Warning (Continued) obstructions that could limit brake pedal use. Driving Environment It is recommended that if gas Continuous or heavy use of cylinders are frequently Before entering the vehicle brakes will shorten the life of the transported that a purpose-built brake pads. -
Page 189: Off-Road Driving
Driving and Operating If the steering wheel is turned until it Be aware of uncommon noises Note reaches the end of its travel and is from the tyres and the engine. Regular off-road driving requires held against that position for an more frequent maintenance. -
Page 190: Hill And Mountain Roads
Driving and Operating differentials and wheel bearings. Starting and Ignition Positions Contact a Holden Dealer as Operating soon as possible. Hill and Mountain Roads New Vehicle Break-In If the vehicle is driven frequently Use the following precautions to over hilly terrain, it must be improve performance: maintained in good condition. -
Page 191: Starting The Engine
Driving and Operating 2. Turn the key to position 1 while Starting the Diesel Danger moving the steering wheel Engine slightly to release the lock. Do not leave the key in position 1 Observe the following precautions to Manual transmission: Push the or 2 for extended periods while ensure maximum turbocharger clutch pedal to the floor and... -
Page 192: Parking
Driving and Operating the bearings are adequately On an uphill gradient turn the Warning (Continued) lubricated creates unnecessary front wheels away from friction. the kerb. Never leave the engine running in Use only the specified engine oil On a downhill gradient turn the an area such as a closed garage and observe the inspection and front wheels towards the kerb. -
Page 193: Engine Exhaust
Have the cause of the fault Fuel consumption may also be To prevent clogging of the filter, the repaired by a Holden Dealer. higher during this period. soot particles are burnt off at regular Under certain driving conditions,... - Page 194 Driving and Operating prevent the cleaning process from Caution Caution completing. This will result in increased fuel consumption and a Permanent damage can occur to Extended idle should be avoided reduction in engine oil life. the DPF or related components if as the DPF system will not self You will also notice a change in the the required Ultra Low Sulfur...
-
Page 195: Automatic Transmission
Driving and Operating Automatic Shift Lever Note The selector lever is locked in Transmission position P. To move, switch the ignition on, apply the brake The automatic transmission permits pedal and push the release manual gear shifting (manual mode) button. or automatic gear shifting (automatic mode) of the gears. -
Page 196: Manual Mode
- : Downshift certain gear. 2. Select position P. If a higher gear is selected when the Contact a Holden Dealer. 3. Apply the parking brake firmly vehicle speed is too low or a lower without engaging the release gear when vehicle speed is too Interruption of Power button. -
Page 197: Drive Systems
6. Close the cover. Do not engage four-wheel drive if 7. Have the vehicle repaired by a wheels of different sizes are fitted Holden Dealer as soon as as damage to the vehicle can result. possible. The repair would not be covered by the warranty. - Page 198 Driving and Operating low adherence, dirt roads, grass, has received the request for a new N (Neutral) : Shift the vehicle pasture, mud, sand, whenever setting. The lamp continues to flash transfer case to N (Neutral) only additional traction is required. until all shifting criteria has been when towing the vehicle.
- Page 199 Driving and Operating You might choose four-wheel low if Shifting from Four-Wheel High setting is selected when the vehicle you were driving off-road in sand, is in gear and/or moving faster than to Two-Wheel High (4 to 2 ) mud, or deep snow and while 5 km/h, the four-wheel low indicator Rotate the shift control switch to the climbing or descending steep hills.
- Page 200 Driving and Operating and/or moving faster than 5 km/h, on. The N (Neutral) red four-wheel high. With a disengaged the two-wheel high or four-wheel indicator light will come on transfer, there is no power flow the high indicator light will flash for when the transfer case shift to either axle, thus allowing towing 30 seconds but will not complete the...
-
Page 201: Brakes
The braking distance is retained, even in the event of efficiency. extended. Contact a Holden Dealer. panic braking. If the vehicle is travelling above When the engine is not running, 50 km/h and ABS braking occurs,... -
Page 202: Parking Brake
Note: The vehicle's brake system approximately 2 seconds. Never drive the vehicle with the remains operational, but without parking brake applied. ABS assistance. Have a Holden Dealer check the system as soon as possible. See Brake and Clutch System Warning Light 0 73. -
Page 203: Ride Control Systems
Driving and Operating Ride Control Systems Deactivate by pressing Warning (Continued) approximately 2 seconds. Traction Control vehicle's speed should always be Traction Control Off is displayed adjusted to suit road and traffic System (TCS) on the DIC. conditions. Always maintain an TCS is reactivated by pressing TCS improves driving stability when adequate distance to the vehicle... -
Page 204: Descent Control
Driving and Operating Alters engine power and/or See Ride Control System braking on specific wheels, Messages 0 82. improving the vehicle's steering Descent Control control and power delivery, on wet or slippery roads, System (DCS) particularly on snow and ice. The DCS allows the vehicle to travel on a steep decline at Warning... - Page 205 Driving and Operating Noise or vibration from the brake While travelling at speeds below When in standby mode and the system may be noticeable when 50 km/h: vehicle speed exceeds 50 km/h, the system is in operation. DCS deactivates. Press The message Reduce Speed for Caution illuminates green on the...
-
Page 206: Cruise Control
Driving and Operating All other braking functions will Cruise Control Warning continue to operate normally. Once the brakes are at normal Do not use the cruise control temperatures, press when road or driving conditions speeds below 50 km/h to require varying speeds. reactivate the DCS. - Page 207 Driving and Operating 4. Take your foot off the Deactivation Note accelerator pedal. Switching the ignition off also Press CANCEL. deletes the stored speed. Increasing Set Speed illuminates white. Push the switch up to RES/+ Alternatively, do one of the and hold it or briefly push to following: RES/+ repeatedly.
-
Page 208: Object Detection Systems
Driving and Operating Object Detection Note Warning (Continued) Vehicles may not be detected on Systems curves, highway exit ramps, or hills, warning with enough time to help due to poor visibility; or if a vehicle avoid a crash. It also may not Forward Collision Alert ahead is partially blocked by provide any warning at all. - Page 209 Driving and Operating When your vehicle approaches Tailgating Alert Warning another detected vehicle too rapidly, the red FCA display will flash and Poor illumination conditions will sound several high-pitched beeps prejudice the camera from the front. When this Collision identification of vehicles ahead. Alert occurs, the brake system may prepare for driver braking to occur Motorcycles may not be detected...
-
Page 210: Parking Assist
Driving and Operating or off. The first button press shows Cleaning the System the current control setting on the If the FCA system does not seem to DIC. Additional button presses will operate properly, cleaning the change this setting. The chosen outside of the windshield in front of setting will remain until it is changed the rearview mirror may correct the... - Page 211 Driving and Operating zone 25 cm high off the ground and location information for the Parking Warning (Continued) below bumper level. These Assist system. As the object gets detection distances may be shorter closer, more bars light up. always check the area around the during warmer or humid weather.
- Page 212 Driving and Operating The vehicle is driven above Caution (Continued) Caution (Continued) 11 km/h front and rear parking assist is deactivated. sensor surface (ice, snow, mud, Object identification in the upper The reverse gear is disengaged soiling, multiple varnishing/ part of the vehicle can not be rear parking assist is painting, etc.).
- Page 213 45º. a fault sign: Seek the assistance of a Holden Use caution while backing up when dealer. towing a trailer, as the RCTA detection zones that extend out...
-
Page 214: Side Blind Zone
Driving and Operating Turn off parking assist when towing ground. This zone starts at Warning (Continued) a trailer. approximately the middle of the vehicle and goes back 5 m. making a lane change, always Side Blind Zone How the System Works check mirrors, glance over your Alert (SBZA) shoulder, and use the turn... -
Page 215: Rear Vision Camera (Rvc)
Driving and Operating up if a moving vehicle is detected in SBZA may not always alert the Rear Vision that blind zone. If the turn signal is driver to vehicles in the side blind Camera (RVC) activated in the same direction of a zone, especially in wet conditions. - Page 216 Operating the RVC vision camera, the camera may Higher than the camera become misaligned. Contact a To activate: Holden Dealer. RVC Display 1. Turn the ignition key to ON. Always keep the camera lens free The camera image appears on the 2.
-
Page 217: Lane Departure Warning (Ldw)
Driving and Operating direction. LDW uses a camera to Danger Warning (Continued) detect the lane markings at speeds of 60 km/h or greater. Do not use abrasive cleaners or departing the lane on the side scouring pads as they could where it has detected a lane Warning scratch the lens, impairing the... -
Page 218: Fuel
Driving and Operating LDW alerts may occur due to tar Fuel marks, shadows, cracks in the road, temporary or construction lane Danger markings, or other road imperfections. This is normal system EXHAUST WARNING operation; the vehicle does not need CARBON MONOXIDE service. - Page 219 Take the vehicle to a Holden If fuel fumes are detected while Use of such fuels may result in Dealer if you think the vehicle driving, the cause should be...
-
Page 220: Filling The Tank
Caution (Continued) fuel are temperature-dependent. When temperatures are low, use Voluntary Warranty. In no event diesel fuel with guaranteed winter will GM Holden be responsible or properties. bear any liability for any damage or loss that may arise in Caution... -
Page 221: Trailer Towing
Driving and Operating The fuel filler door is located at Trailer Towing the rear side of the vehicle, on The word trailer is used throughout the left. this section and includes all types of 2. Slowly remove the cap. towed vehicles, such as caravans, 3. - Page 222 Driving and Operating Maximum Towing Capacities (kg) Braked Trailer 2.8L Diesel Maximum ball load (kg) Maximum towing capacity 3,000 Note Exceeding these values could affect the New Vehicle Voluntary Warranty. The maximum unbraked towing capacity for all vehicles is 750 kg.
- Page 223 When towing a trailer: A Holden Dealer will assist with equipment which should be used. supply and installation of towing Do not drive with the equipment.
- Page 224 Driving and Operating Trailer Recommendations Adjust by moving items forwards or backwards within the trailer, to change the balance. Check the tow ball load before coupling the trailer to the towing vehicle. Axle loads must not be exceeded when the tow ball load is included.
- Page 225 Tow Load Equipment Equipment Vehicles handle differently when Up to 750 kg Holden tow bar Load distribution towing. Take a couple of short hitch. distance trips with the trailer Holden trailer wiring before taking a long trip.
-
Page 226: Trailer Sway Control (Tsc)
Trailer Sway Territory for the legal affect engine cooling. Control (TSC) requirements of trailer brakes. The Holden Genuine Accessories If the system detects trailer sway Running-in when Towing are an exception, however they movements, engine power is should be removed in high load and... - Page 227 To prevent snow or other The Holden roo/nudge bar is contaminants from entering the available from a Holden Dealer and snorkel and engine air intake. has been tested for compatibility with the vehicle's design, including the Holden airbag system.
-
Page 228: Vehicle Care
Vehicle Care Vehicle Care Headlamps ....238 Towing Front Turn Signal Lamps ..240 Towing the Vehicle ... 264 Taillamps . -
Page 229: General Information
General Information Before returning the vehicle to Emission Control System the road: Major emission control systems that Where specified, use only Holden Connect the clamp to the the vehicle may have are: genuine parts and accessories. negative terminal of the vehicle Evaporative emission control battery. -
Page 230: Vehicle Checks
It is recommended that service and It is recommended that servicing be Vehicle Checks repair to fuel or emission systems carried out by an authorised Holden be carried out by an authorised Dealer who will maintain the Doing Your Own Holden Dealer. -
Page 231: Bonnet
Vehicle Care Bonnet Opening Note 3. Pull the support rod up and away from the holder and Do not step on the front Nudge Bar secure. (if equipped) to access the engine compartment Closing 1. Pull the release lever 2. Push the safety catch towards rearwards and upwards. -
Page 232: Overview
Vehicle Care 1. Place the support rod into the Engine Compartment Overview holder. 2. Lower the bonnet to approximately 30 cm and allow it to drop into the catch. 3. Check that the bonnet is engaged. 4. If it is not engaged, open the bonnet and repeat Steps 2 and 3. -
Page 233: Engine Oil
Vehicle Care Engine Oil 3. Insert the dipstick to the stop on the handle. Checking Oil Level 4. Remove and read the engine Check the engine oil level oil level. regularly and before a long The level should be at the MAX journey. -
Page 234: Engine Oil Life System
Vehicle Care 4. Replace the engine oil filler cap indicated can vary considerably. For the oil regularly over the course of tightly. the oil life system to work properly, an oil drain interval and keep it at the system must be reset every time the proper level. -
Page 235: Automatic Transmission
Vehicle Care If the vehicle has a CHANGE Engine Air Cleaner/Filter Checking Coolant Level ENGINE OIL SOON message and it comes back on when the vehicle is Warning started and/or the OIL LIFE REMAINING is near 0%, the engine Do not remove the radiator cap if oil life system has not been reset. -
Page 236: Washer Fluid
4. Replace the cap securely. 3. If no problems are found, refill Check the fluid level weekly. If the coolant requires regular the coolant reservoir. See topping up, contact a Holden Adding Coolant previously in Adding Washer Fluid Dealer. this section. -
Page 237: Brake Fluid
Adding Brake Fluid Wash any affected area If the brake fluid requires regular immediately. See Recommended Fluids and topping up, contact a Holden Dealer Lubricants 0 271. immediately. 1. Turn the ignition off. 2. Wipe the sides of the cap... -
Page 238: Battery
Use the local, authorised waste and metal watch bands) near Compartment Overview 0 230. management facility. battery terminals. For replacement, refer to a Holden Dealer or authorised repairer. Battery The vehicle battery is maintenance free, provided that the driving profile... -
Page 239: Fuel Filter
5 seconds. vehicle is driven while Water in If the engine does not start, Fuel Contact Service is contact a Holden Dealer. illuminated. Wiper Blade Replacement Contact a Holden Dealer immediately to have the fuel filter Regularly check the condition of the drained. -
Page 240: Bulb Replacement
Clean stained bulbs with If water does collect in the lamp methylated spirits. 1. Remove the protective cover. contact a Holden Dealer. Bulbs to be Changed by a Holden Dealer Turn signal lamps on the exterior mirrors Courtesy lamp Reading lamps... - Page 241 If the headlights need to be engage the lugs in the re-aimed, it is recommended that recesses on the reflector. the vehicle is taken to a Holden dealer for service, because it is 6. Engage the spring clip. related with safety.
-
Page 242: Front Turn Signal Lamps
Vehicle Care Front Turn Signal Lamps Taillamps 2. Push the bulb into the socket slightly, rotate counterclockwise and remove the bulb. 1. Rotate bulb holder 1. Open both covers unscrewing counterclockwise and both screws. 3. Insert a new bulb into the bulb disengage. - Page 243 7. Switch on the ignition, operate counterclockwise. and check all lights. Liftgate Tail Lights 1. Open the liftgate. 3. Turn signal light (1) Tail light/brake light (2) For LED version just replace lights (1). The tail light/brake light should be replaced by a Holden dealer.
- Page 244 6. Switch on the ignition, operate and check all lights. Reverse Lamps 2. Remove the cover. 3. Rotate the relevant bulb holder anticlockwise and remove it. Tail light/brake light For LED version the tail light/ brake light should be replaced by a Holden dealer.
-
Page 245: Licence Plate Lamp
Vehicle Care 1. Behind the rear bumper, Licence Plate Lamp unscrew the screw to remove the reverse lamp assembly and disconnect the electrical connector. 3. Replace the bulb. 4. Insert and turn the bulb into the 1. Insert a screwdriver on the left bulb holder and screw it into side of the bulb housing. -
Page 246: Electrical System
Turn off the ignition (LOCK the replacement of high current position) and any electrical fuses or relays carried out by a equipment before changing Holden Dealer. a fuse. Replace blown fuses promptly. A blown fuse can be recognised by its melted wire. - Page 247 Vehicle Care Place the fuse extractor on the top or side of the fuse to extract the fuse. Fuse Extractor A fuse extractor can be located in the fuse box in the engine compartment.
- Page 248 Vehicle Care Engine Compartment Mini Fuse Block Fuses Usage Not Used 15A - Electric Power Steering (EPS) (if available) Not Used Horn Front Fog Lamp (if available) High Beam LH High Beam RH The fuse box is in the front left of 7.5A - Engine Control the engine compartment.
- Page 249 Vehicle Care Mini Mini JCase Fuses Usage Fuses Usage Fuses Usage Run Crank 20A - Rear ABS or ESC Relay Signal Wiper (SUV) SB01 Module Pump (if available) Automatic 10A - Front / Rear Transmission Control (SUV) Washer Pump Transfer Case Module (if available) SB02 Control Module (4X4)
-
Page 250: Block
Vehicle Care Instrument Panel Fuse Maxi Usage Block *: Located near battery positive terminal The fuse box is behind the instrument panel cap. Relays Usage RLY01 Starter RLY03 High Beam Viscous Heater RLY05 (Diesel) RLY08 Front Wiper Control Mini RLY09 Front Wiper Speed Fuses Usage... - Page 251 Vehicle Care Mini Mini Mini Fuses Usage Fuses Usage Fuses Usage 15A - Side Blind Zone Sensing and Front Collision (SBZ) (If available) Diagnose Alert (FCA) / Rain Module (SDM) Sensor (if available) Body Control Module (3) Body Control Rear View Module (2) Mirrors (if available) Front A/C...
-
Page 252: Vehicle Tools
Check the tyres regularly for damage, stones, punctures, cuts, cracks, bulges, etc. Check the rims for damage. Contact a Holden Dealer, if in doubt. Tyre Pressure Keep the tyres at the recommended 1. Lift lever to unlatch. pressures to avoid increased fuel consumption, uneven and 2. -
Page 253: Tyre Pressure Monitor
Vehicle Care Always inflate the spare tyre to the 2. Tyre positions levels. The TPMS sensors monitor pressure specified for the air pressure in your tires and 3. Normal load (up to three maximum load. transmit tire pressure readings to a people) receiver located in the vehicle. - Page 254 Vehicle Care a different size than the size the TPMS from functioning properly. Caution indicated on the tire placard, you Always check the TPMS malfunction should determine the proper tire light after replacing one or more Tire sealants could damage the inflation pressure for those tires.) tires or wheels on your vehicle to TPMS sensors.
-
Page 255: Tyre Pressure Monitor
Vehicle Care Incorrect tyre pressures will impair The low tire pressure warning light Caution (Continued) safety, vehicle handling, comfort and and the DIC warning message come fuel economy and will increase on at each ignition cycle until the reached the level to trigger tyre wear. - Page 256 Vehicle Care The TPMS can warn about cycle. A DIC warning message also One or more TPMS sensors are a low tyre pressure condition displays. The malfunction light and missing or damaged. The DIC but it does not replace DIC warning message come on at message and the malfunction normal tyre maintenance.
-
Page 257: Tread Depth
Vehicle Care TPMS Sensor Calibration Warning (Continued) Process are not capable of being driven Each TPMS sensor has a unique identification code. The identification safely at high speeds. Therefore, code needs to be matched to a new their use is not recommended. tire/wheel position after rotating the tires or replacing one or more of the Tyre Rotation... -
Page 258: Buying New Tyres
Vehicle Care as road surface, driving style, Caution (Continued) Warning suspension alignment, wheel balancing, tyre pressure, etc. Tyre ageing depends on Do not use different sizes or The owner must evaluate the many conditions of use types of tyres and wheels than vehicle wear. -
Page 259: Tyre Chains
Vehicle Care Tyre Chains Whenever tyre chains are fitted, Warning (Continued) switch off the ESC. See Tyre chains should be fitted only Electronic Stability Control Use the jack only at the on the rear wheels. (ESC) 0 201. designated lifting points. Use in Remove large hubcaps and If driving in snowy conditions other locations may result in the... - Page 260 Vehicle Care Note Warning (Continued) Do not change more than one wheel at one time. was new, it can lose air over time. 7. Remove the tools. See Check the inflation pressure Tools 0 250. regularly. After installing the spare tyre on the vehicle, stop as soon as possible to check the inflation pressure is correct.
- Page 261 Vehicle Care Wheel nut removal Jacking procedure 15. Remove the centre cap by placing the chisel end of the wheel wrench into one of the slots on the cap and gently prise the cap out. Note To protect the wheel, place a soft cloth between the wheel wrench and the wheel.
- Page 262 Vehicle Care Front position: If the flat tyre is on the front of the vehicle, position the jack to the rear of the front tyre in the cut out on the frame (1). Rear position: If the flat tyre is on the rear, position the jack under the rear axle and get as close as possible to the shock...
- Page 263 Vehicle Care 23. Put the wheel nuts back on Warning (Continued) with the rounded end of the nuts towards the wheel. Do not get under a vehicle that is 24. Tighten each wheel nut by supported by a jack. No person hand, then use the wheel should place any portion of their wrench to tighten the nuts until...
-
Page 264: Jump Starting
If you are still unsure about jump wrench to 140 Nm (Newton Do not let the jumper lead starting, Holden strongly metres). Wheel nuts must be clamps touch each other or recommends for your safety and tightened evenly to the correct other metal parts. - Page 265 Vehicle Care Defrost the frozen battery before 3. Place the selector lever in Warning (Continued) connecting jumper leads. position P. Use a booster battery with the 4. Turn the ignition off. Battery acid is corrosive. If it same voltage (12 volts). Its gets on your skin, wash with 5.
-
Page 266: Towing The Vehicle
Vehicle Care 8. Connect the black lead to the 13. Switch on the headlamps and Towing negative terminal of the the heated rear window of the booster battery (3). vehicle that received the jump Towing the Vehicle start. 9. Connect the other end of the black lead to a vehicle 14. -
Page 267: Towing Another Vehicle
Vehicle Care In an emergency, the vehicle may Do not attach towing To prevent exhaust fumes be towed on all four wheels for short equipment to the bumpers or entering the towed vehicle, close distances only, using the front brackets, suspension or cross the windows and press towing eyes. - Page 268 Vehicle Care Vehicle Recovery Attach a tow rope or other suitably rated system to the towing eyes. Ensure all equipment is in good condition and is being used correctly. Caution The front towing eyes are rated to 1,500 kg each and the rear towing eye to 1,375 kg.
-
Page 269: Appearance Care
Have the door hinges of all doors brake performance returns to Bird droppings, dead insects, resin, greased by a Holden Dealer. pollen and the like should be normal. cleaned off immediately, as they Caution... - Page 270 Polishing is necessary only if the wiper drive mechanism. paint has become dull or if solid Have more extensive damage or deposits have become attached rust areas repaired by your Holden to it. Dealer. When cleaning the rear window, make sure the heating element...
-
Page 271: Interior Care
Vehicle Care Interior Care Interior and Upholstery Plastic and Rubber Parts Only clean the vehicle interior, Plastic and rubber parts can be including the instrument panel cleaned with the same cleaner as Warning fascia and panelling, with a dry cloth used to clean the body. -
Page 272: Service And Maintenance
Service and Maintenance Service and General Information When Change engine oil soon is displayed, have the engine oil and Maintenance filter changed as soon as possible, Service Information within the next 1,000 km. In order to ensure economical and It is possible that, if you are driving safe vehicle operation and to General Information under the best conditions, the oil life... - Page 273 Service and Maintenance Recommended Fluids, Lubricants, and Parts Recommended Fluids and Lubricants Engine Type 2.8L Diesel Engine oil specification SAE 5W-30; (dexos ® Coolant specification 50% clean fresh water and 50% Dexcool anti-freeze coolant, conforming to specification number GM6277M ® Automatic transmission fluid Dexron ®...
-
Page 274: Technical Data
Technical Data Technical Data Vehicle Identification Identification Plate An identification label is located on Vehicle Identification the front door frame. Vehicle Identification Number (VIN) Vehicle Identification The Vehicle Identification Number Number (VIN) ....272 (VIN) is located on the chassis rail Identification Plate . - Page 275 Technical Data Engine Number : Front of vehicle The engine serial number (1) is located on the right side at the rear of the engine block.
-
Page 276: Vehicle Data
Technical Data Vehicle Data Engine Data Engine Type 2.8 L4 Turbo Diesel Number of cylinders Engine 2776 cc Engine power Please refer to holden.com.au Engine torque Please refer to holden.com.au Diesel fuel Complies with Euro Standard EN590... -
Page 277: Vehicle Weight
Technical Data Vehicle Weight Maximum Vehicle Carry Capacity Carrying capacity (occupants, accessories Overloading is a safety hazard and and luggage) (kg) could also shorten the life of the vehicle. Example Loading Guide Example 1: A. Vehicle carrying capacity (example 645 kg) B. - Page 278 Technical Data Example 2: Accessory mass examples (cont'd) A. Vehicle carrying capacity (example 645 kg) Nudge bar 6 kg B. Subtract occupant weight Cargo barrier 12 kg (example 5 x 80 kg = 400 kg) Snorkel 3 kg C. Subtract mass of fitted accessories (see the following Axle Loads table) (example 40 kg)
-
Page 279: Vehicle Dimensions
Technical Data Front Axle Load (kg) Rear Axle Load (kg) All models 1450 1600 Vehicle Dimensions Dimensions (mm) Length Width (incl. Height (incl. Front Track Rear Track Front Wheel Base mirrors) roof rail) Overhang 4887 2132 1840 1570 1588 2845 4887 2132 1846... -
Page 280: Tyre Pressure
Technical Data Tyre Pressure Tyre Wheel Recommended Pressure Size Size Profile Up to 3 people (Light) Up to 3 people (ECO) Full load (Max) Spare Front Rear Front Rear Front Rear 255/65 x 7.0J 110S 265/60 x 7.5J 110T... -
Page 281: Customer Information
Information staff, further options are available Trademarks and Licence to you. Agreements As a first step, Holden suggests you Customer Information discuss any concern with the DexosTM is a trademark of General Trademarks and Licence relevant Department Manager Motors LLC Agreements . - Page 282 Alternatively, you may prefer to Written Correspondence Certificate, located inside the front email Holden at: cover of the Service/Warranty You can also write to Holden at the Booklet in your vehicle's glovebox. holdencustomercare@gm.com address below: Before you write however, You can also write to Holden at the...
- Page 283 This will take place when other organisations for research the vehicle is serviced by a Holden purposes. dealer. Some data is electronically fed into global diagnostic systems.
-
Page 284: Index
Index Index Anti-theft (cont'd) Alarm System Messages ..82 Add-On Electrical Equipment . . . 224 Antilock Brake System (ABS) . . . 199 Adjustable Air Vents ... . 182 Warning Light . - Page 285 Index Bulb Replacement (cont'd) Climate Control Systems (cont'd) Licence Plate Lamps ..243 Air Conditioning ....177 Battery ......236 Taillamps .
- Page 286 Index Curtain Airbag System ... 48 Driver Information Engine (cont'd) Centre (DIC) ....78 Check and Service Engine Driving Soon Light .
- Page 287 Index Flashers, Hazard Warning ..92 Fuel (cont'd) Filter ......237 Flat Tyre Hands-Free Phone .
- Page 288 Index Lighting Entry ......96 Identification Plate ....272 Key and Lock Messages .
- Page 289 Index Lights (cont'd) Messages (cont'd) Monitor System, Tyre Tyre Pressure Monitoring Diesel Particulate Filter ..81 Pressure ..... . 251 System .
- Page 290 Index Overview (cont'd) Pregnancy, Using Safety Belts . . . 44 Recommended Fluids and Instrument Panel ....63 Pressure Lubricants ..... 271 Owner Assistance .
- Page 291 Index Seats (cont'd) Start Vehicle, Remote ... 18 System Head Restraints ....32 Starting the Diesel Engine ..189 Forward Collision Heated Front .
- Page 292 Index Traction Tyres (cont'd) Vehicle Care Chains ......257 Tyre Pressure ....250 Control System (TCS) .
- Page 293 Index Where to Put the Restraint ..52 Windows Heated, Rear ....29 Power ......27 Windshield Wiper/Washer .
Need help?
Do you have a question about the Trailblazer RG 2017 and is the answer not in the manual?
Questions and answers