Table of Contents

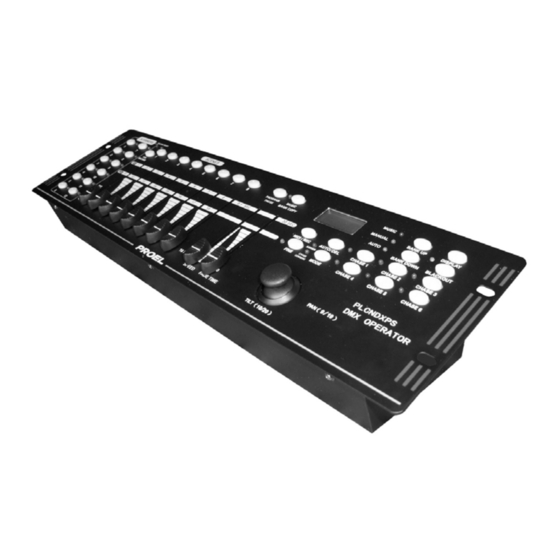
Summary of Contents for PROEL PLCNDXPS
- Page 1 MANUALE UTENTE – USER’S MANUAL DMX OPERATOR PLCNDXPS PROEL S.p.A. (World Headquarters – Factory) Via alla Ruenia 37/43 64027 Sant’Omero (TE) – Italy Tel. +39 0861 81241 Fax. +39 0861 887862 e-mail: info@proelgroup.com www.proelgroup.com...
-
Page 2: Table Of Contents
Notes: INDICE: ATTENZIONE………………………………………………………………… p. 3 NORME DI SICUREZZA……………………………………………………. p. 3 CONDIZIONI OPERATIVE………………………………………………….. p. 4 CARATTERISTICHE PRINCIPALI…………………………………………. p. 4 SETUP…………..…………………………………………………………….. p. 6 Installazione………………………….…………………………………. p. 6 Modalità musicale……………………………………………………… p. 6 DMX-512 connessione con i proiettori……………………………….. p. 7 Settaggio dei canali……….…………………………………………… p. 8 FUNZIONAMENTO………………………………………………………….. -
Page 3: Attenzione
Notes: ATTENZIONE ! Tenere questo apparecchio lontano da pioggia e umidità Scollegare il cavo dalla rete di alimentazione prima di aprire il coperchio PER LA VOSTRA SICUREZZA, LEGGERE ATTENTAMENTE QUESTO MANUALE PRIMA DI ACCENDERE L’APPARECCHIO PER LA PRIMA VOLTA Chiunque si occupi dell’installazione, uso e manutenzione di questo apparecchio deve: essere una persona qualificata seguire le istruzioni riportate sul presente manuale Prima di accendere per la prima volta la centralina, sinceratevi che non vi siano danni... -
Page 4: Condizioni Operative
CONDIZIONI OPERATIVE Notes: Questo apparecchio è una centralina DMX per controllo di effetti (testemobili o scanners) per discoteche, spettacoli ecc. E’ progettato per funzionare in corrente continua, minimo 300mA, 9 o 12V e per uso interno. Proteggere l’apparecchio da urti o shock improvvisi, sia in fase di installazione che di normale funzionamento. - Page 5 This unit receives Note On signals wich enables to run 15 banks (01-15) of scenes, and PANNELLO FRONTALE 6 chases of scenes. In addition, black-out function can be activated by MIDI signal. 13 19 20 21 14 15 16 17 18 Bank: Note number: Function:...
-
Page 6: Setup
18. PULSANTE BLACK-OUT: per chiudere il fascio luminoso di tutti i proiettori, DELETE A SCENE: attraverso lo shutter Press and hold the PROGRAM button for about 2 seconds to enter the 19. PULSANTE MIDI / REC programming mode. The program flash will flash. 20. -
Page 7: Dmx-512 Connessione Con I Proiettori
Deleting a scene in a chase: DMX-512 – CONNESSIONE CON I PROIETTORI Press and hold the PROGRAM button for about 2 seconds to enter the programming mode. The program flash will flash. I cavi DMX non devono venire a contatto con altre tipologie di cavo. In tal caso infatti i Select the chase in which a scene will be deleted via the CHASE buttons proiettori potrebbero funzionare in maniera non corretta o non funzionare affatto. -
Page 8: Settaggio Dei Canali
Select the desired scene via the SCENE buttons Press the MIDI/REC button Indirizzo di Indirizzo di Indirizzo di Proiettore Proiettore Proiettore partenza partenza partenza Program the next steps until the chase is finished or the maximum number of steps (240) has been reached Press and hold the PROGRAM button in order to save the chase RUNNING A CHASE: Press the respective CHASE button and press the AUTO button. -
Page 9: Funzionamento
Per assegnare X (fine) ed Y (fine) della centralina (joystick orizzontale e verticale – Press one of the SCENE buttons in order to save the data. All leds on the panel will pagina B) ai canali 3 e 4 del motorizzato (pan fine e tilt fine), bisogna premere il be flashing, indicating the data is saved. -
Page 10: Modalità Programmazione
Attraverso il pulsante PAGE SELECT, è possibile regolare gli sliders dei canali da 1 a 10 Press the DISPLAY button to switch between the “ALL CH FD TIME” mode (for all (pagina A) e da 11 a 20 (pagina B), oppure entrambi contemporaneamente. DMX channels) or “ONLY X/Y FD TIME”... -
Page 11: Chase
CHANNEL SETTING Selezionare la scena desiderata, premendo il relativo pulsante, per salvare This device can control 12 scanners, each up to 20 channel. COPIA DI UN PROGRAMMA: Premere e mantenere premuto il pulsante PROGRAM per circa 2 secondi, per The first 8 channels of each scanner, can be controlled via the 8 faders directly. The entrare in modalità... - Page 12 Copiare una scena in un chase Premere e mantenere premuto il pulsante PROGRAM per circa 2 secondi, per DMX-output DMX-input entrare in modalità programmazione. Il led program lampeggerà. XLR mounting socket XLR mounting socket Selezionare il chase desiderato, attraverso il relativo pulsante CHASE, il rispettivo led si illuminerà.
-
Page 13: Scena (Passo)
21. AUTO/DEL BUTTON SCENA (Passo) 22. CHASE BUTTONS (chase 1 - chase 6) 23. SPEED FADER INSERIMENTO DI UNA SCENA: 24. FADE TIME FADER Premere e mantenere premuto il pulsante PROGRAM per circa 2 secondi, per 25. FINE BUTTON: for moving the joystick with the smallest increment entrare in modalità... -
Page 14: Modalità Audio
MODALITA’ AUDIO FRONT PANEL Premere il pulsante MUSIC/BANK COPY. Il relativo led si accenderà. Dal momento 13 19 20 21 14 15 16 17 18 in cui la centralina riceverà un segnale musicale, sarà sotto il completo controllo di quest’ultimo. Selezionare il banco da eseguire in modalità... -
Page 15: Pulizia E Manutenzione
OPERATING DETERMINATIONS Banco: Numero di nota: Funzione: Chase This device is a DMX controller for controlling DMX effects or spots in discotheques, on Banco 01 da 00 a 07 attiva o disattiva le scene 1-8 del banco 1 stages etc. It is allowed to be operated with a direct voltage of DC 9-12V, minimum Banco 02 da 08 a 15 attiva o disattiva le scene 1-8 del banco 2... - Page 16 CAUTION ! Keep this device away from rain and moisture! Unplug mains lead before opening the housing! FOR YOUR OWN SAFETY, PLEASE READ THIS USER MANUAL CAREFULLY BEFORE YOUR INITIAL START UP INDEX: Every person involved with the installation, operation and maintenance of this device has CAUTION……..…………….…………………………………………………...


Need help?
Do you have a question about the PLCNDXPS and is the answer not in the manual?
Questions and answers