Teton Grill XA Series Assembly Instructions
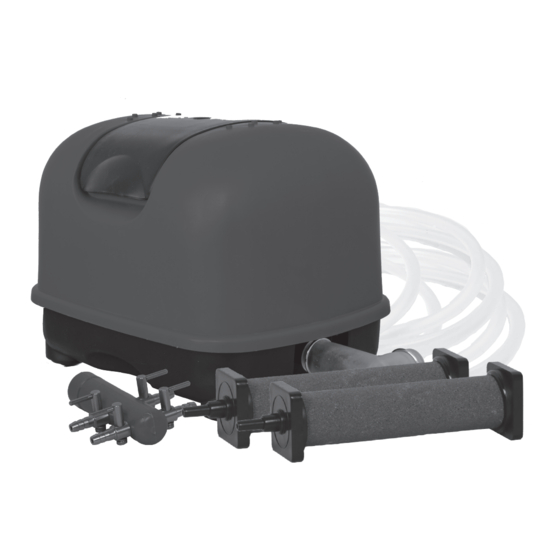
Aeration kit
Hide thumbs
Also See for XA Series:
- Instruction manual (9 pages) ,
- Assembly instructions (4 pages) ,
- Assembly instructions (4 pages)

Related Manuals for Teton Grill XA Series


Summary of Contents for Teton Grill XA Series
- Page 1 XA SERIES XA20K Teton Aeration Kit ASSEMBLY INSTRUCTIONS Teton Dynamics Teton Dynamics P.O. Box 3031 P.O. Box 3031 San Leandro, CA 94578-0031 San Leandro, CA 94578-0031...
- Page 2 TETON AERATION KIT XA20K VERSION AUG 2020 www.tetonus.com 800.752.0399 info@tetonus.com WELCOME TO THE WORLD OF TETON, BEFORE USING THESE PRODUCTS, PLEASE READ THESE NATURAL RELIABILTY! INSTRUCTIONS CAREFULLY AND FAMILIARIZE YOURSELF WITH THE ITEMS. PLEASE KEEP ASSEMBLY MANUAL IN A SAFE PLACE FOR FUTURE REFERENCE. You Made The Right Choice Investing In These Quality Products.
- Page 3 STEP 1 FIGURE A • With the air stones in hand, slip the tubing onto the barbed fittings, applying a little pressure. STEP 2 FIGURE B • Locate 4-way manifold (provided with kit). While applying pressure, connect both hose ends onto the two barbed fittings. Open the valves on the two connections you have connected to and close the valves on the remaining two outlets.
- Page 4 STEP 4 FIGURE D • Locate air pump in an area free of dust and avoid areas prone to flooding. Air pumps located in areas below water level will require a check valve to prevent potential water flow back into the pump. Then place the airstones in the desired area of the pond and plug in the power cord to a GFCI protected power supply.
Need help?
Do you have a question about the XA Series and is the answer not in the manual?
Questions and answers