Table of Contents
Advertisement
Quick Links
Advertisement
Table of Contents

Related Manuals for Essilor Visioffice


Summary of Contents for Essilor Visioffice
- Page 1 Quick Reference Guide...
- Page 2 For Technical Assistance, please contact the Visioffice Support Group at: 1-877-457-3760 ext. 3, or visioffice@essilorusa.com www.essilorvisioffice.com...
- Page 3 Contents Your Visioffice System Measuring Frame Styling Patient Education...
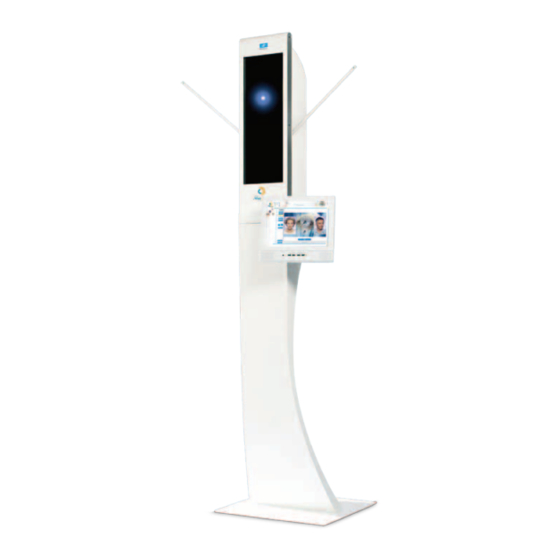
- Page 4 Your Visioffice System Welcome to your new Visioffice System! Turn on the Visioffice by moving the Master Power Toggle into the “UP” position. The Master Power Toggle is located in the rear access panel of the Visioffice. Select the appropriate Patient Category...
- Page 5 Adjust the frame for your patient, ensuring precise fit and comfort. Remove the demo lenses from fullrim frames, and remove stickers or markings from the lenses on rimless or semi-rimless frames. Attach the Visioffice Tracking Clip to the frame by holding the frame bridge and the Frame Clip facing up Place the frame in the lower supports Extend the frame clip to allow the top of the frame to rest in the upper supports.
- Page 6 Frame Adjustment is still comfortable for the patient. You can now begin the Measurements With Visioffice Table Top, use a rotating stool without seatback or arms. Rotate the stool for position 1. Static Front View adjustments, then block during measurement recording.
- Page 7 Quick Tip Lighting Adjustment While positioning the patient, if the Red Tracking Line is flashing, adjust the Visioffice Luminosity Settings: - If the image is too dark, move the luminosity slider to the right - If the image is too bright, move the luminosity slider to the left...
- Page 8 Ask your patient to look at the bridge of his/her nose in the mirror and to remain still. Press Camera button to start Video Recording. Visioffice will record a video for a few seconds and select the most acceptable image. Image Verification Verify two things: 1.
- Page 9 Press the Camera button to begin recording as the patient rotates their head. Visioffice will record for a few seconds, automatically selecting the most acceptable image with a Head Rotation angle closest to 20°.
- Page 10 Alignment Zone and onto the Blue Optical squarely facing the unit. Localization Decal attached to the front face of the Raise or lower the Visioffice camera to place your Visioffice. patient’s face in the gray area on the screen.
- Page 11 Press the Camera icon to start the video squarely facing the unit. recording as they are reading. Raise or lower the Visioffice camera to place your The Visioffice camera will automatically zoom patient’s face in the gray area on the screen.
- Page 12 Position the patient roughly 24in from the Visioffice mirror, with shoulders and feet squarely facing the unit. Raise or lower the Visioffice camera to your patient’s eye level, ensuring detection of all four green clip markers. If your patient is taller than the Visioffice arms, adjust so the clips appear higher in the view.
- Page 13 Measuring Dynamic Visual Behavior Results Two different values will be displayed, both key for Visual Behavior Lens Personalization: H/E Ratio 0.00 0.50 1.00 Eye Dominant Movement Head Dominant Movement - If the Head/Eye Ratio is <0.50, your patient’s dynamic visual behavior is more naturally an Eye Mover - If the Head/Eye Ratio is >0.50, your patient’s dynamic visual behavior is more naturally a Head Mover Stability Coefficient A lower Stability Coefficient indicates a more consistent measure of your patient’s dynamic visual behavior.
- Page 14 Measuring At this point, you have completed the process involving the Lens Boxing patient. If they need to be seated, they may, or if you need to move Press the Lens Boxing icon on the Measuring Tab. onto a different patient before finalizing the current one, you may do so since all pictures have been saved to the Patient Record.
- Page 15 (Head Cape) to the non-zero value. The measurement results will be adjusted automatically. For non personalized designs (Essilor or other suppliers), do not activate the Head Cape measurement. Measurement data is now ready for PMS/Web Export or Print.
- Page 16 Select the Frame Tab at the top of the screen. Position the patient wearing their selected frame in front of the Visioffice mirror. Raise or lower the Visioffice camera to align your patient’s face in view. Press the Digital Camera icon to capture a still image, or press the Video Camera button to record a short video clip.
- Page 17 Patient Education Product Demo Tools The Patient Category Selection on the Visioffice Home Screen will customize the product demos available for view. Select the Guide Tab at the top of the screen. Use the tabs on the left of the screen to navigate through the each demo section.
- Page 18 Notes...
- Page 19 Notes...
- Page 20 Essilor brands to correct myopia, hyperopia, presbyopia and astigmatism. © 2012 Essilor of America, Inc. All rights reserved. Unless indicated otherwise, all trademarks are the property of Essilor International and/or its subsidiaries in the United States and in other countries.
Need help?
Do you have a question about the Visioffice and is the answer not in the manual?
Questions and answers