Table of Contents
Advertisement
Quick Links
Advertisement
Table of Contents

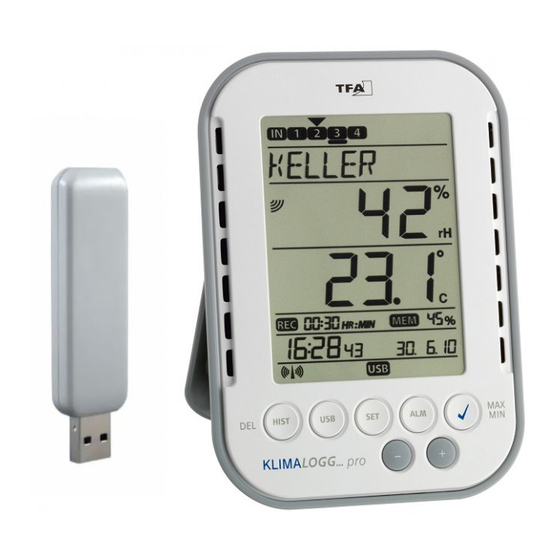
Summary of Contents for TFA KlimaLogg Pro Pavouk DTHL
- Page 1 Návod na používanie TFA Pavúk DTHL Anglicky strana www.zahradnejazierka.sk...
- Page 2 FEATURES: • • • • • • • • • • • • • • • • • •...
- Page 3 • • • • • ADDITIONAL TRANSMITTER (purchased separately) INSTALLATION AND REPLACEMENT OF THE BATTERIES: Note: If you have purchased external transmitters, you should insert the batteries into the transmitters just before into the KlimaLogg Pro. For more information, please have a look at the chapter “transmitters” of this manual or refer the instruction manual of the transmitter.
-
Page 4: First Installation
FIRST INSTALLATION: DCF RADIO CONTROLLED TIME RECEPTION •... - Page 5 • • • • • Note for Radio Controlled Time DCF: The base for the radio controlled time is a Caesium Atomic Clock operated by the Physikalisch Technische Bundesanstalt Braunschweig which has a time deviation of less than one second in one million years. The time is coded and transmitted from Mainflingen near Frankfurt via frequency signal DCF-77 (77.5 kHz) and has a transmitting range of approximately 1500 km.
-
Page 6: Lcd Display
LCD DISPLAY: BUTTONS:... -
Page 7: Basic Settings
FUNCTIONS OF THE BUTTONS IN THE NORMAL VIEW: History / Delete (single press) (press and hold for three seconds) single press (press and hold for three seconds Alarm (single press) (press and hold for three seconds OK / Max.Min. Plus Minus BASIC SETTINGS:... - Page 8 Note: Changes at the setting-mode require no additional confirmation and are automatically saved when you leave or go further to the next setting. If you press and hold the “+” or “-” button, you are quickly taken through the possible settings (time, date and time zone settings). LCD-contrast: Time zone: Alarm sound ON/OFF:...
- Page 9 Note: This setting is related to the alarm sound only. Alarms that have been set, continue to be registered. Also they are shown on the display as well. Only the sound is activated or inactivated by this setting in case of an alarm.
- Page 10 Note: Note that through the main reset also all recorded data will deleted. If necessary, please ensure that there is no relevant data on the KlimaLogg Pro that has not yet been retrieved or transferred to the PC. If the device shows a malfunction, we recommend that you firstly check the batteries and try a normal reboot of the unit.
-
Page 11: Learning Mode
information in learning mode. In learning mode, the serial number of the entered channel is always displayed for the corresponding channel. Note: After the batteries of a transmitter are changed, we recommend activating the comprehensive transmitter search in learning mode in order to re-establish contact as quickly as possible. -
Page 12: Recording Interval Setting
Transmitter search for a certain channel • • • • • • • • Delete transmitter: • • • • RECORDING INTERVAL SETTING: • • • • • Note: This function allows you to set the interval in which the KlimaLogg Pro records the data sets. -
Page 13: Alarm Setting Mode
The recorded data sets can be called up in history mode or transferred to a PC using the USB wireless transceiver. MAX./MIN VALUES AND THE CURRENT DEW POINT in the selected channel: • • • • • • • • •... - Page 14 • • • • • • Alarm function: • • • • Note: If any alarm limit is activated (no matter which alarm limit or which channel), “ALARM” is displayed permanently in normal mode (in the time and date display area). The alarm sound can be deactivated in the basic settings of the KlimaLogg Pro if desired.
-
Page 15: History Mode
ALARM EVENT DATA SET FUNCTION: • • • • Note: The AlarmEvent data records can be displayed in the history mode on the KlimaLogg Pro and also in the PC software separately. HISTORY MODE: • • • • • •... - Page 16 • • • • PC CONNECTION: Note: The required PC software can be downloaded free from the download page of the TFA homepage (www.tfa-dostmann.de). Synchronisation: Initiate contact:...
- Page 17 Note: The data sets that have been recorded are wirelessly transferred to the PC using the USB transceiver. The average transfer speed is 20 data sets per second. In extreme cases, it can take almost 45 minutes until all data sets have been downloaded (when the memory is completely filled). During radio-clock reception, communication with the USB receiver is not possible and is interrupted.
- Page 18 switch point 1 - high alarm - Jack switch point 2 - low alarm - C = switch point 1, high alarm B = switch point 2, low alarm A = ground Note: Comply with the technical specifications. Please get sure, while you plug in any external hardware that this unit is not under electrical power.
-
Page 19: Troubleshooting
TROUBLESHOOTING:... -
Page 20: Care And Maintenance
POSITIONING OF THE LOGGER CARE AND MAINTENANCE • • •... -
Page 21: Battery Replacement
BATTERY REPLACEMENT: Note: After the batteries are changed, it is not necessary to re-install the logger. It will automatically maintain all of the transmitters and settings that were originally entered. However, it is necessary to receive the DCF time signal again. The receipt of the entered transmitters and the radio clock signal usually occurs on a fully automatic basis. -
Page 22: Specifications
SPECIFICATIONS: DECLARATION OF CONFORMITY...


Need help?
Do you have a question about the KlimaLogg Pro Pavouk DTHL and is the answer not in the manual?
Questions and answers