Table of Contents
Advertisement
Quick Links
Advertisement
Table of Contents
Troubleshooting

Related Manuals for Tiger TM-01


Summary of Contents for Tiger TM-01
- Page 1 OPERATION MANUAL Model: TM-01 Version: 1.01...
-
Page 2: Table Of Contents
Safety information Installation Preparatory before usage Storage Unfolding the package Package list Installation of the balance Usage conditions Install the balance with wind shield Install the balance with round weighing pan Install the balance with rectangular weighing pan Connect the power adapter Install the external facilities Warm-up time Adjust the level gauge purpose... - Page 3 Clearance Clearing the stainless steel surface Safety check Troubleshooting Technical conditions Guarantee...
-
Page 4: Safety Information
SAFETY INFORMATION To avoid unnecessary damage to the balance, please pay attention to the following tips: • Please do not use this balance in dangerous area. • Please turn off the power of the balance before connecting it or disconnecting it with other facilities. •... -
Page 5: Preparatory Before Usage
• This balance could only be connected to our accessories or optional fittings. We are not responsible for any modification the operator makes to our balance, including using the facilities and cable which are not supplied by us. However, we are always ready to offer the operation norms information. -
Page 6: Installation Of The Balance
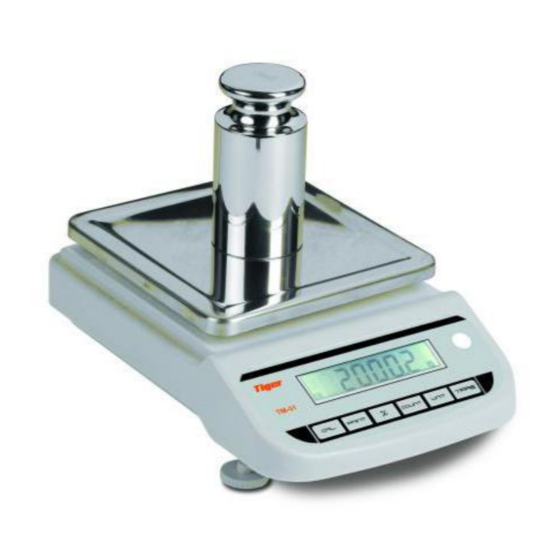
Model TM-01 TM-01 TM-01 TM-01 TM-01 Capacity 300g 600g Readability 0.01g 0.01g 0.01g 0.1g 0.1g Balance √ √ √ √ √ Power adaptor √ √ √ √ √ Pan size (mm) Φ120 Φ120 180*170 180*170 180*170 Weighing pan √ √... -
Page 7: Install The Balance With Wind Shield
Install the balance with wind shield • Assemble the parts in the indicated order. Install the balance with round weighing pan • Installation Sequence. • Pan support. Install the balance with rectangular weighing pan • Use a Philips screwdriver to orient the 4-M3 screws in the diagrammatic directions to fix the rectangular weighing pan on the center of the sensor. -
Page 8: Adjust The Level Gauge Purpose
Adjusting the Level Gauge Purpose • Adjust the level gauge of the balance. The level gauge needs to be adjusted once its place is changed.The two front bottom bolts are used to adjust the level gauge. • Spin the two bolts as shown in the figure until the bubble in the level gauge is in the center of the circle. - Page 9 OK - Reading shown is stable. Reading shown is given in grams. OZ - Reading shown is given in ounces (1g = 0.03527396200 oz). ct - Reading shown is given in carats (1g = 5.0000000000 ct). dwt - Reading shown is given in pennyweight (1g = 0.64301493100dwt) Reading shown is given in percent weight.
-
Page 10: Power On/Power Off The Balance
POWER ON/POWER OFF THE BALANCE Procedure TARE 1. Press the key to power on the balance. 2. Press and hold the key for 5 seconds to power off. TARE TARE FUNCTION Procedure 1. Put a container on the weighing pan. 2. -
Page 11: Percentage Mode
4. Put the rest of th e objects into the container, the balance will display the total quantity. 5. Take off the objects, you can repeat this action to count another object. COUNT 6. To come back to normal weighing mode, press the key. -
Page 12: Weighing Units
WEIGHING UNITS Procedure UNIT Press the key to select the desired unit weight (g, oz, dwt). CALIBRATION Procedure To decide the accuracy of the balance, test the difference between the reading and the actual weight of the object on the weighing pan. 1. -
Page 13: Parameters
Under Setting State the function of keys are as follows: • to save the current parameter and enter into the next parameter setup. PRINT • to move to left. • to move to right. TARE COUNT • Press key together to display “C00000”. key pressed for several seconds to enter into linearity calibration state. - Page 14 KEY: PRT key CON: continuous 10 C00802 Con---xxx Communication mode Sty:communication when stable 0: Normal printing 1: Output format in Output format 11 C00802 PC-X EXCEL Sensor flexibility compensation, for 12 C01688 FLEXxx compensating weighing -5 to 5 deviation when the balance is unload 13 C01688 CrEEP-x...
- Page 15 Repeatability 0 – 9. Setting to 0 compensation intensity, rEdrEP means canceling this larger value with function stronger compensation Largest range for whole rEdrNxx point or repeatability 0d – 20d compensation...
-
Page 16: Communication With A Computer
COMMUNICATION WITH A COMPUTER The balance keyboard functions can be accessed via the RS-232 interface. The following commands are available: UNIT U – : Units conversion. TARE T – : Tare function. C – : Calibration with external standard weight. PRINT P –... -
Page 17: Rs-232 Interface Hardware
Unit field, it describes the units of the number being transmitted. Your balance will transmit G for grams, O for ounces and C for carats. Return character. Line feeds character, it indicates the line feeds. RS-232 INTERFACE HARDWARE This balance adopts the transmit and receive lines of standard RS-232. The data format is: 1 start bit. -
Page 18: Routine Maintenance And Troubleshooting
Notice: “Handshake” signals, such as “clear to send” (CTS) are not used. The peripheral must have a minimum buffer (15 characters). It is suggested that the maximum recommended cable length is 15 meters, the load impedance of the device connected should be between 3000 and 7000 ohms with no more than 2500 pf shunt capacitance. -
Page 19: Clearing The Stainless Steel Surface
Clearing the stainless steel surface All the stainless steel components need to be cleaned regularly. Remove the weighing pan and thorough clean it with a damp cloth or sponge. The cleaner applicable to stainless steel are recommended. Wipe the stainless steel surface of the balance first and then clear the stainless steel weighing pan. - Page 20 The real weight is 5% higher Unload or contact your HHHHHH than its capacity or the local service center. transducer is damaged. a) Install the right weighing a) The weighing pan is not on. pan and press the TARE b) There is wrong connect with LLLLLLL key.
-
Page 21: Technical Conditions
Calibrate the balance Apparent wrong No calibration or the tare Deduct the tare weight weighing display weight is deducted. before weighing. If there is any other trouble, please contact your local distributor or service center. TECHNICAL CONDITIONS AC-DC adapter Input: 220V/110V, output: 12V (+15% to -20%) 48-60Hz Power consumption: Maximum=4W, Average=3W... -
Page 22: Guarantee
GUARANTEE This scale is guaranteed for one year from the delivery date. The guarantee covers any fabrication defect of the material. This guarantee does not cover the failures caused by an inappropriate use or overcharge.
Need help?
Do you have a question about the TM-01 and is the answer not in the manual?
Questions and answers