Table of Contents
Advertisement
Quick Links
Advertisement
Table of Contents

Subscribe to Our Youtube Channel
Related Manuals for Rokit AEP Series


Summary of Contents for Rokit AEP Series
- Page 1 AEP SERIES USER MANUAL AEP-CHS-20191117...
-
Page 2: Table Of Contents
TABLE OF CONTENTS LIABILITY STATEMENT COPYRIGHT STATEMENT 1. SAFETY INSTRUCTIONS 2. ABOUT THE AEP SERIES 3. GETTING STARTED 4. LCD TOUCH SCREEN 5. FILE PRINT 6. PRINTER VIEW 7. BED LEVELING 8. FILAMENT 9. SETTING 10. PRINTING AEP-CHS-20191117... -
Page 3: Copyright Statement
The text and drawings herein are for illustration and reference only. The specifications on which they are based are subject to change. ROKIT Healthcare may, at any time and without notice, make changes to this document. ROKIT Healthcare, for itself and on behalf of its subsidiaries, assumes no... - Page 4 The following instructions prevent safety hazards that could potentially result WARNING in death and serious personal injury. The following instructions prevent safety hazards that could potentially result CAUTION in equipment damage Safety Instructions Related to Installation CAUTION Keep or install the AEP printer out of reach of children or infants ...
- Page 5 Never place your fingers near the machine until all parts have stopped moving. Moving parts can cause injury. The AEP series 3D printers generate high heat. Always wear gloves and, if reaching inside the printer, wait until the printer’s been cooled down.
- Page 6 Use AEP printer only for prototype production. Use only 3D printing materials provided with the AEP Series 3D Printer from ROKIT Healthcare or materials approved by ROKIT Healthcare. Using unapproved materials may result in poor print quality or printer failure, in which case ...
-
Page 7: About The Aep Series
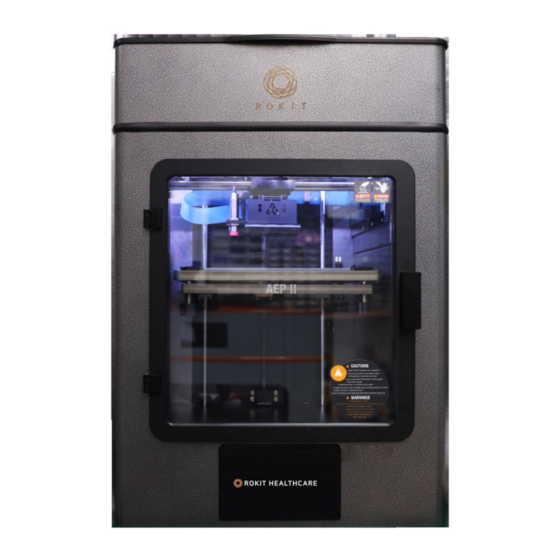
2. ABOUT THE AEP SERIES 2.1 AEP II Components AEP-CHS-20191117... - Page 8 2.2 AEP450 Components 1. Emergency Switch 2. LCD Screen 3. Extruder + Top 4. Bed 5. Cooling Fans (x3) 6. Chamber Control Fan 7. Power Switch 8. Power Supply Cable 9. Top Door Handle 10.Top Door Lock BACK FRONT 11.Heating Fans 12.Connection Ports 13.Bowden Block 14.Filament Holder...
- Page 9 2.3 AEP II Specifications CATEGORY AEP II SPECIFICATIONS Printing Method Fused Filament Fabrication (FFF) 230 mm x 200 mm x 200 mm Build Volume Build volume may be subject to filament type and object shape ~max 60 mm / sec Printing Speed Speed may be subject to filament type and object shape Resolution...
- Page 10 subject to change for improvement without notice. 2.4 AEP450 Specifications CATEGORY AEP 450 SPECIFICATIONS Printing Method Fused Filament Fabrication (FFF) 400 mm x 400 mm x 400 mm Build Volume Build volume may be subject to filament type and object shape ~ max 60 mm / sec Printing Speed Speed may be subject to filament type and object shape...
-
Page 11: Getting Started
warm up the equipment 30 minutes in advance before printing To operate printing on a PC, install NewCreatorK on the PC and connect with AEP SERIES. PC and AEP SERIES can be connected by USB cable or Wi-Fi. -
Page 12: Lcd Touch Screen
Improper use of electricity may cause equipment failure, electric shock or fire. Use an outlet that matches the electrical capacity of AEP SERIES provided including the accessories. If multiple devices are provided, connect to a separate outlet for each device ... - Page 13 4.2 Main Screen New Creator K: Click and open APP to control all printer tasks and parameters. The most frequently used APP. Setting: Change the general settings of your hardware or connect to Wi-Fi 4.3 NewCreatorK APP Menu Screen In order to operate the hardware normally, check the [StealthAEP: Operational] status on the top bar of the screen before operating.
- Page 14 4.4 Wi-Fi Connection 1. Press [Setting] from the main screen. In [Setting], change the general settings of the hardware. 2. In [Setting], select the Wi-Fi network under settings to turn Wi-Fi on in the [On/Off] Slider. 3. List of available Wi-Fi servers appears. Top right button description - [On/Off] slider: Turn On/Off Wi-Fi connection.
- Page 15 6. The word “Connected” and the Wi-Fi icon in the upper right corner of the screen indicated that the printer has successfully connected to the Internet. 7. Click on the Wi-Fi connection server and the IP address will appear. Remember that the IP address is the address that will enter the New Creator K software on your PC.
-
Page 16: File Print
5. FILE PRINT This screen allows you to select file for printing or to delete a file. [Printer]: You can check the files stored in the internal memory. Internal capacity is 1.6G [USB]: When you connect a USB drive, you can see the files stored on the USB ... - Page 17 5.1 Printing STL files 1. Tap the file to be printed. A pop-up confirm message appears. 2. When [CONFIRM] is pressed, printing will start. The LCD screen moves back to the initial screen. When [CANCLE] is pressed, the LCD screen returns to the previous screen.
-
Page 18: Printer View
6. PRINTER VIEW 6.1 Left screen [STEALTH_AEP: Printing]: It indicates the printer status (i.e during printing, when an error occurs or the printer is paused etc.). Printing in progress: The green bar depicts the percentage of printing progress. [START]: Reprints the file that was paused or has been completed. [STOP]: It cancels printing. - Page 19 6.2 Motion Use this menu screen while scrolling down. [Motor]: It turns the motor on / off. (It controls X, Y, Z axis and extruder simultaneously.) [Fan]: It turns the extruder fan on / off. [X/Y home]: It moves to the starting point of the X and Y axis. [X/Y Arrow]: The X and Y axis are moved in the direction of arrows.
- Page 20 6.3 Nozzle (Filament Loading/Unloading) Use this menu screen while scrolling down. [Extuder 1]: It selects the nozzle types. [Loading]: It loads the filament. [Unloading]: It unloads the filament. * Notice: The material must be heated up to the suitable temperature. - [Speed]: It sets the speed of filament loading during the printing process.
- Page 21 * Tip: [LOAD], [UNLOAD], [PAUSE] are used to load / unload continuously. 6.4 Temperature AEP-CHS-20191117...
-
Page 22: Bed Leveling
[Bed]: It sets the bed plate temperature. [Extruder 1]: It sets the nozzle temperature. [Top]: It sets the top bed temperature. * Tip: The temperature can also be adjusted during printing. Press the numeric field next to [Set to] in order to set the suitable temperature. Then, the temperature setting box pops up. -
Page 23: Filament
8. FILAMENT 8.1 Left Screen The left screen shows the current temperature of Extruder 1 and this temperature value can be changed.. 1. [Temperature]: The left indicates the current extruder temperature, and the right indicates the set temperature. 2. To set the temperature value, click the numeric field next to [Set to]. - Page 24 8.2 Right Screen This section contains the same information as the section 6.3 Nozzle (Filament Loading/Unloading. Navigate this screen by scrolling. [Extuder 1]: It selects the nozzle types. [Loading]: It loads the filament. [Unloading]: It unloads the filament. * Notice: The material must be heated up to the suitable temperature. - [Speed]: It sets the speed of filament loading.
-
Page 25: Setting
* Tip: [LOAD], [UNLOAD], [PAUSE] are used to load / unload continuously. 9. SETTING 9.1 PRINTER - The product name, product S/N, Mac Address, and Version can be checked. - [Update]: The firmware can be updated via the NewCreator K software while the printer is connected to the PC over Wi-Fi. - Page 26 - [WiFi Network]: The SSID, IP address or Mac address can be checked if the printer is wireless- connected. - [USB network]: Use the address 192.168.7.2 when the printer is connected to the PC with a USB cable. 9.3 Factory Reset [Model Name]: It indicates the product name [Serial Number]: It indicates the serial number.
- Page 27 [FACTORY RESET] is used to initialize all setting values. Click [OK] on the pop-up message. It will reset all setting values. Please be cautious. The printer should automatically reboot after 5 seconds. 9.5 Option Navigate this screen by scrolling. AEP-CHS-20191117...
-
Page 28: Printing
[Language]: It sets the device language to be Korean or English. [Auto Leveling]: It turns Auto Leveling on or off. Auto Leveling is available to set on NewCreatorK on the PC as well. [Door Sensor]: It turns the front door detection function on or off. [Filament Warmer]: It turns the filament warmer function on or off. - Page 29 4. Select a length of 0.1 mm. Insert a piece of print-size paper between the bed and the nozzle, slide it back and forth, and click the up and down arrow buttons of bed to align the spacing between the nozzle and bed, as pictured below. 5.
- Page 30 When the extruder moves to the center of the bed and stops, wait until the bed temperature reaches 50 degrees and remains stable. When the bed temperature reaches 50 degrees, see the top of the control window and select the minimum unit of Z axis movement as 0.1mm or 1mm. (Press the nozzle slowly while checking moving distance of the bed, being careful not to hit the bed.) Click the Up button of Z-axis until the nozzle and bed are in contact.
- Page 31 IMPORTANT!! If the bed is not level even after pre-autoleveling, [Thermal Expansion Bed Calibration] must be reset. (The horizontal value of the bed may change slightly due to vibration or thermal deformation of the product.) AEP-CHS-20191117...
- Page 32 10.3 Thermal Expansion Calibration This is used when autoleveling has bene applied but printing remains difficult due to the gap between bed and nozzle in certain X and Y sections. You should record the setting value before making changes so that you can restore it if necessary.
- Page 33 as follows: Set the correction value so that the “A + D = B + C” condition is met. To extend the spacing at point A 0.01 mm, add 0.005 to the existing value at point A and subtract 0.005 to the existing value at point D To narrow the spacing at point C by 0.02 mm, subtract 0.01 from the existing value at point C and add 0.01 to the existing value at point D.
- Page 34 see the filament move, modulate the speed between 2mm/s and 25 mm/s until there is about 5 cm of the filament remaining at the upper end of the tube. Then, click PAUSE on the LCD screen. Cut the end portion of the filament at a 45 degree angle with the provided filament cutting tool.
- Page 35 - To prepare a file for print, convert the 3D object to a g-code using NewCreatorK. 1. Run NewCreatorK installed on the PC. 2. Select the appropriate printer model by selecting [Settings] > [Printer], located on the upper left corner. 3.
- Page 36 6. Click on the “slicing” button generates the g-code. Save the file clicking “save”. NewCreatorK can be downloaded from the homepage www.rokithealthcare.com. For a detailed guide on NewCreatorK software operations, refer to the NewCreator K User Manual. 10.7 Printing (4 Methods) Print from an external USB hard drive ...
- Page 37 Print directly from the printer’s internal storage On the LCD display, click [File Print] > [Print]. Identify files stored in the printer. Click on a file to print. A window will pop up. Click [Confirm] to start print. Notes: ...
- Page 38 Offset” value and click the “Set Probe Z Offset” button to correct the gap between the nozzle and the bed. (“Thermal Offset” is a relative value. The distance between the bed and the nozzle is changed at a difference set by the “Thermal Offset” value. A positive offset value leads to a greater gap between the bed and the nozzle, while a negative value leads a closing of the gap.) Run the NewCreatorK desktop version, connect to the printer and go to the “Control”...
- Page 39 temperature between 20 ~ 25°C. When using PEEK and ULTEM™, pre-warm them sufficiently in the oven to ensure no bubble during loading tests and a smooth surface in the finished product. [Cautions while printing with ULTEM™ 1010] ULTEM™ 1010 prints have strong adhesion to the glass bed, so if the bed or chamber temperature drop sharply during printing, the print will be deformed and the equipment will be less durable.
- Page 40 Raise the nozzle temperature to the filament loading temperature and clean the inside of the nozzle with the provided 1.8 cleaning pin. Clean the outside of the nozzle with the cutting scissors and tweezers. Set the nozzle temperature to (a theoretical) 0°C, which drives the extruder to room temperature.
- Page 41 plate leveling by loosening a little at a time. Make sure the Autoleveling sensor is securely attached to the extruder. Check that the bolts on the bed are fixed with even torque. Make sure that all coins - 9 in the middle and 4 at the corner - are in normal positions on the glass plate.
- Page 42 become weak. In the NewCreatorK setting, set the brimline to be larger than the default setting of 20 so that the initial 10 lines can be used to check the line spacing. If the lines do not stick together after adjusting the Thermal Offset, reduce the width of the first layer line in 2-5% increments in the slicer settings.
- Page 43 the print is optimized 2.8 If any change in bed temperature and Size of output, the Thermal Offset setting may require adjustments. [When the extruder has been replaced] Connect to the device by clicking the Connect button in NewCreatorK. Raise the temperature of the extruder to a temperature suitable for the filament material and clean the nozzle surface.
- Page 44 Be sure to ventilate during long time printing or after finishing printing. Remove printouts using the provided scraper to prevent overstress when the bed temperature drops below 50 ° C. 10. The printer should be used only by qualified personnel who have completed AEP SERIES operational training. AEP-CHS-20191117...
- Page 45 12F, Gasan High-heel Bldg. , 9 Digital-ro 10 gil, Geumcheon-gu, Seoul, Republic of Korea Tel. +82-2-867-0182 Fax. +82-2-865-0182 Web. Rokithealthcare.com AEP-CHS-20191117...
Need help?
Do you have a question about the AEP Series and is the answer not in the manual?
Questions and answers