Table of Contents
Advertisement
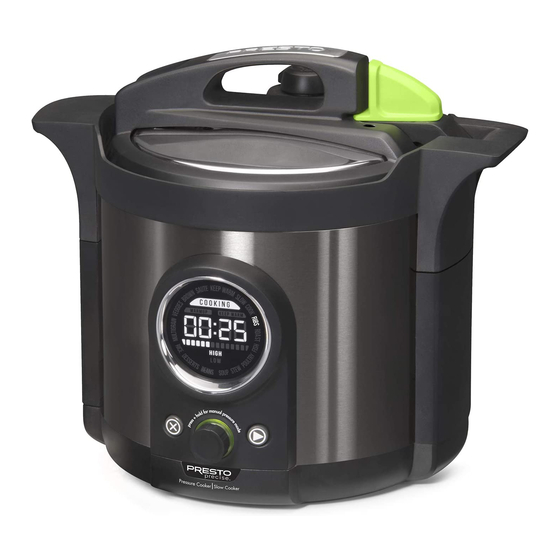
10-quart Multi-use Programmable
Pressure Cooker Plus
SLOW COOKER
RICE COOKER
•
Estas instrucciones también están disponibles en español.
Para obtener una copia impresa:
• Descargue en formato PDF en www.GoPresto.com/espanol.
• Envíe un correo electrónico a contact@GoPresto.com.
• Llame al 1-800-877-0441, oprima 2 y deje un mensaje.
Visit www.PrestoPrecise.com
INSTRUCTIONS
©2019 National Presto Industries, Inc.
This is an
Listed appliance. The following important safeguards are recommended by most portable appliance manufacturers.
To reduce the risk of personal injury or property damage when using electrical appliances, basic safety precautions should always be
followed, including the following:
1. Read all instructions. Improper use may result in bodily injury or property damage.
2. Before each use, check both the vent pipe (see Fig. A, page 3) and vent filter (see Fig. E, page 3) to be certain they are free of any
blockage. Remove the filter and clean any debris from both the vent pipe and filter (see cleaning instructions on page 8).
3. Always check the air vent/cover lock to be sure it moves freely before use.
4. To protect against electrical shock, do not immerse cord, plug, or cooker body in water or other liquid.
5. Do not let children handle or put electrical cords or plugs in their mouths.
6. Always attach plug to appliance first, then plug cord into the wall outlet. To disconnect, press cancel, then remove plug from wall
outlet.
7. Unplug cord from unit and outlet when not in use and before cleaning. Allow unit to cool before putting on or taking off parts and
before cleaning.
8. Do not operate any appliance with a damaged cord or plug or in the event the appliance malfunctions or has been damaged in
any manner. Return the appliance to the Presto Factory Service Department for examination, repair, or electrical or mechanical
adjustment.
9. WARNING! Spilled food can cause serious burns. Keep appliance and cord away from children. Never drape cord over edge of
counter or table. Never plug cord into outlet below counter or use an extension cord. Do not let cord touch hot surfaces.
10. To guard against electrical shock, cook only in the removable cooking pot provided.
11. The use of accessory attachments not recommended by the appliance manufacturer may cause injuries. Use only genuine Presto
accessories and replacement parts.
12. Intended for countertop use only.
13. Do not place on or near a hot gas or electric burner or in a heated oven.
14. Do not fill above the ⅔ fill line. However, the cooking pot should never be filled above the ½ fill line when cooking foods that foam,
froth, or expand, such as rice, grains, dry beans, peas, and lentils, or foods that are mostly liquids, such as soups. Overfilling may
cause a risk of blocking the vent pipe and developing excess pressure. See food preparation instructions.
15. Do not pressure cook applesauce, cranberries, rhubarb, cereals, pasta, split peas, and soup mixes containing split peas, pasta, or grains.
These foods tend to foam, froth, and sputter and may block the vent pipe, vent filter, and air vent/cover lock.
STEAMER
•
•
AND RECIPES
IMPORTANT SAFEGUARDS
®
AND MORE
Form 4048-007A
®
Advertisement
Table of Contents

Subscribe to Our Youtube Channel
Related Manuals for Presto Precise Pressure Cooker Plus


Summary of Contents for Presto Precise Pressure Cooker Plus
-
Page 1: Important Safeguards
Never plug cord into outlet below counter or use an extension cord. Do not let cord touch hot surfaces. 10. To guard against electrical shock, cook only in the removable cooking pot provided. 11. The use of accessory attachments not recommended by the appliance manufacturer may cause injuries. Use only genuine Presto ®... -
Page 2: Table Of Contents
20. To ensure safe operation and satisfactory performance, replace the sealing ring if it shrinks, becomes hard, deformed, cracked, or torn. replace the sealing ring if it shrinks, becomes hard, deformed, cracked, or torn. Use only genuine Presto replacement parts. -
Page 3: Before First Use
BEFORE FIRST USE Valve lever Quick pressure release valve As received, your pressure cooker will be fully assembled. Before removing the cover, you will need to unlock the Cover handle Vent pipe green locking latch according to the instructions below. Before use, remove all packaging material, including the Locking Air vent/cover lock... -
Page 4: Important Information
5. After cleaning, reassemble the cover. Be sure the filter is placed over all 3 clips (Fig. G) when Fig. G reattaching the vent filter. Then push it in place. You will hear a snap when it is in the proper position. It should fit tightly. -
Page 5: How To Operate The Digital Control Panel
HOW TO OPERATE THE DIGITAL CONTROL PANEL Whenever you plug in the unit, it will beep once and all of the program options will appear in the display window on the digital con- trol panel. The KEEP WARM setting will be flashing. This is the “Ready State” (Fig. L). The following information describes how the control panel buttons and preset programs Preset programs... - Page 6 SLOW COOK FUNCTION For slow cooking, turn the control knob to the SLOW COOK setting. Note as you continue to turn the control knob, the unit will change between the LOW and HIGH options. The default cook time is 4 hours on high and 8 hours on low. You can manually adjust the slow cooking time in 30-minute increments by pressing the control knob once and then turning the knob to the desired time.
-
Page 7: How To Use For Pressure Cooking
HOW TO USE FOR PRESSURE COOKING Before you begin cooking, review the “Important Information” instructions on page 4 and always verify that the unit is properly assembled. 1. Place the pressure cooker on a dry, level surface. To avoid steam damage to cabinets, position the cooker so the quick pressure release valve is not directly under cabinets. -
Page 8: Pressure Release Methods
14. After pressure is completely reduced and potential air bubbles dispersed, unlock the cover as described on page 3. When removing the cover, lift it toward you to keep any steam away from you. Place cover upside down on counter. CAUTION! Steam may escape and hot liquid may drip from the cooker cover when removing it. -
Page 9: Care And Maintenance
If for any reason the pressure cooker cannot be opened, contact the Consumer Service Department in Eau Claire, WI at ● 1-800-877-0441 for assistance. Any maintenance required for this product, other than normal household care and cleaning, should be performed by the Presto Fac- ● tory Service Department (see page 28). -
Page 10: Questions And Answers
QUESTIONS AND ANSWERS 1. Sometimes when pressure cooking, I notice beads of moisture forming in the area of the pressure release valve and hear what sounds like escaping steam before the timer begins to count down. Is there something I am doing wrong? No. -
Page 11: Soups And Stews
12. I believe I am thoroughly cleaning my cooker, but sometimes I notice the odor of my last meal remains in the cooker. What can I do to remove the odor? The sealing ring is made of silicone. Silicone has many wonderful properties but it does tend to retain odors. Unfortunately, there is no good way to remove the odors, but over time they will dissipate. - Page 12 Tuscan Bean Soup 3 cups dry Great Northern beans Soak beans according to instructions on page 35. 2 tablespoons olive oil With cooking pot in cooker body, select the SAUTÉ function, press start, 2½ cups chopped onion and preheat cooker. Add oil, onion, and garlic. Sauté until onions are 5 large garlic cloves, minced translucent.
-
Page 13: Meat And Poultry
Meat and Poultry With cooking pot in cooker body, select the BROWN function, press start, and preheat cooker. Brown meat or poultry. Remove from cooker and press cancel. Pour liquid into cooking pot. Place meat or poultry on rack in cooker. Close and secure cover. Place quick pressure release valve on vent pipe. - Page 14 COOKING PRESET TIME PRESSURE MEAT/POULTRY PROGRAM (Minutes) RELEASE METHOD PORK Butt Roast (5–5½ pounds) ROAST 50–55 Natural Shoulder Arm Roast (5–5½ pounds) ROAST 50–55 Natural Chops (¾–1 inch thick) RIBS 6–8 Natural Steak (¾–1 inch thick) RIBS 8–10 Natural Spareribs RIBS 17–20 Natural...
- Page 15 Italian-Style Beef Shanks 6 beef shanks (about 5 pounds), Season meat with salt and pepper. With cooking pot in cooker body, select 1¼ inches thick the BROWN function, press start, and preheat cooker. Add oil; brown meat 2 teaspoons salt on both sides.
- Page 16 Ropa Vieja 1 (5- to 5½-pound) beef chuck roast, Season roast with salt and pepper. With cooking pot in cooker body, select trimmed of excess fat the BROWN function, press start, and preheat cooker. Add oil; brown roast 2 teaspoons salt on all sides.
-
Page 17: Hard-Cooked Eggs
Hard-cooked Eggs 10 to 12 large eggs Pour 2 cups water into cooking pot. Place eggs on cooking rack in pot. Close and secure cover. Place quick pressure release valve on vent pipe. Select the POULTRY function, adjust time to 4 minutes, and press start. When time is up, wait 4 minutes and then use quick pressure release. -
Page 18: Vegetables
Vegetables Pressure cooking is a preferred method for preparing vegetables. Because of the fast cooking time and super-heated steam, vegetables retain most of their natural color, texture, flavor, and nutrients. Pour 2 cups liquid into cooking pot. Place vegetables on rack in cooking pot. Close and secure cover. Place quick pressure release valve on vent pipe. - Page 19 Mashed Cauliflower 2 cups water Pour water into cooking pot. Place cauliflower on cooking rack in pot. Close and secure cover. Place quick pressure release valve on vent pipe. 2 large heads cauliflower, cut into florets Select the VEGGIES–LOW function, adjust time to 3 minutes, and press start.
-
Page 20: Dry Beans, Peas, And Lentils
Ginger Vinaigrette Beets 12 medium beets, 2½-inch diameter Cut tops off beets, leaving at least 2 inches of stems. Scrub beets with soft 2 cups water vegetable brush, being careful to leave skin intact. Pour water into cooking pot. Place beets on cooking rack in pot. Close and secure cover. Place quick •... - Page 21 Dry Beans, Peas, and Lentils Timetable Soak beans and whole peas, according to information on page 20. Lentils do not require soaking. Add 1 tablespoon vegeta- ble oil to cooking liquid. DO NOT COOK SPLIT PEAS. Close and secure cover. Place quick pressure release valve on vent pipe. Select the BEANS function. Adjust time, if nec- essary, according to the times indicated in the timetable below and press start.
-
Page 22: Grains
Red Hot Pinto Beans 4 cups pinto beans Soak beans according to instructions on page 20. 3 tablespoons vegetable oil With cooking pot in cooker body, select the SAUTÉ function, press start, 2 cups chopped onion and preheat cooker. Add oil, onion, peppers, and garlic; sauté until onions 2 jalapeño peppers, seeded, are translucent. - Page 23 Wild Rice with Raisins and Pecans 2 tablespoons vegetable oil With cooking pot in cooker body, select the SAUTÉ function, press start, 2 medium onions, finely chopped and preheat cooker. Add oil and onions; sauté until translucent. Press cancel. Add wild rice and broth. Close and secure cover. Place quick 4 cups wild rice pressure release valve on vent pipe.
-
Page 24: Desserts
Desserts There are some desserts that the pressure cooker does remarkably well: custards, puddings (especially bread pudding), and cheesecake. These desserts may be prepared in oven-safe custard cups, ramekins, or any oven-safe mold or form which will fit loosely in the cooking pot. This pressure cooker will hold a 9-inch springform pan or up to 8 ramekins, depending on their shape and size. - Page 25 Petite Pumpkin Custards 1 (15-ounce) can solid-pack Mix pumpkin, milk, eggs, cinnamon, ginger, and cloves in a medium bowl. pumpkin Pour into eight 5-ounce ramekins. Cover each securely with aluminum foil. 1 (14-ounce) can sweetened Add water and cooking rack to cooking pot. Place four ramekins on condensed milk cooking rack.
-
Page 26: Slow Cooking Recipes
SLOW COOKING RECIPES Due to the nature of slow cooking, meat does not brown as it would if cooked in a skillet or oven. It is not necessary to brown meat or poultry before slow cooking, but you may prefer the flavor and appearance of browned meat. Browning ground beef, bacon, and sausage before slow cooking may be desirable to remove excess fat. -
Page 27: Recipe Index
Apricot Barbecue Pork Chops 3 tablespoons vegetable oil With cooking pot in cooker body, select the SAUTÉ function, press start, and preheat cooker. Add oil; sauté onion until translucent. Press cancel. 3 cups chopped onion Combine teriyaki sauce, ketchup, preserves, vinegar, brown sugar, red ¾... -
Page 28: Consumer Service Information
Presto can only guarantee the quality and performance of genuine Presto parts. “Look-alikes” ® might not be of the same quality or function in the same manner. To ensure that you are buying genuine Presto replacement parts, ®...
Need help?
Do you have a question about the Precise Pressure Cooker Plus and is the answer not in the manual?
Questions and answers