Table of Contents
Advertisement
Quick Links
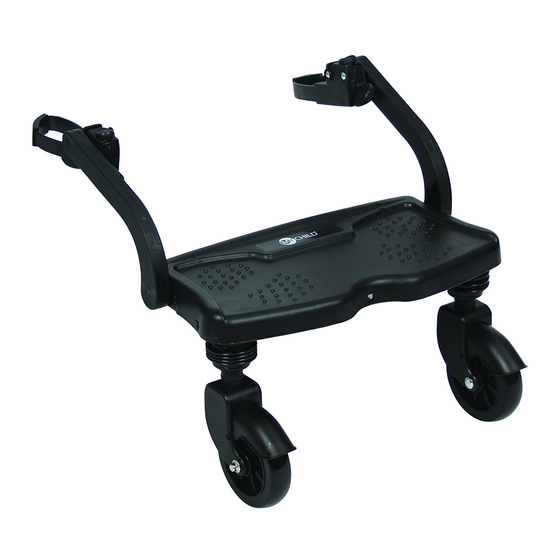
On Board
Instruction Manual
INSTRUCTIONS: Please read carefully and keep for future
reference. Your child's safety may be affected if you do not
follow these instructions. Safety of your child is your
responsibility.
This product is tested to: BS EN 1888-1:2018
This stroller board is intended for children from 2yrs up to 20kg.
V3
Advertisement
Table of Contents

Subscribe to Our Youtube Channel
Summary of Contents for My Child On Board
- Page 1 On Board Instruction Manual INSTRUCTIONS: Please read carefully and keep for future reference. Your child’s safety may be affected if you do not follow these instructions. Safety of your child is your responsibility. This product is tested to: BS EN 1888-1:2018...
- Page 2 Safety instructions 1. WARNING: Never leave your child unattended. 2. WARNING: Ensure that all the locking devices are engaged before use. 3. WARNING: To avoid injury ensure that your child is kept away when unfolding and folding this product. 4. WARNING: Do not let your child play with this product. 5.
- Page 3 0161 335 2508. Welcome Thank you for purchasing the MyChild On Board. Please read the instructions and warnings carefully before use to ensure safe and satisfactory operation of this product.
- Page 4 Parts checklist Contained in your carton are: Part Board Arms (left and right) Connectors (left and right) Wheels Wheel housing washers* Tubing adapters (for square tubing) Storage strap *Washers may be pre-fitted, loose (in the box) or in the sealed plastic bag with the storage strap.
- Page 5 Assembly - Wheels click 1. Place the On Board platform upside 2. Align the wheels to the wheel housing down on a sturdy surface. and push the wheels firmly into the IMPORTANT: If the washers are loose in the housing unit until you hear a “click”.
- Page 6 Assembly - Readying the connectors for fitting (cont) 5. Connector parts: (A) Tube protector. (B) Block (C) Body (D) Quick release slider (E) Strap (F) Adjuster button (G) Safety knob (H) Tubing adapter (for square tubing) 6. To get the connectors ready for fitting on the pushchair, press the adjuster button (F) and release the strap (E).
- Page 7 Assembly - Readying the connectors for fitting (cont) 7. Unscrew the safety knob (G) until the block (B1) is fully retracted (B2). The block (B2) should be flush with the body (C). If it is sticking out then push it in. IMPORTANT: Ensure block (B2) is fully retracted.
- Page 8 Fitting the board - General fitting advice IMPORTANT: Ensure block (B) is fully retracted. Failure to do so may make it more difficult when fitting to strollers with thicker leg tubing. 1. Attach the connectors to the legs of the pushchair. Make sure both connectors are at the same height and pull strap (E) as tightly as possible through the adjuster button (F) (you may need...
- Page 9 Fitting the board - To your model of pushchair The On Board will fit a wide range of strollers and pushchairs. This guide aims to provide the steps for fitting the On Board to some of the more common types of strollers and pushchairs such as: 1.
- Page 10 Fitting the board - LARGE-style umbrella fold strollers Fitting the board - Small-style umbrella fold strollers page 10...
- Page 11 Fitting the board - Double/Twin strollers Fitting the board - 3-Wheeler strollers page 11...
- Page 12 Fitting the board - Classic Frame strollers Note: Strap (K) is facing inwards. IMPORTANT: The connector MUST be clear of the brake bar (L). Fitting the board - Modern Frame strollers This design of frame has a brake wire (M) running down the tube. IMPORTANT: Make sure that the brake still works after you have attached the connector (N).
- Page 13 Fitting the board - Tandem strollers (1 seat behind another) Note: Strap (O) is facing inwards. Fitting the board - 3-in-1chassis Note: Strap (P) is facing inwards. page 13...
- Page 14 Fitting tips - Strap facing outward or inward? The strap side of the connector sticks out a little bit, so it needs slightly more clearance space. If both sides of the connector have space (this means they are not touching the wheels or moving parts) then this is not an issue.
- Page 15 Fitting tips - Fold it first (continued) 2. If the connector is high up on the leg then the board will be nearer to the pushchair. This will give you more leg room if you are taller and have a longer stride. 3.
- Page 16 Customerservice@kooltrade.co.uk Imported by Kooltrade Ltd. M34 3QA www.mychild.co.uk Tel: 0161 335 2508...
Need help?
Do you have a question about the On Board and is the answer not in the manual?
Questions and answers
Wheels won't click in
The wheels may not click in on the My Child On Board if the wheel housing washers are missing or not correctly placed. If the washers are loose in the box or in the bag with the storage strap, they must be inserted into the wheel housing before attaching the wheels.
This answer is automatically generated