Table of Contents
Advertisement
Available languages
Available languages
Quick Links
Advertisement
Table of Contents

Subscribe to Our Youtube Channel
Related Manuals for Niko 10-505


Summary of Contents for Niko 10-505
- Page 1 10-505...
- Page 2 10-505 Nederlands Français Deutsch English 25 Slovenčina...
- Page 3 10-505 Zie hoofdstuk 2 voor de verschillende onderdelen. Pour en savoir plus sur les différents composants, voir chapitre 2. Für mehr Informationen bezüglich der unterschiedlichen Komponenten, siehe Kapitel 2. For more information on the different components, see chapter 2. Viac informácií o ďalších komponentoch nájdete v kapitole 2.
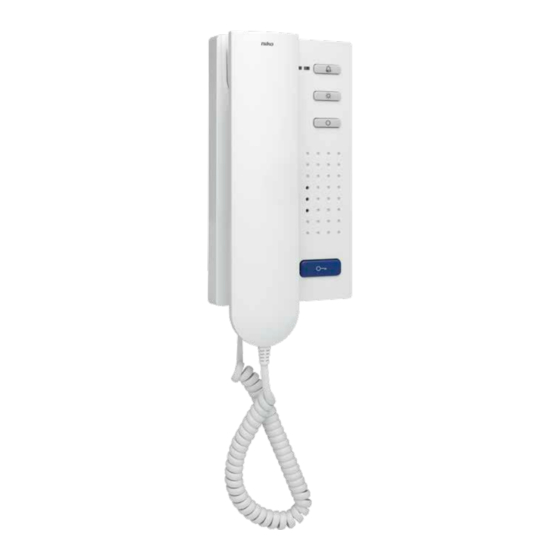
- Page 4 Lees de volledige handleiding vóór installatie en ingebruikname. 1. BESCHRIJVING Deze compacte deurtelefoon uit het Niko toegangscontrolegamma is geschikt voor opbouw en maakt altijd deel uit van een installatie met één of meerdere buitenposten en een voeding. Met het toestel kun je: •...
- Page 5 10-505 3.2. Aansluiting en (de)montage Stap Actie 1. Aansluiting Sluit de deurtelefoon aan volgens het aansluitschema Installeer de deurtelefoon niet onder spanning. Sluit (fig. 1). het toestel pas na volledige installatie aan op de netspanning. 2. Montage van het onderkader Schroef het onderkader met drie schroeven vast Om de aansluitkabel probleemloos te kunnen (fig.
- Page 6 10-505 4.2. Indicatieleds Status Betekenis De rode indicatieled brandt in de volgende gevallen: • het belsignaal is uitgeschakeld. • de oproepdoorschakeling is geactiveerd. • de bel-en-kom-binnenfunctie is geactiveerd. De rode indicatieled gaat uit in de volgende gevallen: • het belsignaal is ingeschakeld.
- Page 7 10-505 Actie Toetsencombinatie deurtelefoon zoeken * 51 # oproepdoorschakeling activeren * 80 # serienummer deurtelefoon # serienummer binnenpost voor doorschakeling # bel-en-kom-binnenfunctie activeren * 81 # serienummer deurtelefoon # interne oproep activeren * 82 # serienummer deurtelefoon # serienummer op te roepen...
-
Page 8: Technische Gegevens
10-505 2. Is het toestelprobleem niet verholpen, doorloop dan onderstaande lijst van mogelijke problemen: Probleem Oorzaak Oplossing Je hoort een negatieve toon (hoog – laag) als Er zit een fout in de programmering. Wis de programmering en herbegin. je op een beldrukknop drukt. - Page 9 10. NIKO SUPPORT Heb je twijfel? Of wil je het product omruilen in geval van een eventueel defect? Neem dan contact op met je groothandel of de Niko supportdienst: • België: +32 3 778 90 80 •...
-
Page 10: Installation
Veuillez lire le mode d’emploi entièrement avant l’installation et la mise en service. 1. DESCRIPTION Ce parlophone compact de la gamme de contrôle d’accès Niko convient pour un montage en saillie et fait toujours partie d’une installation comportant un ou plusieurs postes extérieurs et une alimentation. -
Page 11: Fonctionnement Et Utilisation
10-505 3.2. Raccordement et (dé)montage Étape Action Conseil 1. Raccordement Raccordez le parlophone selon le schéma de N’installez pas le parlophone sous tension. Ne raccordement (fig. 1). raccordez l’appareil à la tension réseau qu’après installation complète. 2. Montage du cadre inférieur Fixez le cadre inférieur à... - Page 12 10-505 4.2. LED d’indication Statut Signification La LED d’indication rouge est allumée dans les cas suivants : • le signal de sonnerie est désactivé. • le transfert d’appels est activé. • la fonction ‘sonner et entrer’ est activée. La LED d’indication rouge s’éteint dans les cas suivants : •...
-
Page 13: Résolution Des Problèmes
10-505 Action Combinaison de touches recherche du parlophone * 51 # activation du transfert d’appels * 80 # numéro de série du parlophone # numéro de série du poste intérieur vers lequel les appels sont déviés # activation de la fonction ‘sonner et entrer’... -
Page 14: Entretien
10-505 2. Si le problème d’appareil n’est pas résolu, passez en revue la liste ci-dessous de problèmes possibles : Problème Cause Solution Vous entendez une tonalité négative La programmation est erronée. Effacez la programmation et recommencez. (haute – basse) lorsque vous appuyez sur un L’installation se trouve en mode de... -
Page 15: Caractéristiques Techniques
En l’absence de facture, la date de fabrication est valable. - Le consommateur est tenu de prévenir Niko par écrit de tout défaut de conformité, dans un délai maximum de deux mois après constatation. - En cas de défaut de conformité, le consommateur peut uniquement prétendre à la réparation gratuite ou au remplacement gratuit du produit, selon l’avis de Niko. - Page 16 10-505 Handbuch vor Montage und Inbetriebnahme vollständig durchlesen. 1. BESCHREIBUNG Diese kompakte Türsprechanlage aus dem Niko-Zugangskontrollprogramm eignet sich für die Aufputzmontage und ist Bestandteil einer aus einer bzw. mehreren Außensprechstellen und einem Netzteil bestehenden Zugangskontroll-Installationsanlage. Mit diesem Gerät können Sie: •...
- Page 17 10-505 3.2. Anschluss und (De-)Montage Schritt Aktion Tipp 1. Anschluss Schließen Sie die Türsprechanlage gemäß dem Installieren Sie die Türsprechanlage niemals unter Anschlussplan an (Abb. 1). Spannung. Schließen Sie das Gerät erst nach vollständiger Installation an die Netzspannung an. 2. Montage des Unterrahmens Schrauben Sie den Unterrahmen mit drei Schrauben Für eine problemlose Einführung des Anschlusskabels...
- Page 18 10-505 4.2. Anzeige-LEDs Status Bedeutung Die rote Anzeige-LED leuchtet in folgenden Fällen auf: • Das Rufsignal ist ausgeschaltet. • Die Rufweiterleitung ist aktiviert. • Die Klingeln-und-Einlass-Funktion ist aktiviert. Die rote Anzeige-LED erlischt in folgenden Fällen: • Das Rufsignal ist eingeschaltet.
-
Page 19: Störungsabhilfe
10-505 Aktion Tastenkombination Türsprechanlage suchen * 51 # Rufweiterleitung aktivieren * 80 # Seriennummer Türsprechanlage # Seriennummer der Innen- sprechstelle, an die weitergeleitet werden soll # Klingeln-und-Einlass-Funktion aktivieren * 81 # Seriennummer Türsprechanlage # Internruf aktivieren * 82 # Seriennummer Türsprechanlage # Seriennummer der anzurufenden Innensprechstelle # Steuerfunktion für das DIN-Schienenrelais aktivieren... - Page 20 10-505 2. Konnte das Geräteproblem nicht beseitigt werden, müssen Sie untenstehende Prüfpunkte abarbeiten: Problem Ursache Lösung Es ertönt ein Warnton (hoch – niedrig) wenn Die Programmierung ist fehlerhaft. Programmierung löschen und erneut Sie einen Klingeltaster betätigen. programmieren. Die Anlage befindet sich noch im Verlassen Sie den Programmiermodus.
-
Page 21: Technische Daten
Bei Zweifel oder falls Sie bei einem eventuellen Defekt des Produkts noch Fragen bezüglich des Umtausches haben, dann nehmen Sie bitte Kontakt auf mit dem Kundendienst von Niko (Belgien: +32 3 778 90 80) oder wenden Sie sich an Ihren Großhändler. Kontaktdaten und weitere Informationen erhalten Sie im Internet unter www.niko.eu in der Rubrik “Unterstützung und Beratung”. - Page 22 Read the complete user manual before carrying out the installation and activating the system. 1. DESCRIPTION This compact intercom from Niko’s access control product range is suitable for surface mounting and is always part of an installation with one or more external units and a power supply.
-
Page 23: Operation And Use
10-505 3.2. Connection and (dis)assembly Step Action 1. Connection Connect the intercom as shown in the wiring diagram Disconnect all power before installing the intercom. (fig. 1). Do not connect the device to the mains voltage until installation has been completed. -
Page 24: Settings And Programming
10-505 4.2. Indication LEDs Status Meaning The red indication LED will be illuminated in the following cases: • the ring signal is deactivated. • the call forwarding function is activated. • the ring-and-come-in function is activated. The red indication LED will no longer be illuminated in the following cases: •... -
Page 25: Troubleshooting
10-505 Action Key combination find intercom * 51 # activate call forwarding * 80 # serial number intercom # serial number internal unit for forwarding # activate ring-and-come-in function * 81 # serial number intercom # activate internal call * 82 # serial number intercom # serial number internal unit to be... -
Page 26: Maintenance
10-505 2. If the problem with the unit is not solved, then go through the following list of possible problems: Problem Cause Solution You hear a negative tone (high – low) when There is an error in the programming. Erase the programming and start again. -
Page 27: Guarantee Provisions
10. NIKO SUPPORT In case of doubt or for the specific exchange procedure in case of a possible defect, contact the Niko support service in Belgium at +32 3 778 90 80 or your wholesaler/installer. Contact details and more information can be found at www.niko.eu under the “Help and advice” section. - Page 28 10-505 Pred vykonaním inštalácie a aktiváciou systému si prečítajte celý návod. 1. POPIS Táto vnútorná jednotka je vhodná na povrchovú montáž a je stálou súčasťou systému s jednou, alebo viacerými vonkajšími jednotkami a jedným napájacím zdrojom. Toto zariadenie umožňuje: • otvoriť dvere, •...
- Page 29 10-505 3.2. Pripojenie a (de)montáž Krok Akcia 1. Pripojenie Pripojte vnútornú jednotku podľa schémy zapojenia Pred inštaláciou vnútornej jednotky odpojte všetky (obr. 1). napájacie zdroje. Nepripájajte zariadenie k napájaciemu zdroju až do dokončenia inštalácie. 2. Montáž základného rámu Pripevnite základný rám pomocou troch skrutiek Pre hladkú...
- Page 30 10-505 4.2. LED Stav Význam Červená LED sa rozsvieti v týchto prípadoch: • zvonenie je vypnuté. • funkcia presmerovania hovoru je zapnutá. • funkcia ‘zazvoň a vstúp’ je zapnutá. Červená LED zhasne v týchto prípadoch: • zvonenie je zapnuté. • funkcia presmerovania hovoru je vypnutá.
-
Page 31: Riešenie Problémov
10-505 Akcia Kombinácia tlačidiel nájsť vnútornú jednotku * 51 # zapnúť presmerovanie hovoru * 80 # sériové číslo vnútornej jednotky # sériové číslo vnútornej jednotky na presmerovanie # zapnúť funkciu ‘zazvoň a vstúp’ * 81 # sériové číslo vnútornej jednotky # zapnúť... -
Page 32: Technické Údaje
10-505 2. Ak sa problém s jednotkou nevyriešil, potom si prejdite nasledujúci zoznam možných problémov: Problém Príčina Riešenie Ozve sa negatívny tón pri stlačení Chyba v programovaní. Zmažte a zopakujte programovanie. zvončekového tlačidla. Inštalácia je v programovacom režime. Ukončite programovací režim. -
Page 33: Záručné Podmienky
Tento výrobok spĺňa všetky relevantné Európske predpisy a nariadenia. V prípade potreby nájdete príslušné ES vyhlásenie o zhode na www.niko.eu. 10. NIKO TECHNICKÁ PODPORA Ak máte otázky, obráťte sa na zastúpenie firmy Niko (Slovenská republika: +421 2 63 825 155) alebo váš veľkoobchod. Ďalšie informácie a kontakty nájdete na stránke www.niko.eu v sekcii “Pomoc a podpora”. - Page 34 10-505 Fig./Abb./Obr. 1 a b E P 10-505 a b E P 10-505 8 - 24 V 14 15 16 17 18 19 20 21 22 23 24 25 14 15 16 17 10 11 12 10-801 230 Vac 10-110...
- Page 35 10-505 Fig./Abb./Obr. 2 Fig./Abb./Obr. 4 Fig./Abb./Obr. 3 Fig./Abb./Obr. 5 tweedraads à deux fils 2-Drahtanschluss two-wire 2-žilové zapojenie driedraads à trois fils 3-Drahtanschluss three-wire 3-žilové zapojenie serienummer numéro de série Seriennummer serial number sériové číslo hoornaansluiting raccordement du combiné volumeregelaar Höreranschluss contrôle de volume...
- Page 36 10-505 Fig./Abb./Obr. 6 Fig./Abb./Obr. 7...
- Page 37 10-505 nv Niko sa Industriepark West 40, BE-9100 Sint-Niklaas, Belgium — tel. +32 3 778 90 00 — fax +32 3 777 71 20 — e-mail: support@niko.be — www.niko.eu PM010-50500R13125...
Need help?
Do you have a question about the 10-505 and is the answer not in the manual?
Questions and answers