Table of Contents
Advertisement
Quick Links
Download this manual
See also:
Service Manual
Advertisement
Table of Contents

Subscribe to Our Youtube Channel
Related Manuals for BOXLIGHT CP-320t


Summary of Contents for BOXLIGHT CP-320t
- Page 1 USER’S GUIDE BOXLIGHT CP-320t...
-
Page 2: To The Owner
WARNING : TO REDUCE THE RISK OF FIRE OR ELECTRIC SHOCK, DO NOT EXPOSE THIS APPLIANCE TO RAIN OR MOISTURE. G This projector produces intense light from the projection lens. Do not stare directly into the lens as it could possibly damage your eyes. Be especially careful that children do not stare directly into the beam. -
Page 3: Safety Instructions
Do not use attachments not recommended by the manufacturer as they may cause hazards. Do not place this projector on an unstable cart, stand, or table. The projector may fall, causing serious injury to a child or adult, and serious damage to the projector. Use only with a cart or stand recommended by the manufacturer, or sold with the projector. -
Page 4: Federal Communication Commission Notice
: (800)762-5757 or +1-360-779-7901 AC POWER CORD REQUIREMENT The AC Power Cord supplied with this projector meets the requirement for use in the country you purchased it. AC Power Cord for the United States and Canada : AC Power Cord used in the United States and Canada is listed by the Underwriters Laboratories (UL) and certified by the Canadian Standard Association (CSA). -
Page 5: Table Of Contents
TABLE OF CONTENTS FEATURES AND DESIGN PREPARATION NAME OF EACH PART OF PROJECTOR SETTING-UP PROJECTOR CONNECTING AC POWER CORD POSITIONING PROJECTOR ADJUSTABLE FEET INSTALLING PROJECTOR IN PROPER POSITION MOVING PROJECTOR CONNECTING PROJECTOR TERMINALS OF PROJECTOR CONNECTING TO COMPUTER CONNECTING TO VIDEO EQUIPMENT... -
Page 6: Features And Design
This Multimedia Projector is designed with the most advanced technology for portability, durability, and ease of use. This projector utilizes built-in multimedia features, a palette of 16.77 million colors, and matrix liquid crystal display (LCD) technology. Compact Design This projector is extremely compact in size and weight. -
Page 7: Preparation
G Do not touch this area, especially screws and metallic part. This area will become hot while the projector is used. This projector temperature and will automatically adjust the speed of the Cooling Fans. -
Page 8: Setting-Up Projector
NOTE ON THE POWER CORD The AC Power Cord must meet the requirements of the country where you use the projector. Confirm the AC plug type with the chart below. The proper AC power cord must be used. If the supplied AC Power Cord does not match the AC outlet, contact your sales dealer. -
Page 9: Positioning Projector
POSITIONING PROJECTOR G This projector is designed to project on a flat projection surface. G The projector can be focused from 3.6’(1.1m) ~ 22.6’(6.9m). G Refer to the figure below to adjust a screen size. H1 : H2 = 26 : 1 8.5' (2.6m) -
Page 10: Installing Projector In Proper Position
G Do not transport the projector by using a courier or transport service in an unsuitable transport case. This may cause damage to the projector. To transport the projector through a courier or transport service, consult your Boxlight dealer for best way. -
Page 11: Connecting Projector
CONNECTING PROJECTOR TERMINALS OF PROJECTOR This projector has input and output terminals on its back for connecting computers and video equipment. Refer to figures on pages 11 to 13 and connect properly. S-VIDEO INPUT JACK AUDIO INPUT JACKS Connect the S-VIDEO... -
Page 12: Connecting To Computer
16" MODE (832 x 624) 19" MODE (1024 x 768) 21" MODE (1152 x 870) (✽ = Cable or adapter is not supplied with this projector.) • Control Cable for Serial Port • USB Cable • MAC Adapter (When connecting to Macintosh computer) ✽... -
Page 13: Connecting To Video Equipment
S-VIDEO jack are connected, Y-Pb/Cb-Pr/Cr jacks has priority over S-VIDEO jack. NOTE : When connecting the cable, the power cords of both the projector and the external equipment should be disconnected from AC outlet. ✽ = Cable is not supplied with this projector.) •... -
Page 14: Before Operation
LASER button and press it again. LASER POINTER FUNCTION These caution labels are put on remote control. POWER ON-OFF BUTTON Used to turn the projector on or off. (P19) AUTO PC ADJ. BUTTON NO SHOW Use to operate AUTO PC IMAGE Adjustment function. -
Page 15: Remote Control Batteries Installation
Point the Remote Control toward projector (Infrared Remote Receiver) whenever pressing any button. Maximum operating range for Remote Control is about 16.4’ (5m) and 60° in front and rear of the projector. 16.4’ (5 m) 60° 60° 16.4’ (5 m) Replace the compartment lid. -
Page 16: Top Controls And Indicators
BEFORE OPERATION TOP CONTROLS AND INDICATORS This projector has CONTROL BUTTONS (TOP CONTROLS) and INDICATORS on its top. WARNING TEMP. INDICATOR Flashes red when the internal projector temperature is too high. (P41) LAMP REPLACE INDICATOR Turns yellow when the life of the projection lamp draws to an end. -
Page 17: Operating On-Screen Menu
OPERATING ON-SCREEN MENU HOW TO OPERATE ON-SCREEN MENU You can control and adjust this projector through the ON-SCREEN MENU. Refer to the following pages to operate each adjustment on the ON-SCREEN MENU. 1 DISPLAY MENU Press the MENU button to display the ON-SCREEN MENU. -
Page 18: Menu Bar
(Refer to P32) grayscale / Auto fleshtone] (Refer to P34, 35) SCREEN MENU SETTING MENU Used to change settings of the projector or reset the Lamp Replace Counter. (Refer to P36, 37) SOUND MENU Used to adjust volume or mute / Color sound. -
Page 19: Basic Operation
When the WARNING TEMP. indicator flashes red, the projector is automatically turned off. When the temperature inside the projector returns to normal, the READY indicator lights green. Then you can turn the projector back on. The WARNING TEMP. indicator stops flashing after turning the projector on. -
Page 20: Adjusting Screen
BASIC OPERATION Press the ZOOM button on the Top Control or the ZOOM L/M button on Remote Control. The message “Zoom” is displayed. Press the ZOOM L button or POINT UP button to make image larger, and press the ZOOM M button or the POINT DOWN button to make image smaller. -
Page 21: No Show Function
Press the NO SHOW button on the Remote Control to black out the image. To restore to normal, press the NO SHOW button again or press any other button. Press the P-TIMER button on the Remote Control. The timer display “00 : 00”... -
Page 22: Computer Input
Choose either Computer 1 or Computer 2 by pressing the INPUT button on the Top Control or press the COMPUTER button on the Remote Control. If the projector cannot reproduce proper image, select correct input source through MENU OPERATION (see below). NOTE... -
Page 23: Selecting Computer System
SELECTING COMPUTER SYSTEM This projector automatically tunes to most different types of computers based on VGA, SVGA, XGA, or SXGA (refer to the “COMPATIBLE COMPUTER SPECIFICATIONS” on page 24). When selecting Computer, this projector automatically tunes to incoming signal and projects proper image without any special setting. (Some computers need setting manually.) The projector displays one of the Auto, - - -, Mode 1/2/3/4/5, or the system provided in the projector. -
Page 24: Compatible Computer Specifications
COMPUTER INPUT COMPATIBLE COMPUTER SPECIFICATIONS Basically this projector can accept the signal from all computers with the V, H-Frequency below mentioned and less than 140 MHz of Dot Clock. ON-SCREEN RESOLUTION DISPLAY VGA 1 640 x 480 VGA 2 720 x 400... -
Page 25: Pc Adjustment
Store adjustment parameters. Adjustment parameters from Auto PC Adjustment can be memorized in this projector. Once parameters are memorized, the setting can be done just by selecting Mode in the PC SYSTEM Menu (P23). Refer to the step 3 of the MANUAL PC ADJUSTMENT section (P27). -
Page 26: Manual Pc Adjustment
Multi- Scan system of this projector. If this happens, the projector cannot reproduce a proper image and the image may be recognized as a flickering picture, a non-synchronized picture, a non-centered picture or a skewed picture. - Page 27 Display area Selects the area displayed by this projector. Select the resolution at the Display area dialog box. Display area H Adjustment of the horizontal area displayed by this projector. Press the POINT LEFT/RIGHT button(s) to decrease/increase value and then press the SELECT button.
-
Page 28: Picture Image Adjustments
Select an image level among Standard, Real, Image 1, Image 2, Image 3, and Image 4 by pressing the IMAGE button on the Top Control or on the Remote Control. Standard Normal picture level preset on this projector. Real Picture level with improved halftone for graphics. IMAGE 1~4 User preset picture adjustment in the IMAGE ADJUST Menu (P29, 30). -
Page 29: Image Level Adjustment
IMAGE LEVEL ADJUSTMENT Press the MENU button and the ON-SCREEN MENU will appear. Press the POINT LEFT/RIGHT buttons to move the red frame pointer to the IMAGE ADJUST Menu icon. Press the POINT DOWN button to move the red frame pointer to the item that you want to adjust, and then press the SELECT button. -
Page 30: Picture Screen Adjustment
Closes the IMAGE MENU. PICTURE SCREEN ADJUSTMENT This projector has a picture screen resize function, which enables you to display the desirable image size. Press the MENU button and the ON-SCREEN MENU will appear. Press the POINT LEFT/RIGHT button(s) to move the red frame pointer to the SCREEN Menu icon. -
Page 31: Video Input
SELECTING INPUT SOURCE Choose Video by pressing the INPUT button on the Top Control or on the Remote Control. If the projector cannot reproduce proper video source, select correct input source through MENU OPERATION (see below). RGB Scart Input To select RGB Scart 21-Pin video input through the COMPUTER IN 2 / MONITOR OUT terminal, see "COMPUTER INPUT (RGB Scart 21-... -
Page 32: Selecting Video System
PAL / SECAM / NTSC / NTSC4.43 / PAL-M / PAL-N If the projector cannot reproduce proper video image, it is necessary to select a specific broadcast signal format among PAL, SECAM, NTSC, NTSC 4.43, PAL-M, and PAL-N. -
Page 33: Picture Image Adjustments
Select an image level among Standard, Cinema, Image 1, Image 2, Image 3, and Image 4 by pressing the IMAGE button on the Top Control or on the Remote Control. Standard Normal picture level preset on this projector. Cinema Picture level adjusted for the picture with fine tone. IMAGE 1~4 User preset picture adjustment in the IMAGE ADJUST Menu (P34, 35). -
Page 34: Image Level Adjustment
VIDEO INPUT Press the MENU button and the ON-SCREEN MENU will appear. Press the POINT LEFT/RIGHT button(s) to move the red frame pointer to the IMAGE ADJUST Menu icon. Press the POINT DOWN button to move the red frame pointer to the item that you want to adjust and then press the SELECT button. -
Page 35: Picture Screen Adjustment
Closes the IMAGE MENU. PICTURE SCREEN ADJUSTMENT This projector has a picture screen resize function, which enables you to display the desirable image size. Press the MENU button and the ON-SCREEN MENU will appear. Press the POINT LEFT/RIGHT button(s) to move the red frame pointer to the SCREEN Menu icon. -
Page 36: Setting
Reset ····resets the keystone adjustment data when the AC Power Cord is disconnected. Blue back When this function is “On,” the projector produces a blue image while input signal is not detected. Display This function decides whether to display On-Screen Displays. - Page 37 When this function is “On,” the projector is automatically turned on just by connecting the AC Power cord to a wall outlet. Note ; Be sure to turn the projector off properly (refer to the section “TURNING OFF PROJECTOR” on page 19). If the projector is turned off in the wrong steps, the On Start function does not operate properly.
-
Page 38: Appendix
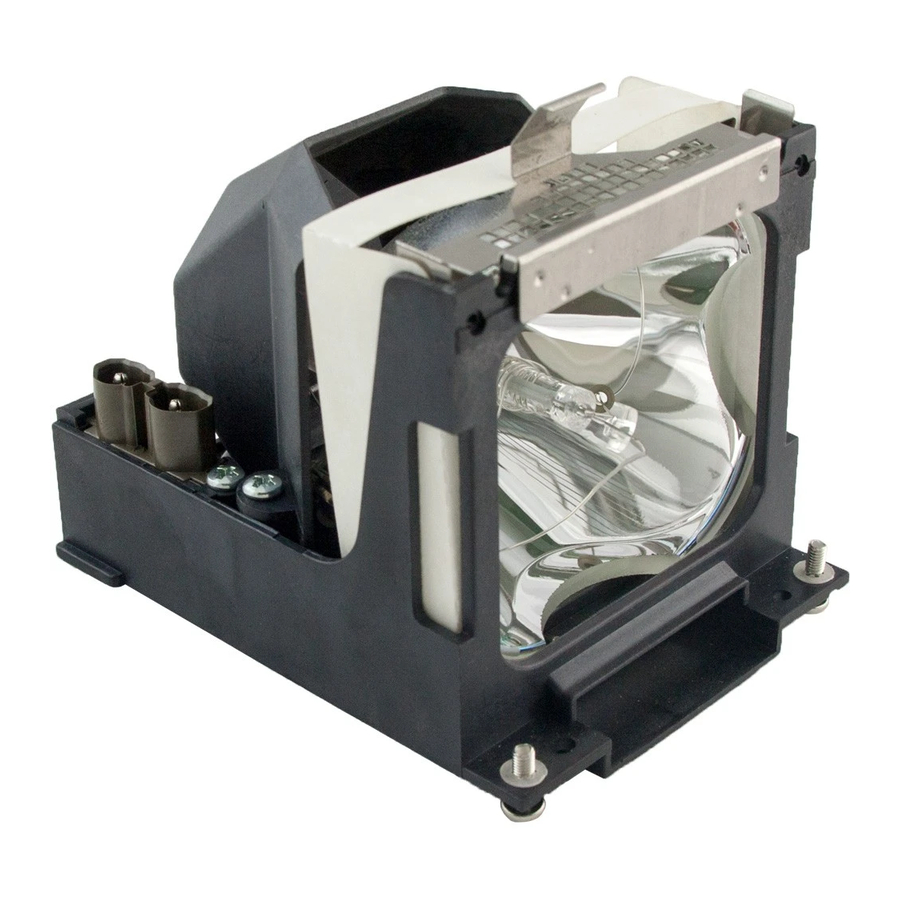
Refer to “LAMP REPLACE COUNTER” on the next page . ORDER REPLACEMENT LAMP Replacement Lamp can be ordered through Boxlight at 1-800-762-5757 or 360-779-7901. When ordering a Projection Lamp, give the following information to the dealer. Model No. of your projector Replacement Lamp Type No. -
Page 39: Lamp Replace Counter
Additionally, check carefully to ensure that there are no broken shards or pieces of glass around the projector or coming out from the cooling air circulation holes. Any broken shards found should be cleaned up carefully. No one should check the inside of the projector except those who are authorized trained technicians and who are familiar with projector service. -
Page 40: Operating Wireless Mouse
OPERATING WIRELESS MOUSE The Remote Control is not only able to operate this projector but also usable as a wireless mouse for most Personal Computers. The POINT button, drag ON/OFF button and two CLICK buttons are used for wireless mouse operation. -
Page 41: Maintenance
The WARNING TEMP. indicator flashes red when an internal temperature of the projector exceeds the normal temperature. The projector cannot be turned on while the WARNING TEMP. indicator is flashing with the READY indicator off. When the temperature inside the projector returns to normal, the READY indicator lights green. Then you can turn the projector back on. -
Page 42: Troubleshooting
G Verify that all computer, video and power cord are properly connected and turn the equipment on. G When you are operating the projector with a computer and it does not produce an image, restart the computer. G Select the other input source. - Page 43 High voltages are used to operate this projector. Do not attempt to open the cabinet. If the problem still persists after following all operating instructions, contact Boxlight for assistance at 1-800-762-5757 or 360-779-7901. Give the model number and explain about the problem. We will advise you how to obtain service.
-
Page 44: Indicators And Projector Condition
LAMP green The projector is OFF. (The AC Power Cord is unplugged.) The projector is READY to be turned on with the POWER ON- OFF button. The projector is operating normally. The temperature inside the projector is abnormally high. The projector cannot be turned on. -
Page 45: Technical Specifications
TECHNICAL SPECIFICATIONS Projector Type Dimensions (W x H x D) Net Weight LCD Panel System Panel Resolution Number of Pixels Color System High Definition TV Signal Scanning Frequency Projection Image size (Diagonal) Projection Lens Throw Distance Projection Lamp Video Input Jacks... -
Page 46: Configurations Of Terminals
APPENDIX COMPUTER INPUT/MONITOR OUTPUT TERMINAL (ANALOG) Terminal : HDB15-PIN Pin Configuration DVI-I TERMINAL (DIGITAL/ANALOG) Pin Configuration C1 C2 CONFIGURATIONS OF TERMINALS Red Input Green Input Blue Input Sense 2 Ground (Horiz.sync.) Ground (Red) Ground (Green) Ground (Blue) Analog Red Input Analog Green Input Analog Blue Input Analog Horiz. -
Page 47: Control Port Connector
CONTROL PORT CONNECTOR Terminal : Mini DIN 8-PIN Pin Configuration 8 7 6 USB CONNECTOR (Series B) Pin Configuration The parts listed below are optionally supplied. When ordering those parts, give the name and Type No. to the sales dealer. G Control Cable (Serial Port) G Control Cable (ADB Port) G MAC Adapter... -
Page 48: Warranty Limitation And Exclusion
Said warranty shall continue for a period of two (2) years from the date of such purchase. BOXLIGHT does not warrant that the Product will meet the specific requirements of the first person or entity that purchases the Product for personal or business use. Lamp is warrantied for 120 days. Accessories are warrantied for 1 year from date of purchase.
Need help?
Do you have a question about the CP-320t and is the answer not in the manual?
Questions and answers