Table of Contents
Advertisement
Quick Links
Advertisement
Table of Contents

Related Manuals for Audio Research HIGH DEFINITION PH9


Summary of Contents for Audio Research HIGH DEFINITION PH9
- Page 3 Thank you for choosing the PH9 as part of your high performance music system. Since 1970, Audio Research has been creating some of the world’s finest audio equipment. Each piece is handcrafted in Minnesota, and has been designed to provide many years of listening enjoyment.
-
Page 4: Table Of Contents
Contents Warnings Installation Before Operating the PH9 In Your System A Note about Vacuum Tubes Connections Back Panel Connections Input Connectors Output Connectors Record Output Operation A.C. Power Connection Front Panel Controls and Display RS-232 and IR Input Start-Up Shut-Down Break-in Front Panel Controls Remote Only Functions... -
Page 5: Warnings
• The PH9 has automatic muting to help with covers removed. Refer servicing protect system components in the event to your authorized Audio Research of low line voltage. When sensing low line dealer or other qualified personnel. voltage, the preamp displays ‘Low Line’... -
Page 6: Installation
Installation Before operating the PH9 Remove all screws fastening the top cover. Your PH9 preamplifier is shipped with the Carefully remove each vacuum tube vacuum tubes packed in a separate foam- from its protective foam and match its lined carton. These must be unpacked location ‘V’... -
Page 7: In Your System
Audio Research recommends a minimum of 6-8 inches (15-20 cm) of clearance above the PH9 to maintain proper ambient operating temperature. -
Page 8: Connections
Connections Back Panel Connections RS-232 connector IR Input Ground Connection Fuse Holder Main Outputs A.C. Mains connector Phono Input... -
Page 9: Input Connectors
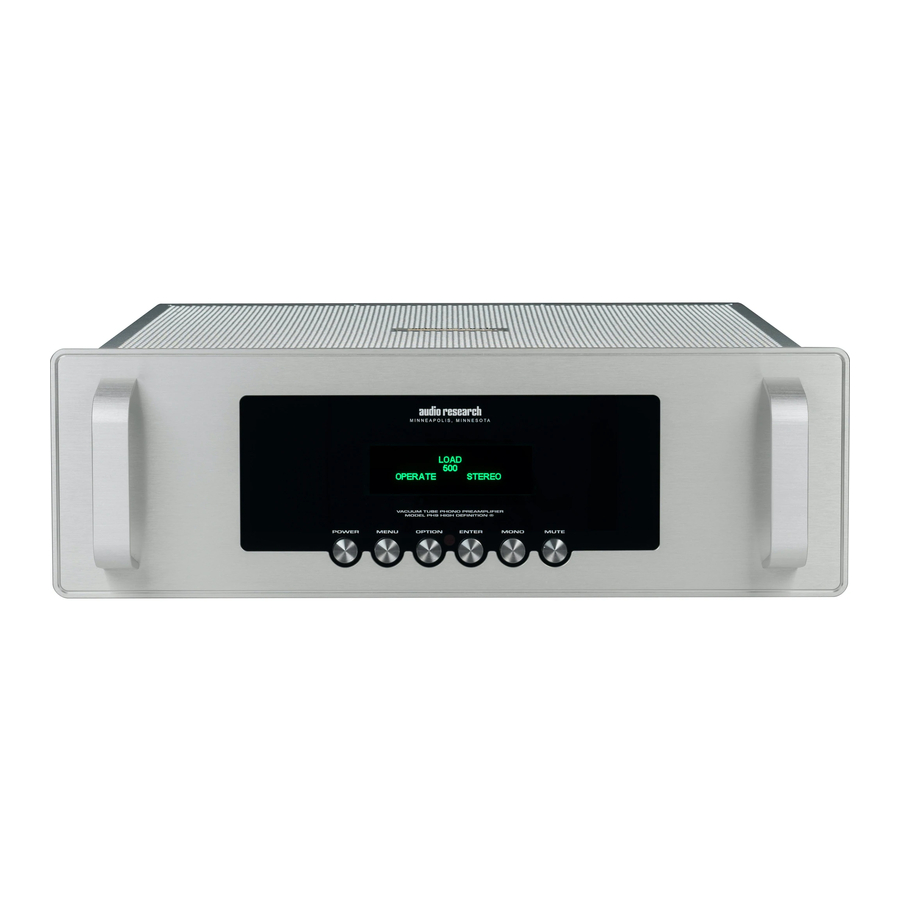
Important A pair of single-ended main outputs Use the best available speaker wires are provided. Connect the output and interconnects. Audio Research of the PH9 to an input of your cannot emphasize this enough. As preamplifier or integrated amplifier. better components and systems are developed, it becomes increasingly A.C. - Page 10 Operation Front Panel Controls and Display Vacuum Fluorescent Display Power On/Off Menu Mute Option Mono (used with Menu) Enter (used with Menu)
- Page 11 Operation Start-Up Shut-Down • Secure all rear-panel connections between • Activate ‘MUTE’ function. PH9, preamplifier, and input sources. • Turn off power amplifier(s). • Plug three-prong power cord from • Turn off preamplifier. rear of chassis into grounded A.C. wall •...
- Page 12 Operation Front Panel Controls Mute The PH9 has six buttons: Power, Menu, When activated, Mute electrically disables Option, Enter, Mono, and Mute. all outputs of the phono preamplifier; indicated by ‘MUTE’ in display window, Power On/Off in the bottom right corner. This control Supplies power from the A.C.
- Page 13 Operation Remote Only Functions Display Brightness Adjustment In addition to the controls found on The front panel display has six brightness the front panel, the remote control settings, as well as the ability to dim offers access to the following the display completely.
- Page 14 Operation System Settings - Menu Tree...
- Page 15 Operation Settings Menu Note The PH9 has been designed with a simple, For the following menu settings, please refer intuitive menu to allow adjustment to the menu tree on page 14 for examples of the various features of the phono of the front panel display.
- Page 16 Operation Load Setting Tube Hours The Load Settings menu offers adjustable The tube hours display shows the cartridge impedance loading on the PH9. accumulated time the PH9 has been The setting is stored in the unit’s memory powered on. This is useful for determining and will be retained until changed.
- Page 17 Operation Display Brightness The display brightness feature offers six different settings (including off) for the vacuum fluorescent display on the front panel. When the lowest setting (off) is selected, the display will remain on for five seconds after any button is pushed, after which it will revert to a black screen with a small, illuminated square in the center to indicate the unit is powered on.
-
Page 18: Maintenance
Should you need service, please contact your authorized Audio Research dealer or other qualified technician. Additional questions regarding the operation, maintenance Disposal and Recycling Guidelines... -
Page 20: Warranty
Limited Warranty are listed on the Audio Research factory, along with a the warranty card accompanying the photocopy of the dated purchase receipt product in its shipping carton. The... -
Page 21: Specifications
Specifications Frequency Response: ±.2 dB of RIAA, 5 Hz to 20kHz; 1 dB points below 0.3Hz and above 80 kHz. Distortion: Less than .015% at 3V RMS 1kHz output. Gain: 58 dB at 1 kHz Input Impedance: Selectable loads: 47k, 1000, 500, 200, 100 Ohms. Output Impedance: 200 ohms. - Page 22 3900 Annapolis Lane North Plymouth, MN 55447 www.audioresearch.com Specifications subject to change without notice. ©2016 Audio Research Corporation. Reproduction of this document in part or whole is expressly forbidden without written consent from Audio Research Corporation. 95000016 A...
Need help?
Do you have a question about the HIGH DEFINITION PH9 and is the answer not in the manual?
Questions and answers