
Related Manuals for Chauvin Arnoux L452


Summary of Contents for Chauvin Arnoux L452
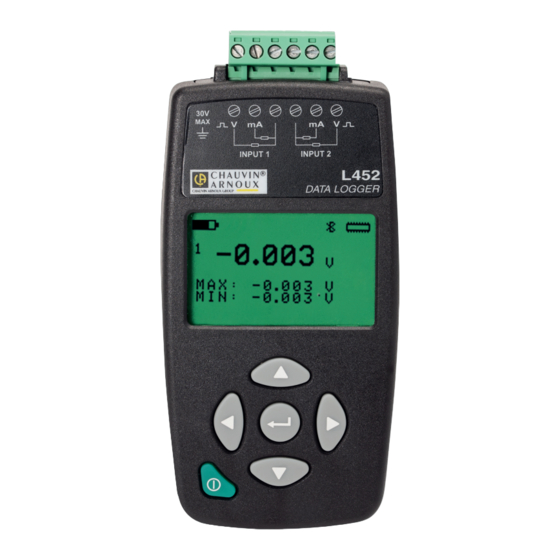
- Page 1 FR - Guide de démarrage rapide GB - Quick start guide DE - Schnellstart-Anleitung IT - Guida di utilizzo rapido ES - Guía de inicio rápido L452 Enregistreur de données Data logger Data-Logger Registratore Registrador...
-
Page 2: Utilisation Des Touches
English ......................... 8 Deutsch ........................14 Italiano ........................20 Español ........................26 1. MISE EN PLACE DES ACCUMULATEURS ET CHARGEMENT „ Retournez l’appareil. „ Retirez la trappe à pile en la poussant dans le sens des flèches jusqu’aux repères puis en la soulevant. „... - Page 3 3. CHOIX DE LA LANGUE „ Allumez l’appareil en appuyant sur la touche et en la maintenant appuyée jusqu’à ce l’afficheur indique Marche. LANGUAGE: ENGLISH „ Appuyez 4 fois sur . DATE/TIME: MM/DD/YY 24h LANGUAGE: ENGLISH „ Appuyez sur pour sélectionner le champ. DATE/TIME: MM/DD/YY 24h „...
- Page 4 „ Appuyez sur pour passer au champ suivant, puis sur les Date: touches ou pour définir ce champ. A nouveau sur 12/01/00 pour passer au troisième champ, puis sur les touches ou Heure: pour le définir. Appuyez sur pour valider. 00:01:15 Date: 12/09/15...
- Page 5 6. BRANCHEMENT DES SONDES, CAPTEURS, TRANSMETTEUR OU CONDITIONNEUR DE SIGNAL Le Data Logger L452 fonctionne avec une grande variété de sondes qui ont une sortie : „ Tension : ± 100 mV, ± 1 V ou ± 10 V „ Courant : 4 - 20 mA „...
-
Page 6: Enregistrement Des Données
Branchez ensuite les sondes. Sonde courant 4 - 20 mA Sonde tension, impulsion ou TOR. Voie 1 Voie 2 Voie 1 Voie 2 INPUT 1 INPUT 2 INPUT 1 INPUT 2 A l’aide d’un petit tournevis plat, dévissez les vis du bornier. Introduisez les fils puis revissez les vis de manière à... - Page 7 „ Suivez ensuite les instructions pour installer le programme. „ Une fois le logiciel et les pilotes installés, vous pouvez connecter l’appareil au PC. INPUT 1 INPUT 2 L452 SIMPLE LOGGER III „ Pour lancer le logiciel, cliquez sur l’icône...
-
Page 8: Installing And Charging The Batteries
ENGLISH 1. INSTALLING AND CHARGING THE BATTERIES „ Turn the instrument over. „ Remove the battery compartment cover by pushing it as far as the marks in the direction indicated by the arrows, then lifting it off. „ Insert the two batteries provided, paying attention to the polarity. - Page 9 3. CHOOSING A LANGUAGE „ Switch the instrument on by pressing the key and keeping it pressed until the display unit indicates Power On. LANGUAGE: ENGLISH „ Press 4 times. DATE/TIME: MM/DD/YY 24h LANGUAGE: ENGLISH „ Press to select the field. DATE/TIME: MM/DD/YY 24h LANGUAGE:...
- Page 10 DATE: „ Press to go to the next field, then or to define the 09/01/00 field. Press again to go to the third field, then or to define it. Press to validate. TIME: 00:01:15AM DATE: 09/12/15...
- Page 11 6. CONNECTING PROBES, SENSORS, TRANSMITTERS, OR SIGNAL CONDITIONERS The L452 Data Logger operates with a great variety of probes having outputs of the following types: „ Voltage: ± 100 mV, ± 1 V or ± 10 V „ Current: 4 - 20 mA „...
-
Page 12: Recording Data
Then connect the probes. 4-20mA current probe Voltage, pulse, or discrete probe. Channel 1 Channel 2 Channel 1 Channel 2 INPUT 1 INPUT 2 INPUT 1 INPUT 2 Use a small flat blade screwdriver to unscrew the screws of the terminal block. Insert the wires, then screw the screws back in so that the wires cannot be pulled out of the connector. -
Page 13: Start Date
„ Then follow the instructions to install the program. „ Once the software and the driver have been installed, you can connect the instrument to the PC. INPUT 1 INPUT 2 L452 SIMPLE LOGGER III „ To start the software, click on the icon. - Page 14 DEUTSCH 1. AKKUS EINLEGEN UND LADEN „ Gerät umdrehen. „ Batteriefachdeckel entfernen: Zum Öffnen in Pfeilrichtung bis zur Markierung verschieben und dann anheben. „ Die beiden Akkus einlegen, dabei die Polarität berücksichtigen. „ Legen Sie den Batteriefachdeckel wieder an und schrauben Sie ihn wieder zu.
- Page 15 3. SPRACHWAHL „ Schalten Sie das Gerät ein, dazu die Taste drücken und halten, bis auf dem Display Leistung Ein erscheint. LANGUAGE: ENGLISH „ Drücken Sie vier Mal auf . DATE/TIME: MM/DD/YY 24h LANGUAGE: ENGLISH „ Drücken Sie auf , um das Feld auszuwählen. DATE/TIME: MM/DD/YY 24h „...
- Page 16 „ Springen Sie mit auf das nächste Feld. Dann benutzen Sie Datum: die Tasten und , um dieses Feld zu definieren. Gehen 12/01/00 Sie wieder mit auf das dritte Feld. Dann benutzen Sie die Uhrzeit: Tasten und , um dieses Feld zu definieren. Drücken Sie 00:01:15 ...
- Page 17 ±100 mV 6. SONDEN, WANDLER, UMFORMER UND SIGNALAUFBEREITER ANSCHLIESSEN Der Datenlogger L452 arbeitet mit einer Vielzahl von Sonden mit einem Ausgang: „ Spannung: ±100 mV, ±1 V oder ±10 V „ Strom: 4 - 20 mA „ Impuls: ± 10 V „...
-
Page 18: Daten Speichern
Schließen Sie dann die Sonden an. Stromsonde 4 - 20 mA Spannungssonde, Impuls oder AON. Kanal 1 Kanal 2 Kanal 1 Kanal 2 INPUT 1 INPUT 2 INPUT 1 INPUT 2 Mit einem kleinen flachen Schraubendreher lösen Sie die Klemmschrauben. Stecken Sie die Drähte ein und schrauben Sie die Klemmschrauben wieder an, damit die Drähte nicht aus dem Klemmenblock rutschen können. - Page 19 „ Folgen Sie dann den Anweisungen zum Installieren der Software. „ Wenn Software und Treiber erfolgreich installiert sind, können Sie das Gerät an den PC anschließen. INPUT 1 INPUT 2 L452 SIMPLE LOGGER III „ Um die Software zu starten, klicken Sie auf das Symbol...
- Page 20 ITALIANO 1. INSTALLAZIONE DEGLI ACCUMULATORI E CARICAMENTI „ Capovolgete lo strumento. „ Rimuovete lo sportello della pila spingendolo nel senso delle frecce fino ai riferimenti poi sollevatelo. „ Inserite i 2 accumulatori forniti rispettando la polarità. „ Rimettete al suo posto lo sportello della pila dopodiché spingetelo per chiuderlo.
- Page 21 3. SELEZIONE DELLA LINGUA „ Accendete lo strumento premendo il tasto e mantenetelo premuto fino a quando il display indicherà Power On. LANGUAGE: ENGLISH „ Premete 4 volte . DATE/TIME: MM/DD/YY 24h LANGUAGE: ENGLISH „ Premete per selezionare il campo. DATE/TIME: MM/DD/YY 24h „...
- Page 22 „ Premete per passare al campo seguente, poi i tasti o Data: per impostare questo campo. Premete di nuovo per passare 12/01/00 al terzo campo, poi i tasti o per impostarlo. Premete Ora: per convalidare.
- Page 23 6. C O L L E G A M E N TO D I S O N D E , S E N S O R I , T R A S M E T T I TO R E O CONDIZIONATORE DEL SEGNALE Il Data Logger L452 funziona con una grande varietà di sonde che hanno un’uscita: „ Tensione: ± 100 mV, ± 1 V o ± 10 V „...
- Page 24 In seguito collegate le sonde. Sonda corrente 4 - 20 mA Sonde tensione, impulso o tutto o niente. Canale 1 Canale 2 Canale 1 Canale 2 INPUT 1 INPUT 2 INPUT 1 INPUT 2 Con un piccolo cacciavite piatto, svitate le viti della morsettiera. Introducete i fili poi riavvitate le viti in maniera che i fili non possano più...
- Page 25 „ Seguite in seguito le istruzioni per installare il programma. „ Una volta installati il software e i driver, potete collegare lo strumento al PC. INPUT 1 INPUT 2 L452 SIMPLE LOGGER III „ Per lanciare il software, cliccate sull’icona...
- Page 26 ESPAÑOL 1. COLOCACIÓN DE LOS ACUMULADORES Y CARGA „ Dé la vuelta al instrumento. „ Quite la tapa de las pilas empujándola en el sentido de las flechas hasta las marcas y luego levantándola. „ Inserte los 2 acumuladores suministrados respetando la polaridad.
- Page 27 3. SELECCIÓN DEL IDIOMA „ Encienda el instrumento pulsando la tecla y manteniéndola pulsada hasta que el display indique Encender. LANGUAGE: ENGLISH „ Pulse 4 veces . DATE/TIME: MM/DD/YY 24h LANGUAGE: ENGLISH „ Pulse para seleccionar el campo. DATE/TIME: MM/DD/YY 24h Idioma: „...
- Page 28 „ Pulse para pasar al campo siguiente, luego en las teclas Fecha: o para definir este campo. Pulse de nuevo para pasar al 12/01/00 tercer campo, luego en las teclas o para definirlo. Pulse Hora: ...
- Page 29 6. C O N E X I Ó N D E L A S S O N D A S , S E N S O R E S , T R A N S M I S O R O ACONDICIONADOR DE SEÑAL El Data Logger L452 funciona con una gran variedad de sondas que tienen una salida: „ Tensión: ±100 mV, ±1 V o ±10 V „...
- Page 30 Conecte luego las sondas. Sonda de corriente 4 – 20 mA Sonda de tensión, impulso o TON. Canal 1 Canal 2 Canal 1 Canal 2 INPUT 1 INPUT 2 INPUT 1 INPUT 2 Con un pequeño tornillo plano, desatornille los tornillos de los bornes. Introduzca los hilos y luego vuelva a atornillar los tornillos de modo que los hilos no puedan salir del conector.
- Page 31 „ Siga a continuación las instrucciones para instalar el programa. „ Una vez instalados el software y los drivers, puede conectar el instrumento al PC. INPUT 1 INPUT 2 L452 SIMPLE LOGGER III „ Para iniciar el software, haga clic en el icono...
- Page 32 FRANCE INTERNATIONAL Chauvin Arnoux Group Chauvin Arnoux Group 190, rue Championnet Tél : +33 1 44 85 44 38 75876 PARIS Cedex 18 Fax : +33 1 46 27 95 69 Tél : +33 1 44 85 44 85 Fax : +33 1 46 27 73 89 Our international contacts info@chauvin-arnoux.com...
Need help?
Do you have a question about the L452 and is the answer not in the manual?
Questions and answers