
Subscribe to Our Youtube Channel
Related Manuals for HOBBYEAGLE A3 SUPER 3


Summary of Contents for HOBBYEAGLE A3 SUPER 3
- Page 1 A3 SUPER INSTRUCTION MANUAL For Firmware Version 1.0, Data Version 1.0 Oct 25, 2017 Revision support@hobbyeagle.com...
-
Page 2: Table Of Contents
10. Program Card …..………………………………………………………………………………………..35 10.1. Buttons ..……………………………………………………………………………………………35 10.2. Method of Use …..…………………………………………………………………………………35 10.3. Language Selection ………………………………………………………………………………35 10.4. Menu Operation …...………………………………………………………………………………35 10.5. Option Selection …..………………………………………………………………………………35 10.6. Value Modification …………………………………………………………………………………36 10.7. Function List (v3.5) …………………………...…….………………………………………………36 11. Specifications …………………………………………………………………………………………...38 * Voltage Protector …………………………………………………………………………………….…...38 support@hobbyeagle.com... -
Page 3: Important Notes
This is designed to protect the USB port and the internal power IC of the gyro. For this reason, you have to connect the battery for your plane if the radio system is needed while setting up the gyro. support@hobbyeagle.com... -
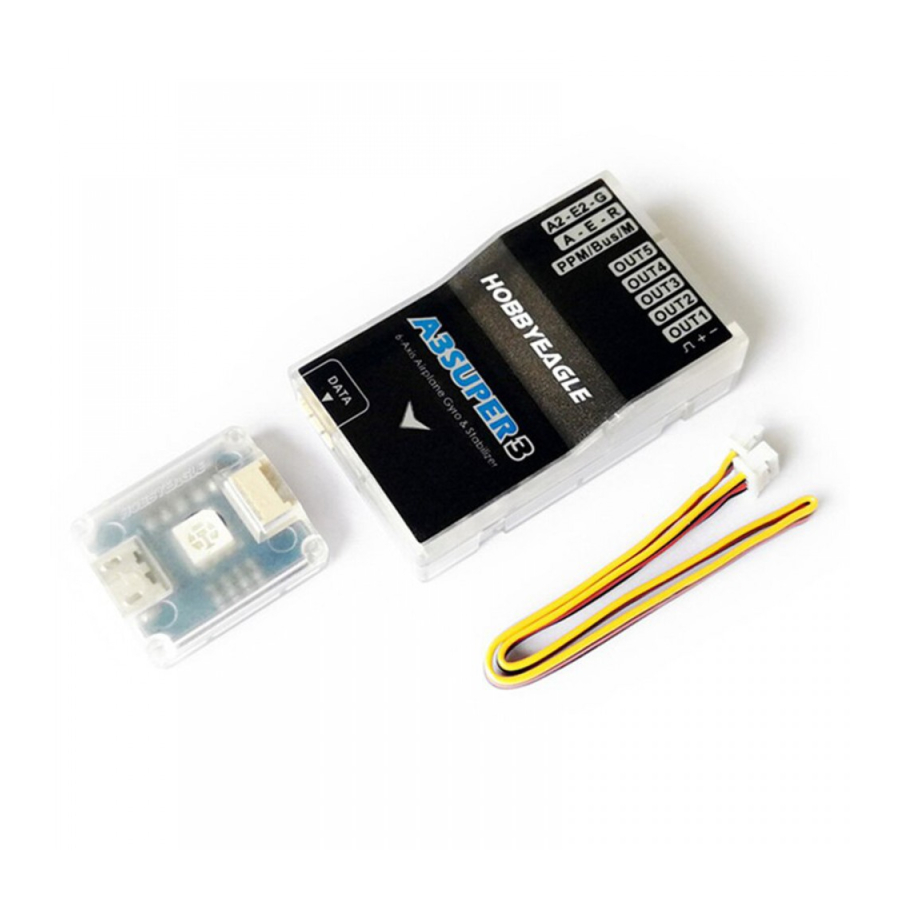
Page 4: Introduction
Thank you for purchasing our products. A3 Super 3 (hereinafter referred to as A3S3) is a high-performance and functional 6-axis gyro and stabilizer designed for R/C airplanes. This gyro can be used with nearly any size and type of R/C airplanes and it will make the flying even easier and comfortable. -
Page 5: Setup Procedure Overview
Adjust the servo travel or end-point setting of the transmitter to make the progress bar be in the right position of +100% or -100% when moving the stick, switch and knob (or slider) to the full left or full right position for each channel. For more details of transmitter calibration, see Page 24 “9.7.1. support@hobbyeagle.com... -
Page 6: Installation
The external LED module is designed for intuitively displaying the system status and easier connecting to the PC and program card. You can attach it wherever you like and connect it with the main controller using the supplied 4-pin wire. support@hobbyeagle.com... - Page 7 Never use the hot-melt glue or nylon ties to fix the gyro onto the plane! The gyro is a sensing device, please make enough space around it and keep as far away from other electronic devices or wires as possible. support@hobbyeagle.com...
-
Page 8: Receiver & Servos Connection
Flight mode switch channel, PPM or S.BUS input channel, power supply port of the gyro. 4.2. SUPPORTED WING TYPE A3S3 supports standard fixed-wing, flying-wing(delta-wing) and v-tail and provides 7 different wing types for you. The following illustration gives the connection of the servos for each type. Standard Wing Type support@hobbyeagle.com... -
Page 9: Using Pass-Through Function Of [A2] & [E2]
ESC or the throttle servo at [OUT4] or [OUT5] by assigning the throttle channel number to [A2] or [E2] in the software . Besides being used as throttle, [A2] and [E2] can be also used as gear, flap or other channels as you need. support@hobbyeagle.com... -
Page 10: Standard Receiver Connection (For Electric Planes)
If you are using the A3S3 on an electric plane, the following illustration shows you how to connect the gyro to your receiver. This illustration is only intended as an example for 2AIL+2ELE+1RUD wing type. In practice, you may need to adjust the wiring to meet your need. support@hobbyeagle.com... -
Page 11: Standard Receiver Connection (For Nitro/Gas Planes)
You have to restart the gyro after you change the receiver type to make the new setting take effect. 4.5. Using the A3S3 on a nitro/gas plane is similar to electric planes, follow the below illustration to complete connection between the gyro and receiver. support@hobbyeagle.com... -
Page 12: Ppm, S.bus Single-Line Receiver Connection
A3S3 supports a maximum of 14 channels when using a single-line receiver. When programing the channel mapping, select “None” for those channels you don’t want to use. support@hobbyeagle.com... - Page 13 Programming the channel assignment in the software. support@hobbyeagle.com...
-
Page 14: Flight Mode
Different from the Trainer mode, there is no maximum angle limitation in this mode and the plane will be stabilized only when there is no specific control inputs from aileron and elevator sticks. This mode can be used if the pilot becomes disoriented and would like to save the plane from crashing. support@hobbyeagle.com... -
Page 15: 3-Position Mode Switching
GYRO DIRECTION It’s extremely important to make sure that the gyro reacts in the correct direction for each channel before flight. An opposite reaction of the gyro could lead to losing control or even crash! support@hobbyeagle.com... - Page 16 Quickly move the nose of the plane downward around the pitch axis, the elevator surface should flap up as shown below. Check the gyro direction in rudder direction Quickly move the nose of the plane to the left around the yaw axis, the rudder surface should flap right as shown below. support@hobbyeagle.com...
-
Page 17: Gain Settings
Auto-Level mode as emergency rescue during flight, then a larger level gain may be needed to make the plane quickly recover to level position when switching into this mode. Hover Gain The hover gain is only used for Auto-Hover mode. It determines the amount of the correction which will always stabilize the support@hobbyeagle.com... -
Page 18: Led Descriptions
Calibrating or testing CONFIG SOFTWARE Please download the A3S3 Config Utility and the USB driver installer from our website www.hobbyeagle.com. Run the setup and follow the instructions to complete the installation. You will then get an icon on your desktop, as shown to the right. -
Page 19: Install The Usb Driver
After setup, insert the USB adapter into the PC and wait until the windows finishes scanning and installing the new hardware. Then open the Device Manager and find the item “Silicon Labs CP210x USB to UART Bridge (COMX)” from the Ports (COM and LPT) List, remember this port number and it will be used later. support@hobbyeagle.com... -
Page 20: Overview Of The Software
Click this button to read the config data from the gyro. [6] Write After you have changed the configuration, click this button to send the changes to the gyro and save. [7] Exit Exit the application [8] Setting Functions All available setting functions are grouped and listed here. support@hobbyeagle.com... -
Page 21: Flight Mode
The max tilt angle setting is only used for Trainer mode. Adjustment range is 30~90deg, the default setting is 60 deg. 9.4. WING TYPE Choose a wing type matched to your plane and connect the servos to the corresponding sockets following the illustration. support@hobbyeagle.com... -
Page 22: Mount Orientation
GYRO SETTINGS [1] Gyro On-Off You can disable the gyro separately for each channel. [2] Gyro Direction Reverse the gyro if it reacts in opposite direction. [3] Gain Settings Adjust the gain of each axis for each flight mode. support@hobbyeagle.com... -
Page 23: Radio Settings
If you have set the Stick Reverse, Stick Rate or Expo here, always adjust the center position of the servos by using the “Servo Trimming” function (P25) provided by A3S3 itself instead of using the Sub-Trim function and Trimming buttons on your transmitter directly. See Page 3 for more details. support@hobbyeagle.com... -
Page 24: Transmitter Calibration
This function allows you to fine tune the servo neutral position using the transmitter. For more details, see Page 25. [5] Travel Limiting This function allows you to adjust the travel limits of the servos using the transmitter. For more details, see Page 26. support@hobbyeagle.com... -
Page 25: Servo Trimming
After you have finished the setting, just flip the flight mode switch or click the Exit button to exit and back to standby state. support@hobbyeagle.com... -
Page 26: Travel Limiting
(i.e.150%). The new travel limit of current servo will also be saved when you switching to the next servo. After you have finished the setting, just flip the flight mode switch or click the Exit button to exit and back to standby state. support@hobbyeagle.com... -
Page 27: Sensor Monitor
0.2 degree. If the angle deviation exceeds ±25 degree, you have to re-install the gyro to reduce the angle deviation caused by installation. Clicking the “Level Calibration” or “Hover Calibration” button can perform an automatic calibration, for more details, see Page 28 and Page 29. support@hobbyeagle.com... -
Page 28: Level Calibration
In addition, a rapid red blinking is used to indicates that the result exceeds the maximum permissible value (i.e. ±25deg), in this case, you have to re-install the gyro to reduce the deviation caused by installation. support@hobbyeagle.com... -
Page 29: Hover Calibration
For more information about how to perform the calibration, please refer to “Level Calibration”. Offset Value on Yaw and Pitch Click to perform Hover Calibration support@hobbyeagle.com... -
Page 30: Accelerometer Calibration
Put the gyro on the table with the sticker on top and fix it with your fingers, then press “Next” to continue, the Step 2 calibration of each step will take about 2 seconds, during calibrating, the LED will blink blue several times and then light up solid in blue. Don’t move the gyro until the calibration is done. support@hobbyeagle.com... - Page 31 Now stand it up with the arrow pointing to the table. Fix it with your fingers and make sure it is vertical to the Step 4 desktop. Press “Next” to continue and wait until the calibration is done. support@hobbyeagle.com...
- Page 32 Now change to another orientation and make the gyro look like it is in the picture, with the long side of the Step 6 housing on the table and the [DATA] socket up. Fix it with your fingers and make sure it is vertical to the desktop. Press “Next” to continue and wait until the calibration is done. support@hobbyeagle.com...
- Page 33 Now turn the gyro around and make the [DATA] socket down. Again fix it with your fingers and press “Next” to Step 7 continue and wait until the calibration is done. After you have finished all of the steps above, you can see the new calibration results of each axis on the Step 8 screen. support@hobbyeagle.com...
-
Page 34: Advanced Settings
Otherwise the servos may get damaged! This setting will affect all servos simultaneously. [7] Gain Level Change the level of the basic gain, the default “Medium” can satisfy most planes. support@hobbyeagle.com... -
Page 35: Program Card
[ENT] to enter edit mode. In edit mode, the value will keep flashing, you can change its value by pressing [UP/+] or [DN/-]. Press [ENT] to confirm or [ESC] to cancel. Press and hold the [ENT] button more than 2 seconds can restore the parameter to its default setting. support@hobbyeagle.com... -
Page 36: Function List (V3.5)
Normal mode, from -100% to +100%. 04. Stick Expo Set the EXP of aileron, elevator and rudder for 03.AttiLock Mode Atti-Lock mode, from -100% to +100%. Set the EXP of aileron, elevator and rudder for 04.Trainer Mode Trainer mode, from -100% to +100%. support@hobbyeagle.com... - Page 37 12. System Menu 04. Device Info. Check the device name, firmware version and data version of the unit. 05. Card Info. Check the firmware version of the program card. 06. Data Reset Restore the settings of the unit to factory default. support@hobbyeagle.com...
-
Page 38: Specifications
It’s recommended to use the supplied 3300uF/16V capacitor to get a more stable and secure working voltage for the gyro. The capacitor can be plugged onto any one of the free input or output sockets of the gyro or the receiver. support@hobbyeagle.com...
Need help?
Do you have a question about the A3 SUPER 3 and is the answer not in the manual?
Questions and answers