Table of Contents
Advertisement
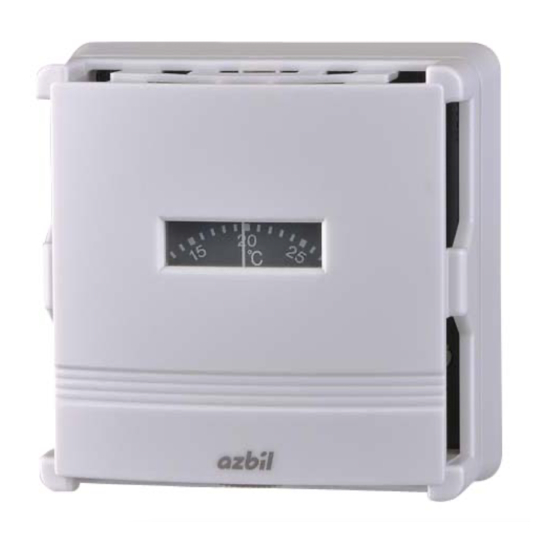
Room Thermostat, Room Humidistat
General
Neostat Models TY600_Z, TTY6023Z, and TY900_Z are
series of electric room thermostat. Neostat Model HY6000Z
is an electric room humidistat.
Neostat is similar in design and size to Neosensor, the
electronic room temperature and/or humidity sensor.
A temperature-sensitive diaphragm is adopted for the
thermostat, and a moisture-sensitive nylon ribbon is adopted
for the humidistat.
Features
●
Simple
connection
to
temperature/humidity control.
●
Compact (thin) and lightweight.
●
Several installation types selectable in combination with
optional auxiliary devices.
Model Numbers
Thermostat
Model number
TY6000Z2000
Two-position, one-step
TY6000Z2000-1
TY6001Z2000
TY6001Z2000-1
TTY6023Z2000
Two-position, two-step
TTY6023Z2000-1
TY9000Z2000
Proportional*
TY9000Z2000-1
TY9001Z2000
TY9001Z2000-1
Note:
* Use Neostat (proportional type) with our Control Motor, ACTIVAL™, etc.
Humidistat
Model number
HY6000Z2000
Tow-position
HY6000Z2000-1
Neostat
an
actuator
allows
Control action
Range
10 °C to 30 °C
Control action
Range
30 %RH to 90 %RH
easy
Switch for heating/cooling
changeover
Without switch
With switch
Without switch
Without switch
With switch
Our corporate logo (on the cover)
Printed
Not printed
© 2014-2018 Azbil Corporation All Rights Reserved.
1
AB-7258
Specifications/Instructions
Our corporate logo
(on the cover)
Printed
Not printed
Printed
Not printed
Printed
Not printed
Printed
Not printed
Printed
Not printed
Advertisement
Table of Contents

Subscribe to Our Youtube Channel
Related Manuals for Azbil TY6000Z2000


Summary of Contents for Azbil TY6000Z2000
- Page 1 * Use Neostat (proportional type) with our Control Motor, ACTIVAL™, etc. Humidistat Model number Control action Range Our corporate logo (on the cover) HY6000Z2000 Tow-position 30 %RH to 90 %RH Printed HY6000Z2000-1 Not printed © 2014-2018 Azbil Corporation All Rights Reserved.
-
Page 2: Safety Instructions
• Aeronautical/aerospace machines For system design, application design, instructions for use, or product applications, please contact Azbil Corporation. Azbil Corporation bears no responsibility for any result, or lack of result, deriving from the customer's use of the product. Recommended Design Life It is recommended that this product be used within the recommended design life. - Page 3 AB-7258 CAUTION Use the product under the operating conditions (temperature, humidity, power, vibration, shock, mounting direction, atmospheric condition, etc.) as listed in the specifications. Failure to do so might cause fire or device failure. Use the product within the rated operating ranges as listed in the specifications. ...
-
Page 4: Specifications
AB-7258 Part Numbers of Optional Items Mount Neostat with the following optional items (sold separately). Order necessary items. Item Part number/Model number Note Adapter Part No. 83172617-001 — Auxiliary device Thermoplate for individual room Model QY1100A With slide switch control Model QY1100C With rotary switch Model QY1100D... - Page 5 AB-7258 Dimensions Neostat Note: * Secure more than 15 mm clearance inside the mounting wall when installing Neostat. Figure 1. Dimensions (mm): Neostat Adapter Figure 2. Dimensions (mm): Adapter...
-
Page 6: Requirements For Installation Location
AB-7258 Installation CAUTION Use the product under the operating conditions (temperature, humidity, power, vibration, shock, mounting direction, atmospheric condition, etc.) as listed in the specifications. Failure to do so might cause fire or device failure. Installation and wiring must be performed by qualified personnel in accordance with all applicable safety standards. Requirements for installation location IMPORTANT: ●... -
Page 7: Precautions For Installation
AB-7258 Precautions for installation ● Secure the clearance for wiring inside the wall (as shown in Figs. 1 and 3). ● Install Neostat with a dedicated mounting kit (sold separately) suitable for your application. ● Do not allow any refuse such as an electric wire scrap to get inside Neostat. ●... - Page 8 AB-7258 Installation steps: Neostat directly on a wall (for new installation) 1) Mount the outlet box cover (conforming to JIS C8340:1999 Boxes and box covers for rigid metal conduits (mounting dimension: 66.7 mm)) so that the two mounting holes are vertically aligned. 2) Remove the cover from Neostat.
- Page 9 AB-7258 Installation steps: Neostat directly on a wall with the adapter (for replacement of the former model) Outlet box cover (conforming to JIS C8340:1999 Boxes and box covers for rigid metal conduits (mounting dimension: 66.7 mm)) of the former model Neostat is mounted with the two mounting holes horizontally aligned. Provide the adapter (Part No. 83172617-001) to replace with the new model Neostat.
- Page 10 AB-7258 Installation steps: Neostat on Thermoplate for open wiring with the adapter 1) Remove the cover from Neostat. (See the Cover removal section.) 2) Unscrew the Neostat main unit screw. Then, hold and lift the guide to remove the main unit from the base. Do not hold the setting dial to remove the main unit.
- Page 11 AB-7258 Installation steps: Neostat on Thermoplate with the adapter 1) Attach the mounting plate of Thermoplate to the outlet box cover (JIS C8340:1999 Boxes and box covers for rigid metal conduits (mounting dimension: 83.5 mm)) on the mounting surface with two pan-head machine screws (M4 x 8) supplied with Thermoplate.
- Page 12 AB-7258 Installation steps: Neostat in Multi-Thermocase with the adapter Mount Neostat onto one of the mounting windows with 66.7 mm mounting dimension of the device mounting plate (included in Multi-Thermocase). 1) Attach the adapter to the device mounting plate of Multi-Thermocase using two pan-head machine screws (M3 x 6) supplied with Multi-Thermocase.
-
Page 13: Precautions For Wiring
Switch Cooling Temp (/heating) equip Temp rise rise Heating Heating equip Not used Figure 10. Wiring diagram: Model TY6000Z2000(-1) Figure 11. Wiring diagram: Model TY6001Z2000(-1) Neostat (Model TTY6023Z2000(-1)) Cooling Heating ACTIVAL or Neostat (Model TY9000Z2000(-1)) Control Motor First Second Temp rise... - Page 14 Switching Action of Two-position Control Thermostat (two-position one-step type) Model TY600_Z2000(-1) Contact between: Switch for heating/cooling Model number Mode changeover Terminals L and C Terminals H and C TY6000Z2000(-1) Cooling Closed Open Heating Open Closed TY6001Z2000(-1) Cooling Closed Cooling...
- Page 15 AB-7258 Thermostat (two-position one-step type) Model TTY6023Z2000 Contact between: Model number Mode Blue and red wires Gray and red wires White and pink wires Black and pink wires TTY6023Z2000(-1) Cooling (step 1) Closed Open Cooling (step 2) Closed Open Closed Open Heating (step 1) Open...
- Page 16 AB-7258 Setting Thermostat model Heating/cooling changeover (of Models TY6001Z, TY9001Z) 1) Remove the cover of Neostat. (See the Cover removal section.) 2) Set the switch for heating/cooling changeover (to "HEAT" or " COOL" position). Note: Do not change the switch while Neostat and connected equipment are being in operation. Switch for Pointer heating/cooling changeover...
- Page 17 AB-7258 Humidistat model Setpoint is factory-set and locked at 90 %RH. Lock of the setting 1) Remove the cover of Neostat. (See the Cover removal section.) 2) Loosen the setting screw that fixes the setpoint. 3) Turn the setting dial so that the pointer points to the desired setpoint. Then, tighten the setting screw. Pointer Setting dial Setting screw...
- Page 18 AB-7258 This blank page was added for page layout purposes.
- Page 19 AB-7258 This blank page was added for page layout purposes.
- Page 20 AB-7258 ACTIVAL is a trademark of Azbil Corporation in Japan or in other countries. Specifications are subject to change without notice. Building Systems Company http://www.azbil.com/ Rev. 1.0 Feb. 2018 AB-7258 (J: AI-7258 Rev. 2.0)
Need help?
Do you have a question about the TY6000Z2000 and is the answer not in the manual?
Questions and answers