
Subscribe to Our Youtube Channel
Related Manuals for SAWAFUJI ELECTRIC ENGEL MT35F-G4-P


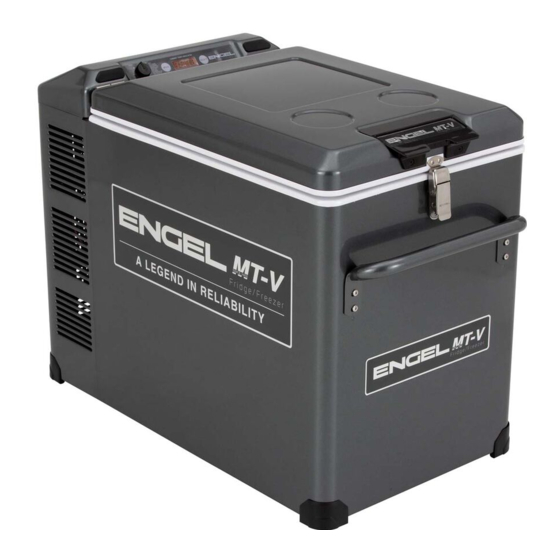
Summary of Contents for SAWAFUJI ELECTRIC ENGEL MT35F-G4-P
- Page 1 SERVICE MANUAL MODEL (Digital display type) : MT35F-G4-P 0642 032 0T60 MT35F-U1D-P 0642 032 0310 MT45F-G4-G 0642 042 0T52 MT45F-G4-P 0642 042 0T60 MT45F-U1D-P 0642 042 0R40 MT45F-G4-L 0642 042 0T70 2020.02...
- Page 2 This service manual describes maintenance procedures for ENGEL refrigerator. This manual is intended for repair engineers who are familiar with basics service skills and knowledge for ENGEL refrigerator. This manual does not guarantee correct maintenance when service is done by a non-skilled worker without technical knowledge.
-
Page 3: Table Of Contents
CONTENTS 1. SPECIFICATIONS ・・・・・・・・・・・・・・・・・・・・・・・・・・・・・・・・・・・・・・・・・・・・・・・・・・・・・・・・・・・・・・・・・・・・・・ ■ Specifications Table ・・・・・・・・・・・・・・・・・・・・・・・・・・・・・・・・・・・・・・・・・・・・・・・・・・・・・・・・・・・・・・・・・・・ ■ Exterior / Interior Dimensions ・・・・・・・・・・・・・・・・・・・・・・・・・・・・・・・・・・・・・・・・・・・・・・・・・・・・・・・・・・ 2. INSTALLATION A REFRIGERATOR ・・・・・・・・・・・・・・・・・・・・・・・・・・・・・・・・・・・・・・・・・・・・・・・・・・・・・・・・・・・・ ■ How to Install the Refrigerator ・・・・・・・・・・・・・・・・・・・・・・・・・・・・・・・・・・・・・・・・・・・・・・・・・・・・・・・・・・ ■ Temperature Setting ・・・・・・・・・・・・・・・・・・・・・・・・・・・・・・・・・・・・・・・・・・・・・・・・・・・・・・・・・・・・・・・・・・・ ■ Electric Power Sources ・・・・・・・・・・・・・・・・・・・・・・・・・・・・・・・・・・・・・・・・・・・・・・・・・・・・・・・・・・・・・・・・ ■ Onboard Direct Wiring with Optional Kit ・・・・・・・・・・・・・・・・・・・・・・・・・・・・・・・・・・・・・・・・・・・・・・・・・・・ ■... -
Page 4: Specifications
1. SPECIFICATIONS ■ Specifications Table MODEL MT35F-G4-P MT45F-G4-G MT45F-G4-P MT45F-G4-L MODEL CODE 0642 032 0T60 0642 042 0T52 0642 042 0T60 0642 042 0T70 STORAGE VOLUME ℓ (liter) EXTERIOR 14.3×16.1×25.5 14.3×20×25.5 DIMENSIONS 364×508×648 364×408×648 W×H×D ※1 10.6×14.6×15 10.6×10.6×15 INTERIOR DIMENSIONS 270×370×380 270×270×380 W×H×D ※1 CABINET... - Page 5 1. SPECIFICATIONS ■ Specifications Table MODEL MT35F-U1D-P MT45F-U1D-P MODEL CODE 0642 032 0310 0642 042 0R04 STORAGE VOLUME ℓ (liter) EXTERIOR 14.3×16.1×25.5 14.3×20×25.5 DIMENSIONS 364×408×648 364×508×648 W×H×D ※1 10.6×10.6×15 10.6×14.6×15 INTERIOR DIMENSIONS 270×270×380 270×370×380 W×H×D ※1 CABINET OUTER Painted steel plate ENCLOSURE DOOR CABINET...
-
Page 6: Exterior / Interior Dimensions
1. SPECIFICATIONS ■ Exterior / Interior Dimensions ※ Tolerance is omitted Unit (mm) ・MT35F ・MT45F... -
Page 7: Installation A Refrigerator
2. INSTALLATION A REFRIGERATOR ■ How to Install the Refrigerator. (1) Your shockproof fridge is best installed on a solid surface. (2) Be sure your fridge is not placed near a gas stove, heater or other heat-generating appliances. (3) Adequate ventilation and suitable distance from each wall (at least 150mm or more) is necessary for the maximum cooling efficiency and minimum electric current consumption for "free standing use"( see Fig.1 shown below). -
Page 8: Electric Power Sources
2. INSTALLING A REFRIGERATOR ■ Electric Power Sources Connect only to either of the following power sources: • 240V AC from wall outlet (U1D type is AC120V) • 12V or 24V DC battery. AC and DC voltages may be connected simultaneously, when AC will be automatically selected if both voltages are applied. -
Page 9: Onboard Direct Wiring With Optional Kit
2. INSTALLATION A REFRIGERATOR ■ Onboard Direct Wiring with Optional Kit Twisting lead wire To further reduce the radio interference during DC operation, twist the negative and positive cables (use separate cables) together into a spiral form, between thebattery and the DC outlet socket. Connecting refrigerator directly to battery Any switches and lead wires for other electrical equipment should not be shared with the wiring between the refrigerator and the battery. -
Page 10: Part Name
3. PART NAME ■ MT35F / MT45F... -
Page 11: Connecting Diagram
4. CONNECTING DIAGRAM ● Block Diagrams 1 MODEL: MT35F-G4-P, MT35F-U1D-P, MT45F-G4-P, MT45F-G4-L, MT45F-G4-G, MT45F-U1D-P ● Wiring Diagrams 1 MODEL: MT35F-G4-P, MT35F-U1D-P, MT45F-G4-P, MT45F-G4-L, MT45F-G4-G, MT45F-U1D-P... -
Page 12: Trouble Shooting
4. TROUBLE SHOOTING Error Message ■ Error Message (Digital display of temperature controller) Error message will be displayed if the voltage of the battery is low or in the event of any malfunctions - (see table below). When error message is displayed, the unit will be on "standby mode". Operations will stop. ERROR CODE CAUSE SOLUTIONS... -
Page 13: Does Not Get Cold
5. TROUBLE SHOOTING Checking Test result Judge Fixing Output Power supply output voltage. Replace the Lower than AC13V Approx. AC13V - 17V ※1 maladjustment power supply. See page 13 Normal ■ Does not get Cold 【Check 2】 (Temperature setting -18℃) The compressor is locked, or Higher than 2.0A contaminated. -
Page 14: Cooling Is Weak
5. TROUBLE SHOOTING Checking Test result Judge Fixing ■ Cooling is Weak Please keep the ambient Ambient temperature is Ambient temparature is higher than 30℃ temperature below 30℃. too high. Make at least 150mm Is the machine part ventilated enough? Insufficient ventilation. -
Page 15: Typical Problem
5. TROUBLE SHOOTING ■ Typical Problem ※1 Ambient temp 25℃ ※2 Ambient temp 25℃ to -16℃ Symptoms Cause Test Result Treatment Resistance of compressor coil is ∞Ω Coil of the compressor is open Replace the cooling unit Inside of the fridge does not ・Normal: Approx. -
Page 16: Check Point & Check Method
6. CHECK POINT & CHECK METHOD 【Check 1】 Special Fuse & Blade Fuse. (Fig.1) Fig.1 DC CORD ◇ Check the resistance of special fuse by tester. Test result Judge 0Ω Normal ∞Ω Broken SPECIAL FUSE WORK TIPS ・Please attach attention to the special fuse of orientation. -
Page 17: Check 4】 Resistance Of Thermistor
6. CHECK POINT & CHECK METHOD POWER SUPPLY 【Check 4】 Resistance of Thermistor. (Fig.4) Fig.4 ◇ Checking points Remove the two pin couplers from temperature controller. Measure resistance between thermistor coupler terminals. Test result Judge Approx. 2 kΩ - 10 kΩ Normal ∞Ω... -
Page 18: Check 6】 Compressor Rated Current
6. CHECK POINT & CHECK METHOD 【Check 6】 Compressor Rated Current. (Fig.6) Fig.6 ◇Checking point Current value measurement with clamp meter between input cord terminals. WORK TIPS To measure the rated current of the compressor, please measure after 15 minutes or more after starting the refrigerator. -
Page 19: Replacing Parts
7. REPLACING PARTS 【How to Replace Cooling Unit】 Fig.1 1. Remove the door (Fig.1) DOOR Open the door and take out the basket. Remove four screws which hold hinges. (Fig.1-①) WORK TIPS ① When re-installing for door and hinges, please be care with placing position of hinge height. - Page 20 7. REPLACING PARTS 4. Remove the case cover assy. (Fig.4) Fig.4 Remove seven screws of case cover assy. (Fig.4-①) Remove case cover assy. (Fig.4-②) ② ① 5. Remove three screws of evaporator. (Fig.5-①) Fig.5 EVAPORATOR ① 6. Remove the cover pipe. (Fig.6) Fig.6 FASTENER ②...
-
Page 21: How To Replace Power Supply
7. REPLACING PARTS 8. Remove four screws of compressor. (Fig.9) Fig.8 ① ① 9. Pull out cooling unit. (Fig.9) COOLING UNIT Fig.9 Take out cooling unit from cabinet assy. (Fig.9-①) ① Remove screw of EVA. thermister. (Fig.9-②) ② EVA. THERMISTER 10. -
Page 22: Change Battery For Thermometer
7. REPLACING PARTS 【How to Replacement of Fan Motor】 Fig.12 ② 1. Remove the door. (【How to Replace Cooling Unit】 STEP.1) 2. Remove the motor cover. (【How to Replace Cooling Unit】 STEP.2) 3. Remove the case cover assy. ① ③ (【How to Replace Cooling Unit】...
Need help?
Do you have a question about the ENGEL MT35F-G4-P and is the answer not in the manual?
Questions and answers
the compressor rattles i think rubber mounts need replacing.