
Related Manuals for DIVERSIFIED WOODCRAFTS Shain CDTC-60


Summary of Contents for DIVERSIFIED WOODCRAFTS Shain CDTC-60
- Page 1 CDTC-60 ASSEMBLY INSTRUCTIONS *Model views may not represent exact model purchased...
- Page 2 TABLE OF CONTENTS ASSEMBLY COMPONENTS_______________________________________ 3 LEG ASSEMBLY (ATTACHMENT OF STRETCHERS)_________________ 4 TOP ATTACMENT, ALONG WITH LEG LEVELER ATTACHMENT______ 5 UNDER DESK KEYBOARD________________________________________ 6 CPU HOLDER____________________________________________________7...
- Page 3 ASSEMBLY COMPONENTS ITEMS INCLUDED PART # PART# 1-TOP,TABLE 2-LEG,PANEL,PED,ASSY,30H 227569 237959 1-UPPER STRETCHER, LEG 228501 8- SCREW,7MMX70MM,CONN,ALLENHEAD 1-STRETCHER,LEG 227927 Accessories: 1-PT HARDWARE BAG {CONSISTS OF:} Accessories: {Some items may depend upon model 15-0069 purchased}: 10-SCREW,#10X2.50 PHIL PAN SMS TRAY,KEYBOARD,SLIDE OUT,#KVKD100 227831 214416 4-LEG LEVELER,BLK BASE 1...
- Page 4 Assembly Instructions Items not included but needed for assembly: 1. ½” wrench Instructions: 1. Lay the table on the floor with the bottom up. (Be sure to lay the table on a clean surface so you don’t damage the tabletop.) 2.
- Page 5 3. Center the leg assembly over the top as pictured below. Attach the legs to the top using the 10- screws, #10X2.50 Phil Pan SMS, zinc provided (part# 227831) 4. Screw leg levelers (part # 100079 into each t-nut located in the bottom each leg assembly.
- Page 6 6. Next, you will need to attach the under desk keyboard which is an option to some units. It may be easier to attach the keyboard when the table is upside down. You will attach the under desk keyboard with the remaining hardware which is provided.
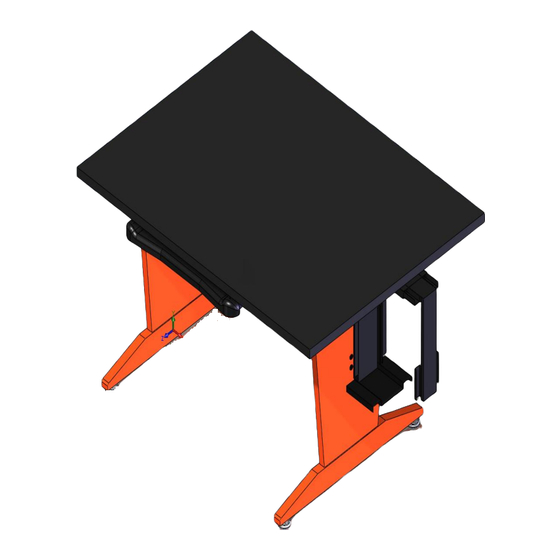
- Page 7 Finally, attach the CPU holder to the side of the unit. Please see below for more details on how the CPU holder works. If you need additional information on the assembly on the CPU holder, please see the box that the CPU holder came...
Need help?
Do you have a question about the Shain CDTC-60 and is the answer not in the manual?
Questions and answers