Table of Contents
Advertisement
Advertisement
Table of Contents

Subscribe to Our Youtube Channel
Related Manuals for TECE Lux Mini


Summary of Contents for TECE Lux Mini
- Page 1 Sanitary systems FLUSH PLATES TECHNICAL GUIDELINES...
-
Page 2: Table Of Contents
Contents Overview Cleaning TECE flush plates TECEantibac Flush-mounted installation Dry-wall – toilet flush plate Installing the toilet flush plate in a dry-wall Brick-wall – toilet flush plate Installing the toilet flush plate in a brick-wall Dry-wall – urinal flush plate... - Page 3 2-84 Installing the flush-mounted TECEfilo urinal flush plate 230/12 V 2-87 Programming the urinal electronics 2-90 Toilet flush handle 2-92 Installing the rotary mechanism 2-92 Insert chute 2-95 Operating the insert chute 2-95 Installation dimensions for TECE flush plates 2-98...
-
Page 4: Overview
These flush plates, with their robust actuation mechanism, can be installed TECEnow from the front or from the top. TECE flush plates are some of the most compact models available on the market. Thanks to the cistern's special design, the mounting space inside is easily accessible, despite the flush plate's small size. -
Page 5: Cleaning Tece Flush Plates
TECEantibac The antibacterial effect of the TECEantibac flush plates The “TECEantibac” versions of the TECEambia and TECE- has been demonstrated in an expert report written by the loop (toilet and urinal) flush plates have antibacterial Hohenstein Research Institute: “Under practical conditions, properties. -
Page 6: Flush-Mounted Installation
TECE flush plates – Flush-mounted installation Flush-mounted installation Installing the toilet flush plate in a dry-wall To insert the flush-mounted installation frame into the Flush-mounted installation is a distinctive characteristic plasterboard, a recess for the cistern's inspection opening of the TECElux Mini, TECEloop glass (toilet and urinal), must be made in the plaster board. - Page 7 Mark the dimensions of the inside of the installation frame – width 230 mm, height 160 mm – in the centre of the plasterboard. Saw the required opening for the installation frame in the board. Remove the protective foils from the bonding surfaces on the installation frame, and stick them, together with those of the support frame, onto the plasterboard.
- Page 8 After adjusting the depth, you can tile right up to the instal- lation frame. Tip: To obtain a perfect tile edge around the installation frame, TECE recommends cutting the tiles with a water jet cutter.
-
Page 9: Brick-Wall - Toilet Flush Plate
TECEbox plate from the front. The frame must be mounted in the brick-wall mounted cistern. “reading direction” (= “TOP” lettering to the wall). However, TECE cisterns of all installation heights can also be used in brick-walls. Components required: TECEbox module... - Page 10 TECE flush plates – Flush-mounted installation Mount the expanded metal, reinforcement fabrics or similar in the cistern area. Apply a layer of plaster of at least 25 mm thick (measured from the front edge of the splash guard) to the wall.
- Page 11 After adjusting the depth, you can tile right up to the instal- lation frame. Tip: To obtain a perfect tile edge around the installation frame, TECE recommends cutting the tiles with a water jet cutter. 2-11...
-
Page 12: Dry-Wall - Urinal Flush Plate
TECE flush plates – Flush-mounted installation Installation from above Dry-wall – urinal flush plate In a brick-wall structure too, the flush-mounted installation A flush-mounted installation frame also exists for uri- frame can be used to install the flush plate from the top. - Page 13 Mark the dimensions of the inside of the installation frame – width 114 mm, height 134 mm – in the centre of the plasterboard. Saw the required opening for the installation frame in the board. Remove the protective foils from the bonding surfaces on the installation frame, and stick them, together with those of the support frame, onto the plasterboard.
- Page 14 After adjusting the depth, you can tile right up to the instal- lation frame. Tip: To obtain a perfect tile edge around the installation frame, TECE recommends cutting the tiles with a water jet cutter. 2-14...
-
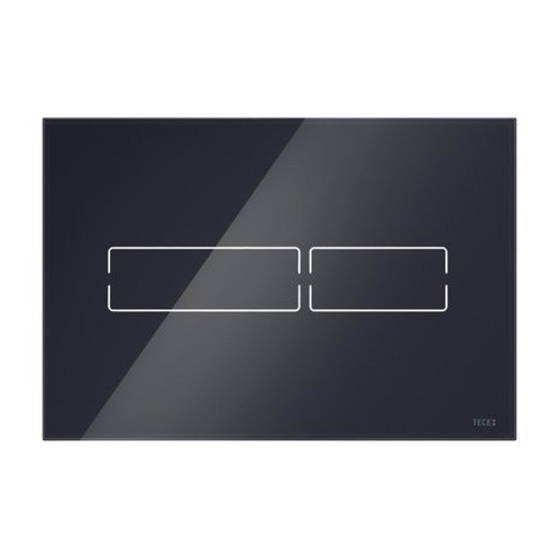
Page 15: Tecelux Mini
TECE flush plates – TECElux Mini TECElux Mini The TECElux Mini is a real glass flush plate with electronic flush actuation. A sensor recognizes when somebody approaches the toilet – at which point, the contours of the sensor surfaces light up through the seamlessly smooth glass facing. - Page 16 TECE flush plates – TECElux Mini Guide the cable and plug through the splash guard. < 60 mm (A) Break off the actuating rods according to the wall struc- ture. Place the splash guard and actuation motor back in the cistern.
- Page 17 The cover can be detached from the flush plate using Connect the plug to the actuation motor and the trans- the disassembly tool. To do this, insert the tool into the former. recesses on the underside of the flush plate and carefully remove the cover.
-
Page 18: Flush-Mounted Installation Of The Toilet Flush Plate
TECE flush plates– TECElux Mini < 60 mm (A) The cover can be detached from the flush plate using Break off the actuating rods according to the wall struc- the disassembly tool. To do this, insert the tool into the ture. - Page 19 Stick the spacers onto the back of the TECElux Mini's sup- Connect the plug to the actuation motor and the trans- port frame. former. Screw the support frame onto the attachment rods. Mount the glass cover of the TECElux Mini electronics. Check whether the touch pad lights up.
-
Page 20: Installing The Transformer With Connection Cable
TECE flush plates – TECElux Mini The installed cover can be removed from the flush plate using the bow-type handles included in the installation frame's scope of supply. Installing the transformer with connection cable The transformer is required for the TECElux Mini's power supply. - Page 21 Feeding the cable into the cistern. Connecting the transformer 230 V 12 V 230 V ~ 12 V weiß/ white schwarz/ black 2-21...
-
Page 22: Programming The Electronics
TECE flush plates– TECElux Mini Programming the TECElux Mini electronics: 230 V • Move closer to the electronics until the button illumina- 230 V ~ 12 V 230 V ~ 12 V 230 V ~ 12 V tion is activated. -
Page 23: Installing The Anti-Theft Device
Installing the anti-theft device The TECElux Mini electronics can be protected by an anti-theft device. Order separately, quoting item number 9820354, and proceed as follows to mount the device: Attach the anti-theft device to the support frame with the screw supplied. Dismount the glass cover of the TECElux Mini electronics. -
Page 24: Tecesquare
TECE flush plates – TECEsquare TECEsquare Similarly to the TECEloop flush plate, the glass version can be wall-mounted in front of the tiled section or flush- The TECEsquare flush plate is available both for toilets and mounted with the toilet installation frame. -
Page 25: Installing The Tecesquare Ii Metal Toilet Flush Plate
The first four steps for installing the manual toilet flush plate are the same for all TECE flush plates: The activation hooks must fit correctly in the drain valve's drawbar eyelets. Tighten the splash guard clamping screws. - Page 26 TECE flush plates – TECEsquare Remove the cover from the flush plate using a screwdriver. Place the screwdriver into the recesses on the underside of the flush plate and carefully remove the cover. < 80 mm (A) < 50 mm (B) 50–110 mm (A)
-
Page 27: Wall-Mounted Installation Of The Glass Toilet Flush Plate
The first four steps for installing the toilet flush plate are the same for all manual TECE flush plates (see the section entitled “Installing the TECEsquare II toilet flush plate” for Break off the actuating rods according to the wall struc- more information). - Page 28 TECE flush plates – TECEsquare Remove the cover from the flush plate using a screwdriver. Place the screwdriver into the recesses on the underside of the flush plate and carefully remove the cover. The installed cover can be detached from the flush plate using a screwdriver.
-
Page 29: Flush-Mounted Installation Of The Glass Toilet Flush Plate
(see the section entitled “Flush-mounted installation” for more information). As with all manual TECE flush plates, the first four steps for installing the toilet flush plate are the same (see the sec- tion entitled “Installing the TECEsquare II metal toilet flush Break off the actuating rods according to the wall struc- plate”... -
Page 30: Wall-Mounted Installation Of The Glass Urinal Flush Plate
The first seven steps of the procedure for installing the glass urinal flush plate for the U 1 urinal flusher are the same for all TECE (wall-mounted) urinal flush plates. Screw the support frame onto the attachment rods. Allow the TECEsquare flush plate cover to click into place in the support frame. - Page 31 SW 3 SW 19 Before mounting the cartridge, ensure that the inlet flow Screw in the mechanical cartridge. control is closed so that no water can leak out during assembly. Close the shut-off using an Allen key. In the free-flow setting (fig. 3), the shut-off slot is parallel with the housing, and in the closed setting (fig.
-
Page 32: Flush-Mounted Installation Of The Glass Urinal Flush Plate
The first eight steps in the procedure for installing the urinal flush plate for the U 1 urinal flusher are the same for all (flush-mounted) TECE urinal flush plates. When mounting (above) or dismounting the cover (below), do not press the button: First, mark the bare-wall protection protrusion, and remove the polystyrene support. - Page 33 6-8l SW 3 If applicable, set the flush volume before mounting the Flush out the pipe. cartridge (factory setting = 2 litres). To do this, remove the retaining ring and insert it back into the corresponding slot: Observe the following: the first slot corresponds to a flush volume of 1 litre, the When performing the pressure test, the inlet flow control of second to 2 litres, and the third slot to a flush volume of 4...
-
Page 34: Installing The Metal Urinal Flush Plate
TECE flush plates – TECEsquare When mounting or dismounting the cover, do not press the button. The installed cover can be removed from the flush plate using the bow-type handles included in the instal- lation frame's scope of supply. Only position the suction cups on the cover to be removed. -
Page 35: Teceloop
TECEloop flush plates are available in plastic or with a glass surface. The flush-mounted installation option is an As with all TECE flush plates, the first four steps for install- outstanding feature of the TECEloop glass flush plate. The ing the toilet flush plate are the same (for more informa- TECEloop flush plate is also available for urinals. - Page 36 TECE flush plates – TECEloop Screw in the actuating rods through the corner supports – distance to front edge of support frame = 15 mm. Break off the actuating rods according to the depth of the wall structure. Fold down and lock both buttons.
-
Page 37: Teceloop Modular System
TECEloop modular system The modular system is available for the TECEloop toilet As with all TECE flush plates, the first four steps for install- flush plate with glass cover. The glass cover and flush plate ing the toilet flush plate are the same (for more informa- must be ordered separately. - Page 38 TECE flush plates – TECEloop Screw the support frame onto the attachment rods. The cover and flush unit are supplied ready-mounted, and must be separated for the installation. Remove the cover from the flush plate using a screwdriver. Place the screw- driver into the recesses on the underside of the flush plate and carefully remove the cover.
-
Page 39: Wall-Mounted Installation Of The Plastic Urinal Flush Plate
The first seven steps of the procedure for installing the urinal flush plate for the U 1 urinal flusher are the same for all (wall-mounted) TECE flush plates – see “TECEsquare – Wall-mounted installation of the glass urinal flush plate” for more information. -
Page 40: Wall-Mounted Installation Of The Glass Urinal Flush Plate
TECE flush plates – TECEloop Open the inlet flow control. To dismount the cover, insert a screwdriver into the notches on the underside of the flush plate. Screw the support frame onto the urinal flush valve hous- ing. Wall-mounted installation of the glass urinal... -
Page 41: Flush-Mounted Installation Of The Glass Urinal Flush Plate
The first eight steps of the procedure for installing the urinal flush plate for the U 1 urinal flusher are the same for all (flush-mounted) TECE flush plates – see “TECEsquare – Flush-mounted installation of the glass urinal flush plate”. Screw the support frame onto the urinal flush valve hous- ing. -
Page 42: Teceplanus
TECEplanus urinal flush plate Installing the toilet flush plate As with all TECE flush plates, the first four steps for install- ing the toilet flush plate are the same (for more informa- tion, see the section entitled “TECEsquare, Installing the TECEsquare II metal toilet flush plate”). -
Page 43: Installing The Urinal Flush Plate
The first seven steps of the procedure for installing the urinal flush plate for the U 1 urinal flusher are the same for all (wall-mounted) TECE urinal flush plates – see “TECEsquare – Wall-mounted installation of the urinal actu- ation” for more information. - Page 44 TECE flush plates – TECEplanus Open the inlet flow control. If necessary, you can mount the vandal-resistant screw supplied. Screw the support frame onto the urinal flush valve hous- ing. Finally, mount the flush plate cover. 2-44...
-
Page 45: Teceplanus Infrared Electronics
TECE flush plates – TECEplanus infrared electronics TECEplanus infrared electronics Toilet infrared electronics The toilet infrared electronics activate the flush if some- one enters the detection range and leaves again – after a specified minimum period of time. The following parame- ters must be observed in the process: •... -
Page 46: Installing The Toilet Infrared Electronics, 6 V Battery
Hold the programming key in front of the sensor window (see figure). The programming mode starts with a quick The TECE transformer (order no. 9810003, order sepa- series of short beeps. rately) transforms 230 V AC to 12 V DC. - Page 47 Mount the support frame. Then adjust the drain valve to the toilet electronics: on newer cisterns installed after mid/end of 2009, the red pull rod of the valve (A2) must be replaced by a black one (see figure above). Insert the (new) splash guard for the electronics with the actuation motor.
-
Page 48: Installing The Toilet Infrared Electronics, 12 V Mains
Installing the toilet infrared electronics, 12 V mains To connect the 12 V mains version, for each toilet flush plate, you need a TECE transformer (order no. 9810003, order separately) and a connection cable (order no. 9810004, order separately). The steps for installing the toilet infrared electronics are virtually the same (see the section entitled “TECEplanus,... -
Page 49: Teceplanus Urinal Infrared Electronics
It is possible to precisely determine the detection range completely separately from the background. This significantly reduces the likelihood of incorrect activation. The TECE autofocus sensor has many advantages: • Intelligent PSD (Unique Position Sensitive Detection) technology • Precise activation behaviour •... - Page 50 Hygiene flush 24 h siphon back up again. If this does not work, the refill Hygiene flush 255 h function of the TECE electronics can be activated, and a Sensor sensitivity “low” short flush impulse fills the siphon up. Distance “standard”...
-
Page 51: Technical Data
Flush time, factory setting Flush time, setting range 2-10 s • Mains variant: Pre-flush, factory setting The TECE transformer (order no. 9810003, order sepa- Pre-flush, setting range 0.5-2 s rately) transforms 230 V AC to 12 V DC. Pause function, factory setting off •... - Page 52 TECE flush plates – TECEplanus infrared electronics Overload protection electronic Installing urinal infrared electronics for the U 1 Short circuit protection electronic urinal flusher, 6 V battery Type of protection IP 2 Protection class CE low voltage power supply Operating temperature –...
- Page 53 Before mounting the cartridge, ensure that the inlet flow Install the electric cartridge (do not let the tool come into control is closed so that no water can leak out during contact with it) and tighten the screws by hand. assembly.
-
Page 54: Installing The Urinal Infrared Electronics, 12 V Mains
TECE flush plates – TECEplanus infrared electronics Place the connector adapter on the battery and position it Finally, install the flush plate cover and mount the van- in the opening provided for the purpose. dal-resistant screw supplied. Installing the urinal infrared electronics, 12 V... - Page 55 Sufficiently flush out the pipe. Connect the transformer cable to the mains connection adapter. Ensure correct polarity when making the connec- Observe the following: tions. When performing the pressure test, the inlet flow control of Note the maximum number of connected electronics (= 5) the flush valve must be set to free-flow.
- Page 56 TECE flush plates – TECEplanus infrared electronics Please note: The right position is particularly important when installing the electronic cartridge. As can be seen on the right of the above illustration, the position also depends on the installation situation of the flush valve housing: Horizontal housing = shut-off on the left, electronics on the right (fig.
-
Page 57: Teceplanus Electronics, Remote Release
• Make sure that you fit the housing cover correctly: the and all two-flush systems are possible too (e.g. TECE- cover features a sealing ring which prevents water from loop, TECEsquare). However, the largest flush volume will penetrating inside. - Page 58 TECE flush plates – TECEplanus electronics, remote release Assembly Power supply 3 V DC (2 x LR-1 alkaline batteries) Battery life approx. 3 years or 100,000 flushes The radio transmitter is delivered with two pre-mounted Housing ABS housing approx. 85 x 46 16 mm...
-
Page 59: Toilet Electronics, Remote Release, 6 V Battery
Toilet electronics, remote release, 6 V battery Turn the corner valve to close it again and connect the reinforced hose to the filling valve. If you wish to fill the cistern with water (e.g. for the initial operation), you must open the corner valve again. - Page 60 TECE flush plates – TECEplanus electronics, remote release The subsequent work steps differ depending on the installed toilet module: Either a TECE Geronto module with conduits for cabling and an installation box for housing the electronics, or a different TECE module without conduits, will be installed.
- Page 61 Now check that the motor is functioning correctly. To do ... Toilet module (dry-wall and brick-wall) without conduits this, press the button again to activate the motor once. Guide the cable for the actuation motor and battery through the opening in the splash guard so that it is easier to connect in the next step.
-
Page 62: Toilet Electronics, Remote Release, 12 V Mains
To connect the 12 V mains variant, the power supply must be transformed to 12 V DC by a TECE transformer (order transformer separately: order no. 9810003). After installing the radio receiver, it must be coordinated Installing the toilet electronics, remote release, with the signal from the button on the safety arm support. - Page 63 ... Geronto module with conduits After installing the radio receiver, it must be coordinated with the signal from the button on the safety arm support. Open the cistern cover and remove it with the installation To do this, press the blue button on the receiver electron- box.
- Page 64 TECE flush plates – TECEplanus electronics, remote release ... Toilet module (dry-wall and brick-wall) without conduits Connect the cable coming out of the transformer to the mains connection adapter (ensure correct polarity – see details in fig. 5). Place the electronics in the installation box, seal and place back in the cistern.
- Page 65 Now check that the motor is functioning correctly. To do this, press the button again to activate the motor once. Connect the radio electronics first to the motor (grey plug) and then also to the batteries (black plug). If the installation is correct, the motor will be activated once for checking Install the electronics on the cistern or in another suitable purposes.
-
Page 66: Teceplanus Electronics, Cable-Connected Remote Release
TECE flush plates – TECEplanus electronics, cable-connected remote release TECEplanus electronics, cable-connec- A flush plate is not included in the scope of supply. Any single-flush system can be used with the remote release, ted remote release and all two-flush systems are possible too (e.g. TECE- Another solution when using safety support arms is to loop, TECEsquare). - Page 67 ... Geronto module with conduits Connect the electronics first to the motor (black plug) and then to the batteries (grey plug). If the installation is cor- rect, the motor will be activated once for checking pur- poses. Open the cistern cover and remove it with the installation box.
- Page 68 TECE flush plates – TECEplanus electronics, cable-connected remote release ... Toilet module (dry-wall and brick-wall) without conduits Place the electronics and the battery in the installation box, seal and place back in the cistern. Guide the actuation motor cable through the opening in the splash guard.
-
Page 69: Toilet Electronics, Cable-Connected Remote Release, 12 V Mains
To connect the 12 V mains variant, the power supply must be transformed to 12 V DC by a TECE transformer (order transformer separately: order no. 9810003). Then, connect the electronics first to the motor (grey plug) and then also to the batteries (black plug). - Page 70 TECE flush plates – TECEplanus electronics, cable-connected remote release ... Geronto module with conduits Then connect the electronics first to the motor (grey plug) and then also to the batteries (black plug). If the installation is correct, the motor will be activated once for checking purposes.
- Page 71 ... Toilet module (dry-wall and brick-wall) without conduits Insert the splash guard for the electronics with the actu- ation motor. The activation hooks must fit correctly in the Connect the cable from the transformer to the mains con- drain valve's drawbar eyelets. Tighten the splash guard nection adapter (ensure correct polarity –...
- Page 72 TECE flush plates – TECEplanus electronics, cable-connected remote release Mount the flush plate support frame and install the elec- tronics in a suitable location (e.g. between the support frame and the flush plate). Finally, install the flush plate. Then connect the electronics first to the motor (grey plug) and then also to the batteries (black plug).
-
Page 73: Tecenow
Wall-mounted installation of the toilet flush ture. plate As with all TECE flush plates, the first four steps for install- ing the toilet flush plate are the same (for more informa- tion, see the section entitled “TECEsquare, Installing the TECEsquare II metal toilet flush plate”). -
Page 74: Flush-Mounted Installation Of The Toilet Flush Plate
TECE flush plates – TECEnow Flush-mounted installation of the toilet flush plate As with all TECE flush plates, the first four steps for install- ing the toilet flush plate are the same (for more informa- tion, see the section entitled “TECEsquare, Installing the TECEsquare II metal toilet flush plate”). - Page 75 7 mm Screw in both actuating rods – distance of actuating rods Screw the support frame onto the attachment rods. to wall surface = 7 mm. Allow the TECEnow flush plate to click into place in the Separate the cover and the support frame. support frame.
-
Page 76: Installing The Urinal Flush Plate
The first seven steps of the procedure for installing the urinal flush plate for the U 1 urinal flusher are the same for all (wall-mounted) TECE urinal flush plates – see “TECEsquare – Wall-mounted installation of the glass urinal flush plate” for more information. -
Page 77: Flush-Mounted Installation Of The Urinal Flush Plate
The first eight steps in the procedure for installing the urinal flush plate for the U 1 urinal flusher are the same for all (flush-mounted) TECE urinal flush plates. 40 mm Screw the support frame onto the urinal flush valve hous- 8 mm ing. -
Page 78: Teceambia
TECEambia urinal flush plate Installing the toilet flush plate As with all TECE flush plates, the first four steps for install- ing the toilet flush plate are the same (for more informa- tion, see the section entitled “TECEsquare, Installing the TECEsquare II metal toilet flush plate”). -
Page 79: Installing The Urinal Flush Plate
The first seven steps of the procedure for installing the urinal flush plate for the U 1 urinal flusher are the same for all (wall-mounted) TECE urinal flush plates – see “TECEsquare – Wall-mounted installation of the urinal actu- ation” for more information. - Page 80 TECE flush plates – TECEambia Screw the support frame onto the urinal flush valve hous- ing. Finally, mount the flush plate cover. 2-80...
-
Page 81: Tecebase
TECEbase toilet flush plate, dual-flush technology Installing the toilet flush plate The first four steps for installing the toilet flush plate are the same for all TECE flush plates (see the section entitled “TECEsquare, Installing the TECEsquare II metal toilet flush plate” for more information. - Page 82 TECE flush plates – TECEbase Break off the actuating rods according to the wall structure Finally, replace the buttons manually. and screw them in – distance from front edge of support frame = 18 mm. 2-82...
-
Page 83: Tecefilo Urinal
TECE flush plates – TECEfilo Urinal TECEfilo urinal The TECE urinal flusher U 2 is suitable for installation in dry and brick-wall constructions. For dry-wall structures, instal- The new TECEfilo urinal electronics are available with a lation is performed together with the TECE urinal module. -
Page 84: Bare Wall - Mounting And Installation
TECE flush plates – TECEfilo Urinal Bare wall – mounting and installation 230 V R 1/2 " To connect the pipe, hold the connection housing as shown in fig. 4. The U 2 flush valve housing can be installed in dry-walls and brick-walls. - Page 85 min. 20 s To flush out the connection pipe, open the inlet flow con- Make sure that the connection piece is fitted with a seal. trol and sufficiently flush out the pipe. This seal can be greased if necessary. Before mounting the flusher, make sure that the inlet flow control is closed so that no water can leak out during assembly.
- Page 86 TECE flush plates – TECEfilo Urinal Open the inlet flow control. Hook in the bottom of the cover panel. Screw the support frame onto the urinal flush valve hous- The top of the anti-theft device must be detached for the ing.
-
Page 87: Installing The Flush-Mounted Tecefilo Urinal Flush Plate 230/12
Installing the flush-mounted TECEfilo urinal flush plate 230/12 V Then click the cover into place. (18) Programmieranleitung Programming instructions Instructions de programmation Istruzioni per la programmazione Instrucciones de programación Instrukcje programowania Инструкция по программированию If necessary, the urinal electronics can be programmed. See the following programming instructions for more infor- To facilitate installation, we recommend shortening the mation. - Page 88 TECE flush plates – TECEfilo Urinal Before mounting the flusher, make sure that the inlet flow control is closed so that no water can leak out during assembly. Close the shut-off using a flat-head screwdriver. In the free-flow setting (fig. 3), the shut-off slot is parallel with the housing, and in the closed setting (fig.
- Page 89 9 242 050 ...054 9 242 060 ...062 Stick the spacers to the back of the support frame and Mount the cover. screw the frame onto the urinal flush valve housing. Hook in the bottom of the cover panel. For the flush-mounted installation, leave out the anti-theft device.
-
Page 90: Programming The Urinal Electronics
(17) To program the TECEfilo urinal electronics, the program- ming key provided in the scope of supply is required. The TECE electronics can be programmed during the first 30 Programmieranleitung minutes after connection to the power supply. In the event Programming instructions of a power failure, the last settings saved are retained. - Page 91 How to program TECE electronics: Adjustable functions: • Hold the programming key in front of the Pause function/stadium function red diode (see figure). The programming When the pause function is activated, the flushing time is mode starts with a quick series of short automatically reduced to one second following repeated beeps.
-
Page 92: Toilet Flush Handle
The toilet flush handle is a completely different toilet actua- to manufacturer and series, and is described in the respec- tion system and can only be mounted on TECE concealed tive installation manuals. The basis of each toilet flush cisterns. It sets new standards in terms of operation and handle (i.e. - Page 93 The activation hooks must fit correctly in the drain valve's drawbar eyelets. Tighten the splash guard clamping screws. Break off the actuating rods according to the thickness of the wall structure. Turn both attaching rods until they are in contact with the surface of the wall.
- Page 94 TECE flush plates – toilet flush handle Screw the rotary mechanism onto the attaching rods and align them horizontally. Mount the cover according to the fittings manufacturer's instructions. 2-94...
-
Page 95: Insert Chute
To ensure this property, different installation steps must The metal spacing frame and guide rods are required for be followed to combine the insert chute with TECE flush installing the following flush plates: plates. For this reason, different installation instructions are provided with the insert chute. - Page 96 TECE flush plates – insert chute The insert chute is easy to use in just a few simple steps: The metal spacing frame and guide rods are not required for the following flush plates: TECEsquare II metal TECEnow The insert chute is easy to use in just a few simple steps: To remove the flush plate, simply take hold of the back of the plate and swivel it downwards.
- Page 97 The tablet can now be placed in the insert chute through the red flap. The tablet falls into the collector basket from where it releases its active ingredients into the water. Note: The cleaning tablets used must not contain chlorine or any other oxidizing substances.
-
Page 98: Installation Dimensions For Tece Flush Plates
TECE flush plates – installation dimensions Installation dimensions for TECE flush plates TECElux Mini Dimensions of toilet flush plate and bare-wall protection for vertical slot alignment OKFF Toilet flush plate with 1120 mm module 2-98... - Page 99 TECEsquare II metal Dimensions of toilet flush plate and bare-wall protection for vertical slot alignment OKFF OKFF Toilet flush plate (left) and urinal flush plate (right) with 1120 mm module Urinal flush plate and bare-wall protection for vertical slot alignment OKFF OKFF Toilet flush plate with 980 mm module (left) and 820 mm module (right)
- Page 100 TECE flush plates – installation dimensions TECEsquare glass Dimensions of toilet flush plate and bare-wall protection for vertical slot alignment Toilet flush plate (left) and urinal flush plate (right) with 1120 mm module Urinal flush plate and bare-wall protection for vertical slot alignment...
- Page 101 TECEloop glass Dimensions of toilet flush plate and bare-wall protection for vertical slot alignment Toilet flush plate (left) and urinal flush plate (right) with 1120 mm module Urinal flush plate and bare-wall protection for vertical slot alignment Toilet flush plate with 980 mm module (left) and 820 mm module (right) Toilet flush plate (left) and urinal flush plate (right): - Installation flush at the top (top illustration) - Centred installation (centre illustration)
- Page 102 TECE flush plates – installation dimensions TECEloop plastic Dimensions of toilet flush plate and bare-wall protection for vertical slot alignment Toilet flush plate (left) and urinal flush plate (right) with 1120 mm module Urinal flush plate and bare-wall protection for vertical slot alignment...
- Page 103 TECEplanus Dimensions of toilet flush plate and bare-wall protection for vertical slot alignment Toilet flush plate (left) and urinal flush plate (right) with 1120 mm module Urinal flush plate and bare-wall protection for vertical slot alignment Toilet flush plate with 980 mm module (left) and 820 mm module (right) Toilet flush plate (left) and urinal flush plate (right): - Installation flush at the top (top illustration) - Centred installation (centre illustration)
- Page 104 TECE flush plates – installation dimensions TECEnow Dimensions of toilet flush plate and bare-wall protection for vertical slot alignment OKFF OKFF Toilet flush plate (left) and urinal flush plate (right) with 1120 mm module Urinal flush plate and bare-wall protection for vertical slot alignment...
- Page 105 TECEambia Dimensions of toilet flush plate and bare-wall protection for vertical slot alignment Toilet flush plate (left) and urinal flush plate (right) with 1120 mm module Urinal flush plate and bare-wall protection for vertical slot alignment Toilet flush plate with 980 mm module (left) and 820 mm module (right) Toilet flush plate (left) and urinal flush plate (right): - Installation flush at the top (top illustration) - Centred installation (centre illustration)
- Page 106 TECE flush plates – installation dimensions TECEbase Dimensions of toilet flush plate and bare-wall protection for vertical slot alignment Toilet flush plate with 1120 mm module Toilet flush plate with 980 mm module (left) and 820 mm module (right) 2-106...
- Page 107 TECEfilo Dimensions of metal urinal electronics and bare-wall protection for vertical slot alignment OKFF TECEfilo urinal electronics with module (U 2 flush valve housing) 1120 mm Dimensions of plastic urinal electronics and bare-wall protection for vertical slot alignment Dimensions of glass urinal electronics and bare-wall protection for vertical slot alignment 2-107...
- Page 108 2-108...
- Page 109 All data contained in the Technical Guidelines has been compiled with the utmost care. The correctness of the data presented cannot be guaranteed, however. TECE assumes no liability for damages resulting from the use of this information. Text and images are protected by copyright law.
- Page 110 More information on www.tece.com TECE GmbH P + 4 9 25 72 / 9 28 999 international-business@tece.com www.tece.com...
Need help?
Do you have a question about the Lux Mini and is the answer not in the manual?
Questions and answers