Advertisement
Quick Links
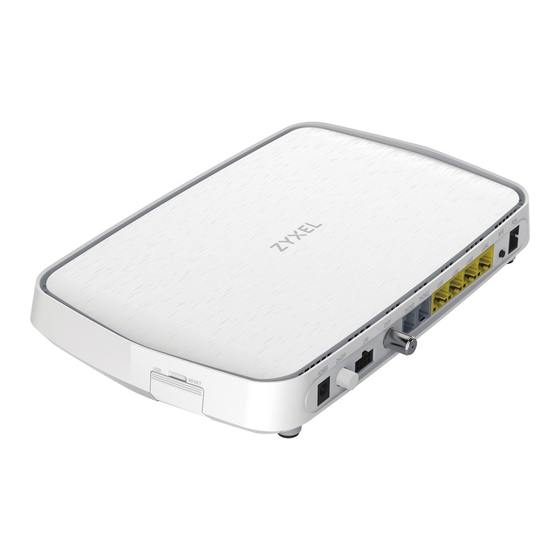
PMG5622GA
Dual-Band Wireless AC/N GPON HGU
with 4-port GbE LAN, RF overlay
Quick Start Guide
ENGLISH | DEUTSCH | FRANÇAIS | ITALIANO | ESPAÑOL |
NEDERLANDS | SVENSKA | SUOMI
Step 1
Hardware Installation
POWER
ON
POWER
UPS
CATV
1
2
3
STB
Cable TV
Blue
On - Power on and system ready
Off - Power off
Blue
On - PON connection ready
Blinking - Trying to link up
Red
On - Not receiving optical signal normally
Blue
On - In Routing mode and WAN connection is up
Blinking - Transmitting data
Off - Physical WAN connection is down or in Bridge mode
Red
On - Attempted to get an IP address, but failed
Blue
On - SIP account registered
Blinking - Telephone off of the hook or incoming call
Off - SIP account not registered
On - Receiving power from UPS
Blue
Blinking - Not receiving power from UPS normally
Off - No UPS connected
Blue
On - USB device connected
Blinking - Transmitting data via USB
Off - No USB device connected
Blue
On - CATV port working
Off - No STB or TV connected
Green
On - 1000 Mbps LAN connection ready
LAN
Amber
On - 100 Mbps LAN connection ready
(Left)
Off - 10 Mbps LAN connection ready
On - LAN connection ready
Green
LAN
(Right)
Blinking - Transmitting data via LAN
1/2
Warning! To avoid possible eye injury, do NOT look into
an operating fiber-optic module's connector.
PHONE
LAN
PON
4
5
6
Package Contents
PMG5622GA
Power Cable
Ethernet Cable Phone Cable
See the User's Guide at www.zyxel.com for more information,
including customer support and safety warnings.
EU Importer
Zyxel Communications A/S
Gladsaxevej 378, 2. th. 2860 Søborg, Denmark
http://www.zyxel.dk
US Importer
Zyxel Communications, Inc
1130 North Miller Street Anaheim, CA 92806-2001
http://www.us.zyxel.com
Copyright © 2018 Zyxel Communications Corp. All Rights Reserved.
EN
1
Connect the power cable to the modem and press the power button.
2
Connect a UPS (Uninterruptible Power Supply) to the UPS port.
Connect an STB (Set Top Box) to the CATV port using a coaxial cable.
3
Connect a phone to a phone port using the phone cable.
4
Connect a computer to the LAN port using the yellow Ethernet cable.
5
Connect the fiber optic cable from your service provider's network to the PON port.
6
DE
1
Schließen Sie das Netzkabel an das Modem an, und drücken Sie auf die Ein/Aus-Taste.
2
Schließen Sie eine UPS (Unterbrechungsfreie Stromversorgung) an den UPS
Anschluss an.
Schließen Sie eine STB (Set Top Box) mit einem Koaxialkabel an den CATV Anschluss an.
3
Schließen Sie ein Telefon mit dem Telefonkabel an den Telefonanschluss an.
4
Schließen Sie einen Computer mit dem gelben Ethernet-Kabel an den LAN-Port an.
5
Schließen Sie das Glasfaserkabel aus dem Netzwerk Ihres Dienstanbieters an den PON
6
Anschluss an.
FR
1
Branchez le câble d'alimentation au modem et appuyez sur le bouton ON/OFF.
2
Connectez un UPS (onduleur) au port UPS.
Connectez un STB (décodeur) au port CATV à l'aide d'un câble coaxial.
3
Fixez un téléphone au port téléphone à l'aide du câble téléphonique.
4
Connectez un ordinateur au port LAN en utilisant le câble Ethernet jaune.
5
Connectez le câble à fibre optique du réseau de votre fournisseur de services au port
6
PON.
IT
1
Collegare il cavo di alimentazione a modem e premere il pulsante di accensione.
2
Collegare un UPS (gruppo di continuità) alla porta dell'UPS.
Collegare un STB (Set Top Box) alla porta CATV utilizzando un cavo coassiale.
3
Collegare un telefono alla porta del telefono tramite il cavo telefonico.
4
Collegare un computer alla porta LAN mediante il cavo Ethernet Giallo.
5
Collegare il cavo in fibra ottica dalla rete del fornitore di servizi alla porta PON.
6
ES
Conecte el cable de alimentación al módem y presione el botón de encendido.
1
Conecte una UPS (fuente de alimentación ininterrumpida) al puerto UPS.
2
3
Conecte un STB (Set Top Box) al puerto CATV usando un cable coaxial.
Conecte un teléfono al puerto del teléfono usando el cable de teléfono.
4
Conecte un equipo al puerto LAN con el cable Ethernet amarillo.
5
Conecte el cable de fibra óptica de la red de su proveedor de servicios al puerto PON.
6
NL
1
Sluit de stroomkabel aan op het modem en druk op de AAN/UIT knop.
Verbind een UPS (Uninterruptible Power Suppy) met de UPS-poort.
2
Verbind een STB (Set Top Box) met de CATV-poort met een coaxkabel.
3
Sluit een telefoon aan op een telefoonpoort met de telefoonkabel.
4
Sluit een computer aan op de LAN-poort met de gele Ethernetkabel.
5
Verbind de glasvezelkabel van het netwerk van je service provider met de PON-poort.
6
SE
1
Anslut nätkabeln till modemet och tryck på strömbrytaren.
2
Anslut en UPS (avbrottsfri strömförsörjning) till UPS-porten.
Anslut en STB (Set Top Box) till CATV-porten med en koaxialkabel.
3
Anslut en telefon till telefonporten med telefonkabeln.
4
Anslut en dator till LAN-porten med den gula Ethernet-kabeln.
5
Anslut den fiberoptiska kabeln från din tjänsteleverantörs nätverk till PON-porten.
6
FI
1
Kytke virtajohto modeemiin ja paina virta painiketta.
2
Liitä varavirtalähde UPS-porttiin.
Liitä digiboksi CATV-porttiin koaksiaalikaapelilla.
3
Kytke puhelin puhelinporttiin puhelinkaapelilla.
4
Kytke tietokone LAN-porttiin keltaisella Ethernet-kaapelilla.
5
Liitä operaattorin valokuitukaapeli PON-porttiin.
6
DoC
Quick Start
Declaration of
Guide
Conformity
Safety Warning
Advertisement

Related Manuals for ZyXEL Communications PMG5622GA


Summary of Contents for ZyXEL Communications PMG5622GA
- Page 1 ENGLISH | DEUTSCH | FRANÇAIS | ITALIANO | ESPAÑOL | 1130 North Miller Street Anaheim, CA 92806-2001 NEDERLANDS | SVENSKA | SUOMI http://www.us.zyxel.com Copyright © 2018 Zyxel Communications Corp. All Rights Reserved. Step 1 Hardware Installation Connect the power cable to the modem and press the power button.
- Page 2 Unit: mm Posizionare il PMG5622GA in modo che i fori di montaggio a parete siano allineati con le viti (2-a). Far scorrere delicatamente il PMG5622GA verso il basso per fissarlo in posizione (2-b). Perfore dos agujeros en la pared a una distancia de 130mm. Inserte los anclajes de los tornillos y los tornillos (no incluidos).
Need help?
Do you have a question about the PMG5622GA and is the answer not in the manual?
Questions and answers