
Subscribe to Our Youtube Channel
Related Manuals for Luma Surveillance 300 Series


Summary of Contents for Luma Surveillance 300 Series
- Page 1 300 Series Mini Dome IP-Enabled HD Surveillance Camera with Microphone Installation Manual...
- Page 2 This allows you to use OvrC, a powerful remote maintenance tool. See OvrC.com for details. In addition, your client can use the Luma Surveillance mobile app to check on the camera from anywhere. For installation using this guide, you must be able to access this camera through a personal computer. If your surveillance system is not on a network, you’ll have to use the NVR’s local interface for installation.
- Page 3 Luma 300 Series Mini Dome IP Camera Safety Tips Handle this device with care. Do not strike or shake this device. Do not operate this device beyond its specified power source ratings. Protect the power cord from being stepped on or pinched, particularly where it connects to the device and to the power outlet.
-
Page 4: Installation
Luma 300 Series Mini Dome IP Camera Installation Before you start, ensure that the device is in good condition and all the assembly parts are included. Also ensure that your recorder has the very latest firmware. Use OvrC to update the firmware, or consult your NVR manual. -
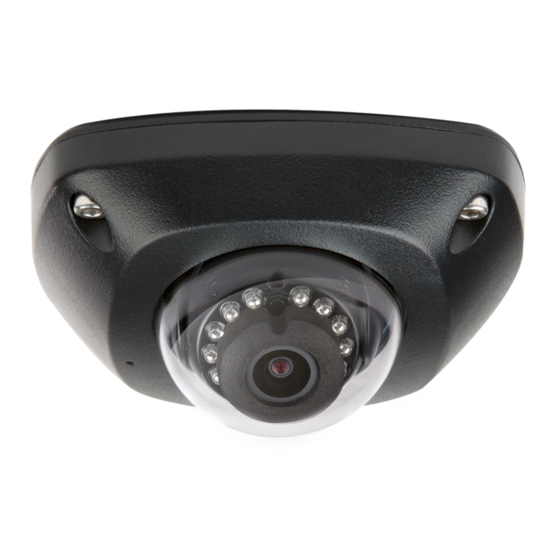
Page 5: Your Camera
Luma 300 Series Mini Dome IP Camera Your Camera Before installing, familiarize yourself with the parts of your camera. Lens Adjustment Tool Camera and Mount Cover and Dome... - Page 6 Luma 300 Series Mini Dome IP Camera Installation with an NVR If you are installing with an NVR, follow these instructions. Otherwise, follow the instructions starting on the next page. 1. Ensure your NVR has the latest firmware. If it does not, your NVR may be unable to locate and activate your camera.
- Page 7 Luma 300 Series Mini Dome IP Camera Installation Without an NVR Install and Run the Luma Utility Use the Luma Utility to locate your camera and set it up. Visit your product page at SnapAV.com and download the Luma Utility installer from the Support tab.
-
Page 8: Activate The Camera
Luma 300 Series Mini Dome IP Camera Activate the Camera Click on the entry for your camera to view its details. If the camera is inactive, use the text boxes at the lower right of the Luma utility window to activate the camera by creating a new secure password. -
Page 9: Edit The Network Settings
Luma 300 Series Mini Dome IP Camera Edit the Network Settings Suggested Best Practices: Ensure the Enable DHCP box is activated. In your router, reserve an IP address and assign it to the camera’s MAC address (found on its box). See your router’s documentation for details. -
Page 10: Physical Installation
Luma 300 Series Mini Dome IP Camera Physical Installation 1. Drill a cable hole and pilot holes for your screws in the ceiling, using the supplied template. Ensure that the front of the template aims at the desired surveillance area. - Page 11 Luma 300 Series Mini Dome IP Camera Weatherproofing the PoE Cable ’ ‘ Ž Œ 1. Before terminating the RJ45 cable Œ, slide it through the lock nut , the thick rubber gasket Ž, and the weatherproof endcap ...
- Page 12 Luma 300 Series Mini Dome IP Camera Start the Web Interface Open your browser and navigate to the camera’s IP address. Below the login area, you may see: “Please click here to download and install the plug-in. Close the browser when installing the plug-in.” If so, download the plug-in and close all browser windows.
-
Page 13: Adjust The Camera
Luma 300 Series Mini Dome IP Camera Adjust the Camera Insert the prongs of the lens adjustment tool into the holes on the front of the lens, as shown. This lets you maneuver the lens without touching it with your fingers. -
Page 14: Set Up Dynamic Dns
Luma 300 Series Mini Dome IP Camera Set Up Dynamic DNS DDNS allows you to connect to your surveillance system from anywhere, via the Internet, using a web address that’s easy to remember. Click on the Settings Menu icon (page 12) and navigate to Basic Network Settings > DDNS. -
Page 15: Add Additional Users
Luma 300 Series Mini Dome IP Camera Add Additional Users Click on User Management. Click the Add button. Enter the new account’s user name and password. Account names can be up to 32 characters long. If you are using an NVR, to ensure compatibility with the NVR’s local interface, user names should contain numbers and letters only. - Page 16 3-Year Limited Warranty This Luma Surveillance™ product has a 3-Year Limited Warranty. This warranty includes parts and labor repairs on all components found to be defective in material or workmanship under normal conditions of use. This warranty shall not apply to products that have been abused, modified or disassembled.
Need help?
Do you have a question about the 300 Series and is the answer not in the manual?
Questions and answers