Advertisement
Quick Links
Advertisement

Related Manuals for K2 Systems S-DOME SYSTEM


Summary of Contents for K2 Systems S-DOME SYSTEM
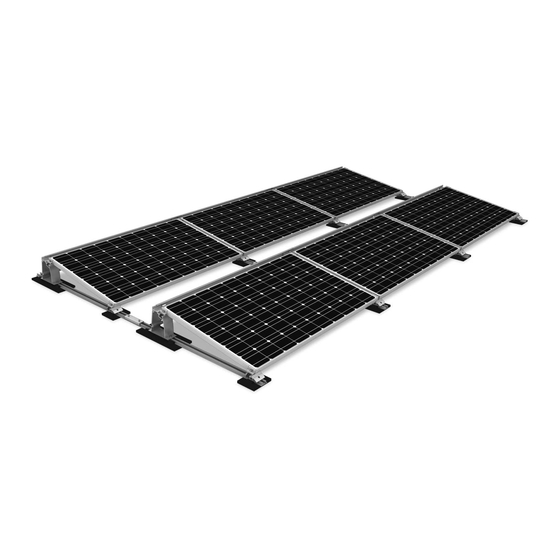
- Page 1 Mounting systems for solar technology ASSEMBLY INSTRUCTIONS S-DOME SYSTEM...
-
Page 2: Table Of Contents
TABLE OF CONTENTS TABLE OF CONTENTS THE COMPANY SAFETY REGULATIONS MATERIALS REQUIRED TOOLS REQUIRED ASSEMBLY Table of contents 2 | 20... -
Page 3: The Company
PARTNER WITH A SYSTEM With sophisticated, fully developed product ideas and obvious customer-orientation, K2 Systems is your friendly partner in the field of mounting systems for solar technology. International customers appreciate the tried and tested designs for use on roofs and in outdoor and individual solutions. -
Page 4: Safety Regulations
GENERAL SAFETY INSTRUCTIONS Please note that our general mounting instructions must be followed at all times and can be viewed online at https://k2-systems.com/en/technical-information. The following guidelines apply: ¬ The equipment may only be installed and operated by qualified and adequately trained installers. ¬... -
Page 5: Materials Required
REQUIRED MATERIALS In order to install the K2 Systems S-Dome installation system, the following listed system components are es- sential. The piece quantities are calculated on the basis of the respective requirements. The listed item numbers facilitate the comparison of items. - Page 6 K2 Dome SD | 1005842 Width: 90 mm Material: aluminium EN AW-6063 T66 K2 Building protection mat Dome SD Alu | 2001739 160x180x18 mm Material: PUR-bonded rubber granules with aluminium triplex foil, laminated Alternatively: K2 Building protection mat Dome SD | 2001740 160x180x18 mm Material: Unlaminated PUR-bonded rubber granulate...
- Page 7 K2 Washer 8,4x30x1,5 mm | 1000273 Material: stainless steel A2 K2 Allen bolt | 1000085 M8x16 DIN EN ISO 4762 Material: stainless steel A2, WS 6 mm K2 Windbreaker Dome S1000 | 1005843 For module length between 1601 and 1700 mm ...
-
Page 8: Tools Required
AT A GLANCE: OVERVIEW OF THE TOOLS K2 Systems mounting systems are designed to ensure effortless assembly. The following recommended tools are not included in the scope of supply: Torque wrench WS 6 mm (WS= wrench size) Chalk line Tape measure... -
Page 9: Assembly
The module distance according to the planning specifications of K2 Systems must be adhered to. ¬ The K2 S-Dome System is suitable for modules with a frame height of 30 - 50 mm. This system is not suitable for thin-film modules. - Page 10 III Gap width between module blocks in module row direction: 140 mm, 210 or 310 mm II.1 II Distance to rail end: (II.1) Fixed bearing side min. 50 mm (II.2) Floating bearing side min. 100 mm (II.3) Floating bearing side to adjacent components 140 mm Installation of S-Dome System 10 | 20...
- Page 11 INSTALLATION OF S-DOME SYSTEM: STEP BY STEP POSITION SPEEDRAIL of 9 Prior to placing the SpeedRail as a base rail, insert a protec- tion layer between the roof covering and the rail in order to avoid any damages to the roof covering. With membrane roofs the Aluminium-coated side shall face downwards.
- Page 12 „ridges“. The connector must not be obstructed with excessive ballast. During installation ensure that the screw is loosely screwed in the bore hole. Required material: K2 SpeedRail, K2 Dome block connec- tor CW Set Installation of S-Dome System 12 | 20...
- Page 13 During installation ensure that the screw is loosely screwed in the bore hole. A (1 : 5) Required materials: K2 SpeedRail, K2 Dome block connec- tor RW Set Installation of S-Dome System 13 | 20...
- Page 14 Finally the Dome SD is loosely fastened with a bolt with serrated under head. Materials required: Dome SD, M K2, bolt with serrated under head M8x20,, S8 locking washer, building protection mat Dome SD 160x180x18 mm Installation of S-Dome System 14 | 20...
- Page 15 Dome 1000, or laterally to the middle Dome. Warning: K2 Porters must be mounted so that all base profiles within a module block are connected. Materials required: K2 Porter, M K2, bolts with serrated under head M8x20 Installation of S-Dome System 15 | 20...
- Page 16 We are happy to assist you with selecting the optimal ballast components once you the ballast size is determined. Table for bricks and slabs * Type Weight in kg Dimensions (LxBxH) in cm 10x10x10 20x10x8 Paving bricks 20x10x10 20x20x6 20x20x8 Flagstones 40x40x4 (slabs) 40x40x5 50x50x4 * recommended values Installation of S-Dome System 16 | 20...
- Page 17 The length of the cylinder screw with serrated flange is defi- ned as module frame thickness + 15 mm when using the XS middle clamp. Torque: 14 Nm. Materials required: Module end/ mid clamp Set Installation of S-Dome System 17 | 20...
- Page 18 It must be ensured that the last windbreakers in a row do not project over the Dome S1000. Torque 16 Nm Materials required: Dome S1000 Windbreaker, allen bolt M8x16, 8.4 x 30 x 1.5 washer Installation of S-Dome System 18 | 20...
- Page 19 THANK YOU FOR CHOOSING A K2 MOUNTING SYSTEM. Ready! Systems from K2 Systems are quick and easy to install. We hope these instructions have helped. Please contact us if you have any questions or suggestions for improvements. https://k2-systems.com/en/contact Our General Terms of Business apply. Please refer to: https://k2-systems.com/en/company/terms-of-delivery...
- Page 20 Mounting systems for solar technology Installation of S-Dome | GB12 | 1016 | Subject to change. SERVICE-HOTLINE Product illustrations are exemplary and my differ from the original. +49 (0)7159 42059-0 info@k2-systems.de...
Need help?
Do you have a question about the S-DOME SYSTEM and is the answer not in the manual?
Questions and answers